Knighthood - RPG Knights
Game Introduction


Hot Strategy
How to Play the Ice Arrow Build in Wind Knight: A Guide for the Ice Arrow Build in Wind Knight
The knight in the game is an all-rounder character, with a relatively high attack frequency, excellent self-preservation abilities, and a good attribute panel, making it an ideal choice for new players. Among these, the ice sword build is more interesting. How to play the Gale Knight Ice Arrow build. Today, we will provide a detailed analysis of this build, which has a moderate difficulty level, allowing players to familiarize themselves with the game mechanics.
The core attack skill naturally involves carrying ice arrows, then focusing all efforts on developing a single output skill to maximize damage efficiency. For auxiliary skills, Meditation + Divine Dragon can be chosen. Meditation is mainly responsible for cooldown recovery, while Divine Dragon effectively boosts damage. Therefore, combining them can increase critical hit rate; since the knight's attack frequency is quite fast, even if the base critical hit rate is not very high, the number of critical hits triggered in actual combat is still considerable. This is the first option. Additionally, players can also choose Overload + Divine Dragon. Overload quickly enhances burst damage, making it suitable for players who are more proficient in their operations.
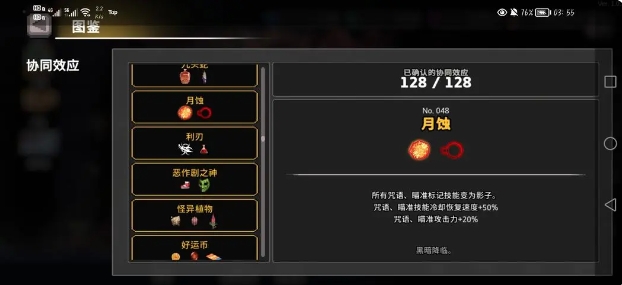
For core synergy, Lunar Eclipse can be selected. Ice arrows are inherently a type of aiming skill, and once the synergy is triggered, all aiming skills turn into shadow form. This increases cooldown recovery speed by 50% and attack power by 20%, and can also trigger a Dark Descent effect, significantly boosting output. If choosing Overload instead of Meditation, players can opt for Gambler Synergy to enhance the effects of auxiliary skills, but note that this may increase damage taken from attacks, so players with less experience should choose cautiously. In terms of equipment, players can select Magic Wand + Niflheim Gold Coin + Silver Coin + Frozen Branch, which not only increases damage but also provides better stability.
In actual gameplay, if a falling attack causes the enemy to become stunned, the method of operation can be jumping up, pressing the normal attack button downwards, and then completing the falling attack action. During the early stages, priority should be given to ensuring survival, and relic combinations should focus on stability rather than forcing Gambler Synergy. When selecting, if opting for a prolonged battle, Meditation should be used to effectively maintain the skill cycle. For quick battles, choose Overload for bursts, initially focusing on unlocking and upgrading skills, prioritizing the activation of synergies, without the need to pursue a perfect setup.
By repeatedly practicing the above methods, you can become familiar with the attack rhythm and understand how to play the Gale Knight Ice Arrow build. Utilizing this character's high survivability, you can steadily advance, gradually taking on and overcoming more challenging dungeons. Relatively speaking, such an approach has significant advantages.
What are the Armorer Knight skills in Borderlands 4? Borderlands 4 Armorer Knight skills showcase
The battle atmosphere of this series has always been intense, with various characters that lean towards a comic style, paired with guns of different appearances, providing players with an exciting combat experience. The all-new generation is about to be released, and everyone is quite concerned about character selection. Let's first take a look at what the skills of the Forgesmith in Borderlands 4 are. If you like this combat style, you can choose to use this character to start your challenge.

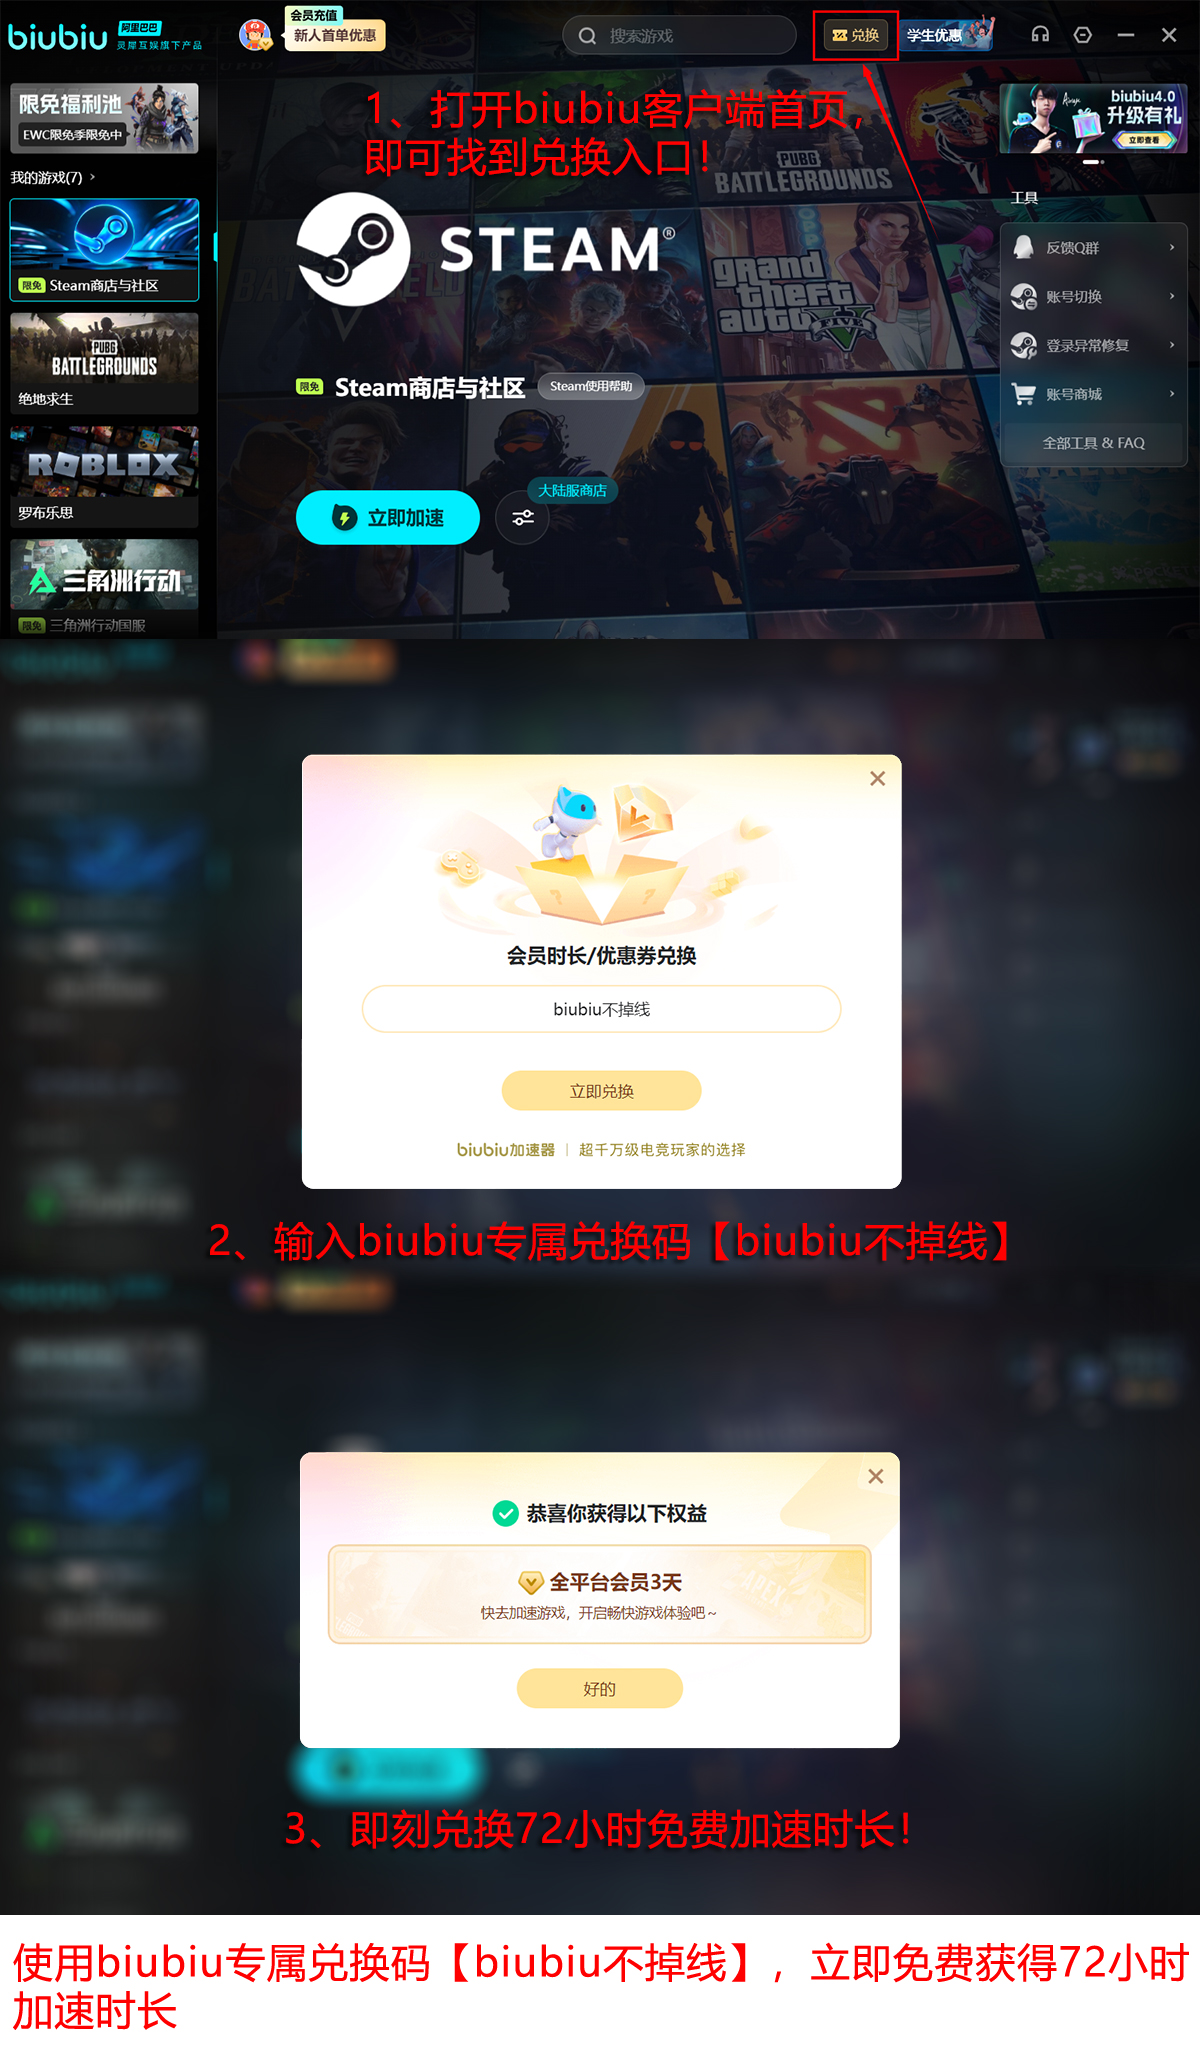
【biubiu Accelerator】Latest Version Download
》》》》》#biubiu Accelerator#《《《《《
Caldron: Characterized by frost and flame forging attacks, it can switch between shooting flames or frost, combining cold and heat to deal higher damage.

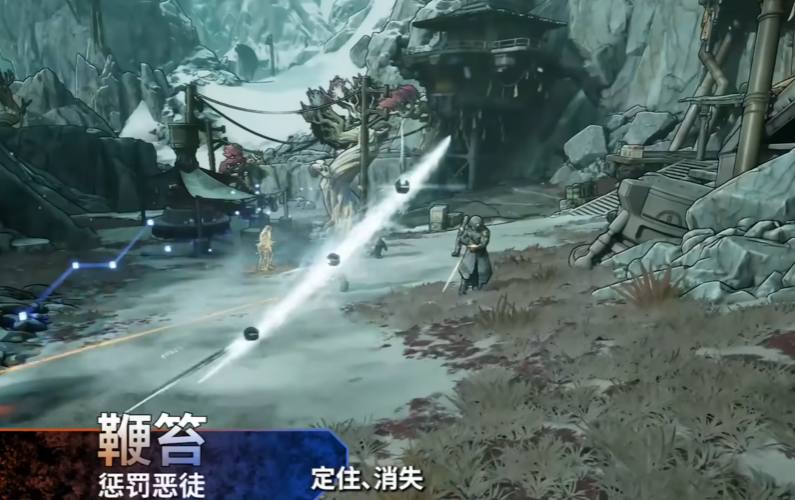
Lash: A long-range attack method that, after hitting an enemy, can freeze them, creating a stun effect, and then proceed with the attack. The defeated enemies will shatter like ice pillars.
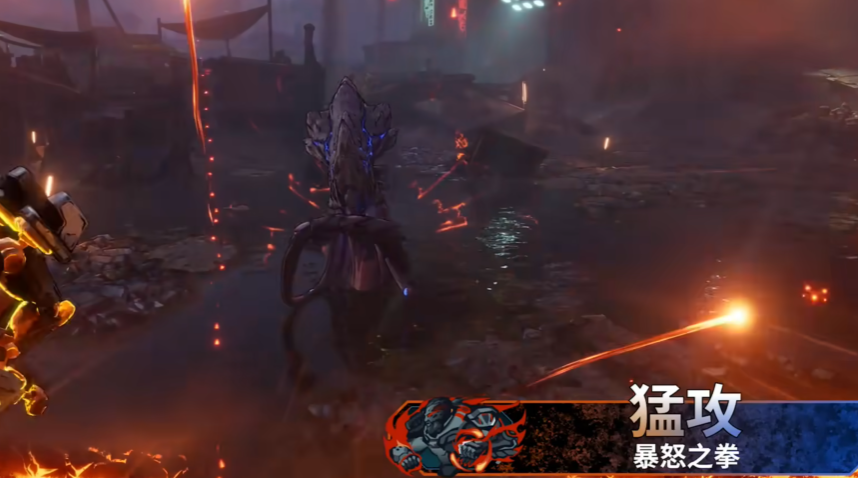
Assault: The most primitive way of attacking, using a rage fist for close combat against enemies. The melee combat style, combined with a first-person perspective, gives players a deeper sense of confrontation.
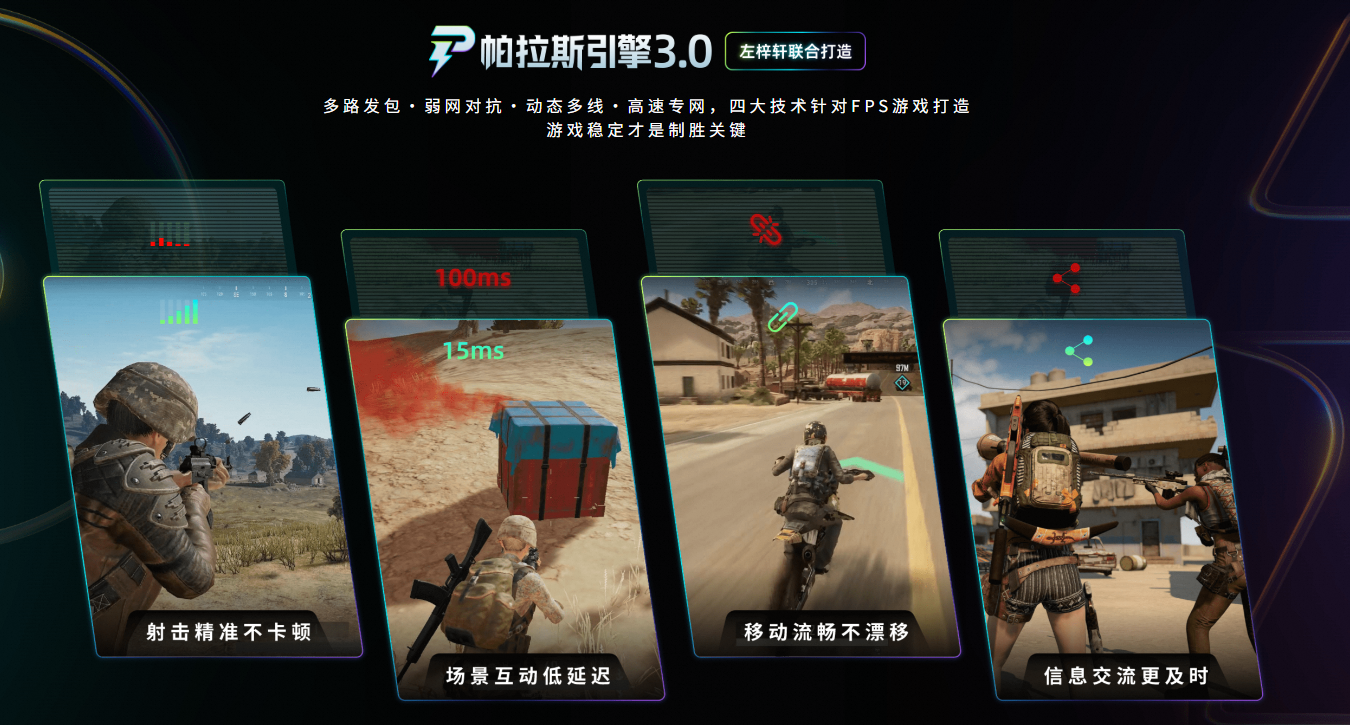
The official version is set to launch on September 12th across various platforms. If you want to quickly complete the download at that time, using the heavily upgraded biubiu will yield better results. After updating to the Pallas Engine 3.0 version, it provides players with a high-speed dedicated network, speeding up the download process, allowing everyone to get their hands on all kinds of fun new games faster and actively participate in battles.
Rewards are now open for everyone to claim. Go ahead and register, so new users can enjoy 24 hours of free acceleration time. There's also the 【biubiu no disconnection】offer, which grants an additional 72 hours of free acceleration time, totaling 96 hours for new users.
The skills of the Forgesmith in Borderlands 4 shown here are just a part and a rather superficial understanding since the official version has not yet been released. All information comes from the official gameplay videos. Once the game is officially launched, through multiple battles, there will be a deeper exploration of the character's skill usage and combat methods, which I will share with everyone at that time.
Ranking of Gale Rider Character Strengths Recommended Gale Rider Characters
Gale Knight sets a dark dungeon world where players need to enter this world and constantly start challenges. As a warrior, the player needs to continuously fight against these destroyers. To make the battle process easier, it's necessary to choose a few relatively powerful heroes. The ranking of Gale Knight character strengths will be introduced below. Players who don't know how to choose heroes can refer to these contents. Each hero has different settings, and the following will introduce and share all these heroes with everyone.
The most recommended hero in the game is the Raider, not just because this hero has strong combat power, but also because during battles, additional special attack skills can be triggered. As long as the player can control flexibly, they can generate powerful lethality in the battle. The character can quickly and flexibly change their current position in the game, which can be used to rapidly move and attack opponents, or to dodge attacks from enemies during the battle. Players with some gaming ability can use these skills of the character to flexibly carry out controls.

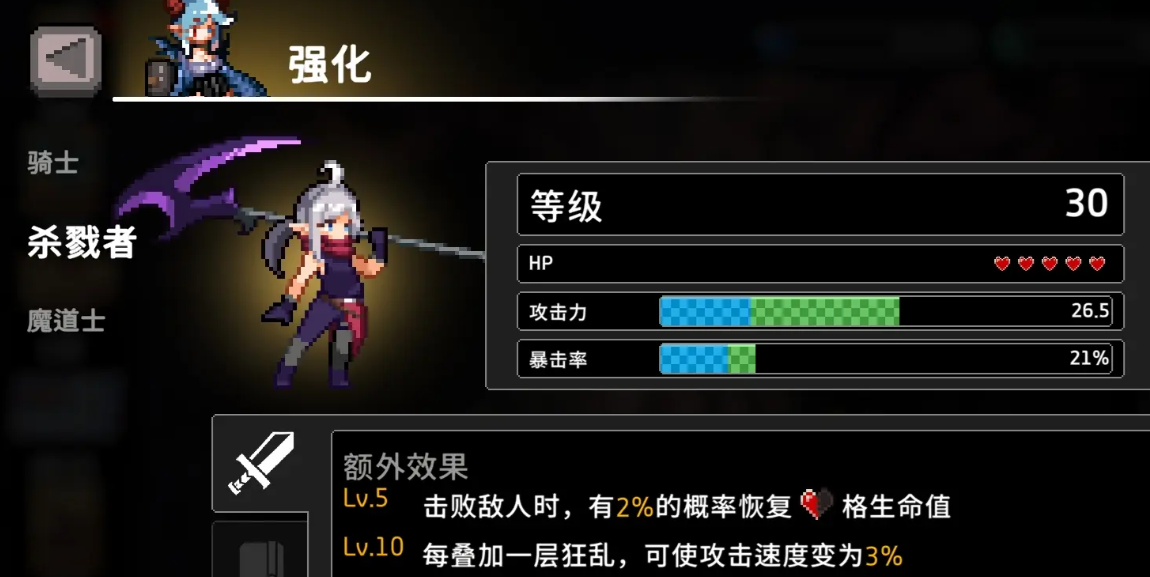
The Slayer is also a highly recommended character. First, this character's burst and damage capabilities are excellent. During battles, critical hit damage can be continuously dealt. The Frenzy skill allows the character to keep stacking output damage during the battle, up to 20 times. The character also has a skill called Poison Coating, after using which, the damage received by the opponent continues to increase. When the character enters the Blood Frenzy state, the character's rage can be further increased. Players who enjoy fighting can choose this character, and by utilizing other high-damage weapons, they can produce even more impressive damage effects.

The Sharpshooter is a character that can attack from a distance. New players tend to be cautious at the beginning, but if the opponent is too far away, they won't receive any damage. At this point, the Sharpshooter can launch an attack. After upgrading this character to level 30, through modification, it can have even stronger long-range attacks. You can choose to use a flame machine gun and other equipment, making the character a member of the machine gun school. This way, the character can get additional bonuses, and by using the flame effect of the machine gun, the player can generate even greater combat power.
The ranking of Gale Knight character strengths ends here. There are many characters for players to choose from in the game, each with different characteristics. To have a better performance, it's necessary to reasonably utilize the skills of the characters. This way, in battles, high damage effects can be achieved. Besides these characters, there are many other professions in the game, and players can freely choose to join them.
Is the Paladin Hall in Kingdom Rush Vengeance good? A guide to using the Paladin Hall in the Kingdom Rush Vengeance mobile game.
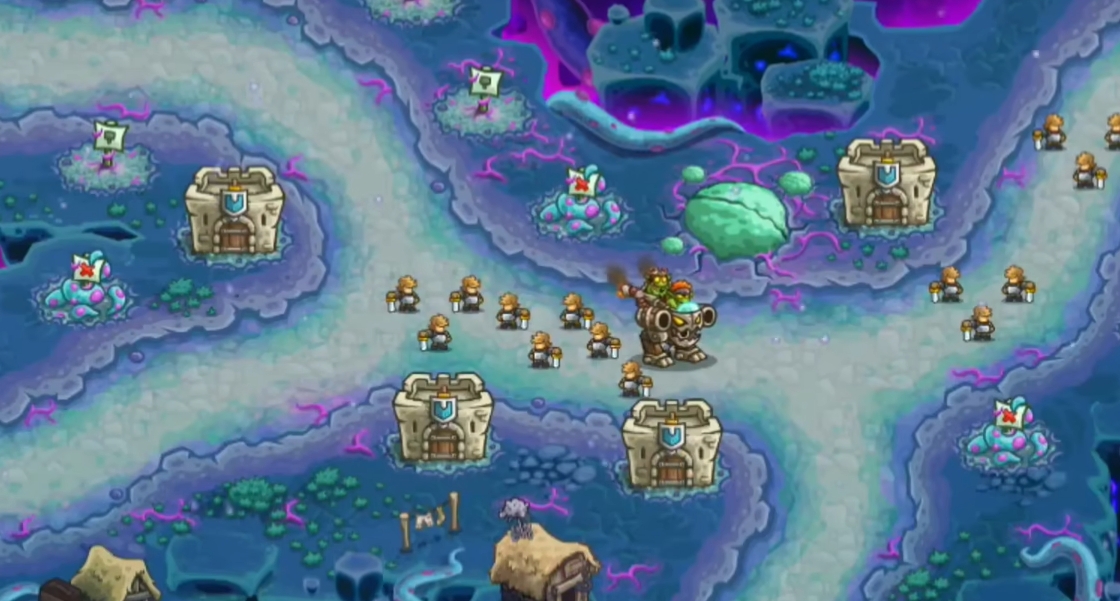
The Paladin Hall is one of the early accessible defensive towers in "Kingdom Rush 5," and it is also one of the few towers in the game that can block paths. So, is the Paladin Hall in Kingdom Rush 5 useful? In fact, although the Paladin Hall can be unlocked early, its role is significant and is key to players successfully passing the early stages. Let this guide introduce you to this defensive tower.
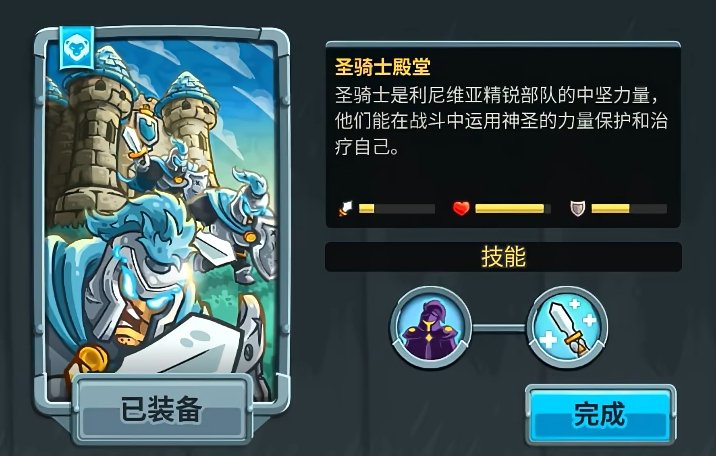
The Paladin Hall is a defensive tower that can be upgraded to the maximum level with just 600 funds. At full level, it summons knights with 198 HP to guard the enemy's path. Enemies passing by will be forced to engage in combat with them, and only after defeating all these knights will the enemies continue to advance. Meanwhile, these knights also have a certain offensive capability (attack power 11-15). When the knights are defeated by the enemies, they will respawn after 10 seconds to continue intercepting the enemies. If the enemies leave the range of the Paladin Hall before the knights respawn, they will not turn back to fight the knights, and the knights can only intercept enemies who have not yet left the range of the Paladin Hall.
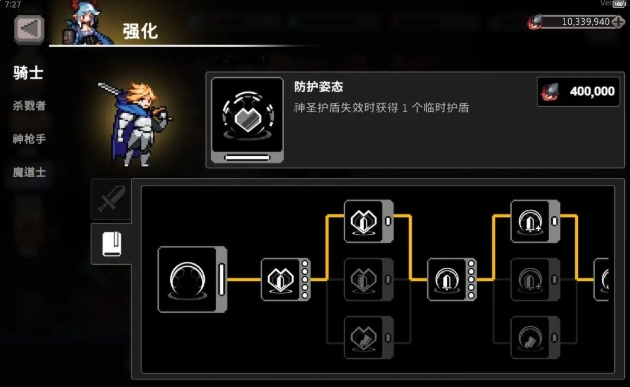
Currently, the Paladin Hall has two skills. The first one is Lead by Example; after upgrading, the Paladin Hall will replace the original knight with a paladin. The paladin inherits the stats of the original knight and grants a 20% attack buff to all nearby friendly units (including defensive towers). This buff is only released when the paladin raises his sword during combat, and it does not activate if there is no contact with the enemy. The second skill is Healing Prayer, which makes the knights invincible when their HP drops below 25%, while also healing themselves. When the skill is upgraded to level 3, the knights can fully restore their HP during the invincibility period. This effect is very powerful, but once the HP drops below 25% again, the effect will not be reactivated. The knights must respawn for the effect to reset and trigger again.

In practice, the Paladin Hall is often placed in front of the endpoint to intercept enemies and is usually placed next to offensive towers. By using the knights' interception, it ensures that the offensive towers have more time to deal damage, thus eliminating the enemies. However, there is also a strategy of building only Paladin Halls, taking advantage of their low cost to spread knights with fully upgraded Healing Prayer across the map, gradually wearing down the enemies' HP. However, this strategy is less effective against high-damage or flying enemies, and it only works exceptionally well on some maps.

This is the detailed explanation of whether the Paladin Hall in Kingdom Rush 5 is useful. The Paladin Hall is a powerful road-blocking defensive tower that gives your offensive towers more time to attack monsters, indirectly enhancing the overall output of the defense line, making it very practical.
Introduction to the Synergistic Play of Gale Knight How to Play the Synergy of Gale Knight
In the fast-paced combat and strategic choice-filled roguelike game, Gale Knight, mastering the synergy mechanism is an essential part of achieving that exhilarating sense of operation in the chaotic battlefield. Today, I will introduce the synergy gameplay in Gale Knight. Synergy isn't as complex as you might imagine; it's more like a set of combination secrets in the game, helping you achieve more efficient output in battles while also creating a wondrous interaction between your skills and relics.

The first core concept to understand is that the synergy mechanism is similar to "bonds" in other games, relying on the combination of relics equipped by the player. When you equip two or more relics simultaneously, it triggers a synergy effect, granting powerful buffs. These effects are not just simple numerical boosts; they can also provide additional advantages in battle under specific conditions. As the game progresses, the types of synergies increase, and their effects become richer, offering players almost unlimited freedom. In short, choosing the right synergy style will significantly enhance your combat power.
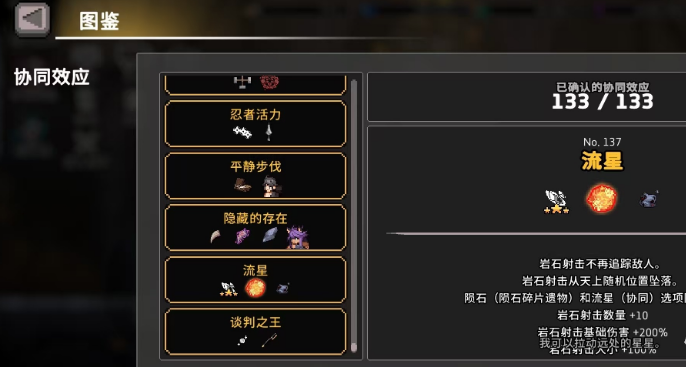
Next, let's look at several synergy styles that perform well in the game. First up is the "Meteor Synergy," which focuses on enhancing the power and quantity of Rock Shot. When you equip the "Skill Sun," "Rock Shot," and "Meteor Fragment" relics, your Rock Shot will no longer track enemies but instead fall from the sky, causing damage over a larger area. More importantly, this synergy effect increases the number of Rock Shots by 10 and raises its base damage. Overall, this synergy is perfect for characters who can use the Rock Shot skill. If you're a player who enjoys burst damage, you definitely shouldn't miss this. For the Ronin and Hunter classes, due to their lower compatibility with this synergy, it's best to avoid using this combination.
If you prefer a character with poison, the "Poison Rider Synergy" might catch your eye. A common combination includes the "Safety First" and "Chimera" relics, allowing your poison damage to be both fast and severe, with excellent damage performance. The advantage of this style lies in its high-frequency poison damage, capable of causing sustained damage in large enemy groups, making it ideal for handling dense crowds.

Another powerful synergy style is the "Bleed Synergy," centered around the "Slash Sword" and "Throw Needle" core skills. By using "Throw Needle" to reduce the enemy's bleed resistance and then utilizing "Slash Sword" for powerful output, you can make enemies unable to withstand your continuous strikes. The relics needed for this combination include "Ragged Shoulder Armor," "Sturdy Armor," "Blood Vial," and "Divine Dragon Seal." With the coordination of these relics, you can continuously deplete the enemy's health in battle, maintaining constant pressure.
Finally, if you play a summoner-type character, the "Six God Synergy" will be a suitable choice. The core of this style is to successfully form the "Six God Synergy" effect through the "Cyan Corpse Cloth" and three other divine skills. Combined with powerful relics like "Aimed Divine Gear," your summoning skills will become more efficient, and the summoned creatures will become exceptionally strong. Paired with "Frenzy" and "Cooldown" skills, the damage dealt will reach new heights, making it ideal for mid to late-game battles.

This concludes the introduction to the synergy gameplay in Gale Knight. Through the introduction of these styles, everyone should now understand the importance of synergy in Gale Knight. Although there isn't a fixed strongest combination in the game, it is precisely this flexible combination mechanism that makes each battle full of variables and fun. In actual combat, players need to adjust their combinations flexibly based on the characteristics of their characters and the needs of the scenario.
How to Play Poison Rider in Gale Rider: Gear and Strategy Guide for Poison Rider
Poison Knight is a very distinctive build (BD) in the game "Gale Knight", with its core gameplay built around "stacking poison damage". Not only does it deal explosive damage, but it also has extremely strong survivability. New players who are just starting out may not be familiar with the Poison Knight of Gale Knight and might find all kinds of skills, relics, and synergy mechanisms confusing. It's worth trying out the Poison Knight, as it boasts high health, high shields, and is very durable, making it suitable for beginners to steadily progress.
Starting Out:
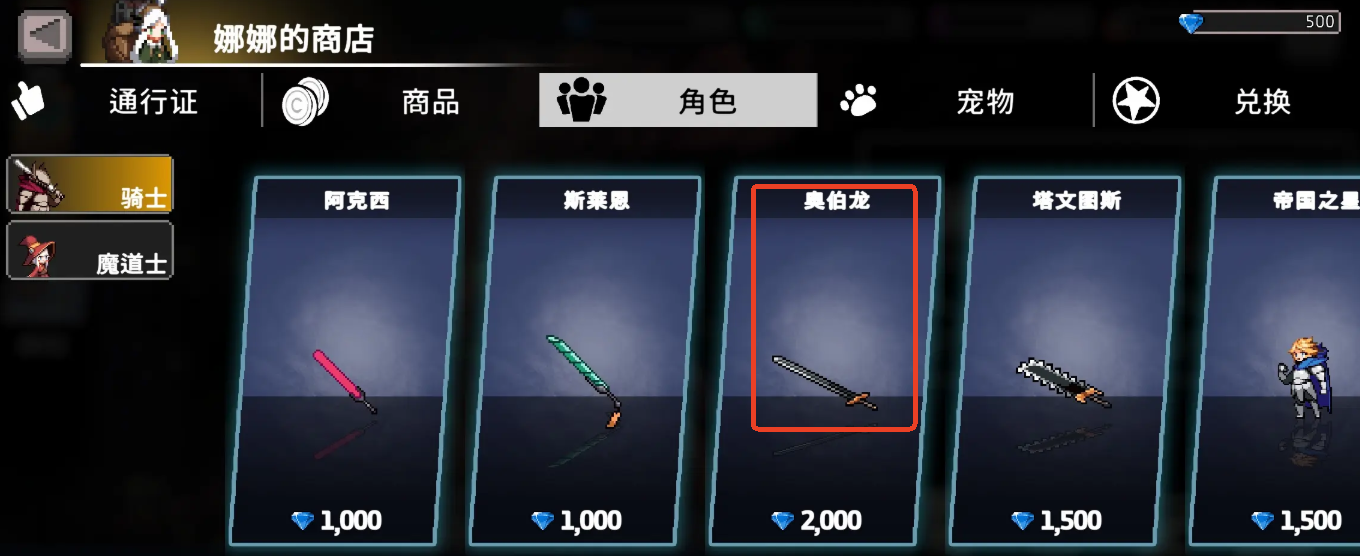
It's recommended to start with the Knight class, paired with the Poison Knight's main weapon, "Oberon" (also known as Aolong). Upon entering the game, the first thing to do is to go to the shop and buy the Aolong Longsword and Lifebuoy relic. The Aolong skill is simple to operate, requiring only a long press of the skill button to automatically release the skill and clear enemies. It comes with area damage and high-frequency attacks, which can easily achieve large-scale poisoning when combined with poison damage in the mid-game. The role of the Lifebuoy is to provide two shield slots automatically at each BOSS level, which, combined with the Knight's high durability, makes the entire progression much more stable. At the beginner stage, using Aolong + Lifebuoy and holding down the skill button can basically allow you to "mindlessly" clear stages.

Core:
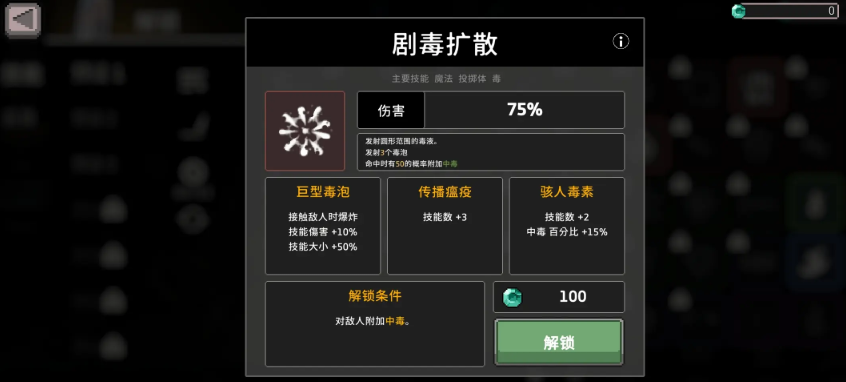
The core of building a Poison Knight lies in the order of unlocking skills and the precise pairing of relics. First, enter the game carrying only the "Spikes of Hatred" and try to successfully modify it through the black market. If successful, this skill will transform into a four-star form, which is the prerequisite for unlocking "Activation Dart" later. After a successful modification, restart the game, carry the Activation Dart, and clear a few small monsters to complete the poisoning effect. Then exit the game again and unlock "Toxic Spread." Repeat the above steps, carrying the Activation Dart and Toxic Spread together to accumulate 10,000 poison damage, and you can also unlock the "Neurotoxin" skill along the way. It's important to note that although Toxic Spread is a passively released skill, its output efficiency in clearing small monsters is not very high. Therefore, it's recommended to prioritize fighting BOSSes to quickly accumulate poison damage values.
The next step is to unlock the two core skills, "Toxic Cloud" and "Poison Coating," with the unlocking of "Toxic Cloud" being more complex, requiring a one-time use of the four-star Toxic Cloud skill to deal 500 poison damage. It's recommended to first unlock damage-boosting relics such as "Lizard Skewer," "Flow Fragment," and "Moldy Mushroom" to enhance the skill's power. In terms of strategy, you can choose to gather monsters and stack poison or fight the BOSS "Greed" in levels 1-3, due to its high health, which makes it easy to accumulate high damage numbers. After unlocking "Poison Coating," you can gradually assemble the complete Poison Knight skill set, including: Activation Dart, Toxic Spread, Toxic Cloud, Poison Coating, Poison Blade, Poison Gas Explosion, Neurotoxin, and Overload, with a 6-poison, 4-magic, and 2-curse combination, which basically covers the core needs of the Poison Knight.
Relics:
The strength of the Poison Knight also depends on the synergy of relics. The recommended core synergy is the "Toad Set," which includes the "Little Toad" and "Toad Fluid" relics. When combined, they greatly increase the efficiency of poisoning, especially when linked with the Knight's high skill frequency, forming a continuous and seamless coverage of poison damage. If this set is further strengthened by adding the "Mystic Egg," it forms the "Big Toad Set," which, when triggered, achieves even stronger poison damage stacking. Adding the "Corrosive Skeleton" and combining it with the "Big Toad Set" forms the "Toad Sage Set," considered one of the most stable core builds for the Poison Knight, offering high output, strong fault tolerance, and quick formation.
Advanced:
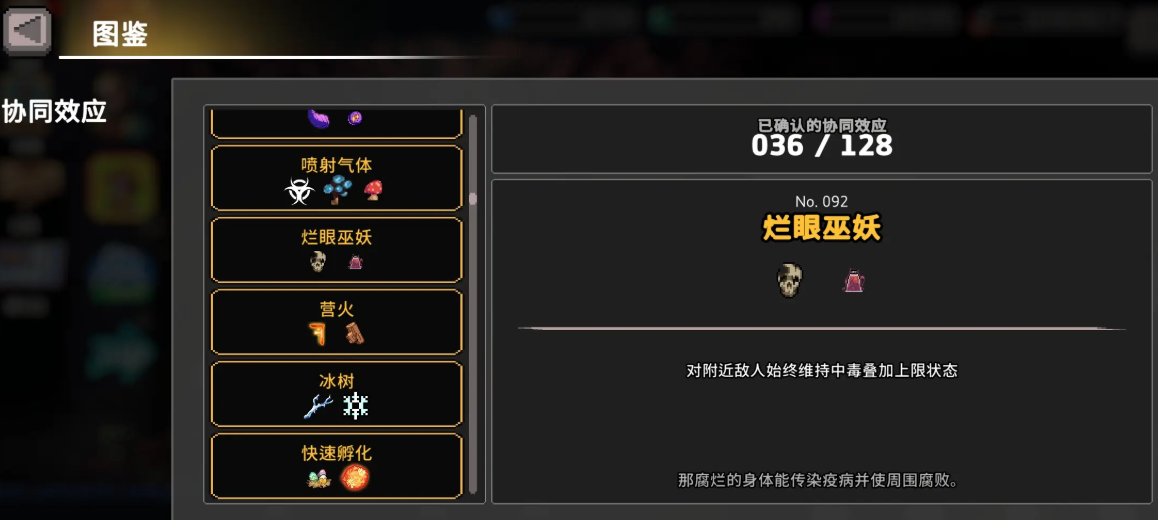
The "Ultimate Poison Knight BD," also known as the "Rotten Eye Lich Set," is composed of the "Elixir of Immortality" and "Corrosive Skeleton," combined with the "Toad Sage," creating a poison damage system that takes the damage to the next level. With an extremely high frequency of applying poison, the output is like a gushing spring, making it an essential combination for the Poison Knight to tackle high-difficulty challenges. On this foundation, you can also choose the "Chimera Set" or the "Trickster God Set" as reinforcement options. The Chimera requires "Flow Fragment + Lizard Skewer" to stably boost skill poison damage, while the Trickster God's combination is more adventurous, requiring "Steel Boots" to prevent operational reversals, suitable for players who enjoy extreme operations.
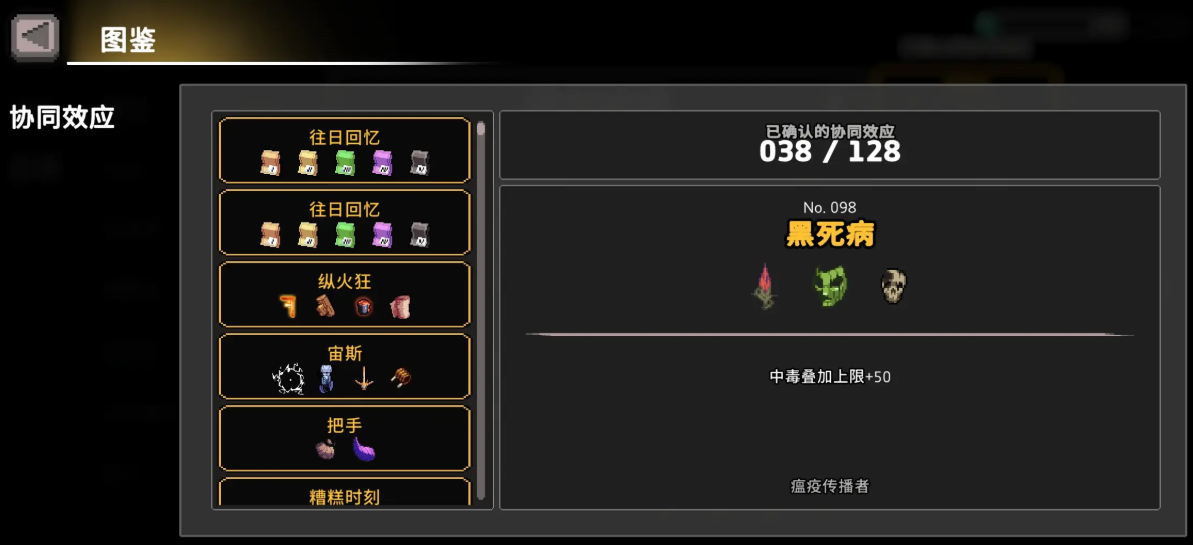
"Black Death Poison Knight" is centered around the "Thirsty Vine + Corrosive Skeleton + Strange Celestial Mask" forming the "Black Death Set," plus the "Mystic Egg" and "Elixir of Immortality" to complete the build. This set relies more on the passive area poisoning of the "Rotten Eye Lich" compared to the Toad flow, so it's crucial to unlock and configure this relic in advance; otherwise, the Mystic Egg will prevent the skill from being used, leading to a significant drop in output.
This concludes the introduction on how to play the Poison Knight in Gale Knight. The Poison Knight is a powerful BD with a low entry barrier and high damage growth, allowing beginners to get started without much thought, while veterans can delve deeper into refining it. If you have completed the basic build of the Poison Knight, you can try honing your skills in various high-difficulty chapters or experiment with building more extreme poison damage variants. There is no "one-size-fits-all" solution; as long as the build is reasonable and the operation is in place, it will work well.
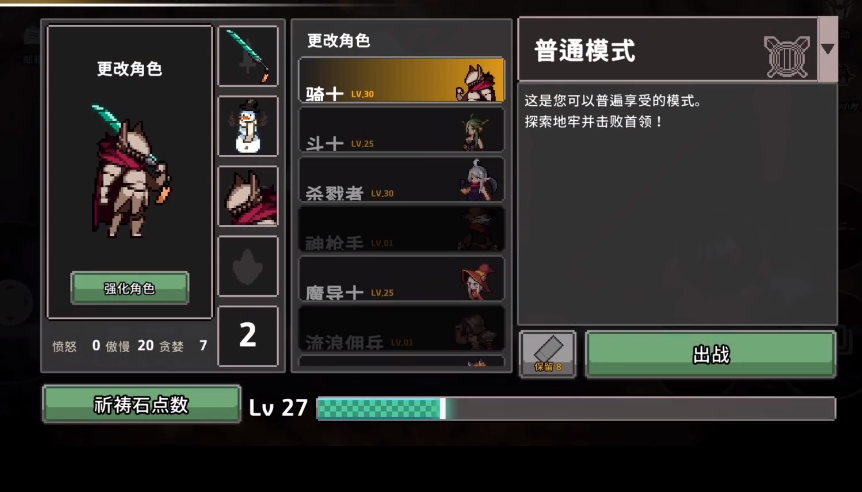
Introduction to All Characters in Gale Rider Which Characters Are in Gale Rider
In this underground world, everyone initially needs to choose different character classes to embark on a wonderful adventure. Since the choice of class will directly determine the combat style in the future, many newcomers who are not familiar with the characters do not know how to choose. So, in this issue's introduction to all characters of Gale Knight, we will sequentially explain the characteristics of each class, so that everyone can embark on a smooth adventure.
1. Wandering Mercenary
The mercenary has a robust and muscular build, wearing a tattered armor full of battle marks. He possesses two exclusive weapons, Kael and Shaptar. Kael takes a small step forward before striking down, while Shaptar first throws a chain forward, pulling the hit enemy. When used as a counterattack skill, it can bind all nearby enemies and pull them in front of him.
2. Summoner
Compared to other characters, the summoner is relatively fragile and belongs to the high-operation role. By default, he converts his health bar into a skill shield. The Eternal Sword White Face is his highly compatible equipment. Because the skill shield loses one segment for every damage received, relics that increase or reduce damage taken can also be equipped. He is chosen because only one shield can be recovered per room, so it's best to avoid control and taking damage.
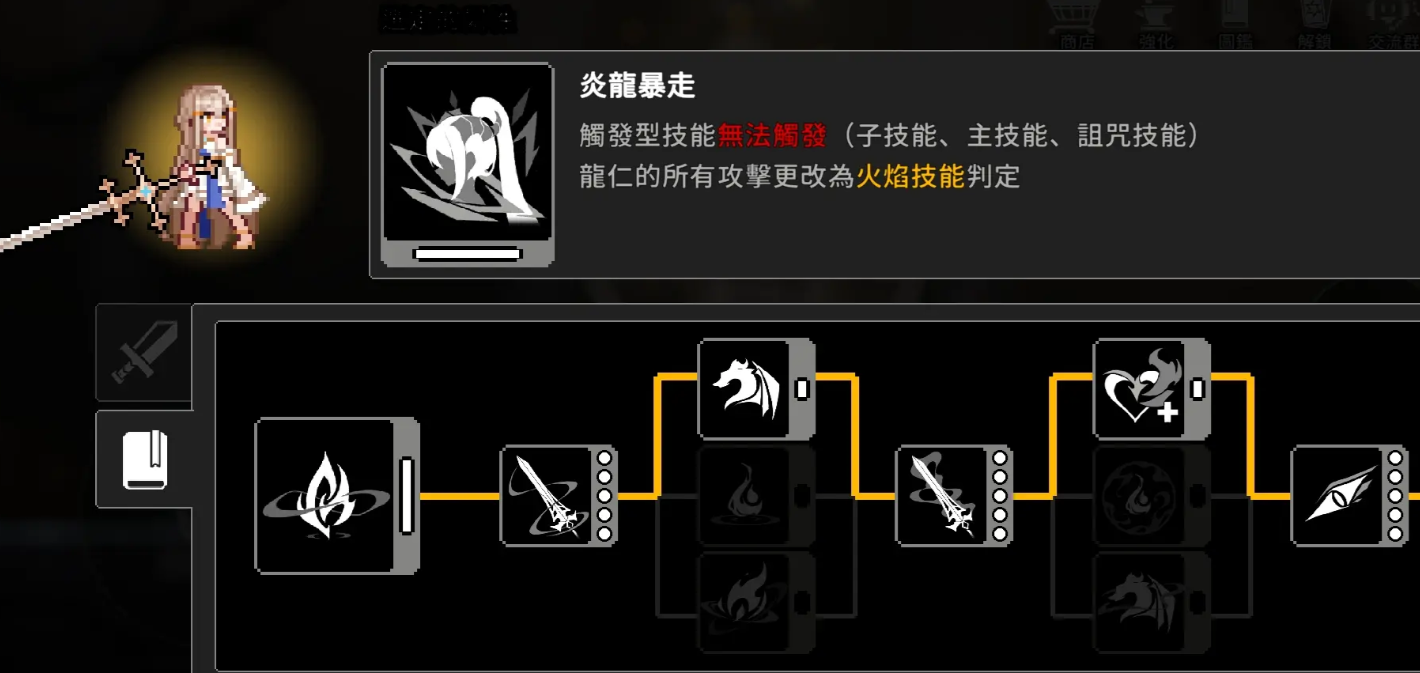
3. Draconian
The Draconian cannot obtain ice attributes but can gain special life called Dragon Meal. When holding Dragon Meal, it triggers a special attack that burns, and each Dragon Meal provides additional effects. Life values cannot increase or recover; higher life value effects will only affect mana, thus increasing mana. For every 25 mana consumed, 1 Dragon Meal is obtained. Holding 3 allows entry into the dragon transformation state, releasing Flame Jade attacks and recovering 1 mana every 2 seconds. Each time injured, Dragon Meal is effectively consumed, and once all are consumed, the dragon transformation ends.
4. Slayer
The slayer has the highest critical hit rate and base attack speed. He gains frenzy when attacking, and each stack of frenzy increases attack speed by 2%, with a maximum of 20 stacks. Blood Frenzy can enter a bloody frenzy state when health is below 15, and at this point, using a weapon skill or dashing will use a Blood Whirlwind once.
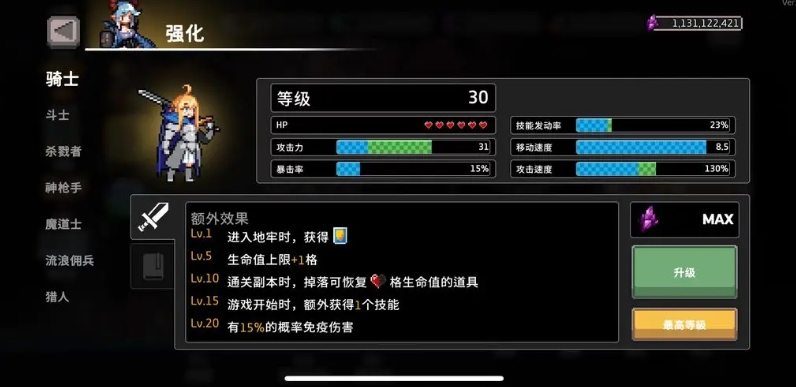
5. Warrior
The warrior has high health and fast movement, capable of withstanding fierce enemy attacks. His skills are usually melee-based and come with the "Divine Dragon Secret Technique," so mastering the power of the divine dragon requires only the following skills. In addition to the essential Shadow, as a martial artist, carrying Blood Splash and Heavy Strike is crucial, allowing the warrior to deliver powerful and swift attacks.
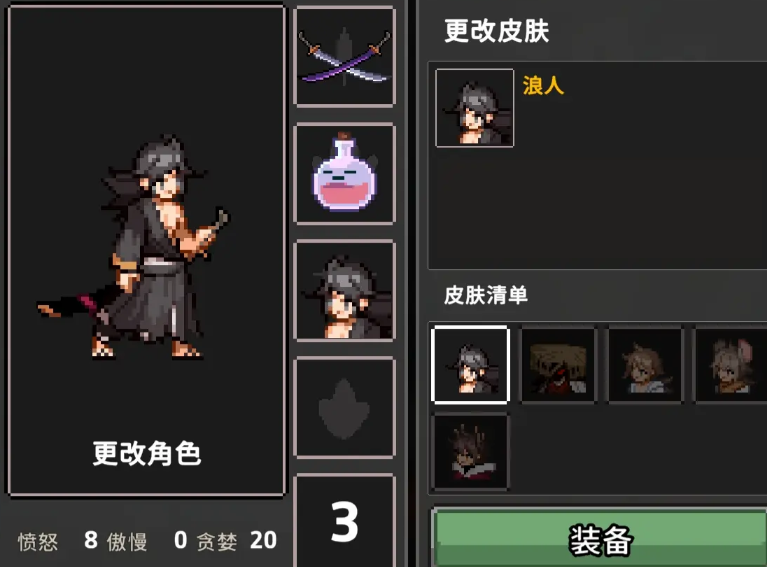
6. Ronin
The ronin is proficient in swordsmanship, with various quick and powerful moves. He can switch flexibly in combat, catching enemies off guard. His basic dash can attack and has a small area target effect. The dash can be charged by holding the dash button, making it go farther and deal more damage upon release. It also enhances normal attacks, turning them into a long-range area attack. The character's trait allows up to three consecutive dashes, which can be used to continuously dash and attack, quickly clearing out small monsters, or to travel by using three dashes. Currently, the ronin can use two swords, Red and Purple. Red deals three-stage damage with a normal attack and causes bleeding. Purple, when activated, drops spikes from the sky that automatically hit monsters. The spike's attribute will match the first installed skill and trigger it, essentially adding an extra ally to help with normal attacks, which also have elemental effects.
7. Vampire
The vampire's characteristic is that they cannot change their red blood, but can increase or decrease it. They cannot be revived by deities, and skill damage is converted into blood loss. Most skills cannot cause damage, except for the basic ones. Therefore, the only recommendation is to save blood loss, relying on stacking attack power and the number of slashing swords to achieve good attack benefits.
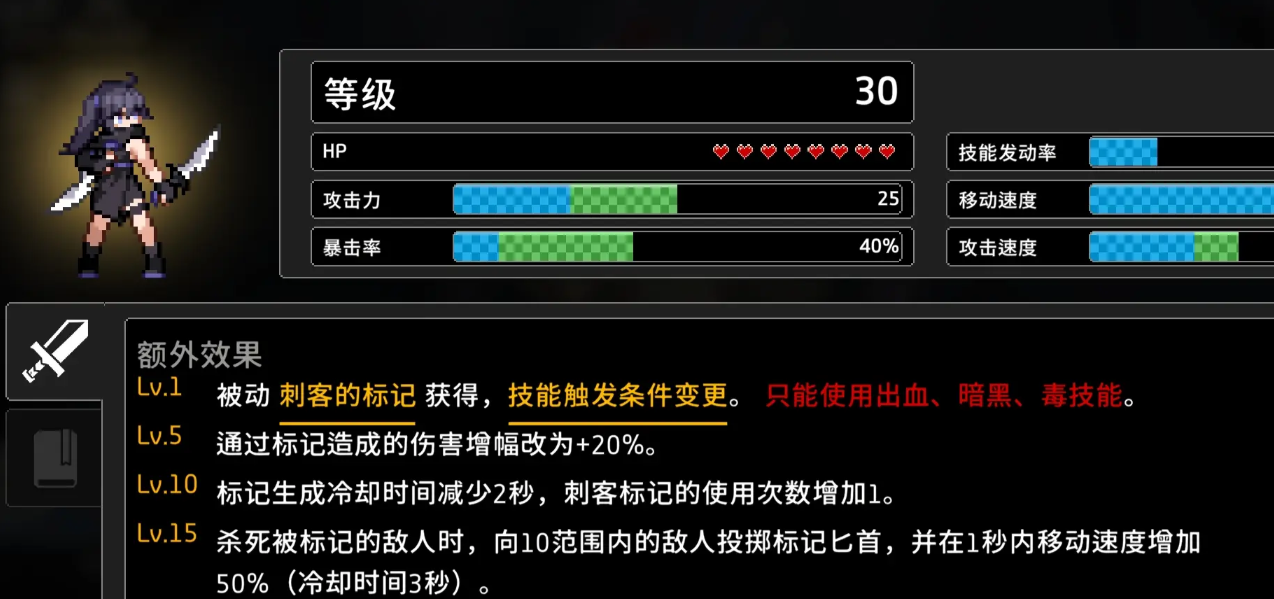
8. Assassin
The assassin throws daggers forward to attack. Successfully hitting a target with a dagger will mark it. Subsequent attacks on marked targets will increase damage. Successfully killing a marked enemy will also attack nearby enemies and grant a speed boost.
Due to space limitations, the introduction to all characters of Gale Knight will stop here. The game offers a wide variety of selectable character classes, each with their own unique features, providing different adventure experiences. Newcomers can follow their hearts and choose the ones they like.
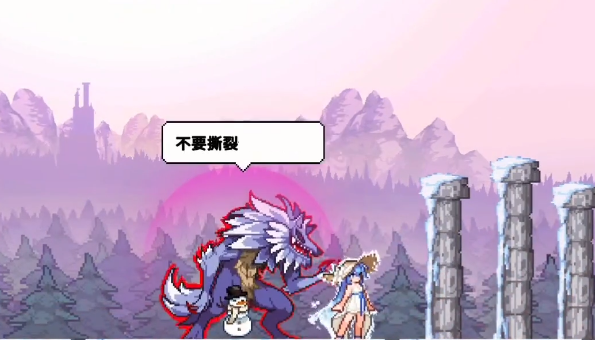
How to play Lupus the Gale Knight, recommended skill combinations for Lupus the Gale Knight
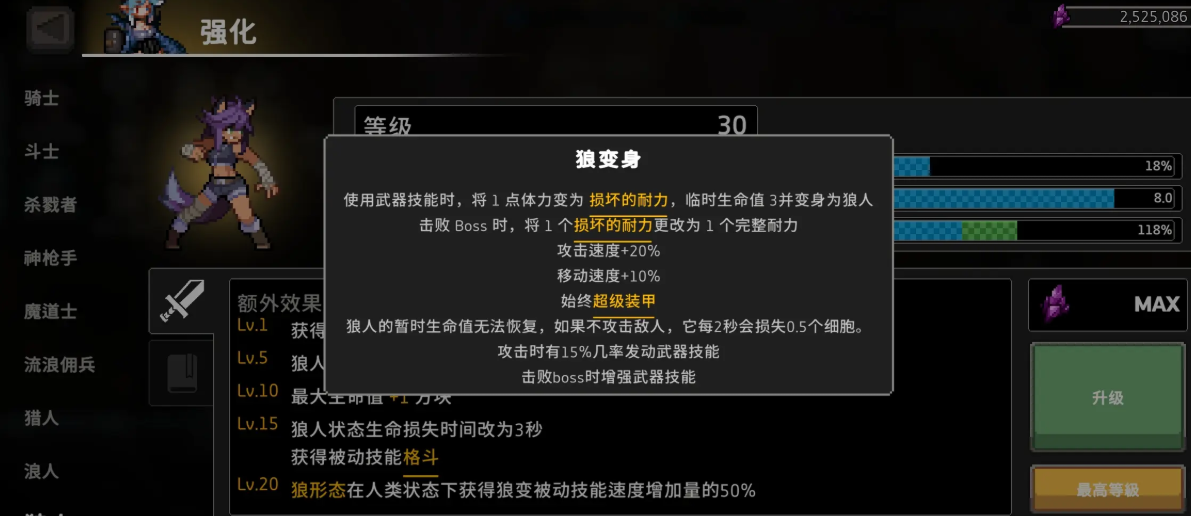
The werewolf character in Gale Knight, with its dual-form design and unique life mechanism, provides a rich array of combat strategies and build possibilities for many players. So, how exactly do you play the werewolf in Gale Knight? In human form, the werewolf is a regular melee warrior using the normal red blood system for judgment, but when transformed into wolf form, its mechanism enters a completely different mode. The red blood will be converted into purple blood (blue blood) that cannot be directly deducted by attacks, and the "yellow blood bar" is activated. The consumption of the yellow blood bar represents the duration of combat in wolf form. This form also brings powerful benefits such as super armor, difficulty in being controlled, and invincibility during dashes, making it highly survivable and mobile in battle.
Werewolf Characteristics:
Maintaining the wolf form relies on attack frequency; not attacking will cause the yellow blood to decrease, while killing a boss can restore purple blood. Players must always keep an offensive rhythm. The existence of purple blood also provides a "life conversion" error tolerance opportunity. However, if the red blood is completely depleted, the wolf form cannot be entered. Therefore, in actual operation, maintaining 1 point of red blood becomes a technical means and strategic choice. Additionally, the "real blood bar" judgment after transformation allows the form to be activated even at zero health, which can exempt some non-recoverable mechanisms when facing certain high-pressure bosses.

Prayer Points Allocation:
Recommended ability points allocation is 20 Pride. For weapons, since the build focuses on active skills, there's no strict requirement for specific weapons, but throwing weapons or melee weapons with a bleeding tag still have higher priority. Talents should focus on enhancing the wolf form. The first branch should choose not to deduct temporary health to increase durability, the third branch should enhance attack speed, and the fifth branch should directly strengthen the wolf form, which is the core. If you prefer the human form, you can try the "21111" allocation route, which is more suitable for traditional skill-based builds.
Skill Build:
The werewolf is adaptable, and almost all active skill builds can be utilized. For example, the general bleeding build, which is not picky about weapons or characters, as long as the skills have the "bleeding tag," can achieve explosive damage through stacking damage and bleeding, piercing mechanics. Knights, warriors, and werewolves can all use this build. The werewolf, with its purple blood protection and sustained attack capability, is particularly adept in high-pressure environments. Only five bleeding skills are needed to build the core set. Since the werewolf cannot carry support skills, it is recommended to prioritize unlocking aggressive and status effect skills as the core of the build.
Relic Selection:
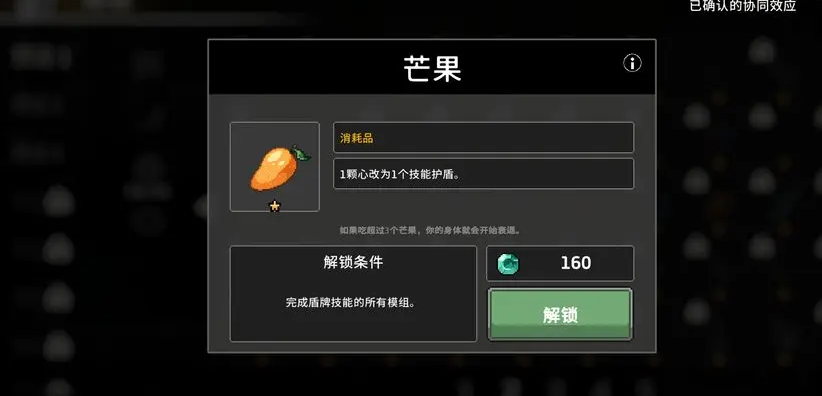
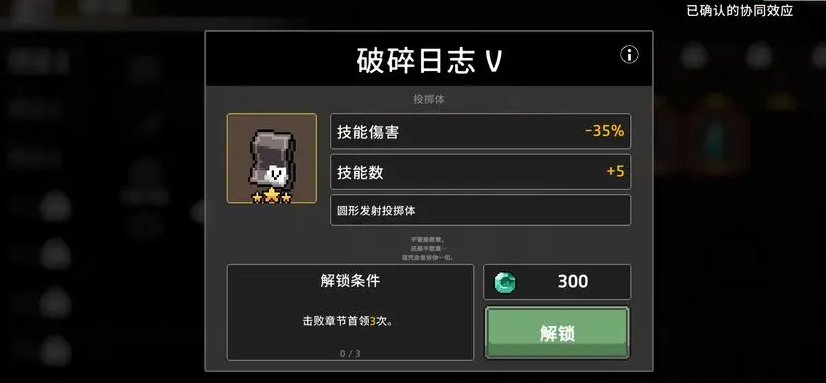
In practice, the main output skill, Slash Sword, can be combined with the Mango relic's skill modification mechanism and shield-type skills to further enhance output and durability. The Mango can also be used to lower health to trigger specific relic unlock conditions (such as the Bloodthirsty Dominator), which synergizes well with the werewolf's characteristics. The Broken Log 5 can increase the number and density of Slash Swords, making it another good option. It is also recommended to unlock "Cursed Brand" and "Dragon Seal" to enhance bleeding output and synergy points.
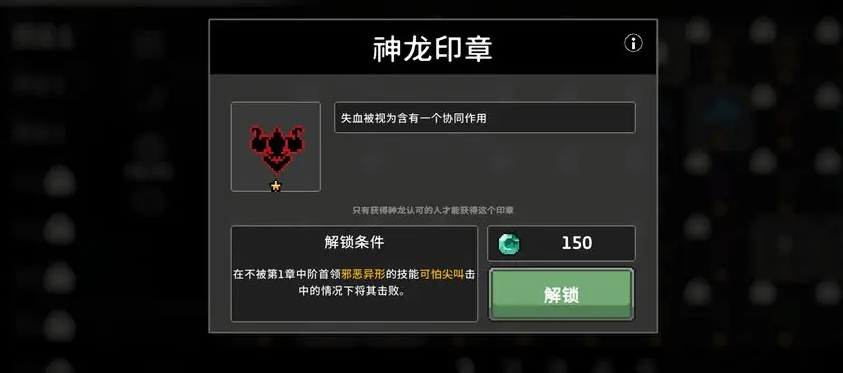
The Dragon Seal provides an extra bleeding synergy slot, allowing the werewolf to maintain full synergy with one less skill, which is very suitable for the werewolf with limited skill slots. The "Cursed Eternal Sword" has numerical bonuses, but its mechanism of converting red blood to blue may conflict with the werewolf's mechanism, so its use depends on personal preference and in-game situations. Money-related relics like the "Niflheim Coin" and "Ascetic Coin" can also be paired with the bleeding build to provide additional damage sources in the mid-to-late game.
For those who want to develop the werewolf's bleeding build over the long term, it is recommended to systematically unlock the relic skills in advance. Unlocking skills 300 times to obtain special modifications, entering the shop 100 times to increase refresh rates, and completing "Super Meat Boy" in challenge mode to obtain Red Rosin, among other things, can help the build take shape quickly. Especially when tackling Challenge 8, a complete bleeding build can easily clear stages without being hindered by debuff resistances.
This concludes the guide on how to play the werewolf in Gale Knight. Overall, the werewolf in Gale Knight is a versatile character centered around high-intensity form transformation and skill burst. It performs consistently well in various build systems, such as the bleeding build and skill synergy builds. By understanding its health mechanics, mastering dash techniques, and optimizing skill and relic combinations, the werewolf can handle challenges, boss rushes, and high-pressure combat scenarios with ease.
Gale Knight Character Rankings Gale Knight Strength Ranking Share
In recent games, the title "Gale Knight" has been frequently mentioned by many players. Although the game's art style may not be outstanding, its roguelike gameplay combined with excellent side-scrolling action has received high praise from many players. Below is a ranking of characters in Gale Knight. Many players have heard of this game but haven't played it yet. The game features a variety of classes and builds, each with different strengths and abilities. If players are not very familiar with them, it can be quite challenging to progress. Below, we will introduce some of the currently strong classes and builds.

1. Crimson Blood Curse
This is a build for the Witch class, which is currently one of the most popular builds. The output of this build is related to the blood curse, and the overall equipment setup is relatively easy, with most of the necessary gear available by mid-game. The biggest advantage of this build is its smoothness. Compared to another Witch build, the Spatial Bomb, it offers higher stability and smoothness, providing more room for error in difficult levels. While the fault tolerance is higher, the damage output is not as high as the Spatial Bomb. Its advantage lies in its smoothness and the ability to increase the player's margin for error, which are significant benefits.

The main source of damage in this build comes from the blood curse and the black curse. The current skill damage bonus is quite high, and after consuming the Elixir of Immortality, there will be even more damage bonuses. Essentially, it can boost the blood curse by 100% and the black curse by 80%. In this build, there is a talent called Eternal Affliction, which is a must-have because it provides a significant damage boost, along with an area-of-effect bonus. It also allows the curse damage to be dealt at five times the speed, making the output much stronger. After consuming the elixir, this combination of speed and damage is extremely lethal to enemies.
When using this build, remember to equip the Mysterious Egg, as the Witch's attack power decreases by 65% during attacks. Therefore, percentage-based buffs significantly enhance our damage. The Mysterious Egg not only boosts our percentage-based damage but also does not disable curse-type skills. This is why equipping the Mysterious Egg is essential. In addition to the Mysterious Egg, players should also obtain the Greed Emblem, which can provide a substantial attack boost if you're lucky. However, remember not to pick it up in a cursed room, as it would be a waste.

2. Bleeding Warrior
This build is currently very popular and powerful. It has high version strength and can deal high damage against enemies of various difficulties. Additionally, this build has a high fault tolerance, making it easy for both newcomers and veterans to get started. Let's start with the skills. The first core skill in this build is the Sword Slash, which has a short cooldown and decent damage. There is also a 20% chance to trigger bleeding on hit, which is very important. The second core skill is the Needle Throw, which is fast to cast and, when upgraded, reduces bleeding resistance by 35%.
Generally, 3 points in Sword Slash and 5 points in Bleeding are sufficient. We can also achieve 6 points in Bleeding through the Relic, Divine Dragon Seal. For weapons, it is recommended to choose either the Glutton or Ayamur; the former increases attack speed, while the latter has tracking capabilities. When using this build, make sure to carry enough Red Balm, a consumable that increases the damage of bleeding skills and reduces the enemy's bleeding resistance. However, this item can only be obtained through the fourth chapter of Super Meat Boy.

The above is an explanation of the character rankings in Gale Knight. This guide mainly introduces two very strong builds. These builds do not take long to set up and perform well, even against the highest difficulty bosses.
How to Play Frost Rider in Wind Runner Introduction to Frost Rider Gameplay in Wind Runner
In the challenging world of Gale Knight, newcomers who wish to master the powerful role of Ice Rider have many tricks and techniques to learn. Below, I will explain in detail how to play as the Ice Rider. If you want to quickly get the hang of the Ice Rider, today's introduction covers the key aspects of this playstyle that you should pay attention to later on. Of course, most of it will tell you how to build this playstyle. If you want to grow quickly in this playstyle, you need to acquire the following equipment.
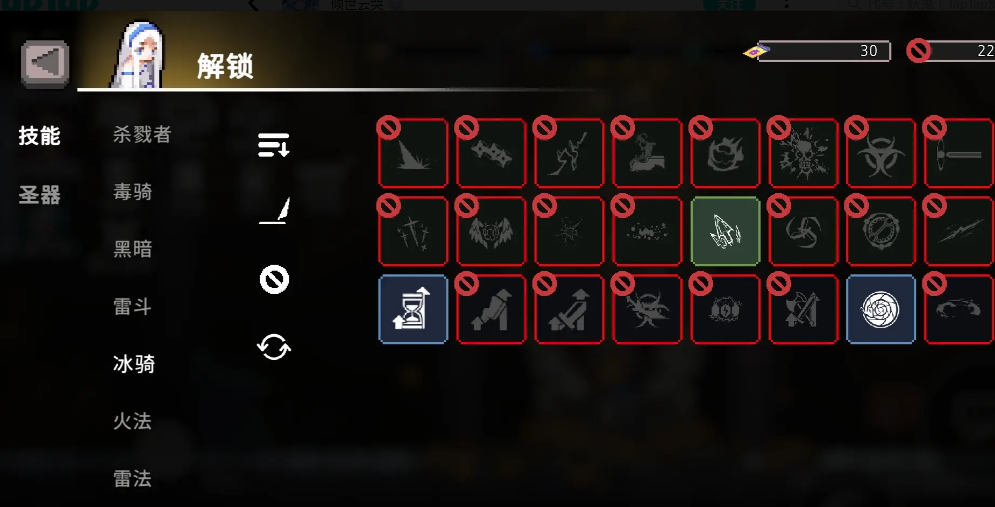
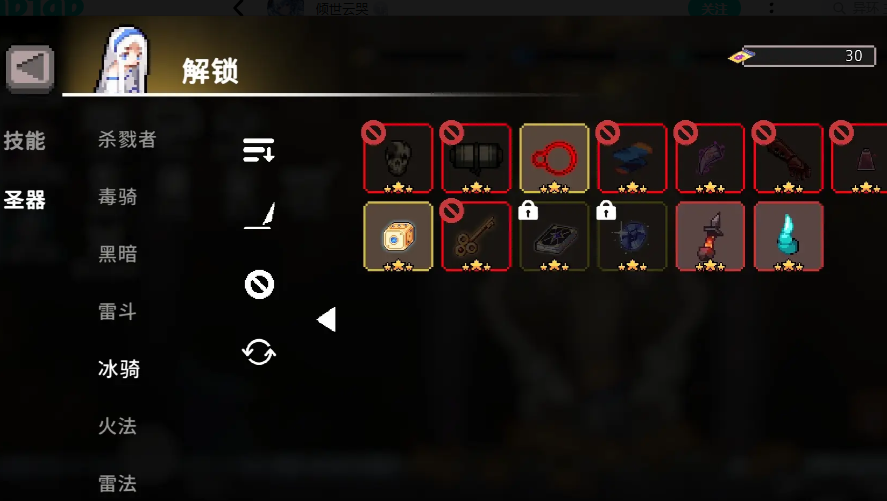
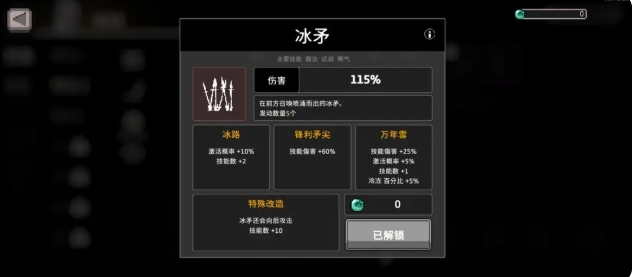
For the Ice Rider, in terms of weapons, there is no doubt that you should choose Oberon. Its uniqueness lies in the fact that holding down the attack button can trigger the Flying Thunder God effect. As for pets, the Lifeguard is the best choice, providing reliable support and protection for the Ice Rider in battle. The buff skills are set to Overload and Meditation, which are default unlocked skills that do not require player input, enhancing the character's combat effectiveness. When it comes to unlocking the main skills, it is a step-by-step process. First, you need to find the key Ice Spear item, which is the foundation for a series of powerful skills that follow.

Next, modify the Ice Spear with the Fragile Ice, and upgrade it to 4 stars to unlock the Frost Spike skill. The manual unlocking method for Fragile Ice is relatively simple and direct. Afterward, when you obtain the Ice Spear again, upgrade the modified Frost Spike to 4 stars and use it three times to successfully unlock the Ice Rider's core skill, Ice Arrow. In terms of active skills, make sure to bring the Ice Arrow skill, discard other miscellaneous skills, and focus on gathering six Ice Arrows to maximize the Ice Rider's power. Also, note that you need to clear the Skeleton Boss three times without taking damage from the Chapter 3 Skeleton Spearman to ensure the successful unlocking of the Ice Spear.
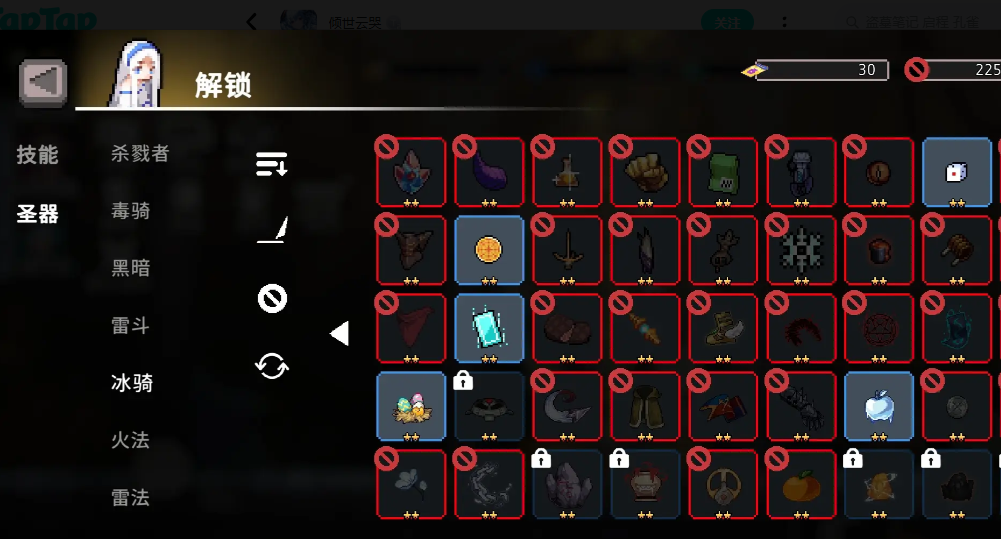
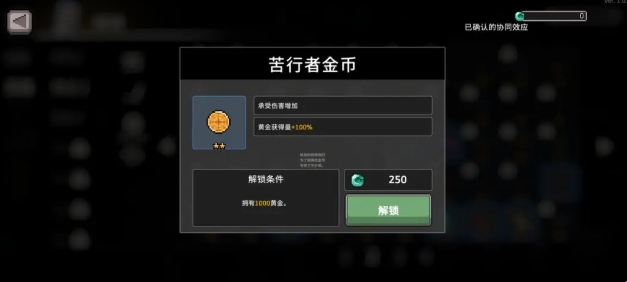
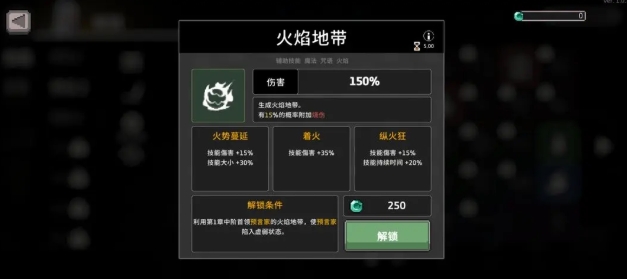
The Ice Rider's relic system is rich and diverse. The Ice Rider's relic can be unlocked by earning 100 gold in a single game. When you have more than 1,000 gold in a single game, you can unlock the Ascetic Gold. Triggering 77 skills with the dice will unlock the Divine Dice. Note that the dice must activate the auxiliary tag skill 77 times to meet the condition. Killing 300 monsters with the bomb-marked skill will unlock the Magic Wand, one of the essential relics for the Ice Rider. Completing a chapter with both Lightning Summon and Flame Zone upgraded to 4 stars will unlock the Small Sun, another important relic for the Ice Rider, which also has a bond with the Lunar Eclipse.
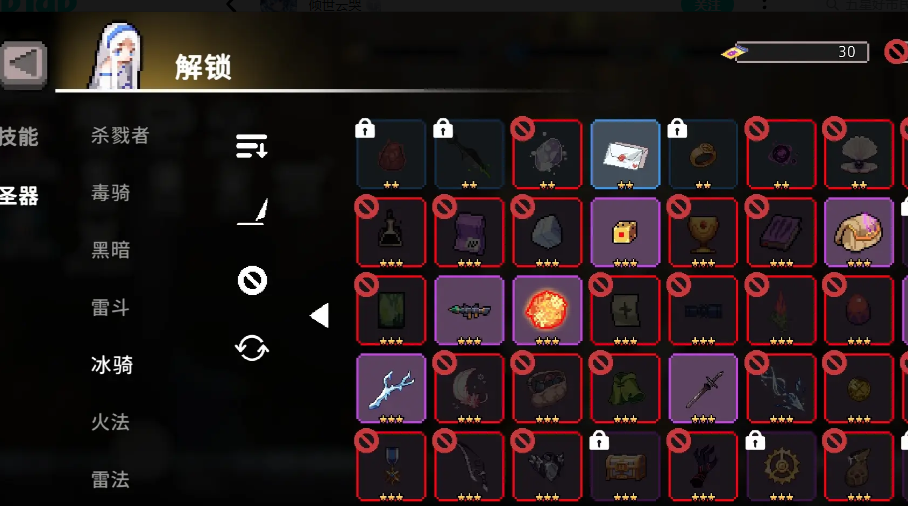
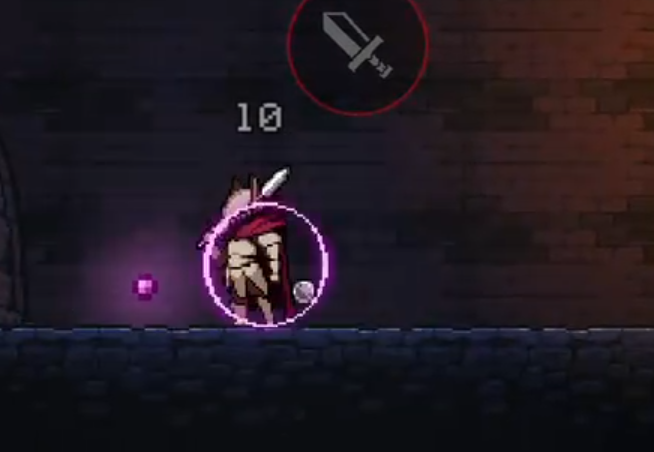
Flame Zone is an essential skill in actual combat. Players only need to stand in the position where the enemy will cast fire to easily deal with it. The unlocking condition for Lightning Summon is relatively special; you need to jump up and then down to stun the enemy 10 times. Using the Cold Tag skill can easily meet the unlocking requirement for the freeze value. In terms of resource utilization, search for the Lightning Tag skill to find Lightning Summon, and upgrade it twice to unlock Chain Lightning. Upgrading Chain Lightning to 4 stars will unlock Plasma, and killing 500 small monsters with Plasma will unlock Death Ray.
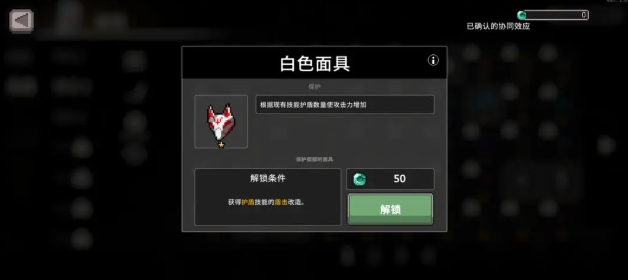
Here’s a useful tip: when using Plasma to kill 500 monsters, it is recommended to have the Mage carry the Electric Spellbook. In the first boss room of Chapter 1, avoid the boss's skills while killing the summoned small monsters. This way, you can safely modify the shield and obtain the White Mask, making it easy to defeat the Skeleton Boss and unlock the Cursed Eternal Sword, one of the late-game artifacts for the Ice Rider. Used in conjunction with the White Mask, it provides a significant boost to attack power.
The Easter Egg, as an auxiliary relic, can be manually unlocked. Although it is a blood-stacking artifact, it does not need to be carried all the time. You can open the treasure chest after defeating small monsters. Once you have obtained six relics, you can unlock the Magic Backpack, which opens the seventh relic slot. The mysterious card, which can be manually unlocked, allows the Ice Arrow to form faster. The Frozen Fruit is a versatile item that does not occupy a relic slot and is very practical.

In terms of talent selection, follow the order of Up—Up—Up—Down, and allocate all Prayer Stone points to the Pride attribute. Note that the Holy Shield is not always present, so prioritizing the Attack Power talent in the early stages is more beneficial for transitioning. Silver coins, including Lucky Coins and Ascetic Gold, are relatively easy to obtain in the early stages. Therefore, it is recommended to activate Midas' Hand first, as once this bond is activated, it becomes easier to obtain pink gear. If a mysterious card drops later, prioritize choosing the Ice Arrow, and use the Frozen Fruit for a quick transition in the early stages.
The Easter Egg is mainly used for stacking health, but be careful not to place it in the same relic slot as the Small Sun, as this will activate the Fast Hatching bond, which only restores health without increasing the maximum health limit. In the later stages, when the health reaches the 12 health cap, you can use it to restore health. The strongest strategy for the Ice Rider is the combination mentioned above, with the core being the bond effect of the Lunar Eclipse. Activating it significantly boosts the damage of the Ice Arrow. Do not pick up the Eternal Sword when the relic slots are not full, as once equipped, it cannot be removed.
Now that you know how to play as the Ice Rider in Gale Knight, you should have your own path to follow. In the early stages, the Ice Rider should flexibly use Midas' Hand to quickly form pink gear. Once formed, it will have the ability to instantly kill enemies. By carefully cultivating the Ice Rider according to these steps and strategies, you will surely be able to play the Ice Rider well in the world of Gale Knight.
Recommend


Strategy

A Guide to Zhetian Fanchen Yiyue Sharing Tips for New Players on How to Play Zhetian Fanchen Yiyue
Introduction to the Public Beta Time of Zhetian Fanchen Yeyi When is the public beta for Zhetian Fanchen Yeyi?
How is Zi Yue from Zhetian Fanchen? Introduction to Zi Yue from Zhetian Fanchen
What are the Luhida Origin redemption codes? Sharing of Luhida Origin mobile game gift codes
Lu Xida Origin Team Recommendations Lu Xida Origin Team Guide
Lu Xida Origin Strategy Sharing: Beginner's Guide to Lu Xida Origin
