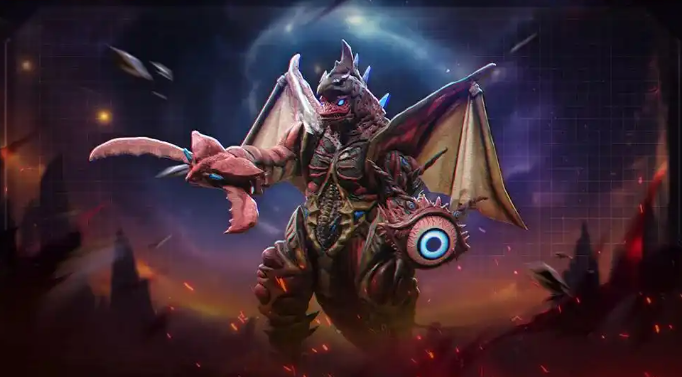
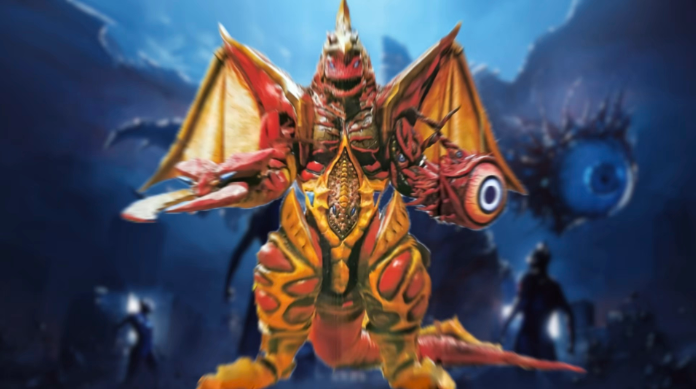
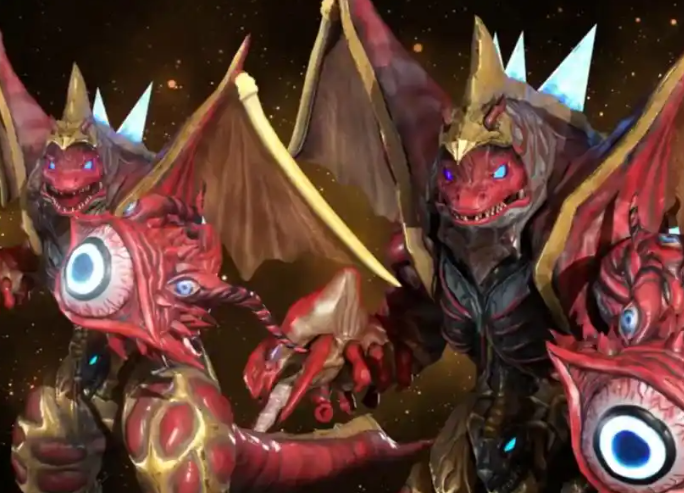
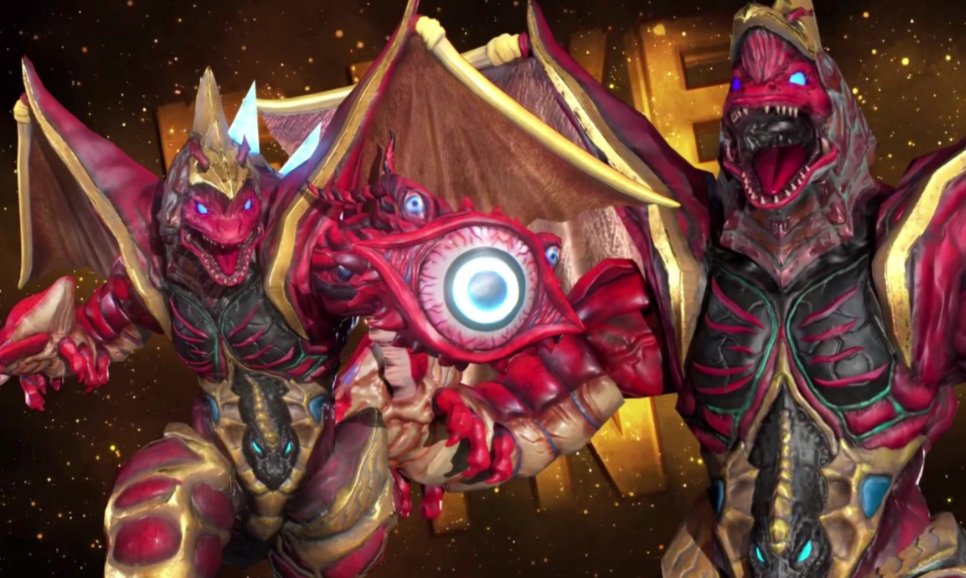
In the cosmic battlefield of "Ultraman Transcendent Hero," King Five, as the ultimate fusion beast combining the powers of five ancient monsters, becomes one of the most severe challenges players face. How to defeat King Five in Ultraman Transcendent Hero? With its multi-stage form transitions and earth-shattering area attacks, this article will delve into the combat mechanics and stage characteristics of King Five to help everyone break through this wall of despair standing in the way of universal peace.
1. Core Mechanism of King Five:
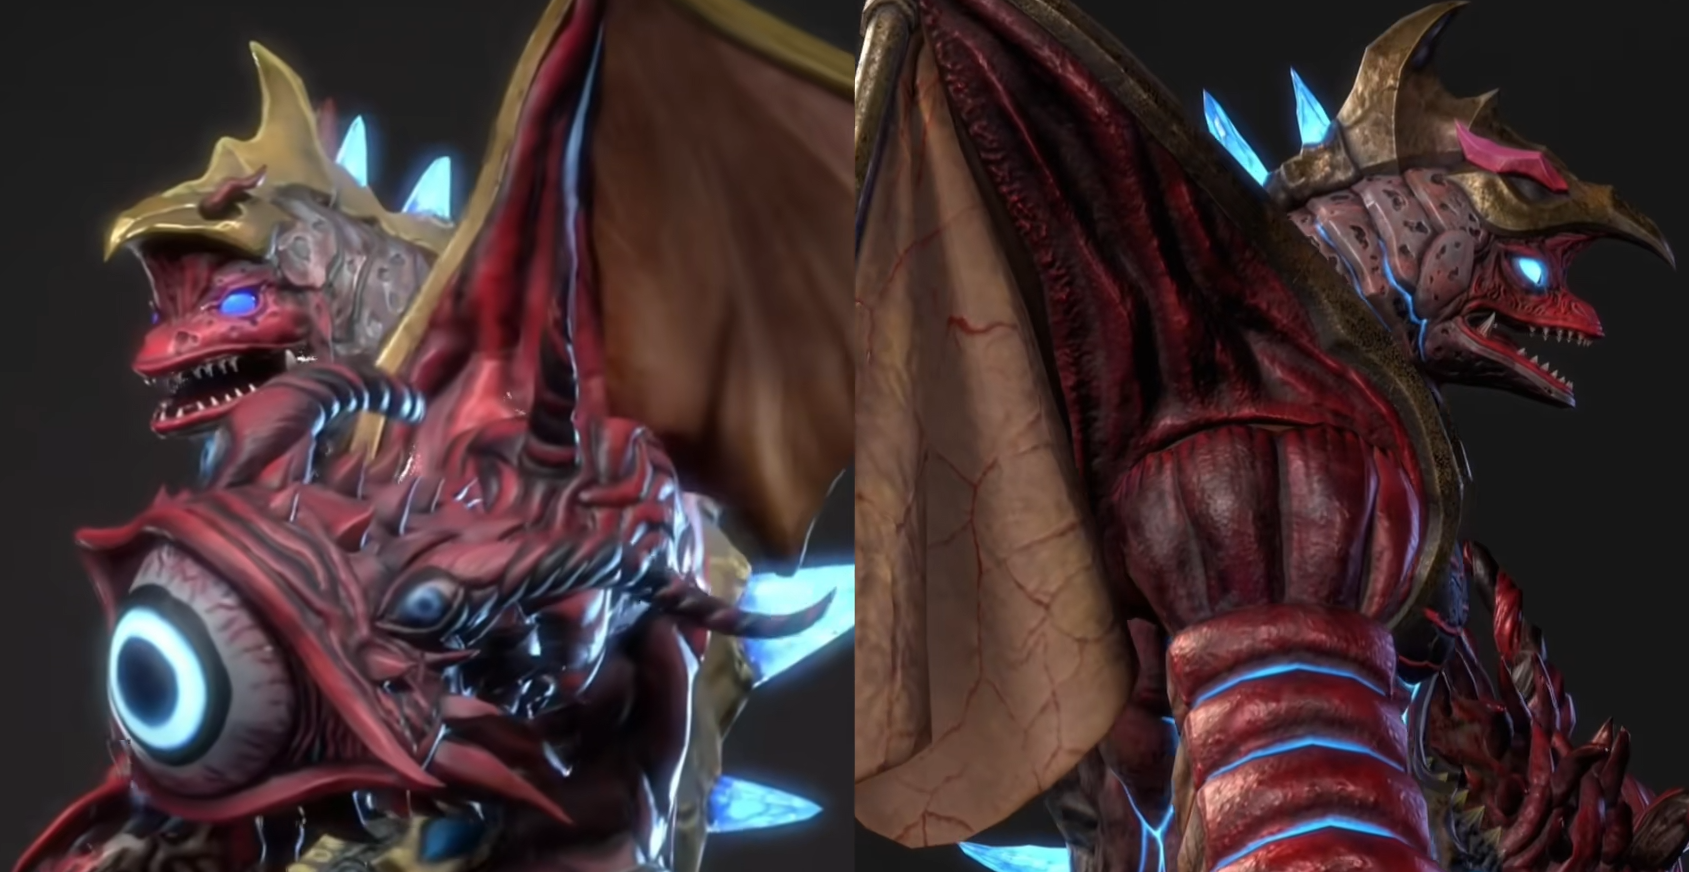
King Five is composed of Gohzam's head, Melba's right wing, Super Gob's torso, Gan Q's left arm, and Lechias' right pincer. Each part has its own health points and unique skills. Gohzam's head (weakness: light) releases a magma beam, causing continuous burning along a straight path, losing 3% of maximum health per second; Melba's right wing (weakness: wind) periodically ascends and dives, generating a shockwave upon landing. Super Gob's torso (weakness: thunder) generates a full-area shield, which requires 200 cumulative attacks to break; Gan Q's left arm (weakness: holy) opens a dark energy vortex, absorbing all flying objects and converting them into self-healing; Lechias' right pincer (weakness: ice) charges a heavy smash, creating a fan-shaped seismic wave (with a 5-second 50% slow effect).
2. Criteria for Choosing Damage Dealers:
Protection type (e.g., Gaia Cosmic Corona), must carry a "Barrier Generator" to neutralize the magma beam, prioritize upgrading shield strength to resist the aftermath of Chaos Nova; Healing type (e.g., Yullian Ultraman), needs to be equipped with "Purifying Light Wave" to remove the earthquake slow, with a healing amount of at least 1200 points per second; Control type (e.g., Aide Ultraman), must have "Light Chain" to interrupt Gan Q's absorption, and carry "Ultra Freeze" to extend the output window.
3. Team Composition Recommendations:
Zero Infinity Form (mainly attacking the wing) + Zeta Delta Claw (strongly attacking the torso) Support: Seven (head boomerang control) + Mother of Ultra (group healing). Seven uses the head boomerang to interrupt Lechias' charging, both damage dealers focus on Melba's right wing (break within 120 seconds), then switch to focusing on Super Gob while Zeta activates "Destruction Fang," reserving Zero's "Infinite Beam" for the fusion form. The fastest completion time is 7 minutes and 30 seconds. The disadvantage of this team composition is that the healing might not be sufficient, resulting in lower fault tolerance. Tiga Power Type (defense breaker) + Geed Royal (sustained damage) Support: Gaia Future Mode (shield support) + Grigio (aura healing). Gaia maintains "Full Moon Light Wave" for damage reduction throughout, Tiga focuses on attacking Gohzam's head to trigger meltdown, Geed uses "Royal End" to deplete Gan Q. Grigio initiates "Healing Rainbow" before Chaos Nova. This setup has a stability pass rate of over 85%, but the overall battle duration exceeds 15 minutes, requiring preparation for a long fight. X Beta Spark (electrification) + R/B Cyclone Form (freezing) Support: Blu Ultraman (water control) + Sora (energy supply). Blu releases "Rushing Water Current" on Lechias, X adds electrification with "Beta Flash Sword," R/B triggers "Absolute Zero" under electrified conditions, and Sora keeps the team's energy above 70%. High operational requirements but can ignore 30% defense, suitable for high-level players aiming for speed runs.
4. Priority of Part Destruction:
First target: Melba's right wing (eliminate aerial threat), dodge warning: when a red fan appears on the ground, dodge sideways, output window: 10 seconds of stun after diving, second target: Gan Q's left arm (disrupt the healing chain), key interruption: use control skills when the absorption vortex reaches 80%, breaking defense tip: attack it up close while it swallows flying objects; dealing with the Catastrophe Fusion form: Magma Storm (Gohzam + Melba), move counterclockwise to avoid magma pillars, attack Melba's remains to trigger weakness; Abyssal Vibration (Super Gob + Lechias), jump to floating platforms to avoid ground fissure waves, focus fire on the torso core immediately after the earthquake ends.
5. Equipment Configuration:
Doom Blade, +45% efficiency in destroying parts, Ancient Armor, reduces damage from fusion beasts by 25%. Weakness Analyzer, +60% critical hit rate when attacking exposed weaknesses, Energy Coordinator, increases skill combo damage by 35%, Chip: Disintegration Core, +15% to all attributes for each part destroyed; Redemption Staff, expands healing range by 40%. Phase Shift Armor, resets control skill cooldown upon successful block. Emergency Recharge Device, instantly restores 50% HP when the entire team is near death. Tactical Command Instrument, doubles the duration of team buffs. Chip: Crisis Prediction, displays enemy skill range 1.5 seconds in advance.
6. Combat Tips:
Hate Control Technique: When Lechias targets the healer, the damage dealer immediately uses "Provocation Roar," and the healer activates "Optical Camouflage"; Terrain Kill: Lure King Five to the edge of the battlefield, using Melba's dive inertia to crash into the energy pillars.
Have you learned how to defeat King Five in Ultraman Transcendent Hero now? King Five poses a significant test to team coordination. Remember the core sequence of "Break Wing → Sever Arm → Shatter Torso," and maintain a three-point stance to distribute pressure during the Catastrophe Fusion phase. Over-time Enrage Countermeasure: If the battle exceeds 25 minutes, King Five will enter an infinite Chaos Nova state. At this point, retain two Ultra Bomb-type skills, concentrate on attacking the remaining parts to trigger a phase transition and reset the timer, and use "Ultra Fusion Beam" to secure 8 seconds of safe output.