The Shield Knight in Star Trace Resonance leans more towards a tank role, with good durability, making it a very reliable frontliner for the team. Currently, the Shield Knight can follow two routes: the Protection and Recovery stream and the Light Shield and Recovery stream. People can refer to this Star Trace Resonance Shield Knight skill pairing guide to help configure the Shield Knight's skills, allowing the class to better exhibit the characteristics of the chosen stream. Come and take a look.

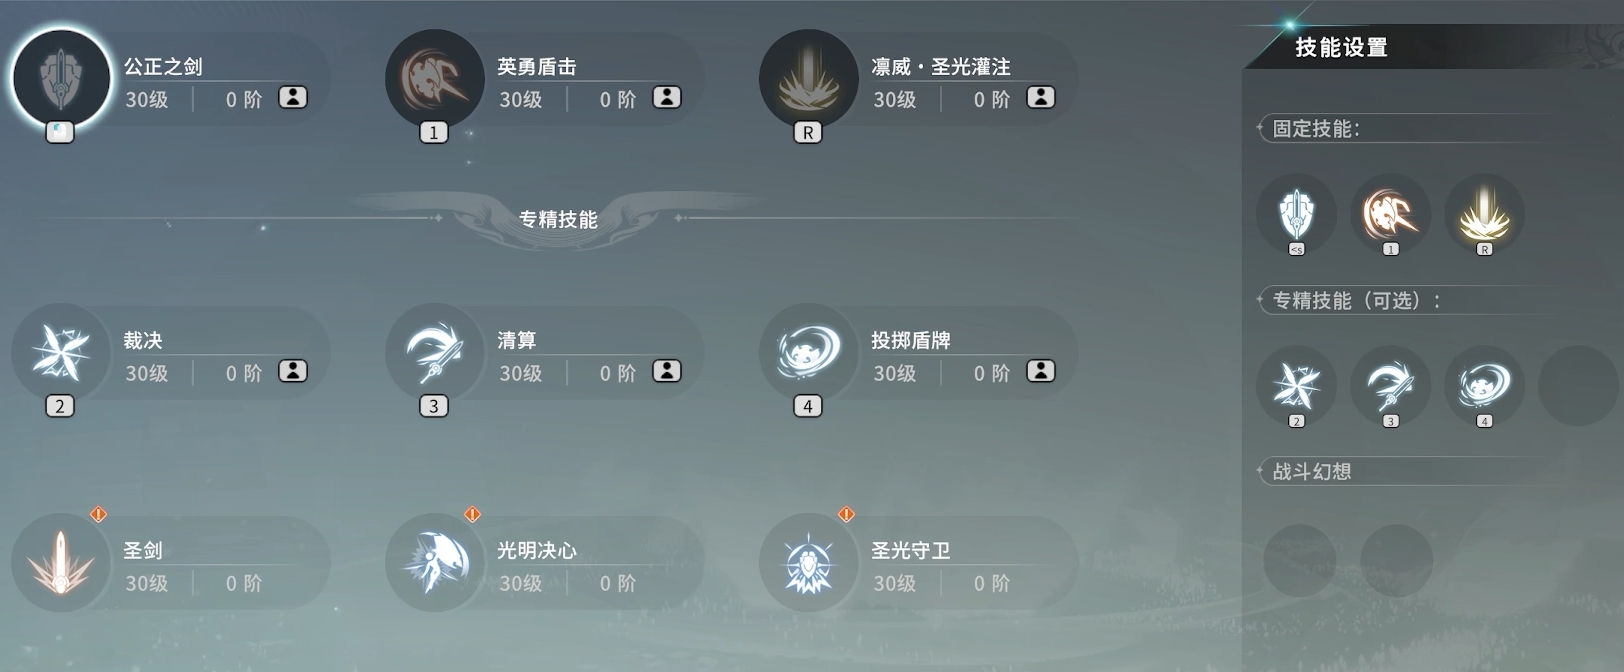
In the first phase, if the Shield Knight wants to complete the initial challenges more easily, they can, in addition to the three fixed skills (Ultimate, Sword of Justice, and Heroic Shield Bash), adopt a specialization skill combination of Judgment, Reckoning, and Throwing Shield. The last skill can be chosen according to the players' needs. This skill combination, as long as it ensures that the defensive layers of Heroic Shield Bash do not drop, will provide extremely strong frontliner capabilities, capable of dealing decent damage. When health is low, Judgment can be used to make up for it, and the skill rotation is smooth without any hitches, helping everyone smoothly reach the second phase to choose their desired stream.

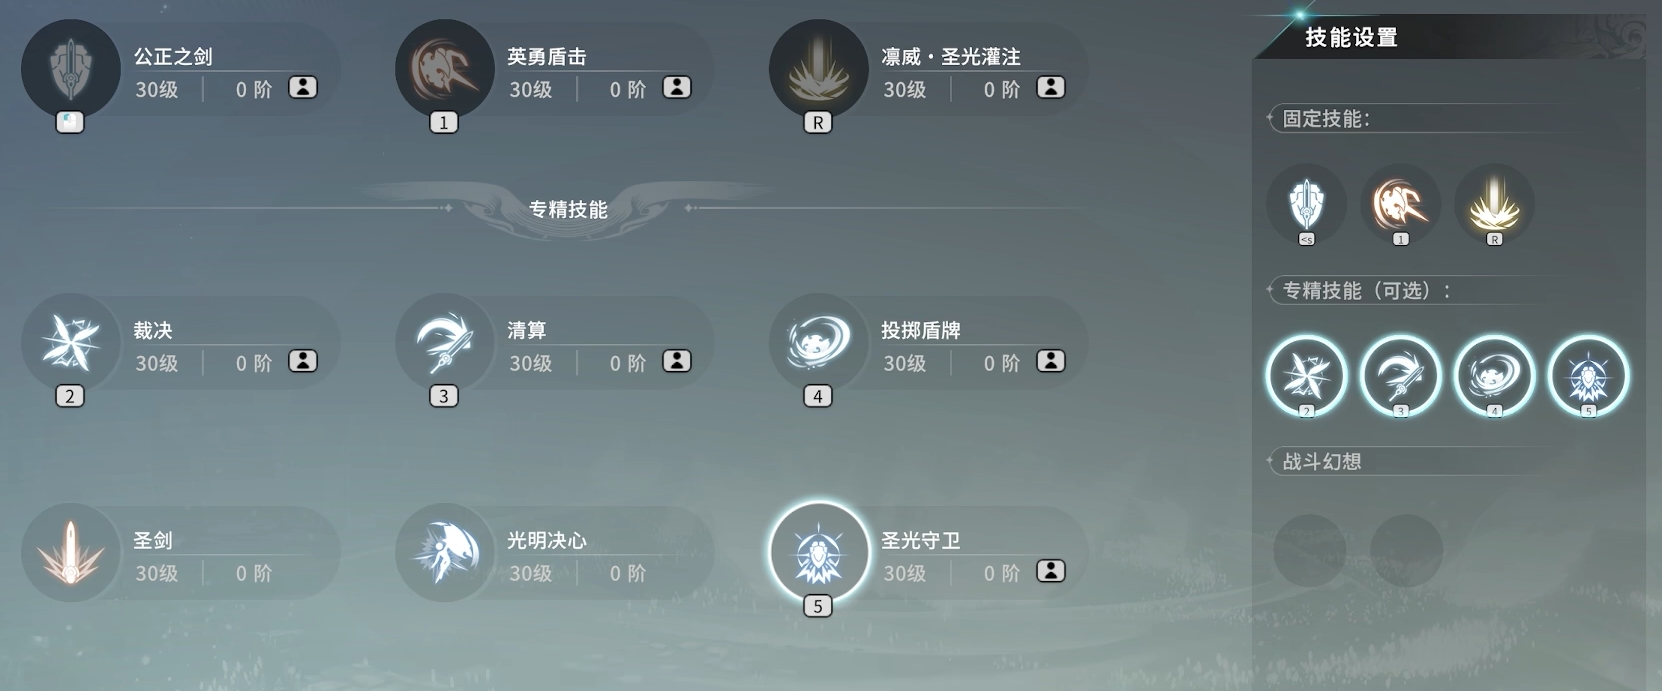
The Protection and Recovery stream can greatly enhance one's frontliner capabilities, and the power of the Heroic Shield Bash skill will also be enhanced. Therefore, in terms of skill pairing, it is similar to the first phase, with the only difference being that the fourth specialized skill needs to carry Divine Light Guardian to gain an increase in physical defense and damage reduction. In practice, the skill rotation for the Protection and Recovery stream is also very simple. When engaging enemies, prioritize stacking the passive of Shield Bash and activate Divine Light Guardian, then continuously charge and use Shield Bash (requires the talent Shield Impact). Once the talent's Reckoning Blazing is triggered, use Reckoning for output. Use Judgment when health is low or energy is about to overflow, and use Throwing Shield whenever it is ready. This combination will give the Shield Knight a very strong damage reduction ability, making it less likely to be focused and killed while pulling mobs. It can withstand enemies for a long time when paired with quality classes, and is also simple to operate.

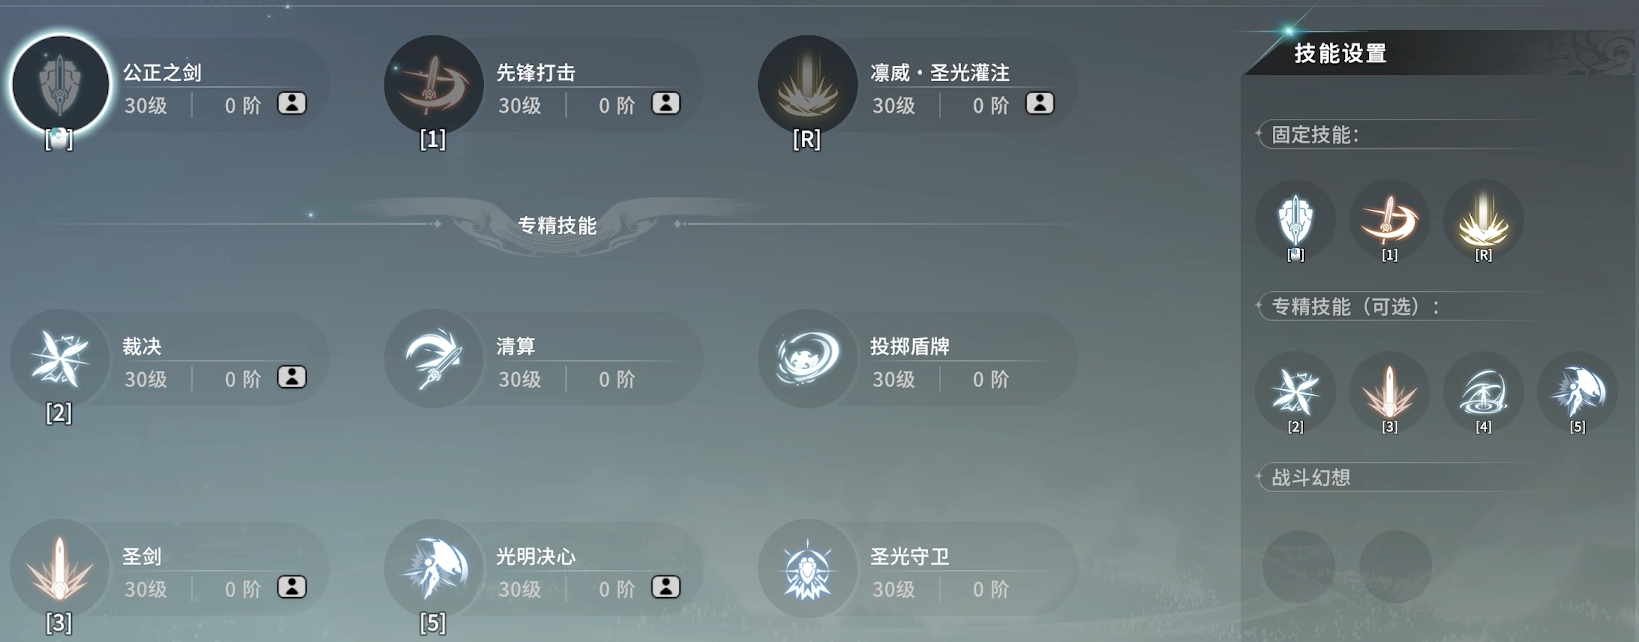
The skill setup for the Light Shield and Recovery stream is quite different from the Protection and Recovery stream. Its Heroic Shield Bash skill is changed to Vanguard Strike, making it more inclined towards dealing damage. Among them, the three fixed skills are Sword of Justice, Vanguard Strike, and the Ultimate, while the specialized skills need to carry Judgment, Holy Sword, Ruthless Conquest, and Radiant Resolve. In combat, you can directly use the Ultimate to return Holy Orders, then hit twice with Holy Sword, which will bring the Lightforged Barrier to level ten. At this point, as long as you activate Ruthless Conquest, you can freely deal damage to enemies during the duration of the Conquest. As long as players pay attention to using Judgment before energy overflows to prevent energy waste, and use Holy Sword more often after triggering the Blessing of Holy Orders, they can play the Light Shield and Recovery stream well.

With this, the Star Trace Resonance Shield Knight skill pairing guide has been shared with everyone. Referring to the above pairing guide, no matter which stream the players choose, the Shield Knight will perform well in actual combat. Players who are still struggling with how to pair skills should go into the game and try it out.


