In the game Dragon Soul Traveler, there are not only character development and strategic battles, but also many fun gameplay elements, such as maze exploration. Player teams can enter the maze to explore unknown rooms, where there are battles, puzzles, and exploration and interaction. Some players do not know how to pass the mazes in Dragon Soul Traveler. Below, we will provide a guide for exploring the mazes in Dragon Soul Traveler, first telling everyone about the various option settings in the maze, what the icons mean, and then sharing the specific exploration process.
About the maze:
The main rewards from maze exploration come from chests, including summoning tickets, horns, and other precious items. Different icons along the way have different meanings. The double swords icon indicates a battle node, which must be won before proceeding, and rewards can also be obtained, which may include puzzle-solving items; the bubble icon indicates an interactive point, with one or more options appearing, and after choosing, the corresponding hidden door can be triggered; the chest icon naturally represents the source of rewards, and some chests also contain puzzle-solving items; the sapphire-shaped icon represents a secret room's hidden door, which requires a specific mechanism or item to open.
First level · Haunted Mansion
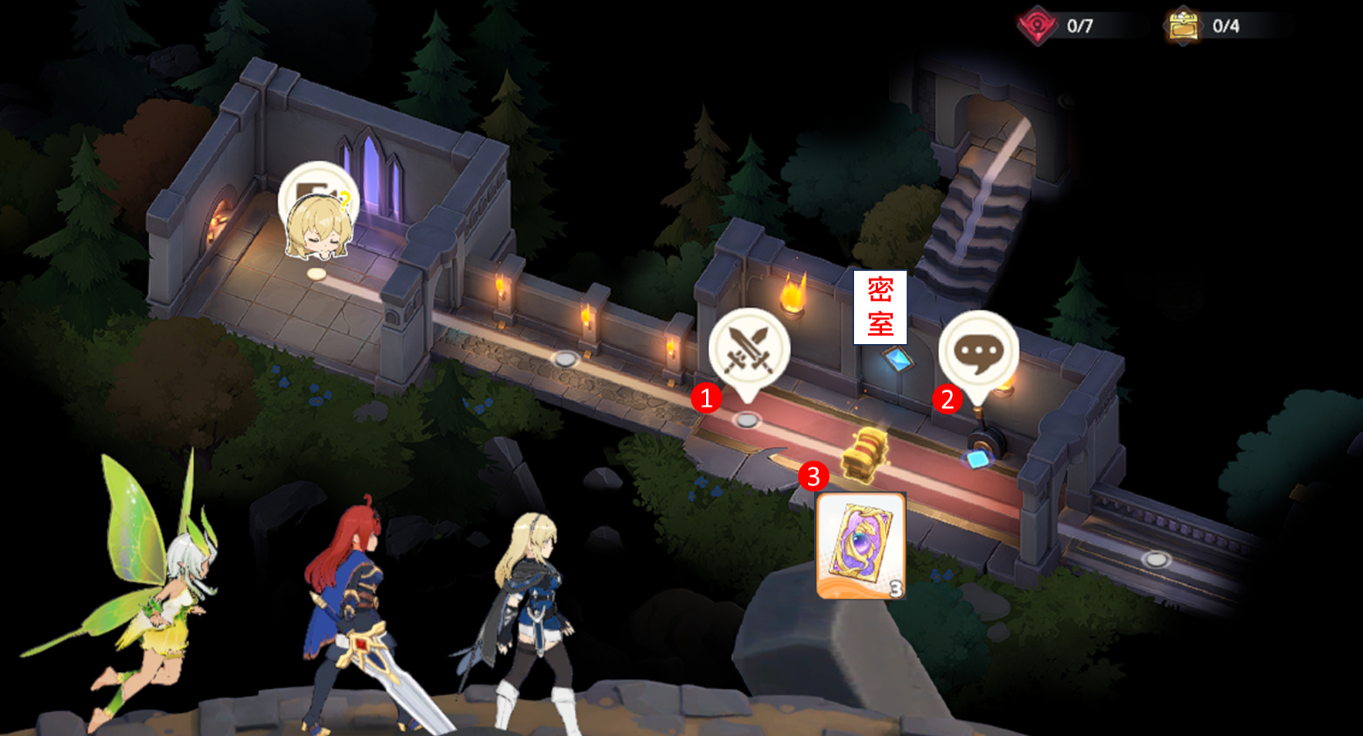
After entering the maze, move to the right first. After winning the first battle, you can open Chest 1. The bubble icon mechanism next to it allows you to choose "activate the mechanism," thus opening the secret room's hidden door. After entering the secret room and completing another battle, you can obtain Chest 2. Exit the secret room and continue moving to the lower right. After completing another battle, you will get the "Boar Headgear." This item is used to pass through narrow passages, and you can switch by clicking the "Human/Boar" button at the lower right corner of the screen.
Note that although turning into a boar allows you to pass through narrow passages, your combat power will significantly decrease. Make sure to turn back into human form before any battles. After obtaining the Boar Headgear, you will see a bubble prompt on the wall saying, "A Knight Helmet is required to unlock." Skip this for now and return once you have the helmet. The currently explorable paths are to the right and below, with the right path blocked, so first explore downward. You need to turn into a boar to pass through the narrow passage here.
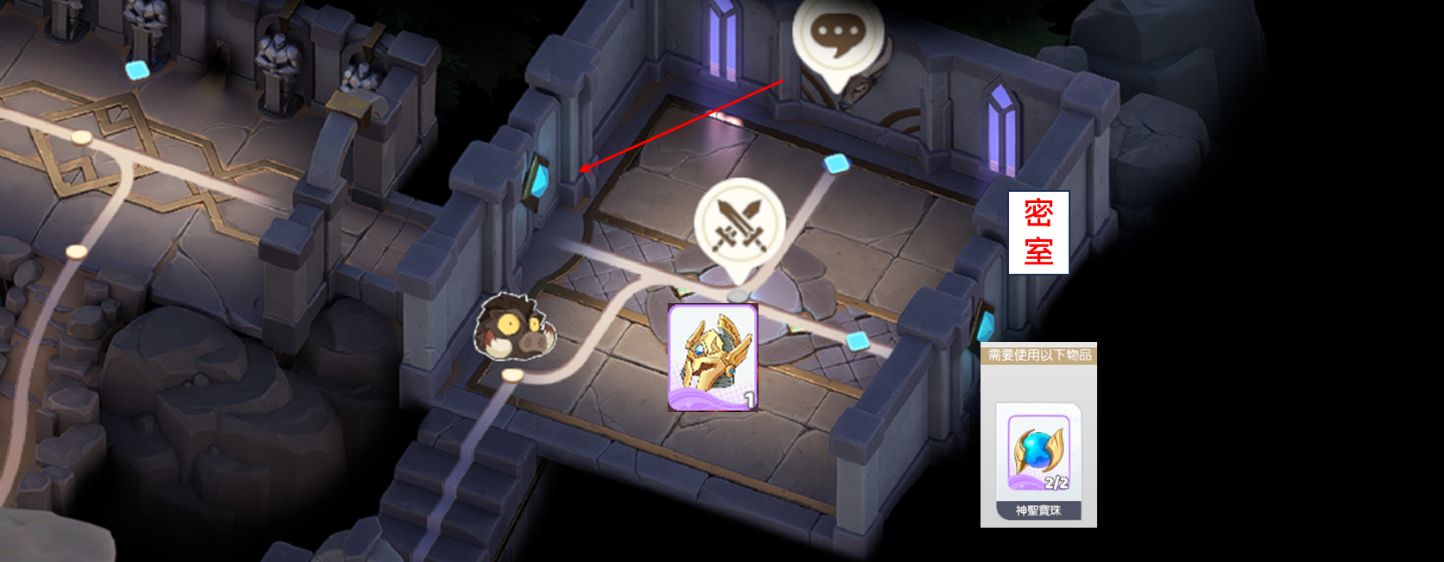
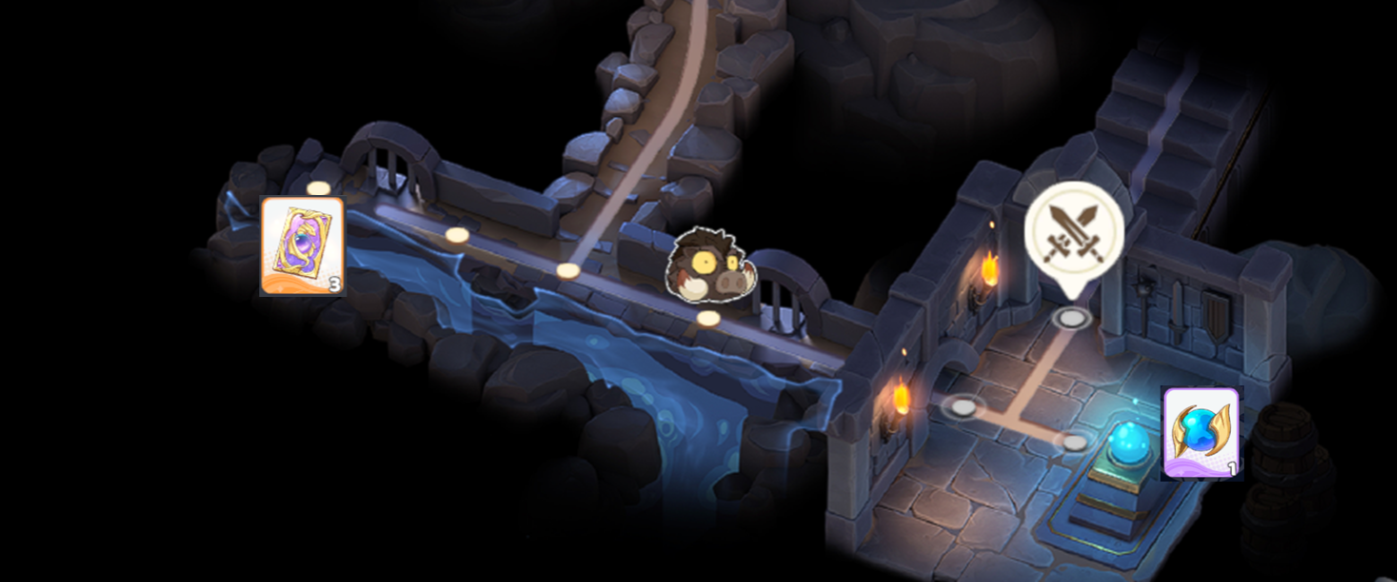
In the lower area, go to the left first to collect Chest 3, then enter the room on the right. Click the waypoint next to the blue orb to obtain a blue unlocking item. After completing the battle in this area, move upward to enter a new room. In the center of the room, there is a battle, and after winning, you can obtain the puzzle-solving item "Knight Helmet." There is a bubble prompt on the right wall saying "Activate the Antlers," which opens the left hidden door. The right hidden door requires two blue unlocking items to open, so you need to find another one. Return to the corridor where the Knight Helmet prompt is, submit the helmet to open the secret room, and after completing the battle, you can obtain the second blue unlocking item. With two blue items, return to the far-right room, submit them, and open the secret room. After completing the battle, you can collect Chest 4, thus completing the exploration of this level.
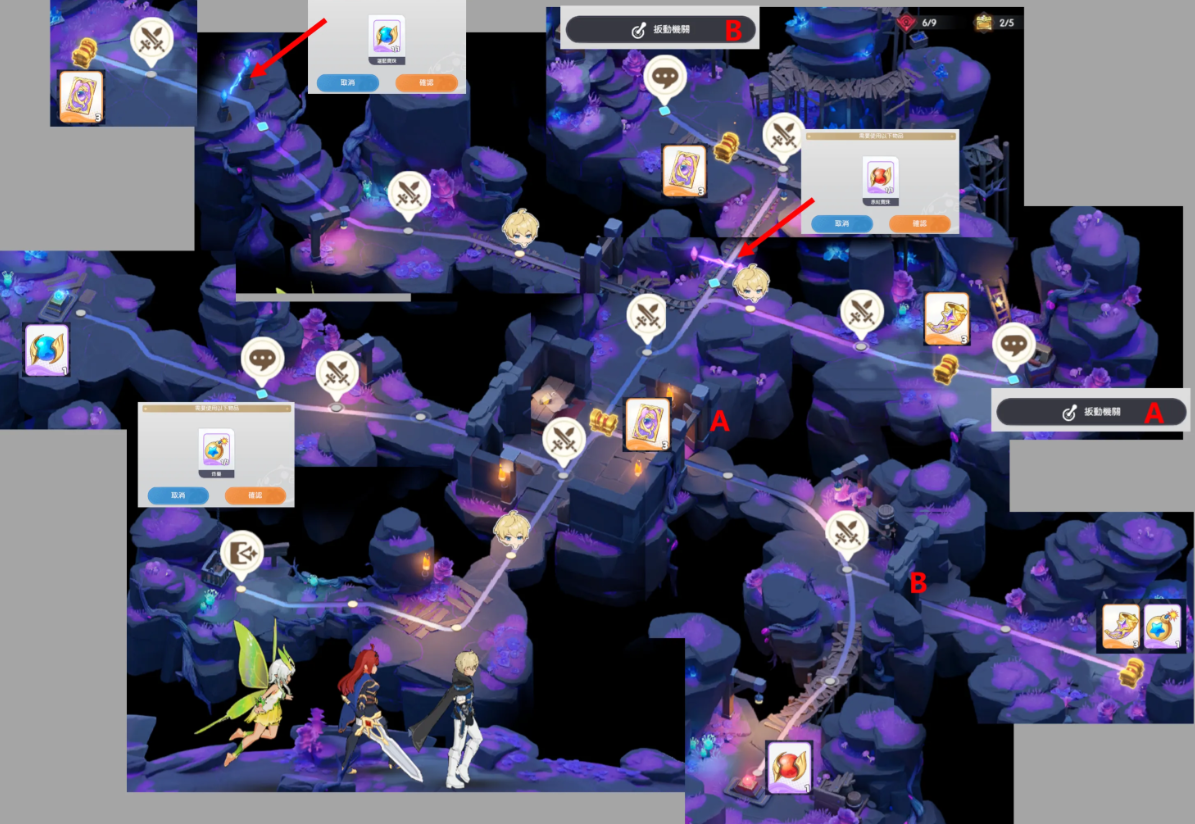
Second level · Crystal Vein Cavern
After entering this level, proceed along the upper right path first. After winning the battle, you can obtain Chest 1. At the fork, go right, continue battling, and open Chest 2, then activate the mechanism to open Door A. Go down through Door A, complete the battle, and obtain the red ball. Return to the fork, use the red ball to remove the barrier, and advance upward. After winning another battle, you can open Chest 3 and use the mechanism to open Door B. Then return to the lower area, cross Doors A and B, and inside, you can obtain Chest 4 and the bomb item. Enter the room directly opposite Door A on the left, use the bomb to break the barrier, and pick up the blue ball item. Return to the fork, use the blue ball to remove the blue barrier, and the final Chest 5 is ahead.
Third level · Abandoned Trench
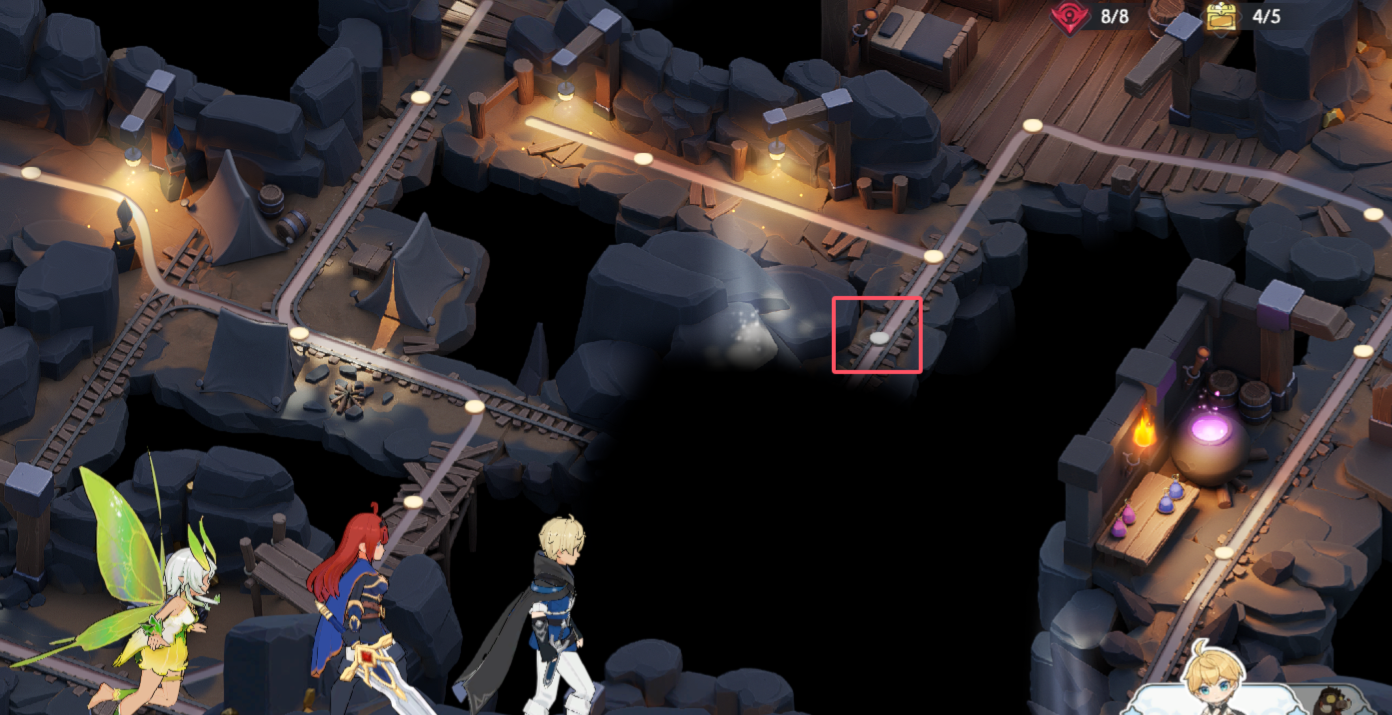
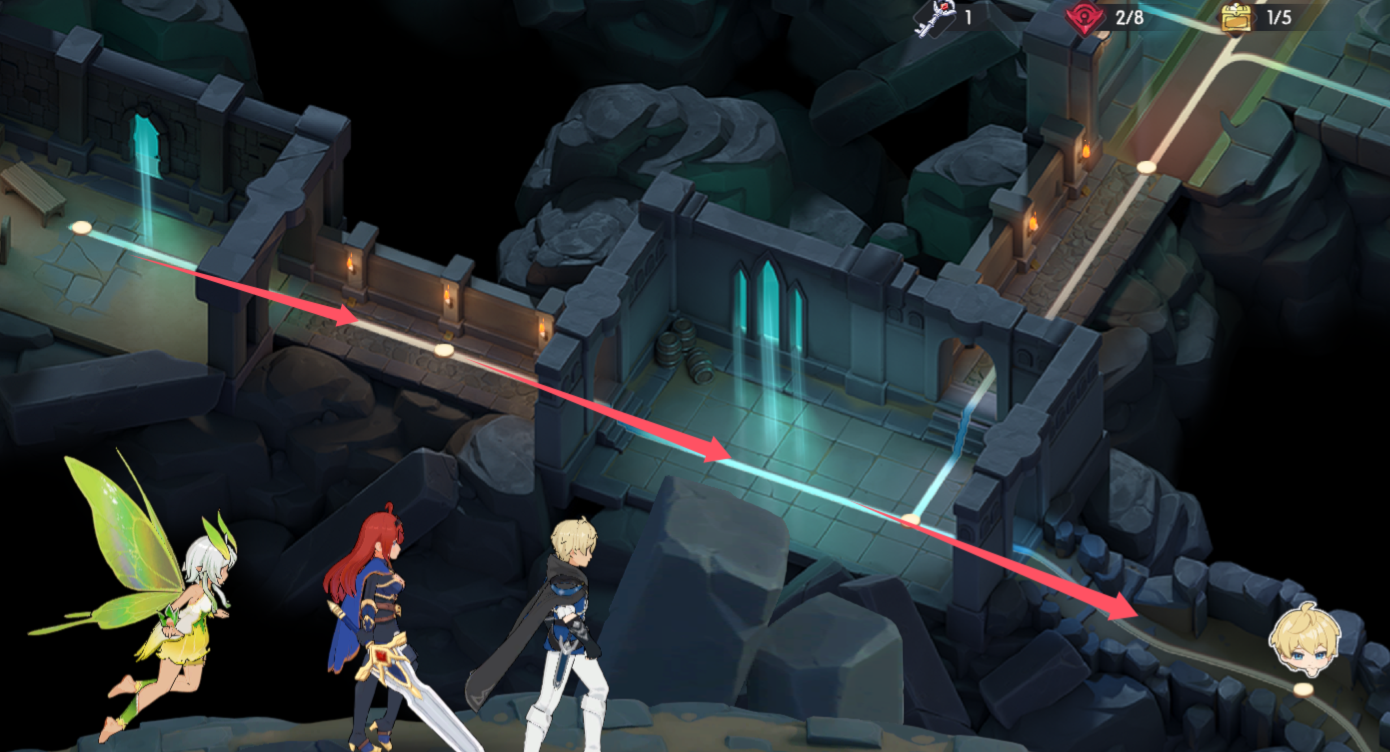
After entering, first engage in a battle, and after winning, you can open the first chest. When you encounter a fork, explore downward, and after the battle, you can obtain the Boar Headgear, which is used for the upcoming narrow path exploration. Return to the fork, use the headgear to enter the upper area. There is a magic ball mechanism ahead, and after deactivating it, you can pass through the left path and continue forward to collect the chest. Then return to the fork, transform to pass through the narrow passage, and then transform back to human form to continue exploring, fighting, and opening chests. Along the way, you will obtain the Orb item and can activate the left mechanism to open a shortcut. Use the shortcut to return to the initial intersection, go downward, and use the Orb to open the secret room, complete the battle, and collect the chest reward. The last chest is located at the end of the branch leading downward from the fork at the top of the map.
Fourth level · Hidden Spirit Temple
After entering this level, first move to the lower left, engage in a battle, and obtain the key. Then, go to the right and around to the right square, activate the antler mechanism to open a shortcut. Use the key on the right side of the square to open the secret room and obtain the chest reward and the golden key. Return to the starting intersection and explore the upper area. Along the upper route, you can collect a chest on the right, and at the top, you can use the golden key to open the secret room and obtain the final reward, thus completing the exploration of this level.

The above is a detailed introduction on how to pass the mazes in Dragon Soul Traveler. By following the text and images, you can complete the exploration of these mazes. Since it is a top-down perspective, the maze exploration here is not as difficult as imagined. Just move around a bit, and you'll figure out how to pass. Flexibly use the two forms and refer to the image above to solve the mazes.