For the game Farlight 84, in addition to mastering hero shooting skills, players also need to do one thing: understand the Farlight 84 map. Only by understanding the game map can you truly master the game. So, let's take a look at the Farlight 84 map. To help everyone understand the map, this article will provide an introduction to the game map. Through this introduction, you can learn the details of the map, making it easier to master the game.
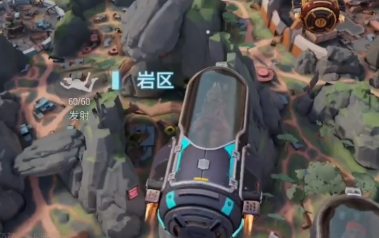
The game currently has only one map, which contains multiple different resource points. What you need to understand are these resource points. You need to know the resources available at these points, as well as their terrain and location, to plan your routes. Looking at the resource points on the map, when you start a game and open the mini-map, you will see a point called Rock Zone in the center. This is the most central location in the game, but not the one with the most resources.
On the contrary, the Rock Zone has relatively few resources and a more open terrain. Although there are a few large rocks, there are no small cover points. This means that players in this area will be in an exposed state during combat, making it easy to get killed. Therefore, it is not recommended to land in the Rock Zone unless many teams have landed in the surrounding areas. In such a case, landing in the Rock Zone can be safer because the surrounding enemies, after looting their own resource points, usually won't come here. Additionally, being in the center, you have many route options for running from the zone.
Next, let's look at the areas surrounding the Rock Zone. There are three nearby areas: Duck Mountain Terrace, Exploration Site, and Nova Market. The first two are small resource areas with very few resources, barely enough to support a full squad. Therefore, fewer players choose to land in these areas. However, the Nova Market is different; it is a high-resource point with plenty of resources, making it a highly contested area where players are likely to land.
If you want to land in this area, you need to consider whether your team can survive. This point is only recommended for strong teams. Weaker teams should avoid it and instead loot the nearby areas (the first two points) while the stronger teams fight over the Nova Market. Then, depending on the situation, you can move towards the Rock Zone to continue looting.
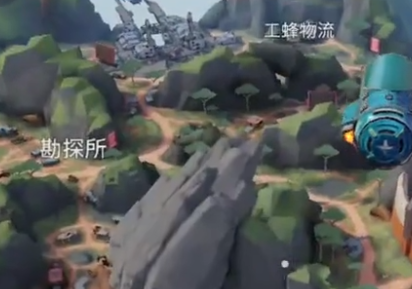
After looking at these two resource points, next, we need to look at the top of the map. At the top, you will see two resource points: Wasp Logistics and Environmental Monitoring Station. The former is a high-resource point, and the latter is a regular resource point. This means that the former will attract many players, and you will find that it is a building-type resource point, requiring good map memory to know which spots each building can cover. If you can't do this, it's better not to contest this point.
The Environmental Monitoring Station is similar to the Rock Zone in terms of environment, but it has even fewer resources, making it a good spot for looting. When your team is not strong, you can come here to loot, but be careful of players from the Nova Market, who often check this area after looting. You can use this opportunity to ambush or quickly leave to avoid direct confrontation. After looking at these two points, let's move to the right side of the map.
On the right side of the map, you can see two high-resource points and one regular point. The high-resource points are Refinery and Command Center, and the regular point is Blade Rock Mine. The regular point is very close to Wasp Logistics, with terrain similar to the Rock Zone, making it another good spot for looting. However, it is relatively dangerous due to its proximity to the Refinery and Logistics. Leaving this area can be risky as you will likely encounter other players. Therefore, even for looting, it is not highly recommended.
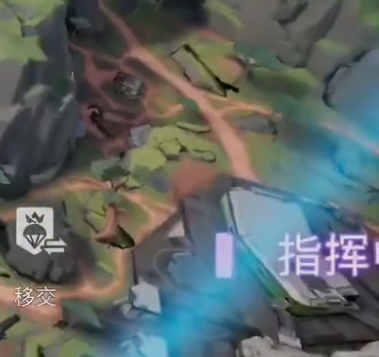
The Refinery and Command Center are located below the mine, forming a line. These three points are very close, but the terrain is completely different. The Refinery has both indoor and outdoor areas, while the Command Center is purely indoor. These points require good positioning, and if you can secure a good position, you can gain an advantage and control the area, increasing your chances of survival. This requires a disciplined team, and it is only recommended for such teams. Additionally, after landing, pay attention to the neighboring points, as they are close and can easily lead to conflicts. Gather as much information as possible. This covers the points on the left side of the map.

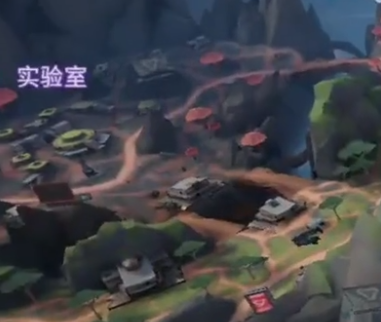
Finally, the giant point on the right side of the map is the Laboratory. This point occupies the entire right side of the map, but it actually has fewer resources, similar to the Rock Zone. Despite this, many players still choose to land here because the significant elevation differences and open terrain make it easy to get kills. Many players who just want to fight will land here. If you want to fight, you can land here, but if you want to win the game, it is not recommended. Instead, it is better to land in the market area, which not only has more resources but also allows you to block players from the Laboratory area, even if they manage to break through.
This concludes the guide to the Farlight 84 map. The details of the current map have been introduced in the above content. After reading this, you will have a better understanding of the map, which will help you win more games in the future.