This game is about to enter its official public beta, and it currently features 13 characters. Whether they are newly introduced or older heroes, all of them can be unlocked for free. So, which of these 13 Outwave characters are there? This article will introduce them to you and help you decide which hero is more suitable for you. Don't miss the content of this article if you have such concerns.
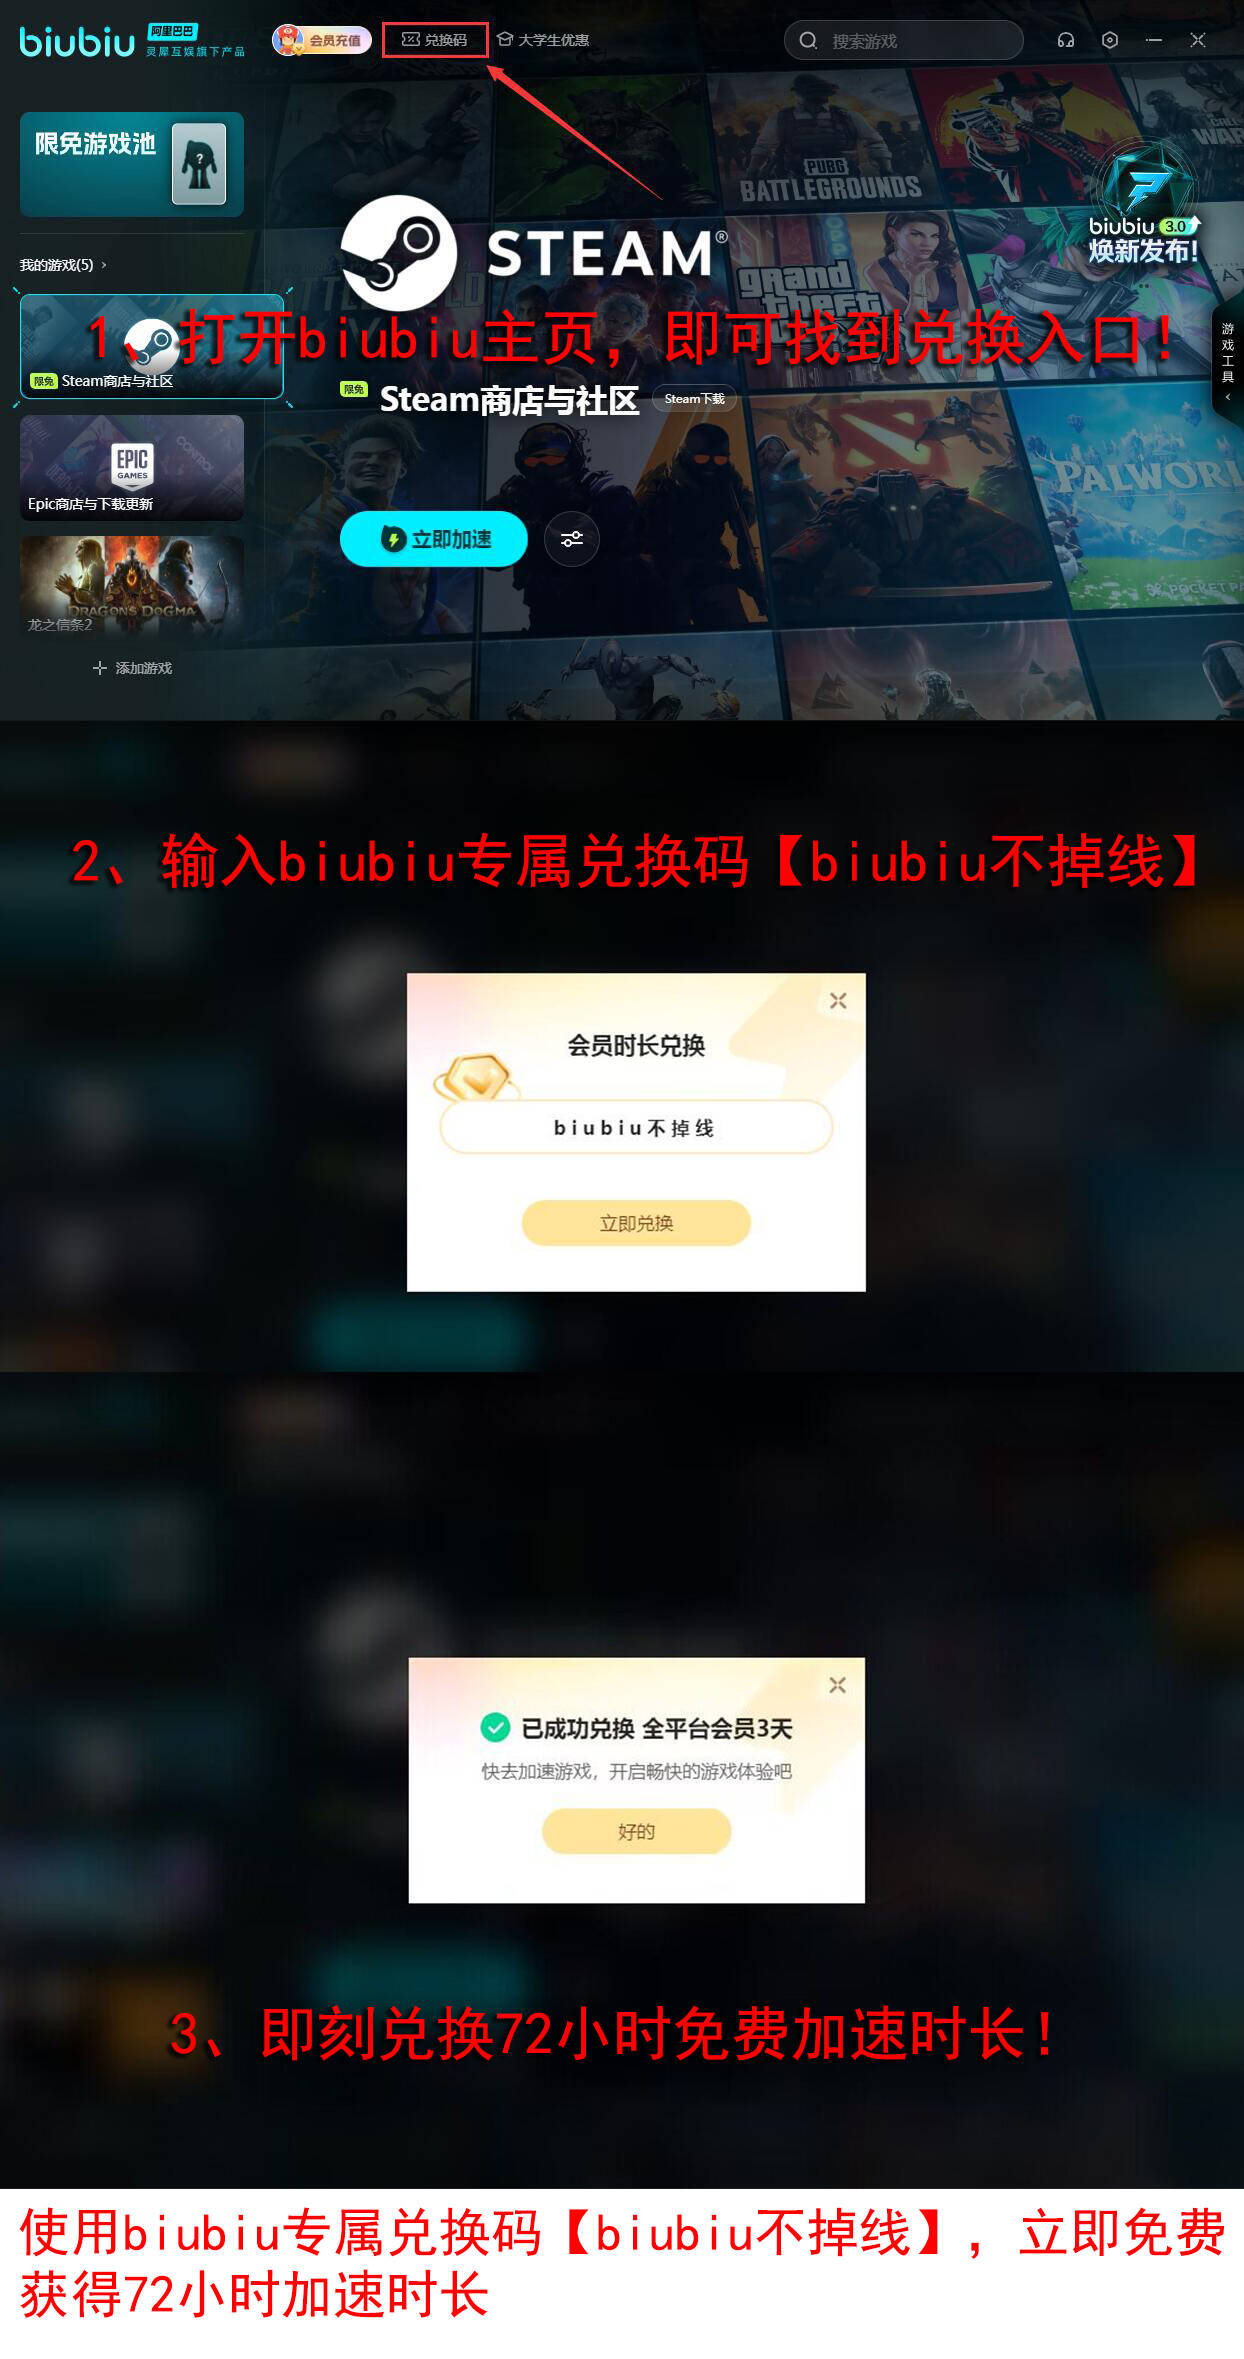
Download the latest version of [biubiu Accelerator]
>>>>>#[biubiu Accelerator]<<<<<<
First, before you start, if you often encounter network lag or slow computer response in the game, you can try using the biubiu Accelerator. After using it, you won't experience high latency anymore. You can now use the code [biubiu no disconnection] to get a super benefit of 72 hours, and by registering a new account, you can immediately activate 3 hours of usage, totaling up to 75 hours.
1. Brok (Initial Roster Character)
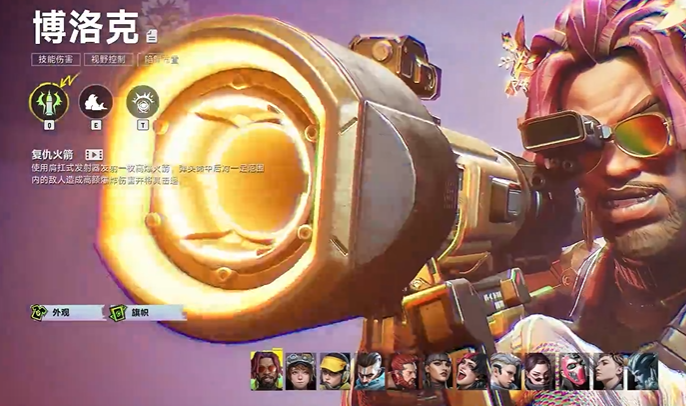
Role: Basic all-rounder, suitable for players focused on gunplay.
Skills:
「Divine Punishment」Rocket Launcher: 2 rockets per round, capable of destroying cover or directly killing enemies, with a slower trajectory requiring prediction.
「Smoke Wall」Smoke Barrier: Generates a linear smoke screen upon throwing, useful for covering retreats or dividing the battlefield.
「Cherry Bomb」Proximity Mine: Explodes upon encountering an enemy, suitable for blocking passages or defending bomb sites.
Tactical Tips:
The rocket launcher has an extremely fast switch speed, and can be used to save yourself in close combat by firing at the ground.
The smoke wall should be prioritized for breaking out, and can also block enemy crossfire.
Mines can be used in conjunction with the smoke wall to create "blind spot traps," or for side defense and early warning.
2. Nixiao
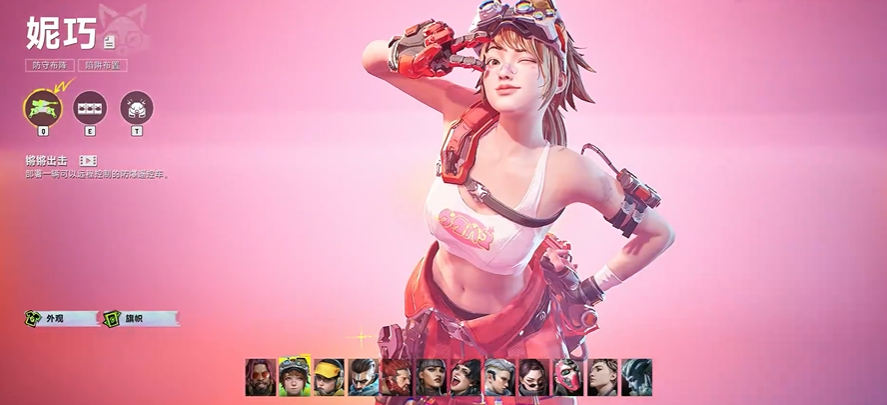
Role: Drone operator, skilled in reconnaissance and interference.
Skills:
「Chirp」Reconnaissance Drone: Remotely controlled, can attack enemies (20 damage per shot) or destroy enemy props.
「Enhanced Cover」Deployable Shield: Provides vertical cover, creating a high-angle shooting position.
「Puff」Automatic Sentry Gun: Automatically attacks enemies within range after deployment, can be hidden in doorways or corners.
Tactical Tips:
Send the drone to draw fire before the battle, protecting teammates as they advance.
Place the sentry gun in high-traffic areas (such as bomb site entrances) and use it in conjunction with cover to block routes.
The drone can prioritize destroying enemy mines, sonar devices, and other tactical props.
3. Stone Boy (New character, added in the official version.)
Role: Mechanical pet collaboration, versatile strategies.
Skills:
「Wave Cutter」Angler Fish (his mechanical pet): Deploys and automatically patrols and attacks, behavior can be changed by feeding it mines or smoke grenades.
Feeding Mines: Explodes upon contact with an enemy.
Feeding Smoke Grenades: Generates a moving smoke screen to disrupt vision.
「Explosive Mines」and 「Smoke Grenades」: Standard tactical props, can enhance the mechanical fish.
Tactical Core:
Send the mechanical fish to scout at the beginning, and set up ambush points with mines.
Use smoke grenades in conjunction with the mechanical fish to disrupt enemy formations.
The mechanical fish has a cooldown of only 35 seconds, so it needs to be frequently recalled and redeployed to maintain pressure.
4. Swiftlight
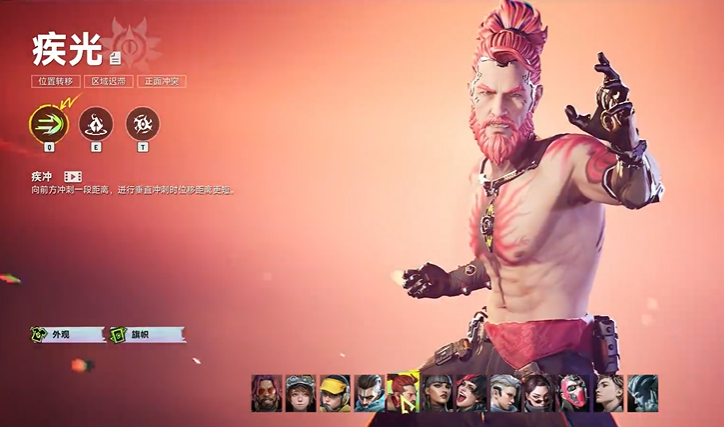
Role: High-mobility assaulter, excels in blitzkrieg. He can be considered one of the top three marksmen, powerful and easy to use.
Skills:
「Sprint」Short-range dash: Can be combined with a jump for a super jump.
「Scorched Earth」Area Projection: Creates a 10-second buff zone, allies receive damage reduction + speed boost, enemies take continuous damage.
「Glower」Delayed Flash: Releases a flashbang from the face, blinding those who look directly at it.
Combo Strategy:
Assault Combo: Release the flash during a sprint, using the blind period to launch a strong flank attack.
Control of Key Points: Deploy 「Scorched Earth」at key intersections, and use the flash to suppress enemy counterattacks.
Save the sprint skill for escaping the battlefield, avoiding overextension.
5. Electroswamp (High-difficulty character)
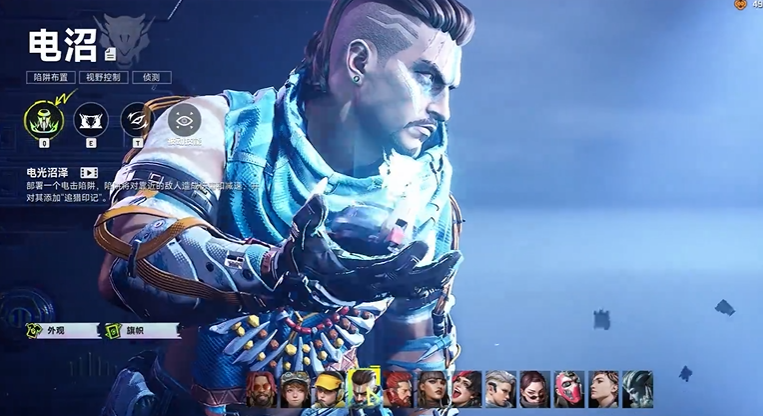
Role: Trap master, relies on environmental control.
Core Mechanism:
Passive 「Hunter's Mark」: Marks enemies hit by skills, allowing their positions to be seen through walls.
Skills:
「Electric Cage」Pulse Cage: Blocks an area and deals continuous damage to enemies inside.
「Thunder Surge」Electric Field Projection: Generates four smoke walls to trap targets, simultaneously triggering 「Hunter's Mark」.
「Eagle Vision」Scan: Activates to show the positions of marked enemies, best used in conjunction with traps.
Tactical Essence:
Combine 「Electric Cage」+ 「Thunder Surge」to form a "death cage," forcing enemies to reveal their positions.
「Eagle Vision」has only two uses, so ensure it is used in conjunction with traps for precise kills.
When defending, prioritize blocking bomb site entrances; when attacking, use it to cut off enemy support.
6. Sand Scorpion
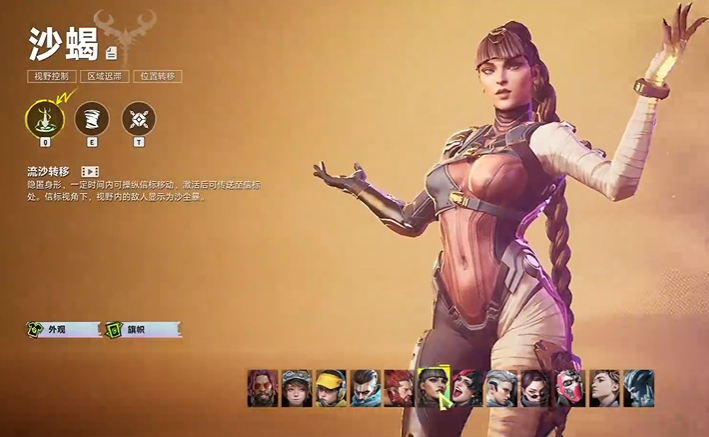
Core Mechanism:
「Dust Storm」Slow Tornado: Releases a tornado that blinds enemies in its range, continuously disrupting the battlefield.
「Recall」Teleport Beacon: Can hide a beacon in enemy territory, recalling to the initial position at any time.
Tactical Tricks:
Use the tornado to cover the deployment of the teleport beacon, ambushing the enemy's flank.
Choose safe paths when recalling the beacon to avoid exposure.
7. Yin
Role: Suitable for controlling the center or crossroads of the map, or occupying space. By sealing two doors with her walls, she can focus on one door. The difficulty lies in the timing and execution of retracting the walls. Being in the center of the map also allows you to hide your traps in high-traffic areas.
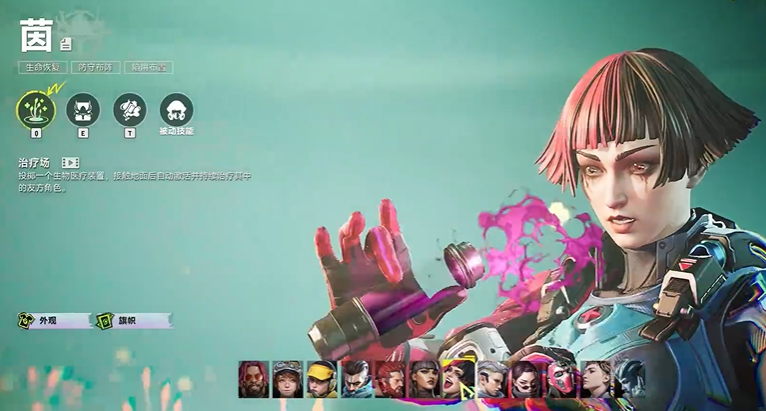
Healing Field: Throws a biological medical device that activates upon contact with the ground, continuously healing friendly units within. The healing area lasts for 15 seconds.
Mushroom Wall: Can seal an entire doorway. The wall can be retracted and reused.
Killing Queen: A trap that causes poison damage over time. It makes no noise and is easy to hide.
Passive Skill: Immune to poison damage.
8. Shadow Assassin
Ambush role, also a character who can fully utilize a full set of skills at once.
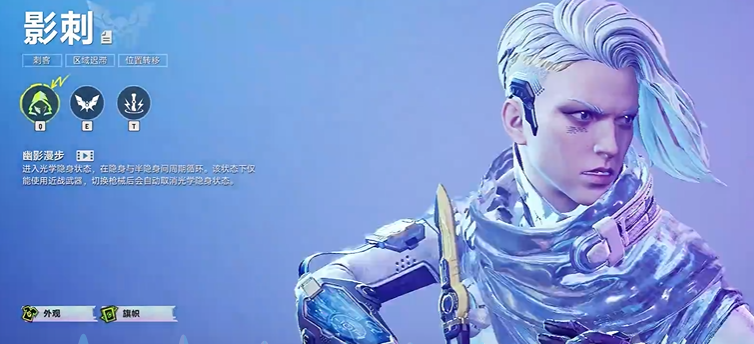
Midnight Wanderer: Cycles between full invisibility and partial invisibility with your knife. The bar passing through the white part indicates partial invisibility. Be careful when not in shadow stealth mode.
Note that invisibility does not hide footstep sounds, so you need to walk or crouch.
Shadow Stealth marks a 15-second area, allowing you to become fully invisible when using Midnight Wanderer.
Dagger Beacon lets you teleport back to where you placed it. Placing and teleporting do not interrupt Midnight Wanderer. You can also use it to escape in dangerous situations.
9. Nightbind
One of the top three assaulters. Spider's transfer has multiple playstyles. For defense, place one near each bomb site to increase the movement speed of your teammates. Another option is to place one where you want to return, and carry the other with you, allowing for instant transfers.
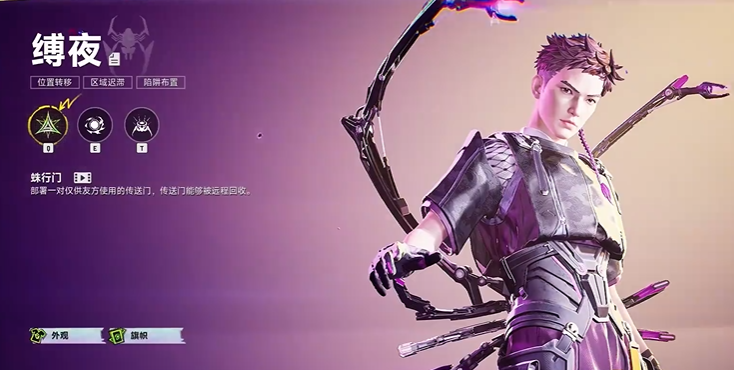
Spider Portal: Places two interconnected teleporters on the map, which can be recalled remotely.
Lucky Draw: Teleports enemies to the location where the skill was cast;
Blind Trap: Blinds and slows enemies passing through it.
10. Destiny
Frequently seen in high-level matches. Strategic role is detection and skill damage.
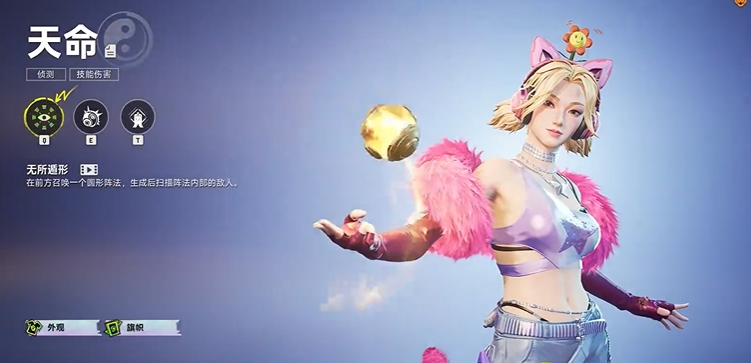
Summons a spherical array that scans for enemies within range after activation;
Ultimate Bomb: Deals damage to enemies within range, even through walls, as long as they are within the area;
Dimensional Walk: Invisible and immune to damage, but cannot see enemies or teammates in the rift. Therefore, when you exit the state, you are at risk and need to draw your weapon.
When using it, it is not recommended to choose unknown areas, but rather to change hiding positions, or leave a room and appear behind your enemies. You can also throw a bomb before entering Dimensional Walk, ensuring that at least one side is safe when you emerge.
11. Exon
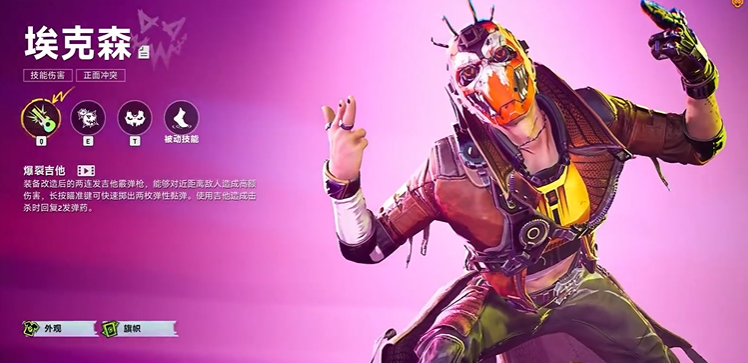
Role: Control-type assaulter, excels in disrupting enemy formations.
Core Mechanism:
「Sticky Grenade」: Can carry up to 12, can adhere to terrain or enemies, forcing target displacement upon explosion.
「Cover Reconstruction」: Recalls deployed walls, flexibly adjusting the battlefield cover layout.
Tactical Tips:
Ambush Combo: Use Sonar's reconnaissance ability to predict enemy movements and throw grenades, forcing enemies to reveal their positions.
Map Control: Prioritize occupying central areas, using grenades to block high-traffic channels (such as bomb site entrances), and protect the team's flanks.
Emergency Evacuation: Recall walls under smoke cover to reconfigure cover and quickly escape the firefight.
12. Sonar
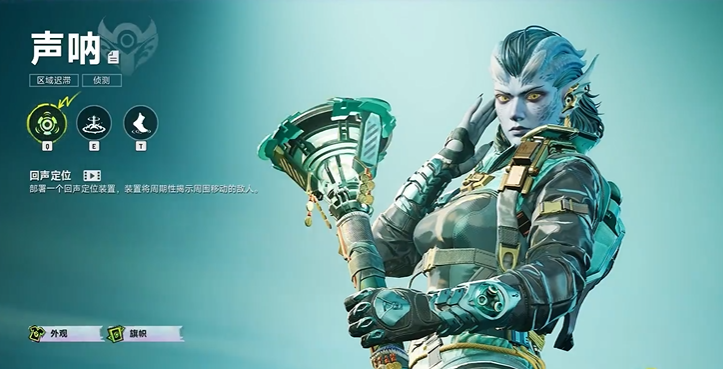
Echolocation: A device that periodically sends signals, detecting any enemies that pass through the ring.
Deep Sea Echo: Throws a shockwave, exposing all hit enemies and causing dizziness;
Silent Steps: Reduces the sound of footsteps for Sonar and allies. More powerful when used in combination with teammates.
13. Meteor
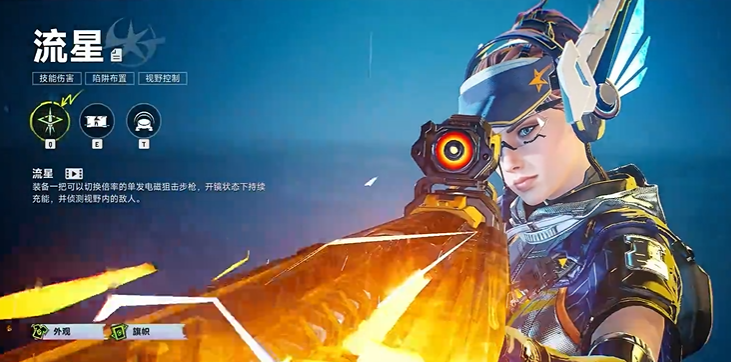
Role: Sniper specialist, high risk, high reward.
Skills:
「Farewell Kiss」Charged Sniper Rifle: A fully charged shot can kill in one hit, marking enemies while aiming down sights.
「Phantom Veil」Holographic Smoke Wall: Fires a penetrating, moving smoke screen, revealing those who touch it.
「Rat Swarm」Proximity Trap: Marks enemies within range upon deployment, making a loud noise when triggered.
Advanced Tips:
「Phantom Veil」can penetrate walls to detect enemies, aiding in predicting and shooting through walls.
「Rat Swarm」is suitable for defending bomb sites or blocking enemy retreating routes during an attack.
The sniper rifle requires taking a high vantage point, but be aware that deploying the smoke screen may expose your feet.