
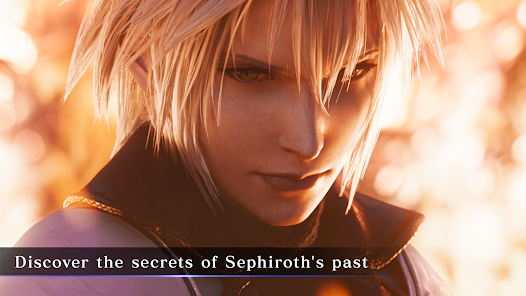
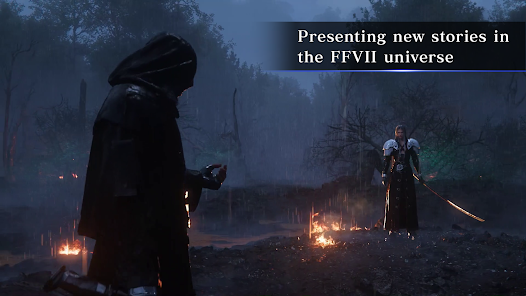
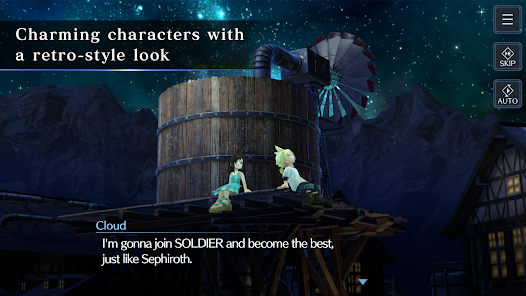
FINAL FANTASY VII EVER CRISIS
Game Introduction


Hot Strategy
Which Gathering and Crafting Skills are Available in Final Fantasy 14 Crystal World? An Introduction to the Living Skills in FF14 Mobile Game
Final Fantasy 14 Crystal World life skills, what are they? For many new players, the improvement of life skills will directly determine the amount of gold a player can earn in the game. In this article, I will give a comprehensive introduction to the various life professions in the game and their skill effects. I hope this introduction can help the Warriors of Light.
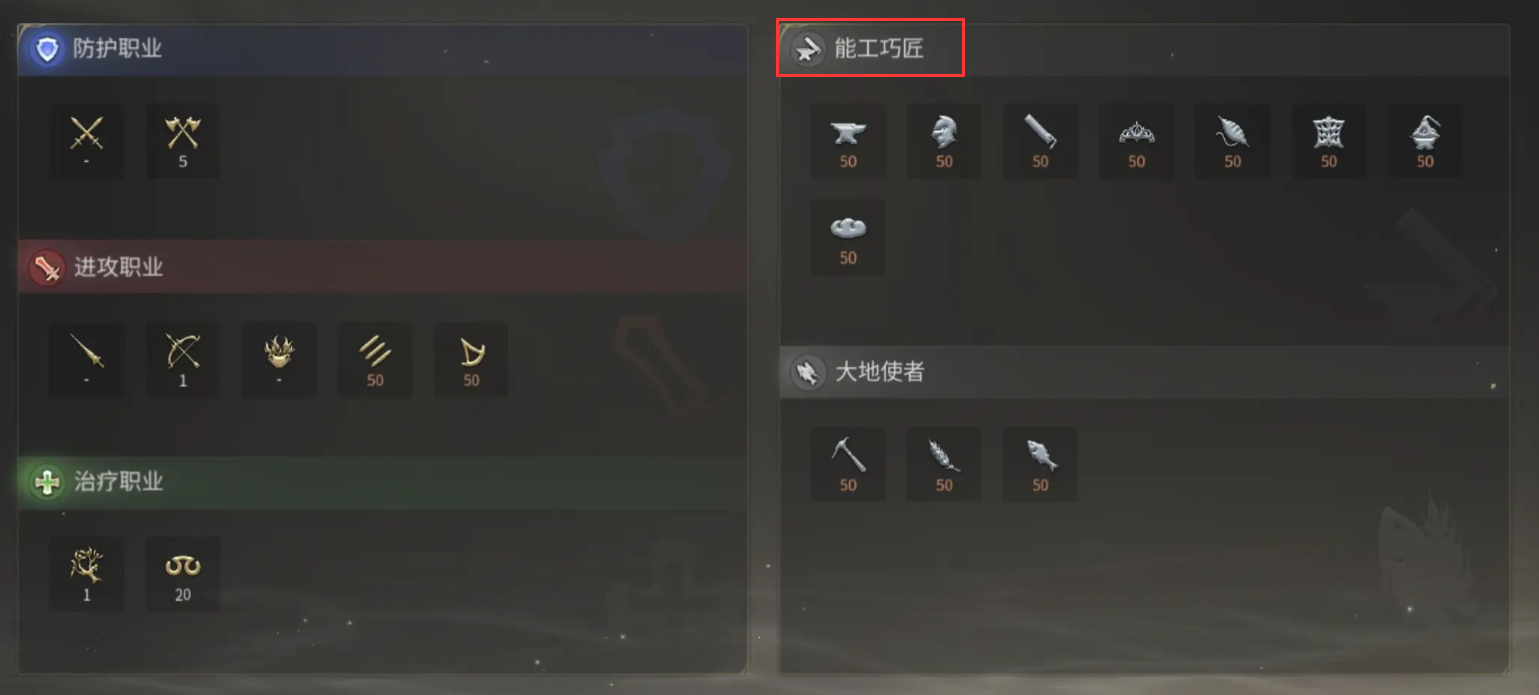
The life professions in the game are varied, divided into production professions and gathering professions. The production professions include Culinarian, Alchemist, and Armorer, while the gathering professions include Miner, Fisher, and Botanist.
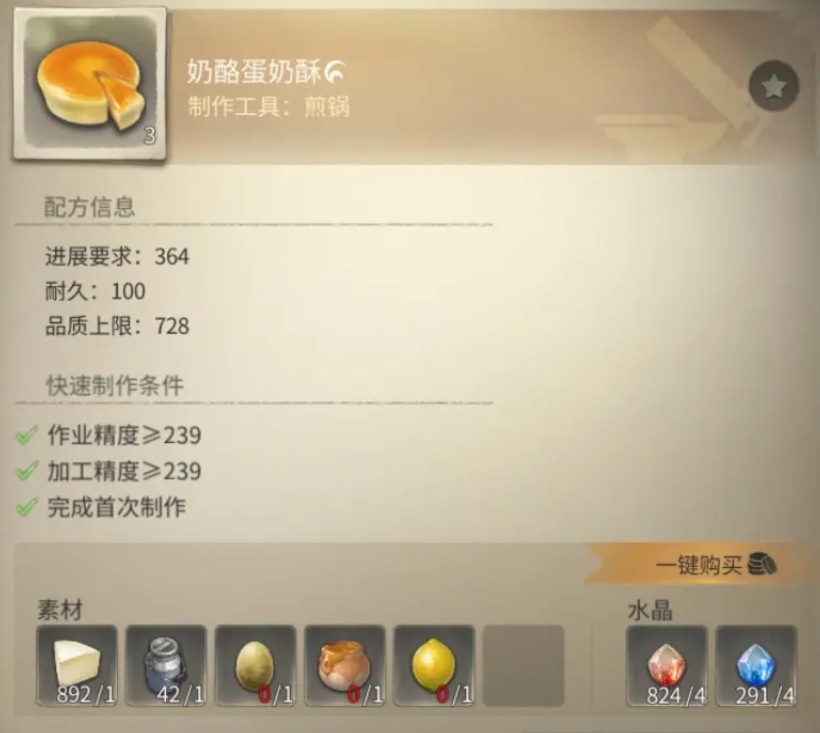
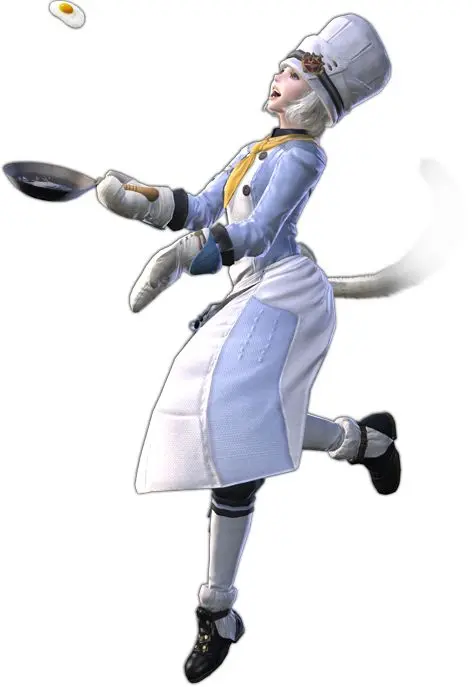
The main tools for a Culinarian are a frying pan and kitchen knife. Its function is to increase the base ingredients' buffs through cooking. The products can be placed on the market for trading. Its feature is an inspiration system with seven cooking elements. During cooking, players can trigger divine skills to improve the quality of the finished product.
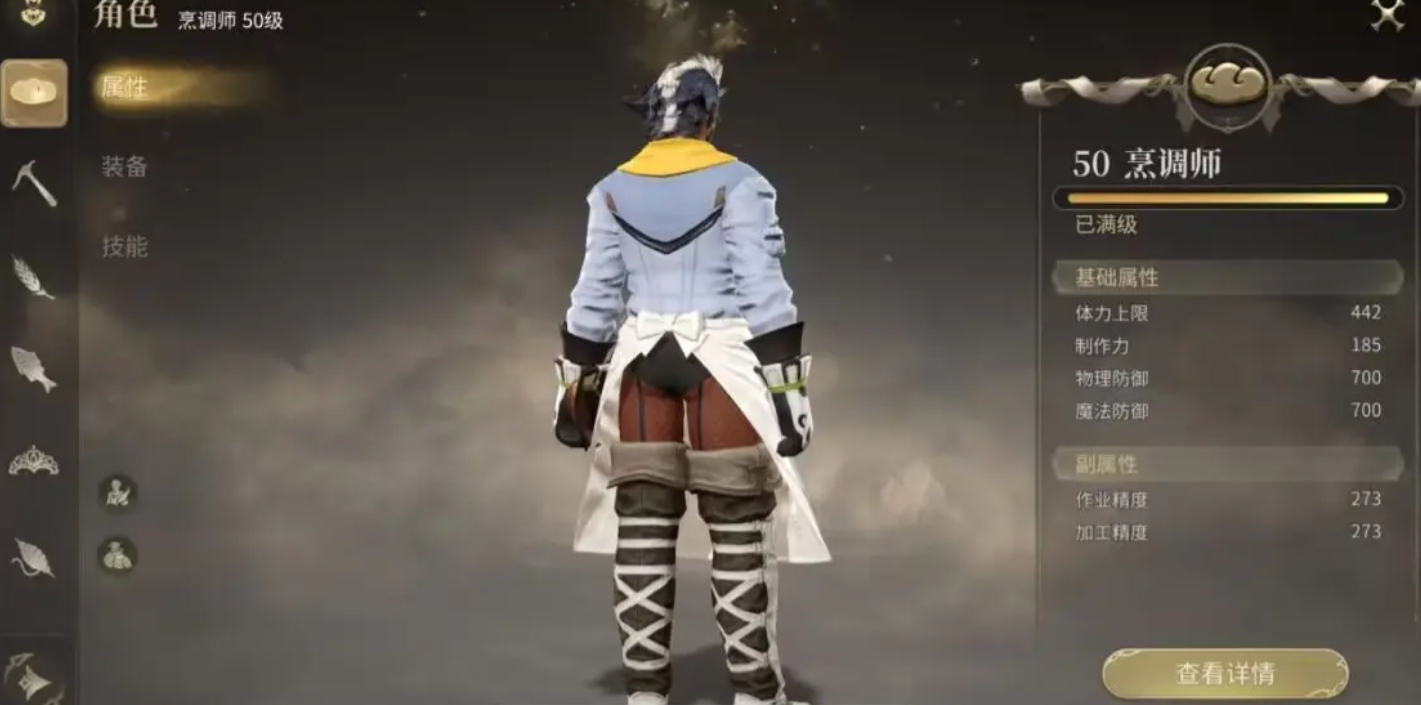
In the production process, players do not rely on equipment attributes, but they need to prepare an appropriate amount of ingredients in advance, such as aquatic or plant products. The items that a Culinarian can sell in the game actually have a high demand, so it is recommended that players prioritize unlocking the Culinarian profession early on.
The main role of an Alchemist in the game is to make potions. Their tools are a distiller and pestle. Additionally, Alchemists can also forge weapons for Conjurers or Arcanists. Alchemists can use passive skills to adjust and increase reaction intensity, thereby enhancing the quality of the finished product. After using a catalyst, the effect of the catalyst can also be increased.
Overall, the raw materials needed by Alchemists are relatively expensive. For early-stage players, the return is poor, but during the late stages, the returns for Alchemists will be much greater than in the early stages.
An Armorer can be used to forge plate or chain armor, enhancing the character's defense. However, an Armorer requires a large supply of ore. If a player chooses to level up the Armorer, they must first level up the Miner to achieve synergy between the production professions.
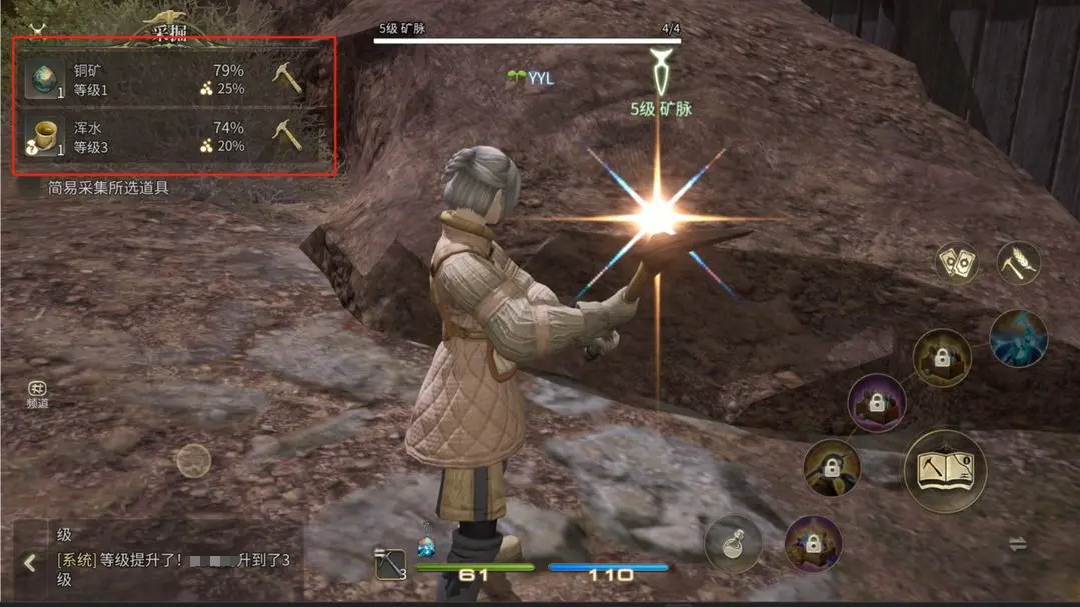
Miners mainly use pickaxes and sledgehammers. Miners can go to ore sources to mine. The unit price of low-level ore is about one hundred gold coins, and players can collect hundreds or even thousands per hour. However, if a player has also unlocked the Alchemist production profession, they can also use the ore supply to invest in the basic crafting of that profession, creating more income.
The gameplay for Botanists and Fishers is different. Botanists need to go to gathering locations and use a hoe to open the gathering interface. During the gathering process, players can use skills to increase the quality of the gathered items.
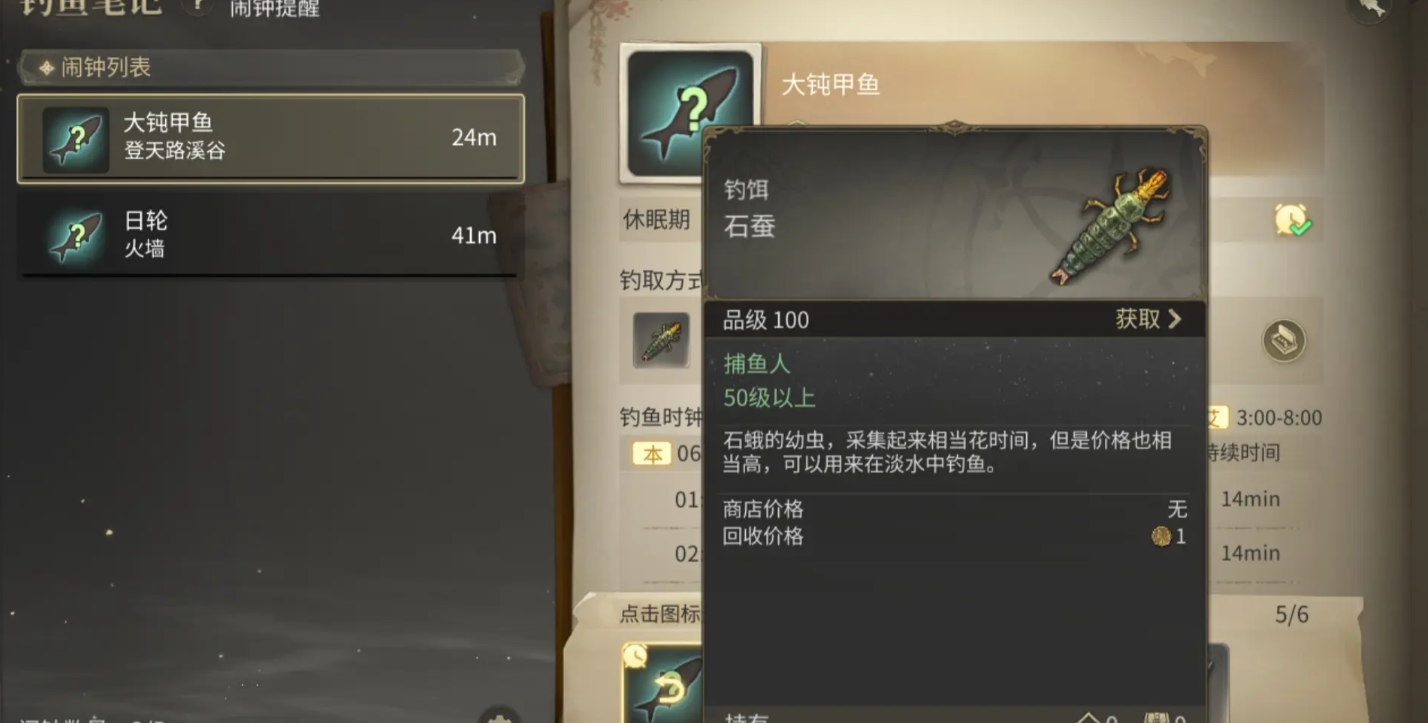
Fishers require a certain level of player skill. Players can go to fishing spots and skillfully cast their fishing rods and control the click force to catch higher-quality fish.
Of course, there is a certain probability of catching higher-quality fish, which can lead to the player earning the "Fish King" title.
The above content is a complete introduction to the life skills in Final Fantasy 14 Crystal World. Almost all life skills in the game can generate income for players, but it is recommended that players combine gathering and production skills to maximize their earnings. I hope that after reading this content, everyone can go into the game and experience these production skills firsthand.
Ways to Obtain Gil in Final Fantasy 14 Crystal World Methods for Getting Gil in the FF14 Mobile Game
Players who have played Final Fantasy 14 Crystal World know that gold has many uses in the game, so it's always in short supply. Therefore, some players ask about the ways to obtain gold in Final Fantasy 14 Crystal World. Today, the editor brings you methods for obtaining gold in Final Fantasy 14 Crystal World, helping all players get more gold, thus allowing them to smoothly progress through every part of the game and achieve a better gaming experience!
1. Completing Missions
In this game, there are various types of missions, including main storylines, side quests, and even some events. Completing each mission can earn you varying amounts of gold. Main storyline missions naturally offer the most gold, but after completing the main storyline, players need to regularly complete side quests to unlock new main storyline missions.
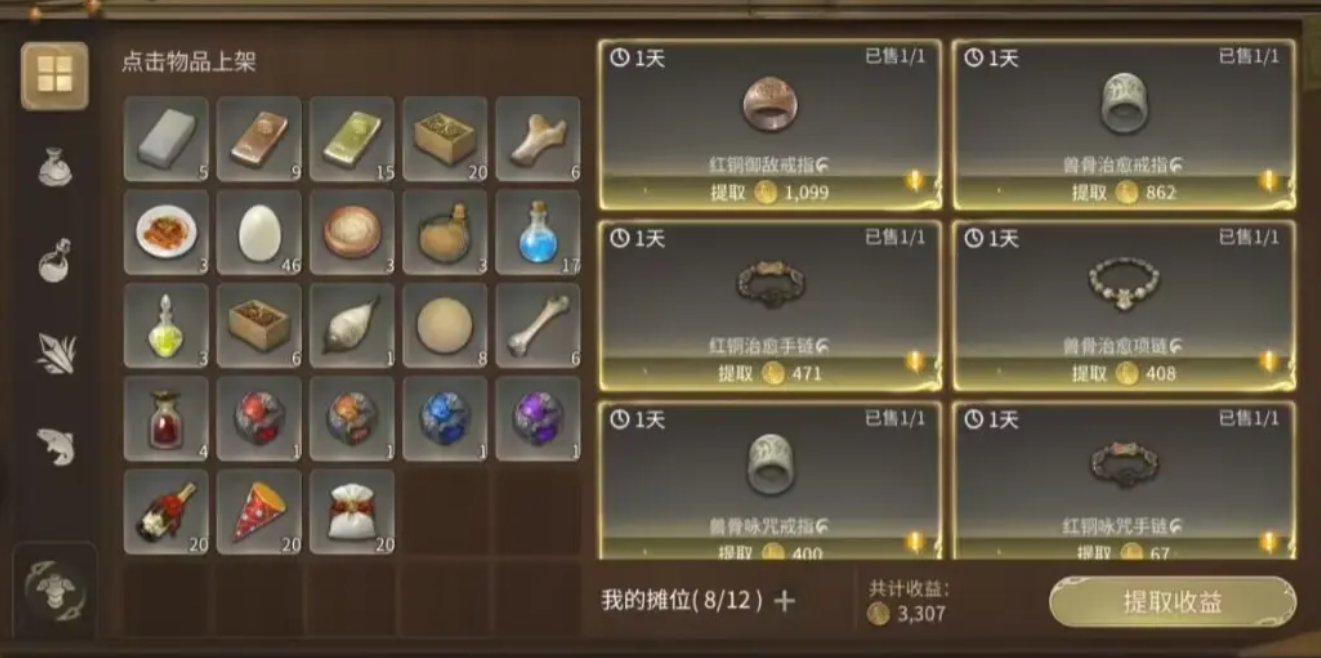
2. Trading Center
Apart from earning gold, completing many game tasks also rewards you with a lot of items. Players can use these items to enhance their combat power or level. For equipment that is temporarily useless, it can be traded or sold to earn some gold. There is a trading center in the game! However, it should be noted that a 15% transaction tax must be paid for each successful trade, so prices should be set reasonably.
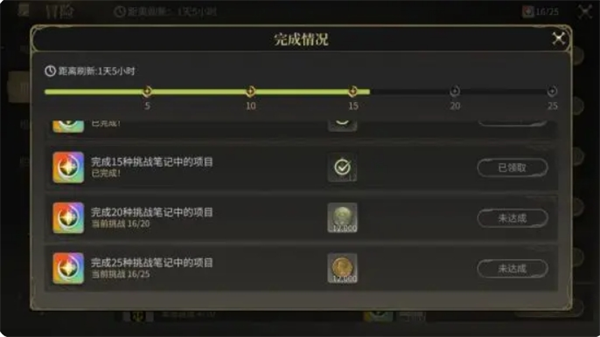
3. Challenge Log
Every week, there is a challenge log feature in the game where you can also have a chance to earn a considerable amount of gold!
4. Exploration Gameplay
To increase the fun of the game and help players earn more gold, the game includes treasure-hunting gameplay. Players can obtain items or gold by opening chests or searching for treasures. It's a great choice for leisure time!
In summary, the above are the specific methods for obtaining gold in Final Fantasy 14 Crystal World, as brought to you by the editor. Of course, such a popular game naturally has many more methods. If you have more methods, feel free to contact the editor to share them with more players. Start playing now and give it a try!
Which Gathering and Crafting Classes Are in Final Fantasy 14: A Realm Reborn FF14 Mobile Life Classes Introduction
What are the living skills in Final Fantasy 14 Crystal World? In addition to the basic professions, there are also relatively relaxed and leisurely living professions to choose from. Each different living profession has its own set of living skills, and the abilities of each living profession differ. However, they all contribute to the overall game progress. Next, I will introduce these living professions to you in detail.
1. Culinarian
The Culinarian is an important profession in the culinary world, capable of cooking all known plants on this continent. They are skilled at using various food ingredients and are proficient in all cooking methods, able to keep characters' stamina full through delicious food. They use a frying pan as their primary tool and a kitchen knife as a secondary tool. Through these foods, various positive effects can be obtained, mainly using ingredients and aquatic products as main materials. Their production does not require any equipment and cannot decompose or repair equipment. The food they make can be sold on the market, thus generating additional economic output.
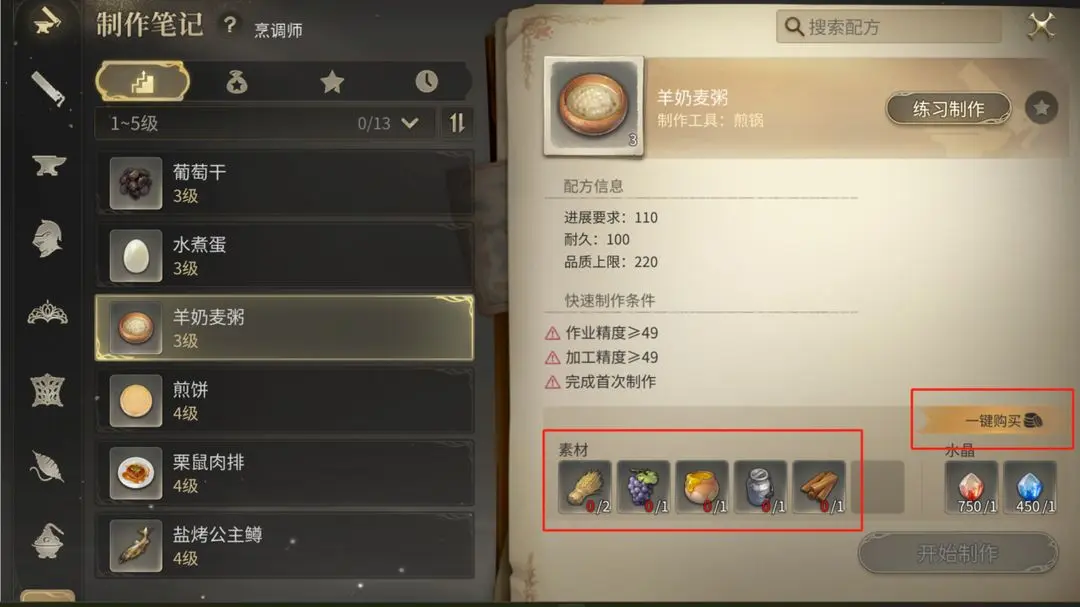
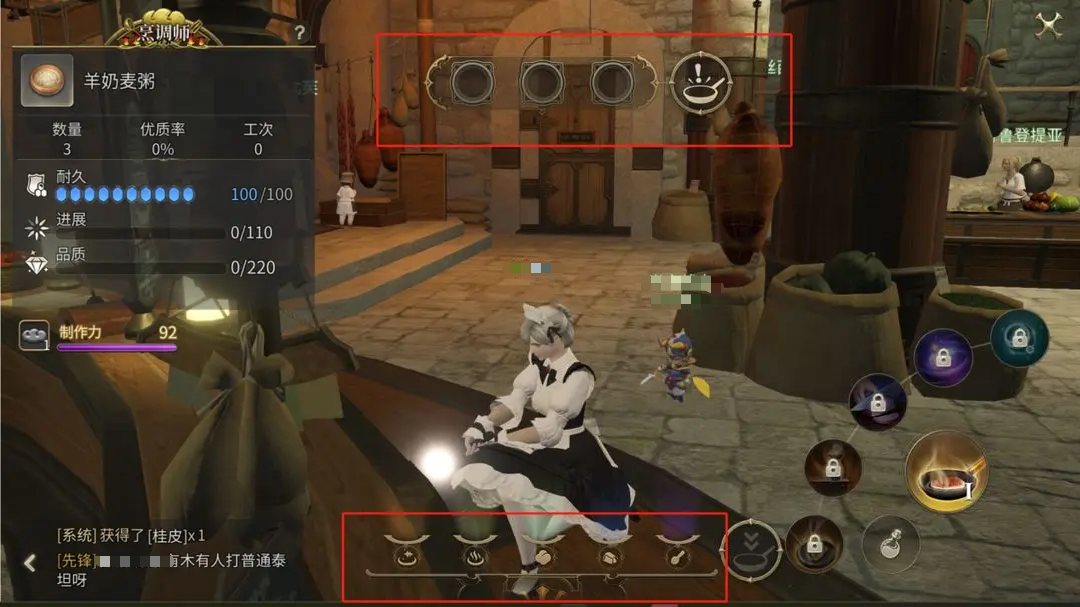
Before using this living profession, you need to confirm the crafting materials first and then start making. Their core mechanism lies in the feature value system, where you can learn skills such as "Inspiration," "Practice," and "Inner Quiet." Through the Inspiration skill, you can see the cooking elements you possess; currently, there are seven types. By collecting three identical elements through the Inspiration skill, you can obtain a "Divine Skill."
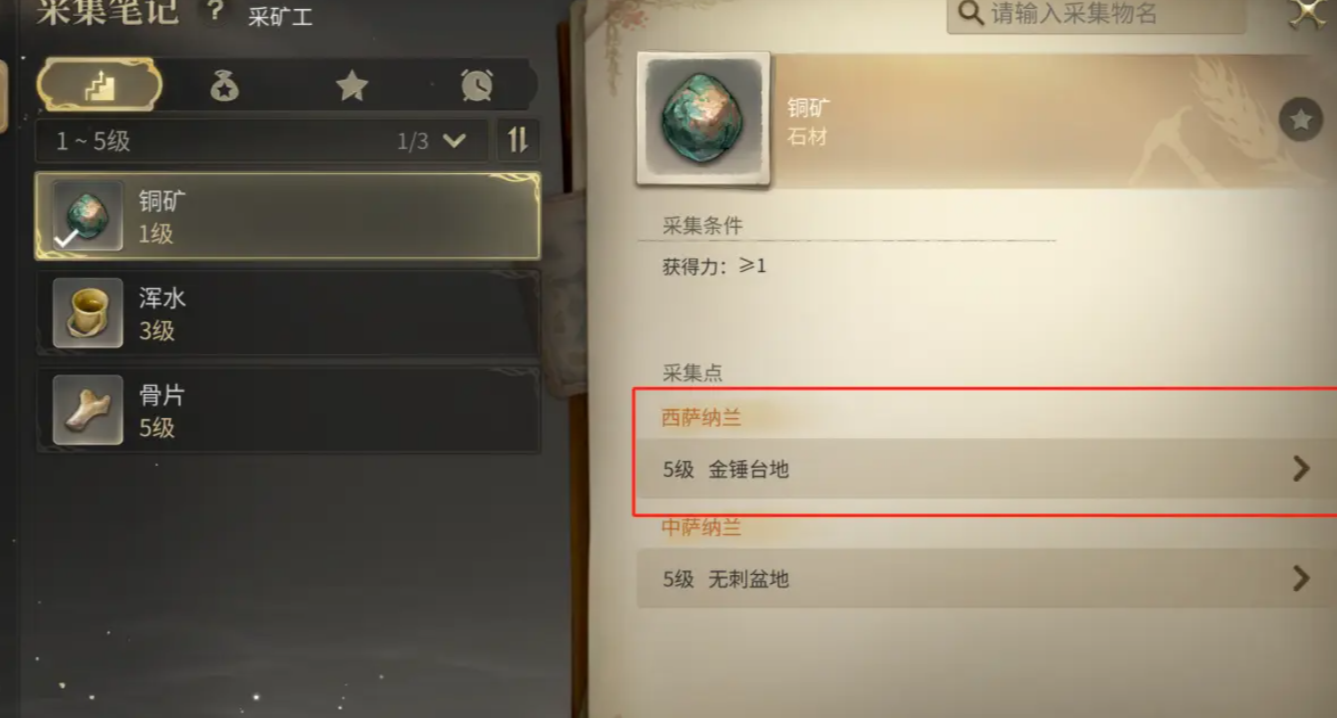
2. Miner
Miners are responsible for mining and processing various minerals, such as ores, fossils, gems, and other minerals. Their main skills lie in the mining aspect, undertaking various mining tasks, including civil engineering projects. They use a pickaxe as their primary tool and a rock hammer as a secondary tool. The ores they collect come in two types: veins and quarries, marked with blue and yellow symbols on the mini-map. These ores are the raw materials for armorers and blacksmiths. The materials collected by miners can also be sold.
3. Alchemist
Alchemists master the secrets of light and darkness, transforming ordinary raw materials into magical potions and converting common herbal juices into powerful healing elixirs. They usually work with distillers and mortars, excelling in the production of various medicines. The materials needed for making medicines are quite varied, dropped by monsters. They can make wands for conjurers and books for arcanists, excluding weapons and equipment. They can also produce restorative potions, potions that provide buffs to characters, potions that inflict debuffs on enemies, and potions that remove various statuses.
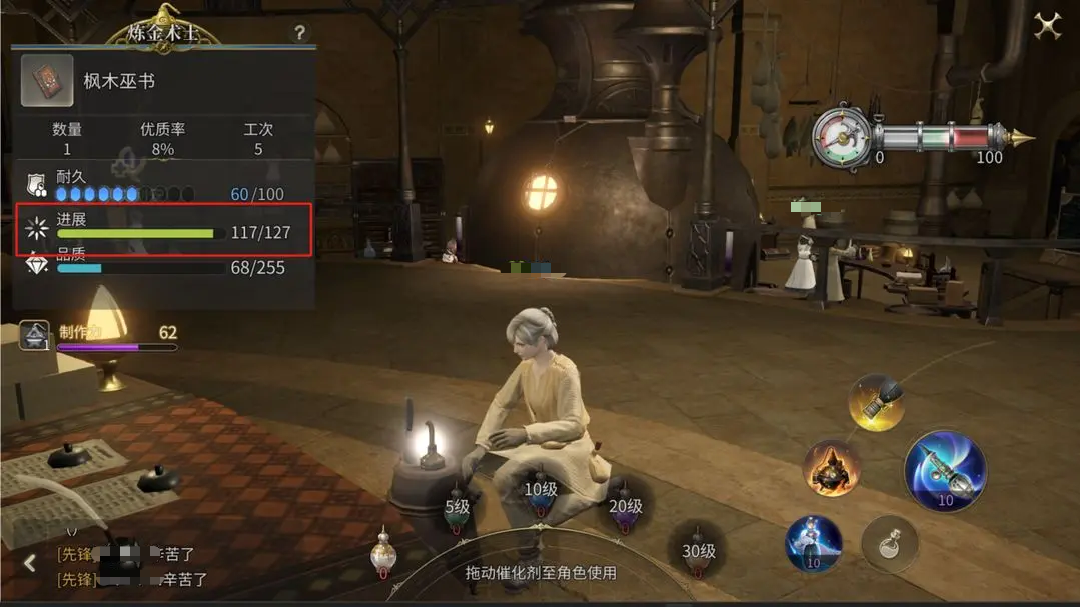
The core of this profession lies in the working state. Learning passive skills allows "Efficient Synthesis," "Extract," and "Manipulation" to be influenced by it. As the skill effect changes, the closer the distance to 50, the higher the efficiency. When the reaction intensity exceeds 100, an alchemical accident may occur. You can also learn the "Any Catalyst" skill, which, after use, requires, in addition to the usual tools, a corresponding catalyst to make the medicine, resulting in better effects.
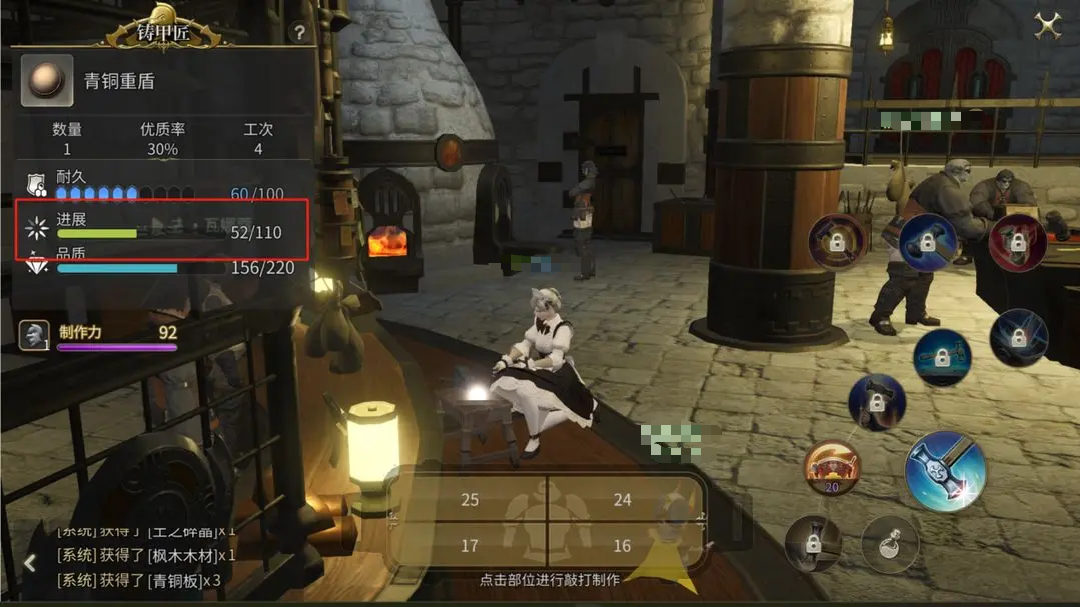
4. Armorer
Their skills allow them to forge various armors, creating armor made of metal, combining metal sheets, nails, and rings to produce plate and chain mail. This unique skill further enhances the character's defensive capabilities when wearing the armor.
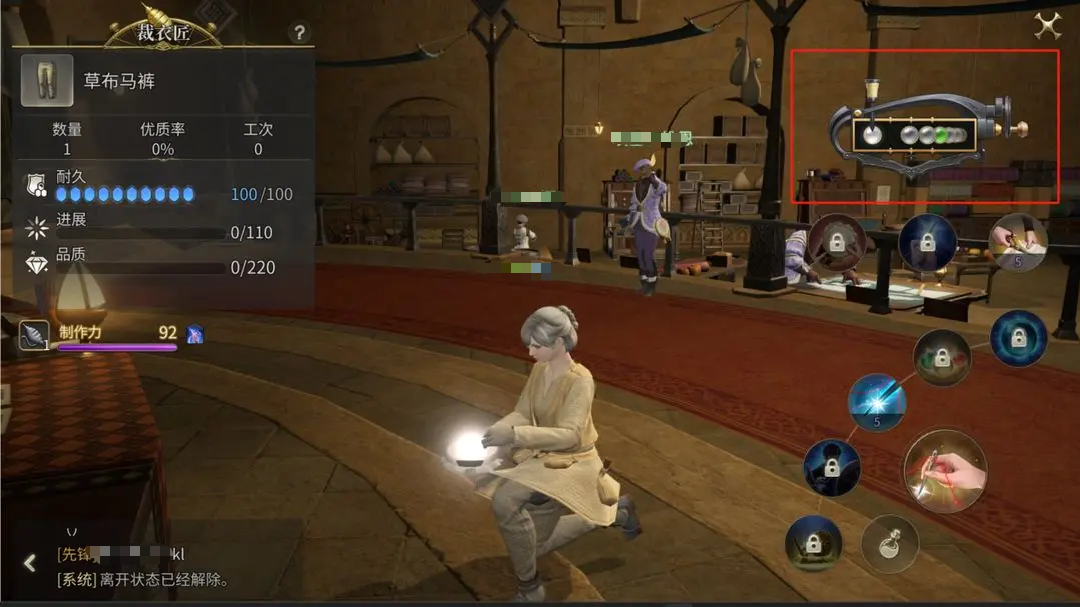
5. Weaver
The skills of this living profession mainly involve processing raw materials into yarn and fabric, then making various garments. From fibers to threads, threads to fabrics, and fabrics to clothing. They require various fabrics as the main material and can make cloth equipment for artisans, earth disciples, and time mages. Different effects are obtained through different sequence balls on the status sequence; green balls double the quality and progress in the final result; yellow balls have a soothing effect, with some skills not consuming durability and providing double focus; the main effect of red balls is enhancement, with some skills gaining additional enhancement effects.
The living skills in Final Fantasy 14 Crystal World are what I've shared with you here. Each living profession represents a set of living skills. There are many different living professions in the game, each with its own characteristics. You can delve deeper to find out which living professions interest you.
Introduction to the Final Fantasy 14 Crystal World Tour Orchestra How to Play the Final Fantasy 14 Crystal World Tour Orchestra
In the land of Eorzea, music is not only a form of entertainment in people's lives but also deeply rooted in various cultures and traditions. Today, I will introduce the玩法 of the Crystal World Tour Orchestra in Final Fantasy 14. The performances of the orchestra are always full of unique charm, with the Crystal World Tour Orchestra being particularly outstanding. This orchestra brings to every audience both the enjoyment of music and the exchange of hearts and art.
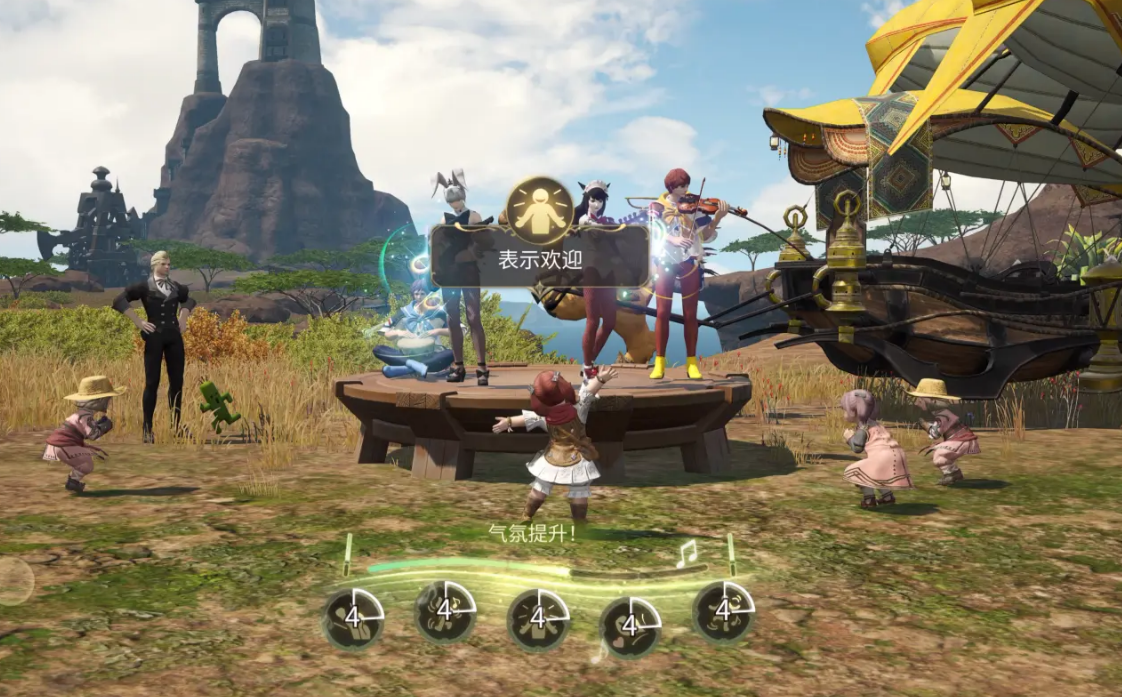
To become a fan of the Crystal World Tour Orchestra, one first needs to pay attention to the orchestra's performances and meet specific interaction conditions. Each orchestra has its own characteristics and requirements, and the Crystal World Tour Orchestra is no exception. Becoming a fan may involve wearing the same fashion as the orchestra members, carrying the same pets, or using the same cheering methods as other audiences. Only when these conditions are met, will the orchestra allow you to participate in deeper interactions and unlock the function of requesting songs.

Each orchestra has a manager who is responsible for daily interactions with fans. In conversations with the manager of the Crystal World Tour Orchestra, over time, you will gradually learn more about the background, members, and their musical creations. The closer your relationship with the manager, the richer and more interesting the content of the exchanges will become, from initial simple greetings to later story sharing, each member of the orchestra displays their unique personality and charm in these dialogues.
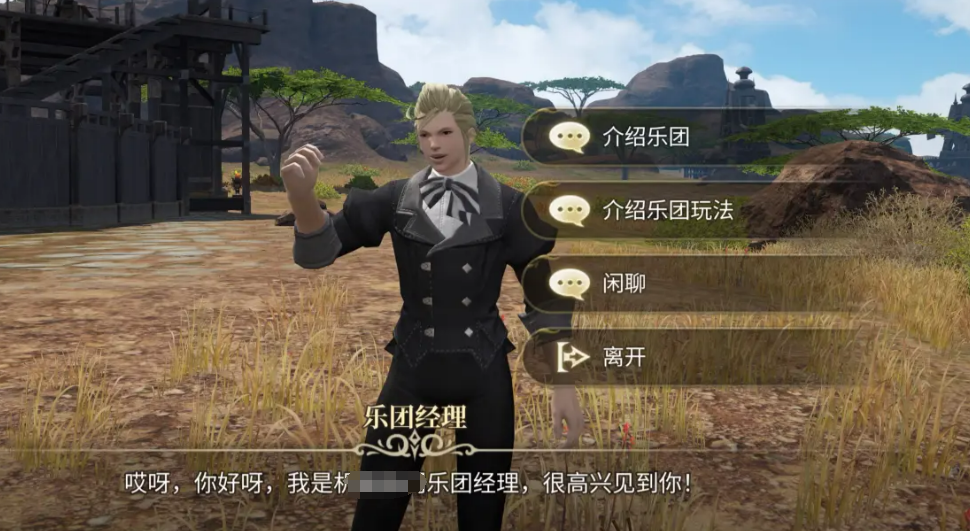
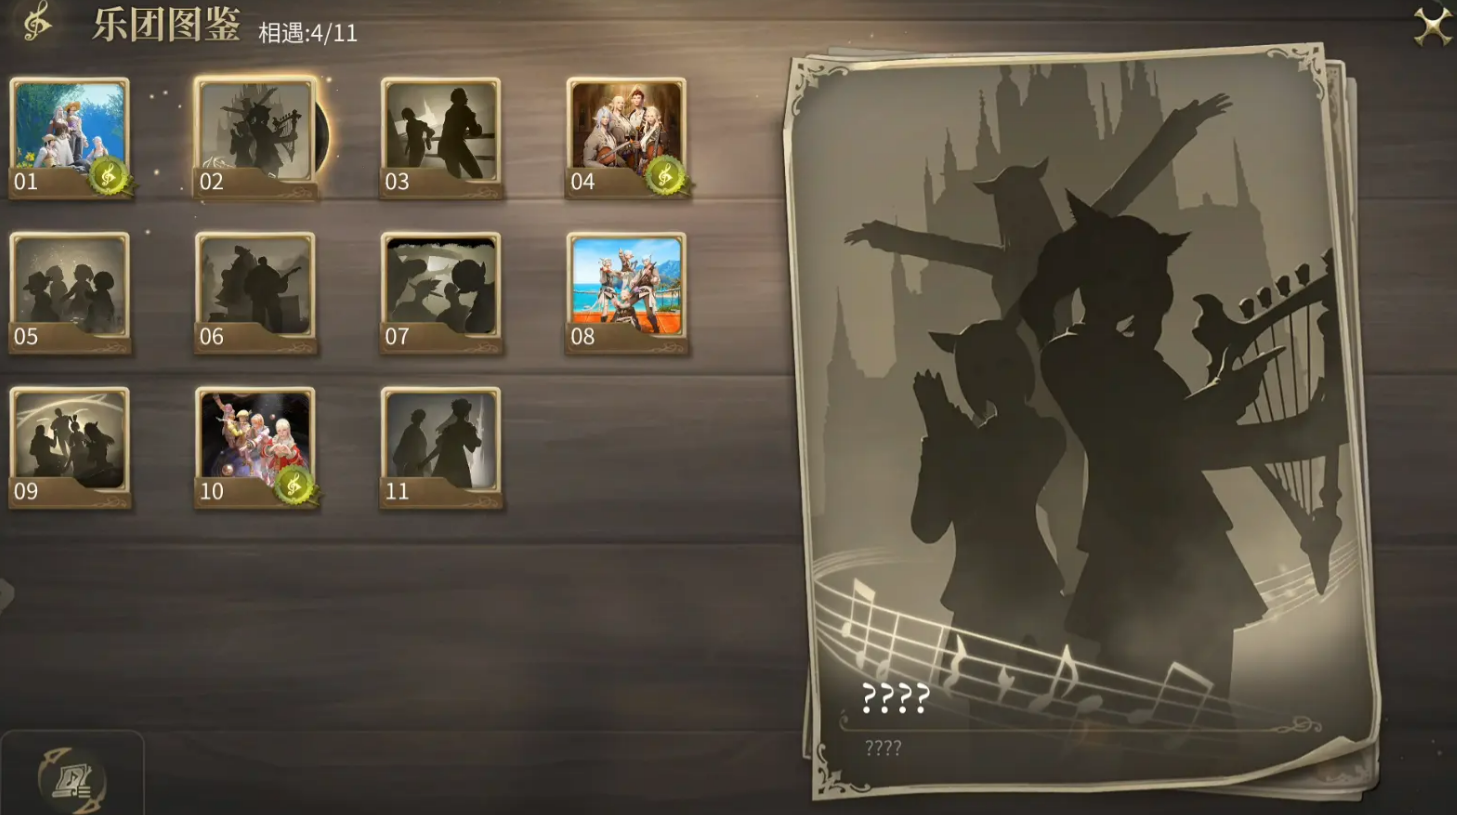
Apart from interacting with the manager, the orchestra's compendium is also an important content that fans should not miss. After becoming a fan of the orchestra, you will be able to unlock the orchestra's compendium and view detailed information about the orchestra members at any time. As your number of interactions with the orchestra increases, the content within the compendium will gradually enrich, unlocking more anecdotes and history about the orchestra. This is not only a deep understanding of the orchestra members but also a comprehensive exploration of the entire orchestra culture.

The charm of the Crystal World Tour Orchestra is not only reflected in their musical performances but more so in their tours across Eorzea. Unlike other orchestras with fixed performance venues, the Crystal World Tour Orchestra appears in every corner of the continent. Sometimes, they hold large-scale performances in bustling city squares, attracting crowds of spectators. Other times, they might bring a warm concert to a few adventurers in a quiet corner of a small town. Whenever and wherever, the performances of the Crystal World Tour Orchestra always bring an unforgettable musical experience to everyone present.
The above is the introduction to the gameplay of the Crystal World Tour Orchestra in Final Fantasy 14. Through interactions with the orchestra, adventurers can gain a deep understanding of the spirit and musical connotations of this orchestra. Whether by becoming a fan of the orchestra or obtaining more information through the orchestra's compendium and conversations with the manager, it will make your connection with the orchestra even stronger. And as the orchestra continues to bring new experiences through their tours, you will also feel more profoundly the diversity and richness of the music in the land of Eorzea.
Introduction to the Final Fantasy 14 Crystal World Job Quest Process How to Complete World Job Quests in the FF14 Mobile Game
In Final Fantasy 14, the Crystal World job quests are an important way for players to enhance their job capabilities. Today, I will share the process of the Crystal World job quests in Final Fantasy 14. In fact, the game's quests are distributed across various main cities, and each combat job has its corresponding job quest line. Completing these can earn you exclusive equipment, skills, and job traits. The quest process is relatively complex, including dialogues, battles, and dungeon challenges, and requires players to reach a specific level to unlock them.

The Crystal World job quests are exclusive storylines unlocked after players switch to a specific job (such as Black Mage, White Mage, Paladin, etc.). Taking the Thaumaturge as an example, first, level up to 30 and complete the main quest "The Magician of Sharlayan." Then, head to the Thaumaturge Guild in Ul'dah and talk to NPC Cocobuki to accept the job quest "The Awakening of the Black Mage Path." The quest requires defeating three specific monsters: you need to kill Shadow Lizards in the East Shroud, which drop the quest item "Shadow Scale." If there are no monsters, try switching channels.
The second phase of the quest, "The Trial of the Black Mage," involves accepting a challenge at the House of Sand. You will engage in a 1v1 duel with NPC Sabric. During this battle, the boss periodically casts "Frost Field," creating blue circles on the ground that you must immediately move away from to avoid being frozen for 5 seconds. It is recommended to equip the "Steady Casting" skill in advance to prevent your casting from being interrupted. Prioritize using Fire III to stack damage, and when the boss's HP drops below 20%, it will summon minions; use Thunder IV to clear them out.
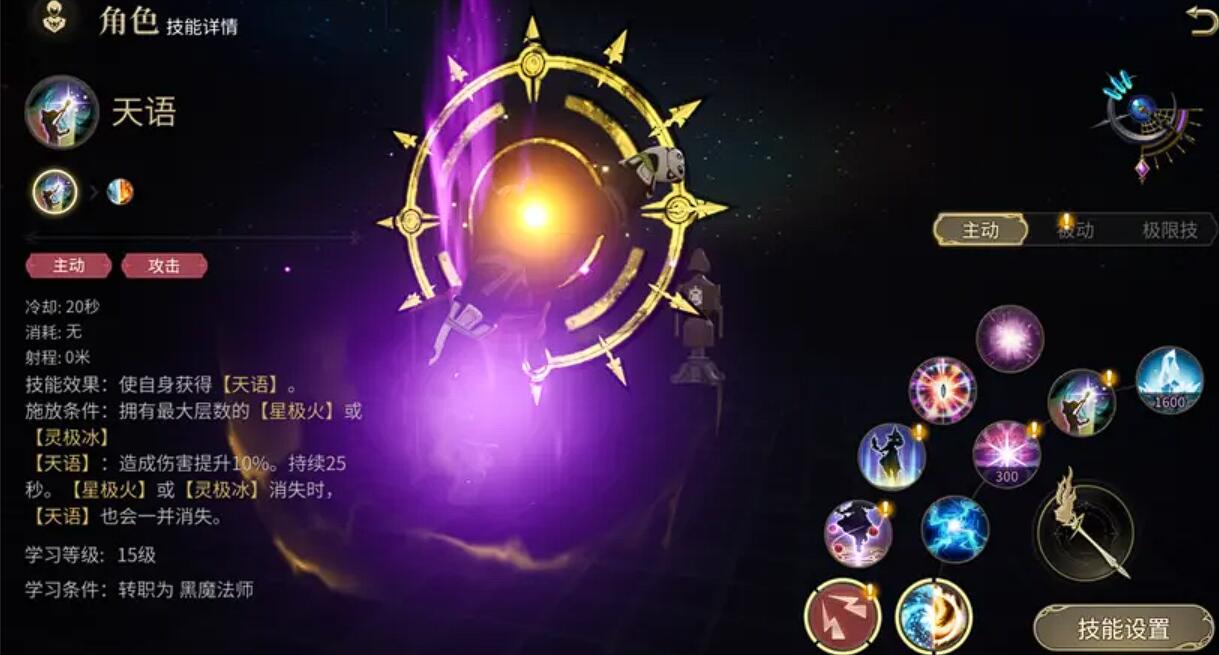
After completing the job change, the level 50 job quest "The Dignity of the Black Mage" requires crafting a Black Mage Soul Crystal. The materials include one Astral Fragment and three Dark Crystals (dropped by monsters level 30 and above). After submitting the items, you need to light the altar in Lower La Noscea, triggering a cutscene.
The final boss fight in the "Fate of the Black Mage" quest requires attention to the three-phase mechanism: In Phase 1, the boss will cast a full-screen AOE "Shadow Burst," and you need to hide inside the rune circles at the edge of the arena to reduce damage. In Phase 2, shadow mirrors will appear, and you need to prioritize killing the mirrors, or the boss will heal. In Phase 3, cross-shaped flames will appear on the ground, so it is recommended to stand close to the boss to avoid being knocked back. Each completed job quest unlocks new skills, such as the level 50 reward "Swiftcast" which resets skill cooldowns. Later in the quest line, you will also receive a job-specific mount (like the Black Mage's "Eye of Darkness").

The Crystal World job quests are a core part of character development in FF14, requiring a combination of dungeon mechanics, material collection, and story progression. The quest design emphasizes job characteristics, such as the White Mage needing to heal NPCs, and the Paladin needing to protect caravans. It is recommended to check dungeon guides in advance, reasonably pair skill rotations, and avoid repeated challenges due to failing mechanisms.
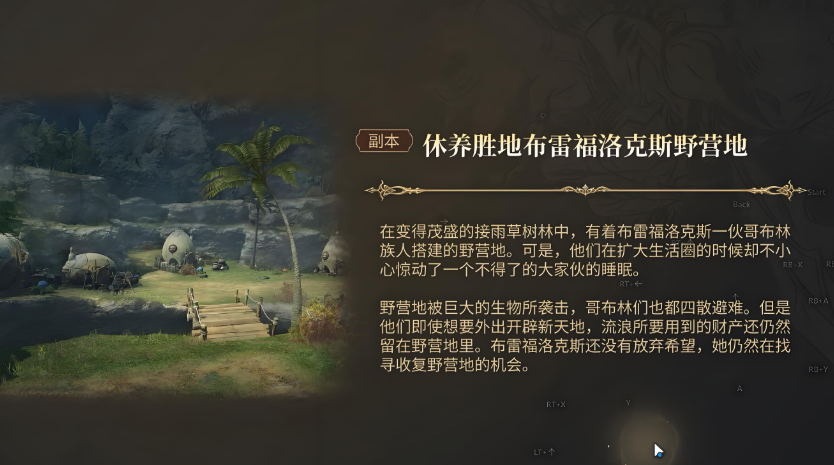
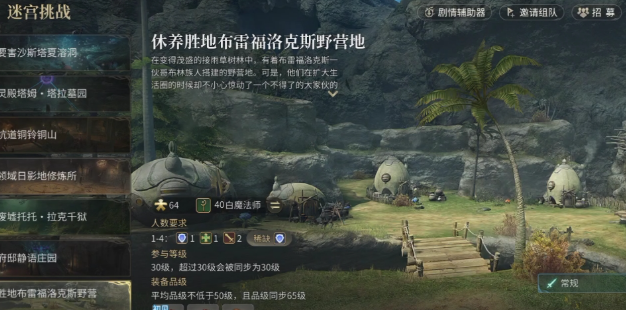
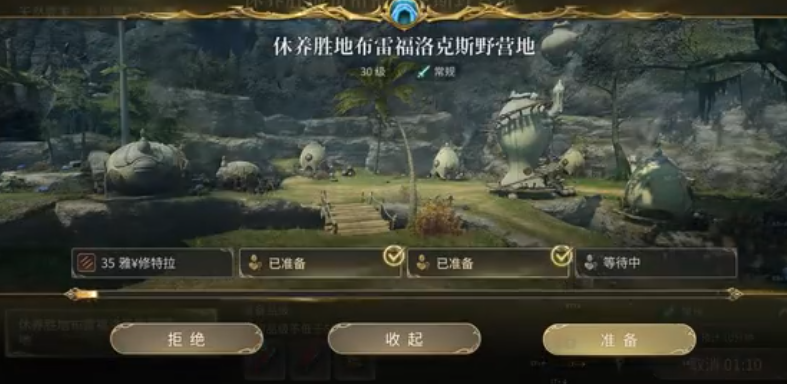
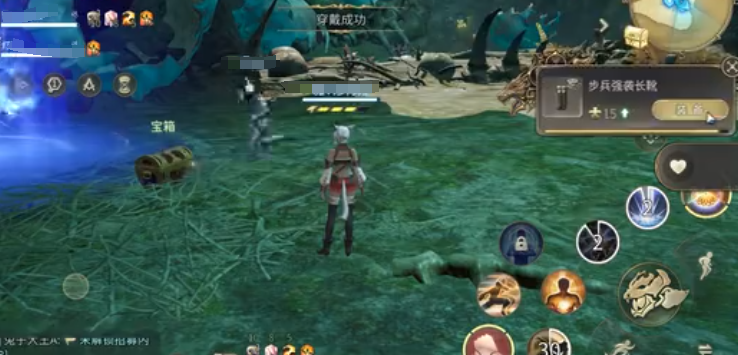
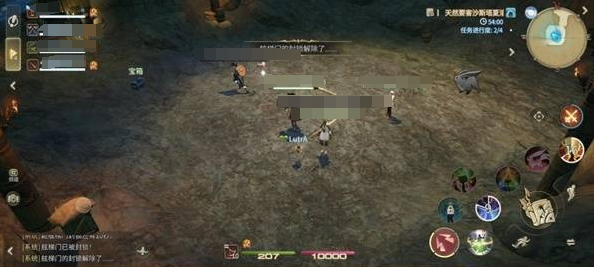
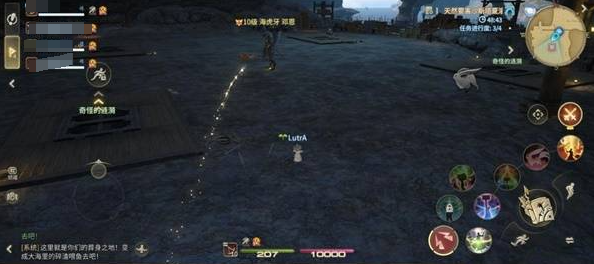
How to Play the Final Fantasy 14 Crystal World Brayflox's Longstop Camp Dungeon: A Guide to the Brayflox's Longstop Dungeon
How to start the Bravolox Campsite dungeon in Final Fantasy 14 Crystal World? Players need to advance the main storyline to level 32, then complete the "Memories of Hometown Sake" quest. After completing the quest, you can move on to the next steps. Below, we will provide a detailed introduction to the key gameplay elements.
At this point, players need to enter through the gate and follow the stream forward, where they will see goblins. After talking with the goblins, you can get the key and then re-cross to the location. There will be three small monsters here, which players can kill all using ranged methods. However, after a while, the boss will summon more small monsters. Here, players need to know that if small monsters appear when the boss's health is clearly over 30%, it is recommended to focus entirely on killing the small monsters. You can completely ignore the small monsters and easily kill the boss.
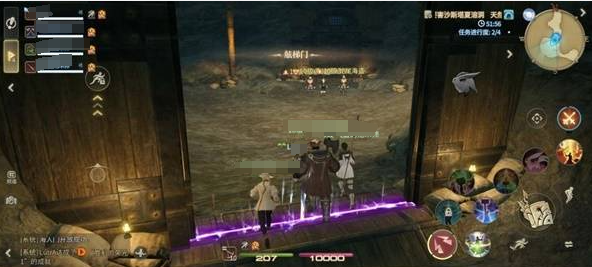
Continue moving forward, and after passing through a short tunnel, you can directly open the camp. Head into the second path on the left without needing to go up the stairs. Every so often, you will be taunted by goblins, who will randomly target a player. As the boss's health decreases, a Thunderwyrm will appear. Players need to defeat it first, then continue moving forward. A large lake will come into view, and it is recommended to proceed along the right side.
Finally, you will encounter the big boss, Agate. The slime on the field will gradually explode upon contact, so players need to stay as far away from the slime as possible and also pay attention to dodging. More slime may appear later, so after dodging the first batch of slime, players should hide in the center of the field. At the beginning of the battle, there will be three magic birds on the field, and more will appear as the battle progresses. Players need to be aware of this during the attack.
In this dungeon, players need to master how to play the Bravolox Campsite in Final Fantasy 14 Crystal World. Additionally, in areas with a high number of enemies, it is advisable to focus on healing rather than attacking, as attacking won't be very effective and will only put you in a passive state.
How to Delete a Character in Final Fantasy 14 Crystal World FF14 Mobile Character Replacement Guide
Today, I will be introducing how to delete a character in Final Fantasy 14 Crystal World. Final Fantasy 14: Crystal World, while inheriting the classics of the PC version, has built a convenient and full-of-surprises gaming world through clever mobile adaptation. With continuous updates and iterations, it is believed that Final Fantasy 14: Crystal World will continue to bring more exciting content to players, helping adventurers to write glorious chapters on the land of Eorzea. Let's take a look together.
Upon entering the game's character selection interface, you can see all the created characters. Click on the name of the character you plan to delete, making sure that the selected character is correct, as once you enter the subsequent deletion process, it will be hard to reverse. After clicking on the character's name, an options menu will pop up on the screen. Among the many options, find and click on "More Operations". After entering "More Operations", a series of executable operations will be presented. Clicking "Delete Character" will pop up a confirmation window, which will detail the relevant prompt information for deleting the character. Carefully read these prompts and click the confirm button to complete the character deletion operation.
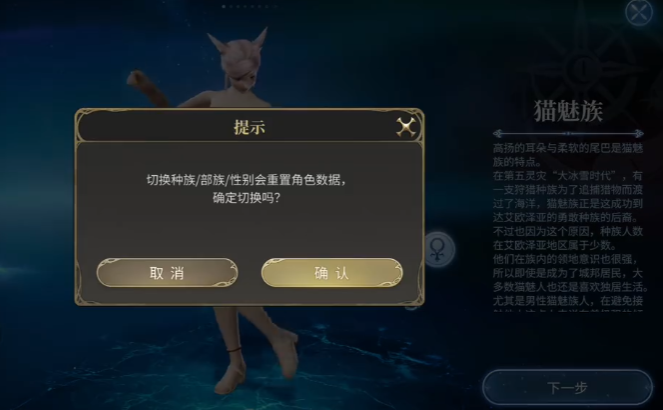
It needs to be emphasized that once a character is deleted, it cannot be recovered. Please make your decision with caution. Additionally, after a character is deleted, the character name will be reserved for 24 hours. During this period, the same character name cannot be used to create a new character. This is mainly to prevent bugs in friend relationships, achievement systems, etc., caused by duplicate character names. One of the major charms of Final Fantasy 14: Crystal World lies in the freedom for players to experience various professions, change jobs at any time, and enrich their gaming experiences.
The primary condition for switching to a special job is reaching level 30 in the base profession. If you wish to switch from Gladiator to Dragoon, then the Gladiator must first reach level 30. This level restriction ensures that players have a certain amount of gaming experience and character strength before switching to a new special job, better adapting to the difficulty and gameplay of the new special job. Go to the corresponding location to complete the specific job tasks and obtain the soul crystal for that job, among other elements. By completing these tasks, players can gain a deeper understanding of the professional characteristics of the new special job. Click on the job crystal slot in the lower right corner of the Armory, equip the soul crystal of the corresponding profession just obtained, and at this point, the character officially switches to the corresponding special job.
The content about how to delete a character in Final Fantasy 14 Crystal World has been introduced. Final Fantasy 14: Crystal World is unique in its character management, with character deletion providing players the opportunity to reshape their adventure journeys. The variety of ways to change professions, whether it's the immediate convenience of weapon switching, the deep experience brought by special job tasks, or the quick switching achieved by set saving, greatly expands the breadth and depth of gameplay.
How to Play as a White Mage in Final Fantasy 14 Crystal World Introduction to the White Mage Class in the FF14 Mobile Game
In the game of Final Fantasy 14 Crystal World, the opportunities encountered on the growth path of various professions are different. This article is specifically about how to play as a White Mage in Final Fantasy 14 Crystal World. Since this profession is not currently a basic one, those who have not chosen a basic profession may not know how to play as a White Mage later on. However, as long as you start with Conjurer, you will have the opportunity to become a White Mage later.
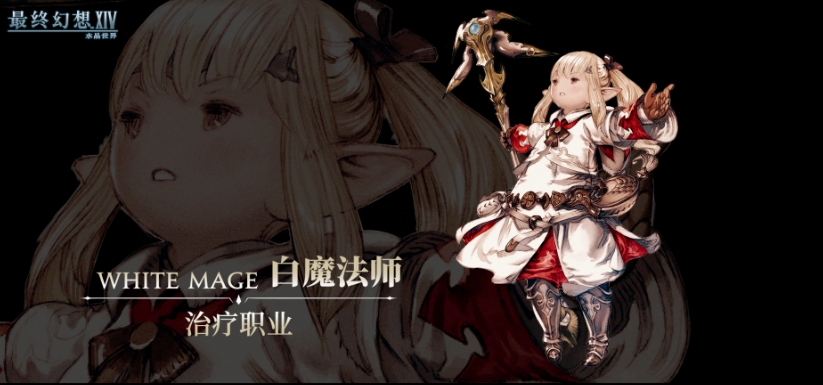
When a Conjurer reaches level 10 and successfully completes the job quest "Understanding Nature," followed by completing the special job quest "The Successor's Duty," they can then unlock the White Mage profession. As the healing role in the team, the White Mage has three unique role skills. One of them is "Steady Recitation," which makes the caster immune to some forced displacement effects, providing a stable environment for casting and healing in complex and changing battle environments, lasting for 8 seconds with a cooldown of 90 seconds.

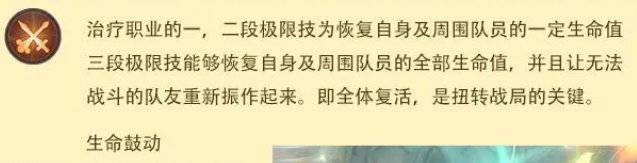
The second is the resurrection skill, which allows targets that have fallen into an unplayable state to be revived, but they return in a weakened state, with a cooldown of only 15 seconds. The third is the "Lucid Dreaming" skill, which grants the White Mage three layers of Lucid Dreaming status. In this state, resurrection and healing magic no longer consume MP, enhancing the White Mage's ability to sustain healing in emergencies. Each use consumes one layer, lasts for 15 seconds, and has a cooldown of 90 seconds.

The ultimate skill is "Life Surge," a powerful force accumulated by the entire team. For healing professions, the first and second stages of the ultimate skill can restore a certain amount of HP to the caster and nearby party members, providing timely HP replenishment in battle. The third stage of the ultimate skill is even more impressive, not only restoring full HP to the caster and nearby party members, refreshing their condition, but also achieving a full party resurrection effect. When using this skill, the White Mage uses their aether reserves to bring healing magic.
In actual combat scenarios, the White Mage primarily uses normal attacks for damage output. During battles, it's essential to maintain the rhythm of normal attacks to ensure stable damage. At the same time, pay close attention to the cooldowns of key skills like "Swiftcast," "Presence of Mind," and "Divine Benison." Once the cooldowns end, release these skills immediately to avoid losing out due to unused skills. Especially when both "Swiftcast" and "Presence of Mind" are available, follow the order of prioritizing "Presence of Mind" before "Swiftcast" to maximize the effectiveness of the skills.

Additionally, when "Pain Sympathy" triggers, respond quickly and use the corresponding skill to prevent over-healing and missing the best timing for healing or dealing damage. In terms of healing techniques, the White Mage must adapt flexibly to different combat situations. When only one teammate is injured, using "Cure II" is the most appropriate choice, as it precisely replenishes the injured teammate's HP without wasting healing resources. In the early stages of combat, if more than two teammates are injured, use "Medica" to stabilize the team's overall HP.

As the battle progresses, in the later stages, it's better to prioritize using "Presence of Mind," which does not consume MP, to effectively heal teammates while conserving mana. If teammates' HP loss is minimal, you can rely on "Presence of Mind" to slowly replenish HP and maintain the team's HP balance. When facing high-damage enemy skills, the White Mage should first use "Plenary Indulgence" to enhance the healing received by teammates, then flexibly choose "Presence of Mind" or "Medica" based on the actual HP situation to restore teammates' HP and ensure the team's survival rate.

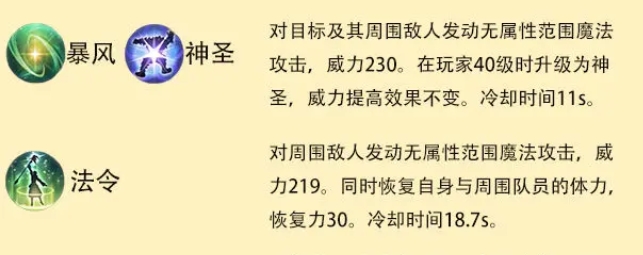
For subsequent skill combinations, the "Aero + Divine Benison" combination is advantageous. This combination can launch an attributeless area-of-effect magic attack on the target and surrounding enemies, with an initial power of 230. When the player reaches level 40, the power of "Divine Benison" further increases without changing its effect, but the range expands. The "Presence of Mind" skill is also a very practical option, as it can not only launch an attributeless area-of-effect magic attack on surrounding enemies with a power of 219 but also restore the caster's and nearby party members' HP, with a recovery power of 30. "Swiftcast" is a versatile skill in the White Mage's skill set, allowing the caster to increase their attack speed and casting speed by 20% for 10 seconds, reducing the cooldown by 20%, and using certain skills can also reduce the cooldown of "Presence of Mind."
This is the guide on how to play as a White Mage in Final Fantasy 14 Crystal World. If you enjoy playing a healer, the current White Mage is the most suitable for you to experience. Therefore, initially, you must start with Conjurer and then choose to switch to White Mage later on.
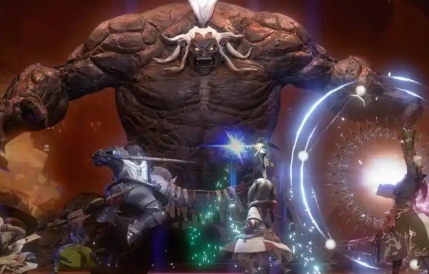
How to Clear the Sastasha Seagrot in Final Fantasy 14 Crystal World Natural Weakness FF14 Mobile Dungeon Strategy
How to clear the Shasta Cave in Final Fantasy 14 Crystal World? When players are tackling this dungeon, they need to choose a party composition, for example, one tank, two DPS roles, and one healer. After participating in the dungeon, you can obtain combat gear and tokens. Today, let's go into detail about how to defeat these bosses in the game?

Fang-Longtooth Panther: This is the first boss. Along the way, players will encounter 3-4 groups of small monsters. Some of these monsters have special skills, such as bats releasing a black debuff. They will use themselves as the center and release a rather terrifying area-of-effect damage. After a normal attack, the jellyfish will have a threat reset effect and a paralysis reset effect; it will also cause area damage in front of it. When facing this boss, players need to choose the correct coral. If the color chosen is wrong, it will affect the chance of clearing the dungeon.
Captain Madison: After driving him away for the first time, players will enter a large room. Defeat the nearby small monsters, pick up the key, and leave quickly. The second boss is the captain, along with two pirates. The captain has a high health pool but only performs regular attacks. Once his health drops below 80%, after every four regular attacks, he will form a vanguard sword, which deals significant damage to the target. If his health drops below 50%, he will enter an untargetable state.
Sea Fang Dunn: After entering the cave area, players can move forward on the left side without needing to kill the small monsters on the right. The main skill of this boss is the Water Ball skill. At the end of the cast, it will silence all targets in the frontal cone and deal damage. Players should not engage head-on but instead dodge by moving. As the boss's health gradually decreases, it will activate the surrounding ripples. Players need to time their actions accurately to defeat it.
In this dungeon, there are mainly three bosses, and the strength of these three bosses is clearly different. How to clear the Shasta Cave in Final Fantasy 14 Crystal World? You can refer to the methods mentioned above. After choosing the appropriate strategy, you can easily clear the dungeon; it's not as complicated as you might think.
Which job is the strongest in the FF14 mobile game? A look at the powerful jobs in Final Fantasy 14 Crystal World
In the massively multiplayer online game Final Fantasy 14 Crystal World, class selection is a key factor in determining the efficiency of instances and the gaming experience. It can unlock different styles of combat. So, do you know which class is the strongest in the FF14 mobile game? This article will comprehensively and deeply analyze the full class tier list from the three important dimensions of output, survival, and team contribution. At the same time, it will also include the operational difficulty of each class.
Among the T0 classes, the Red Mage stands out, with its role as a ranged magic DPS. In battle, it can cast powerful spells from afar. Its core advantages are very significant. On one hand, it has high burst damage, capable of dealing massive damage at critical moments. On the other hand, it also has team-buffing skills, such as the amazing resurrection skill, which allows teammates to quickly return to the battlefield after an accidental fall. Additionally, it has a speed-boosting skill that makes team members' actions more agile, enhancing the overall combat rhythm. Moreover, its rotation is relatively simple, making it easier for new players to get started. Whether in the early stages of exploring unknown dungeons or when speed-running dungeons for efficient clears, it performs excellently. From a data perspective, it ranks first in overall class DPS, with dummy DPS 15% higher than the second place.
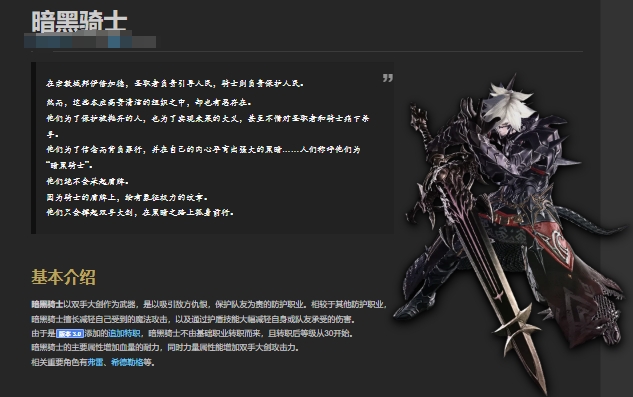
The Dark Knight is also among the T0 classes, positioned as the main tank. In team dungeons, it draws the enemy's attention and takes a lot of damage. Its core advantage lies in having the highest magic resistance. When facing enemies skilled in magic attacks, it can effectively reduce the damage received thanks to its excellent resistance. It also has a healing reduction skill, which can be useful against enemies with recovery abilities or in special dungeon mechanics. Furthermore, it has a high team damage reduction coverage. In high-difficulty dungeons, when the team faces large-scale powerful attacks from enemies, it can use its skills to significantly reduce the damage taken by the entire team, ensuring the survival of team members. Therefore, it is very suitable for challenging high-difficulty ultimate dungeons and complex combat scenarios like the first clear of hard dungeons.
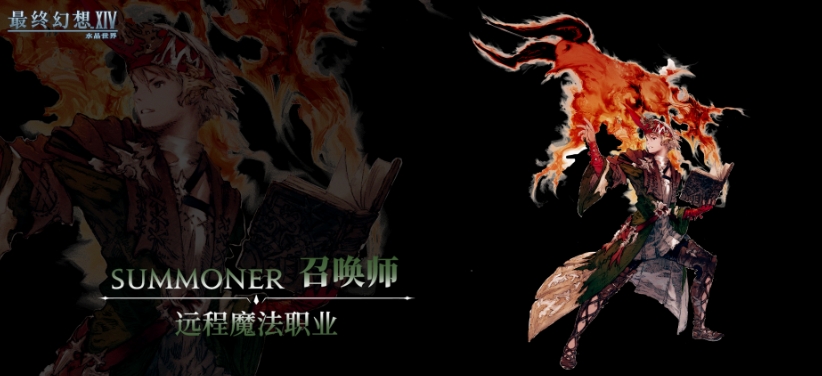
The Summoner is also among the T0 classes, positioned as a ranged magic DPS. It has extremely strong AOE capabilities, able to unleash powerful area-of-effect spells when facing groups of enemies. Its ultimate skill, Bahamut, has the power to turn the tide of battle. When the team is at a disadvantage or in a critical moment, this skill can change the course of the fight. Additionally, it has a resurrection skill, which increases the team's fault tolerance, allowing teammates to worry less about mistakes during battles. Moreover, its operation threshold is very low, making it very friendly for new players, who can easily pick it up and master it.
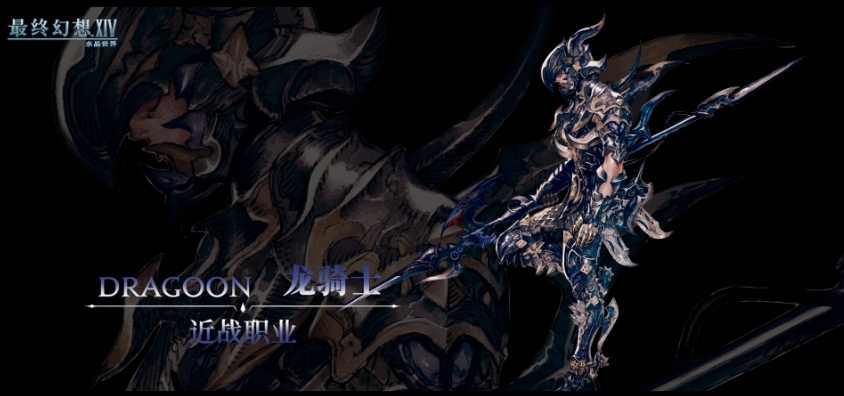
In the T1 tier, the Dragoon is positioned as a melee physical DPS. With its extremely high mobility, it can move freely between enemies. Its core advantage lies in its high mobility, allowing it to quickly approach or retreat from enemies, finding the best attack opportunities. During its burst phase, the damage it can deal is extremely explosive, and its skill effects are very cool, providing players with an excellent visual experience. However, it also has a weakness: its survivability is relatively weak, and in the game, it requires precise timing of the Reprisal skill.
The Ninja is also an important member of the T1 tier, positioned as a melee physical DPS. Its potential is extremely high, offering great exploration space for players who pursue the highest output. It also has strong team support capabilities, such as providing a vulnerability effect to teammates, allowing their attacks to deal more damage. This makes it highly favored in speedrunning teams. However, its operational threshold is very high, and mastering the ninja skill chain is not easy, requiring players to spend a lot of time practicing.

The White Mage plays a crucial role in the T1 tier as a healer. Its positioning is as a healer, and its core advantages are very clear. Its single-target and area-of-effect healing capabilities are well-balanced. Whether a teammate needs emergency healing or the team as a whole needs group healing, it can perform excellently. Moreover, its burst healing capacity ranks first among all classes, able to instantly replenish a large amount of health for teammates in critical moments. It's worth noting that its damage output is also not bad, contributing some damage in combat, making it perform well in four-person speed runs and as the main healer in ultimate dungeons.

In the T2 tier, the Samurai is a representative class, positioned as a melee physical DPS. In battle, it shows strong burst damage, and its skill rotation is relatively simple, making it easier for new players to understand and operate. Therefore, it is suitable for beginners to try. However, it also has some shortcomings, such as a lack of team-buffing capabilities, unable to provide additional attribute boosts or support effects to teammates in team battles. Additionally, there is a significant gap between its upper and lower limits, depending on the player's understanding and application of its skills.
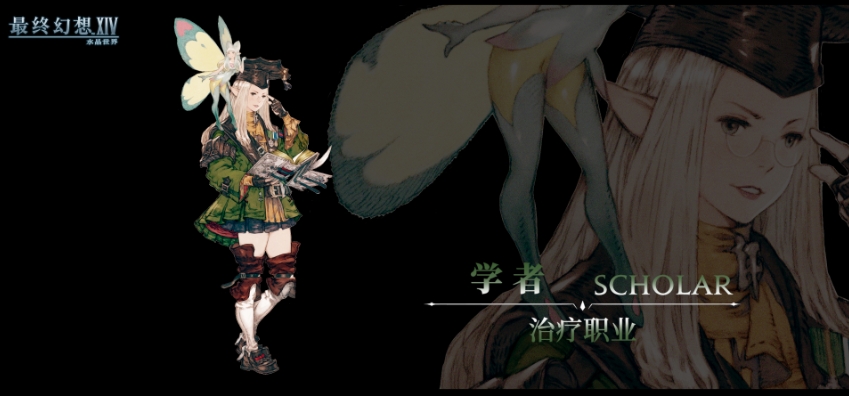
The Scholar is also in the T2 tier, positioned as a healer. Its core advantage is the ability to summon a fairy for automatic healing, making it more flexible in handling various situations during healing. It also has a high shield coverage, providing stable damage reduction in high-difficulty dungeons, enhancing the team's survivability. However, its single-target healing capability is relatively weak, and it may struggle when a single teammate urgently needs a large amount of healing. Additionally, it relies heavily on the cooperation of teammates, needing to work with other classes to maximize its effectiveness.
The Machinist is also in the T2 tier, positioned as a ranged physical DPS. It has strong self-sustaining capabilities and a stable output rotation. In relatively stable combat scenarios like stationary boss fights, it can continuously deal high damage, making it one of the team's stable sources of damage. However, its poor mobility is a significant weakness, making it difficult to quickly reposition to avoid enemy skills. Therefore, it may struggle in combat environments that require frequent dodging.
The above is the analysis of which class is the strongest in the FF14 mobile game. In fact, different players may have different opinions on which class is the strongest based on their team's positioning. The ranking here is based on the consensus of most players. If you see a class you like, make sure to try it out as soon as possible.
Recommend


Strategy

A Guide to Zhetian Fanchen Yiyue Sharing Tips for New Players on How to Play Zhetian Fanchen Yiyue
Introduction to the Public Beta Time of Zhetian Fanchen Yeyi When is the public beta for Zhetian Fanchen Yeyi?
How is Zi Yue from Zhetian Fanchen? Introduction to Zi Yue from Zhetian Fanchen
What are the Luhida Origin redemption codes? Sharing of Luhida Origin mobile game gift codes
Lu Xida Origin Team Recommendations Lu Xida Origin Team Guide
Lu Xida Origin Strategy Sharing: Beginner's Guide to Lu Xida Origin
