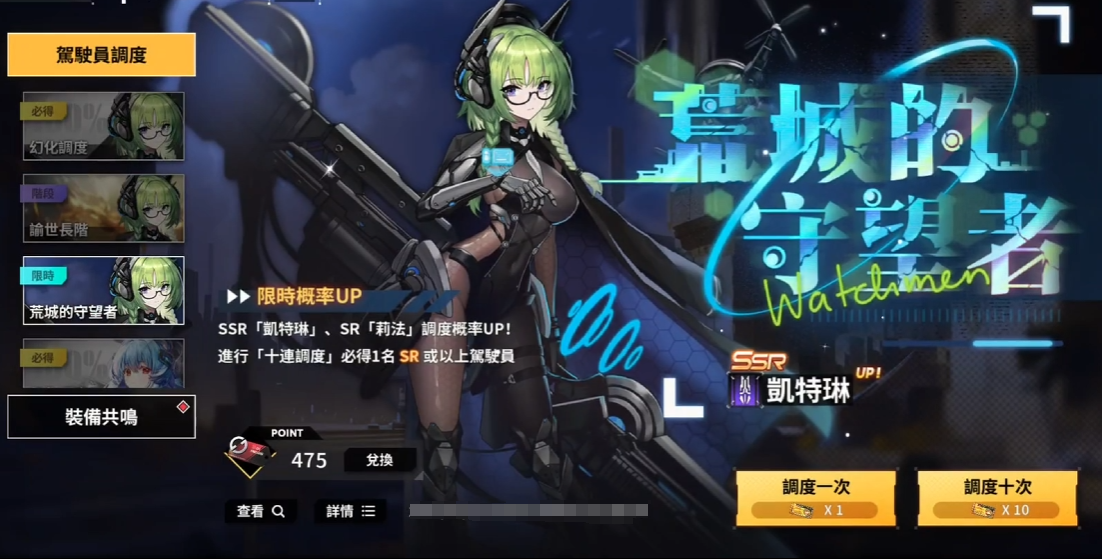
Rhythm Hive
Game Introduction


Hot Strategy
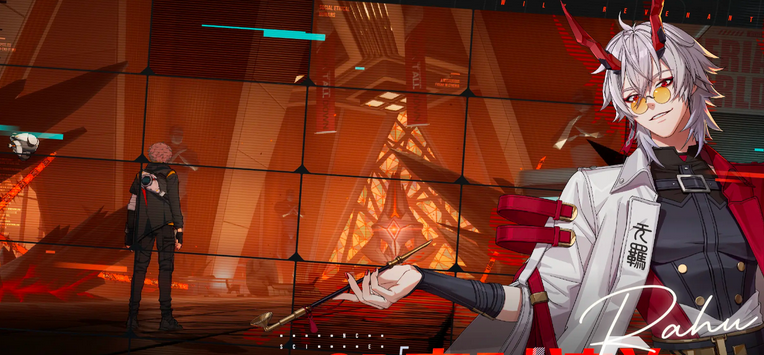
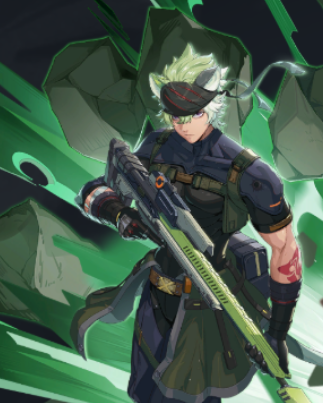
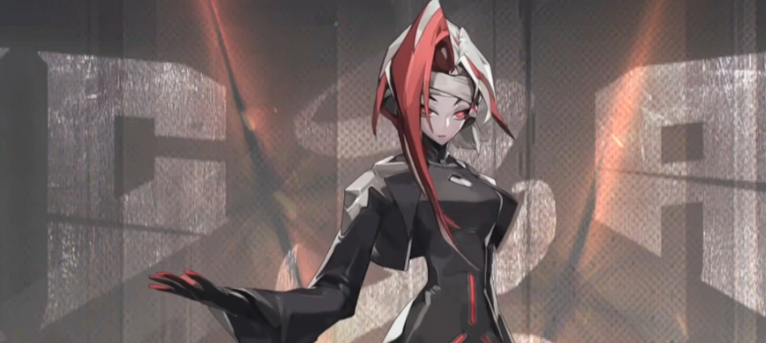
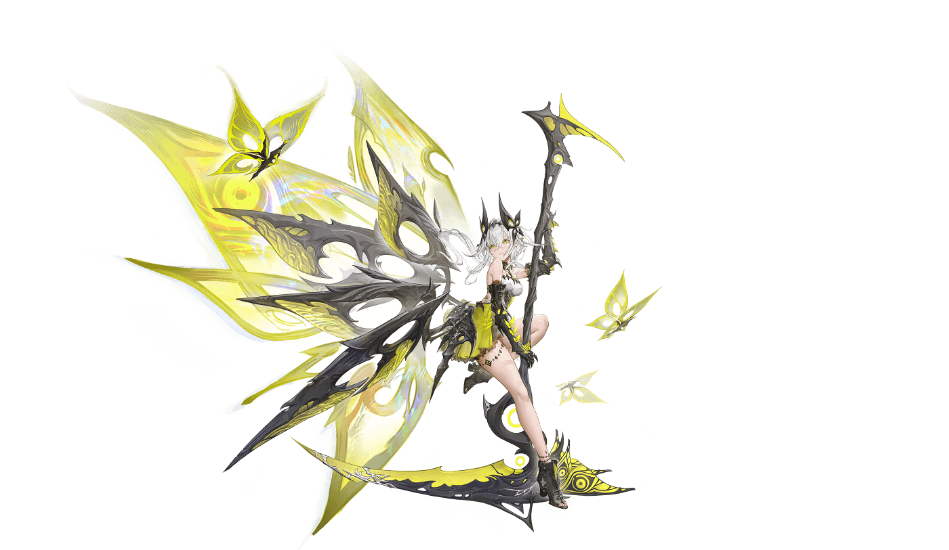
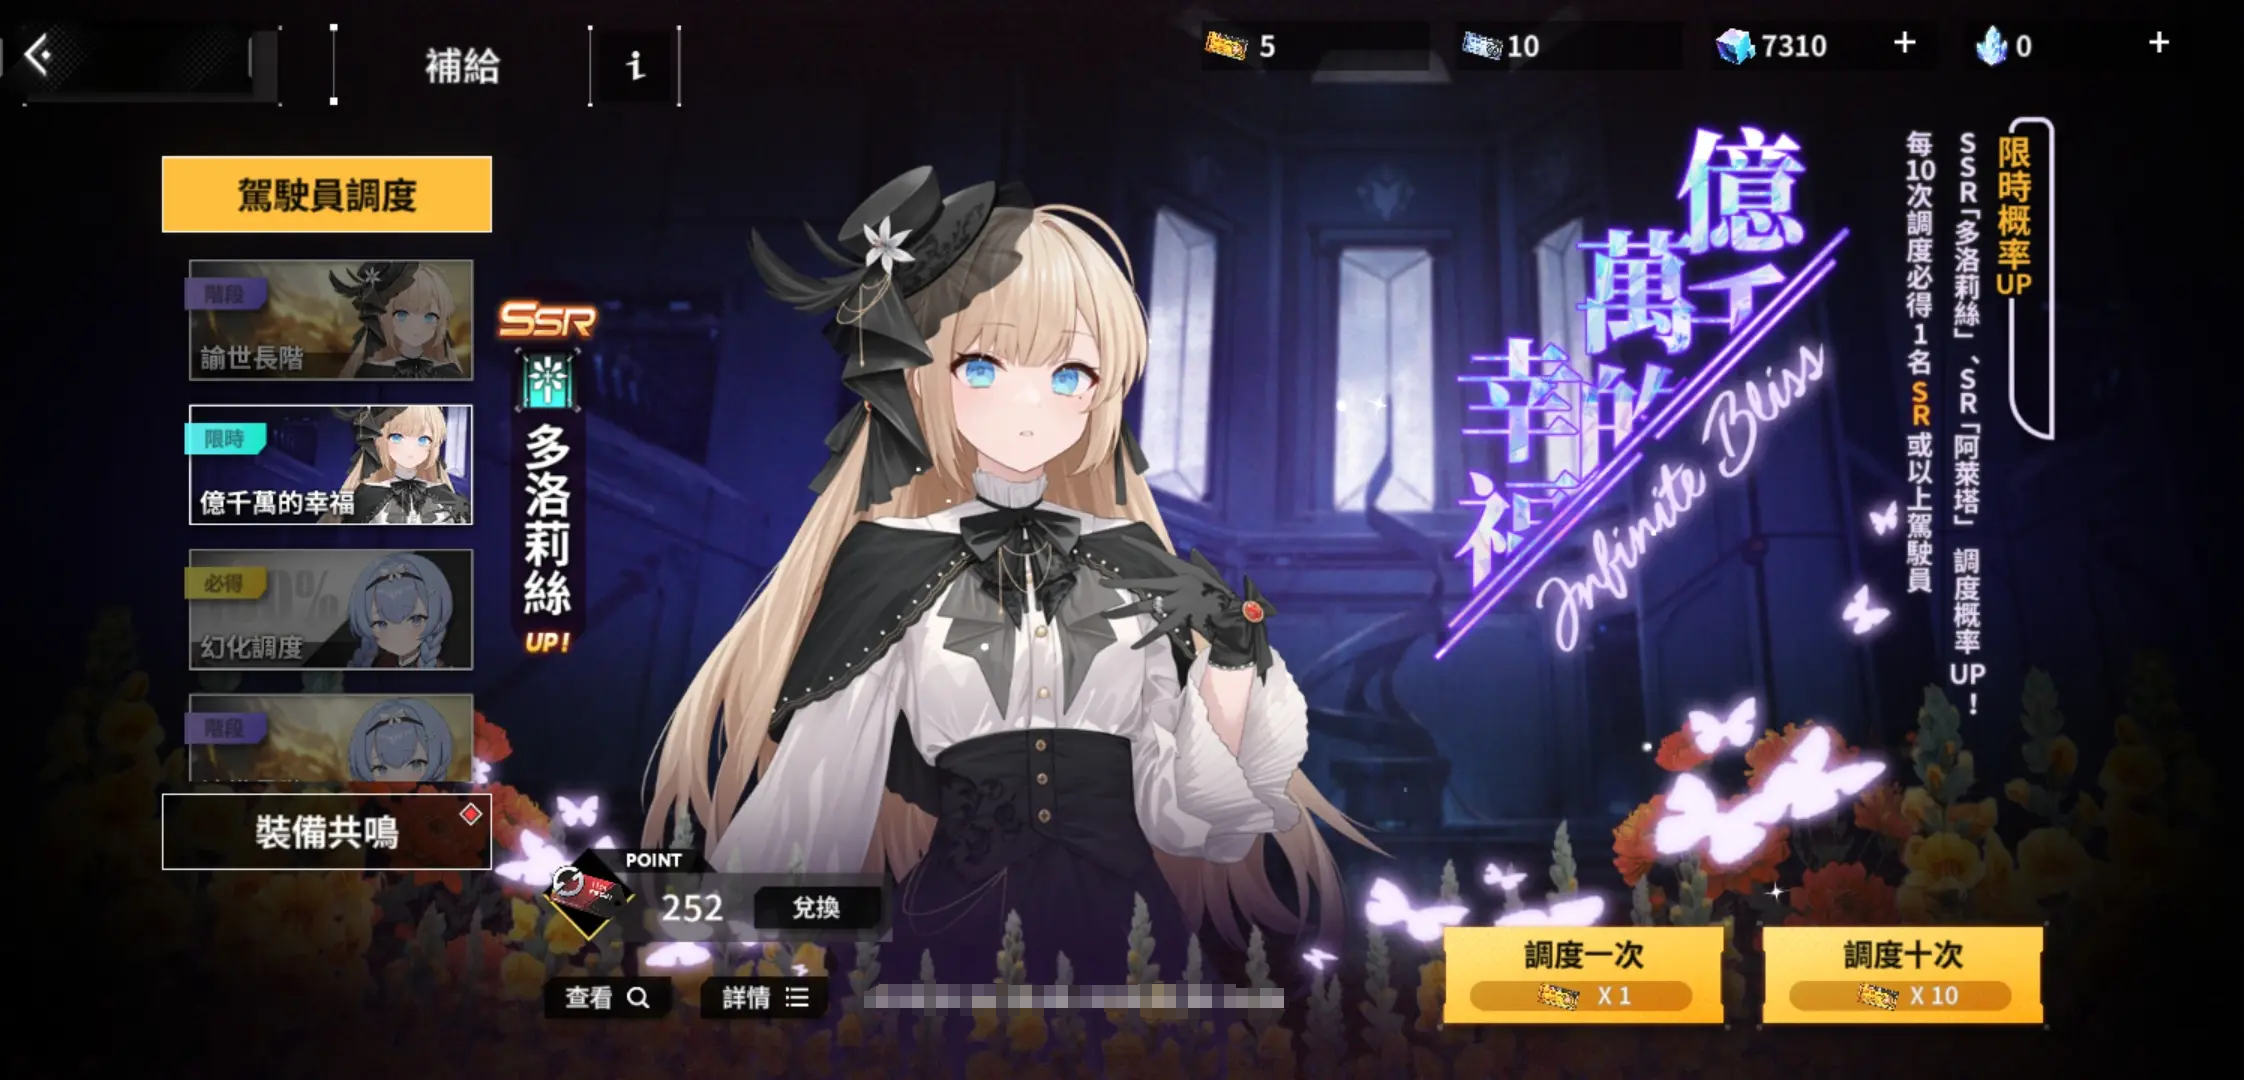
Is the Star Trace Resonance Venomous Hive Important? A Detailed Analysis of the Star Trace Resonance Venomous Hive
Many games are licensed based on IPs, such as Resonance of Star Traces, which is created with the official IP authorization from Bandai Namco. In a very peculiar otherworld, due to the imbalance of the cycle, the entire civilization is on the brink of collapse, and the player will transform into an adventurer in this world. Is the Venomous Hive important in Resonance of Star Traces? In this game, different equipment and wild bosses will be presented. When facing powerful wild bosses, one must use their extraordinary strength to defeat them completely and obtain rare equipment.
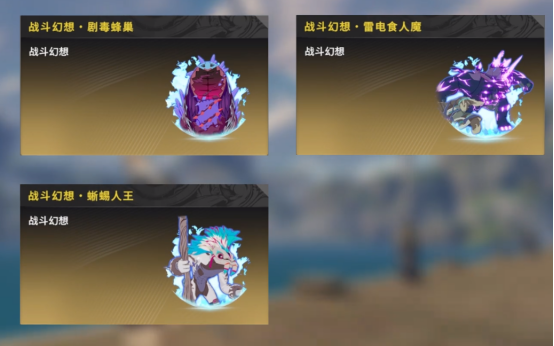
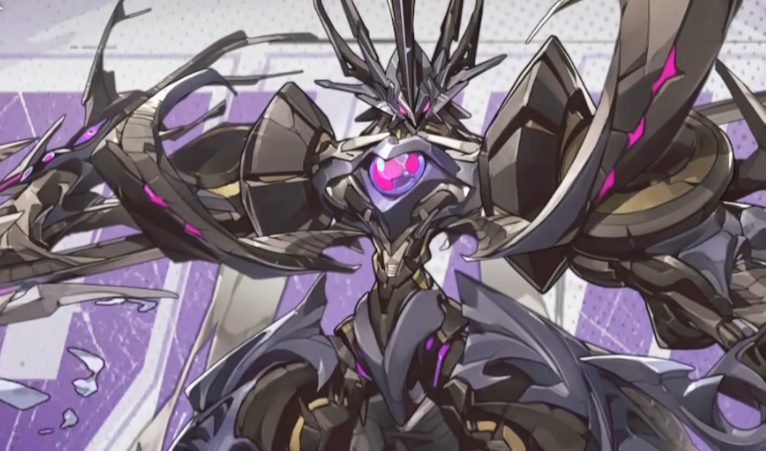
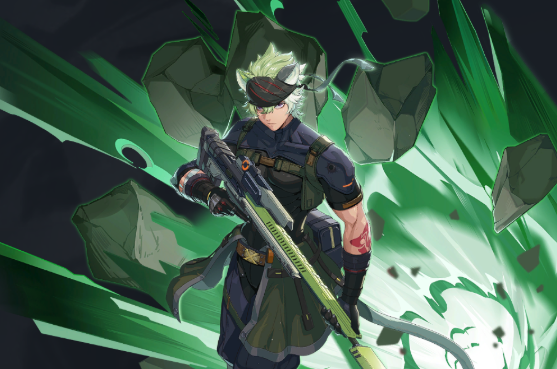
The Venomous Hive is actually a very important combat fantasy equipment in this game. It is an essential choice for every player when leveling up. In the vast outdoor environment, players will encounter various powerful bosses, each with different killing power and defensive capabilities. After reaching level 40, by thoroughly defeating the powerful world boss, players can obtain this rare weapon and equipment, thereby enhancing group buffs and also causing significant damage to enemies. This equipment plays an indispensable role in team battles and is a very critical type of gear.
In the entire battle scene, the Venomous Hive plays a very important core role. First, this equipment can provide high protective skills for the entire team and also enhance the team's output capability. For example, during team combat, if you want to deal significant damage, this equipment can be used at any time. Moreover, during battles against enemies, after targeting the enemy, this equipment can apply a 5-second vulnerability state. By attacking with your weapons, you can make the opponent very vulnerable and easily defeated.
If you want to have the important equipment, the Venomous Hive, in this game, then you must gradually clear stages and level up to improve your combat strength. At level 40, after defeating the powerful wild boss, you can easily pick up this equipment. It also comes with many rare materials, especially in team dungeons, PvP, or high-difficulty battle environments, where this weapon and equipment hold supreme status and demonstrate extremely high value.

In fact, this game presents different types of equipment, but the acquisition methods for each type of equipment are entirely different. The above is a specific introduction to the Venomous Hive in Resonance of Star Traces. For all veteran players, once they reach level 40, they need to use their extraordinary strength and freely wield their weapons to eliminate powerful wild bosses, thereby enhancing their overall skill system.
Introduction to the Ither Rhythm Tier List: Which Characters in Ither Are Stronger
The Ither Rhythm Tier List is something that many players need to understand. In the fantastical world, there are many interesting characters, and one must choose based on their own moves and passives to see which one is better. To provide a better experience, the following analysis of the rhythm tier list will look at the characteristics and advantages of various characters, allowing everyone to make wise choices based on their needs. Let's take a detailed look.
Victor: Acquiring him is not very difficult, and he has excellent damage reduction and damage increase abilities. He is very suitable for early game development. His basic attack allows him to use brute force to pick up weapons and strike opponents more fiercely. Even if his health drops below 40%, it can still be restored to a certain amount. His passive skill increases attack power by 16% for every 10% decrease in health, so the damage also decreases. His ultimate move is to continuously focus on the target, forming a 4-stage 120% input value, thus deducting 40% of the current life and converting 120% into a shield.
Reyn: He is very effective against both single and multiple targets. His basic attack releases flames that wrap around his sword, followed by continuous slashes. Each hit forms a 90% three-stage output, restoring a certain amount of health. With each passive benefit, the damage increases by 10%. His skill releases multiple fire phoenixes towards the target, with an additional fire phoenix being released after each benefit. When all energy from the ultimate is released, it summons a Fire Emperor, dealing 260% damage to enemies.
Veronica: Although she is a support character, she combines damage and functionality. When taking damage, her speed can provide 35% of her basic attack, dealing 240% damage to a single enemy. However, her move also removes the entire enemy's health, with the removal amount matching 20% of her maximum health. Her ultimate move deals 420% damage to a single enemy, then grants a certain benefit. When this benefit is spread to all teammates, it adds a 1-turn Soul Guard.
Ha Yeon: This character is quite special, with passive effects during output and good performance in PvP survival. Her basic attack deals two 130% hits to a single enemy, with a 25% chance per attack. The passive skill immediately restores 60% of her health when she dies. If the ultimate is used, the passive has a four-turn cooldown. After successfully defeating the target, it also revives a fallen teammate.

Xia Da: She requires teammates to add buffs and passive stacking, but once fully stacked, her overall damage is indeed terrifying. Her basic attack deals three 90% hits to a single enemy. The probability of her surviving increases to 80% when full. With four buffs, Heartfire gains one layer, with a maximum of three layers, each increasing attack by 25%.
Ti Ting: Her mechanism is excellent, and her skills mark the enemy with the lowest health, increasing the next attack's critical hit rate by 60%, with excess critical hit rate converted into critical damage. Her basic attack deals 260% damage to a single enemy, with a 30% chance to add two turns of easy damage.
The Ither Rhythm Tier List has been introduced in great detail. They are all strong in terms of output and also have some supportive abilities. You can reasonably pair your team based on your needs, allowing each member to play to their strengths and embark on an adventure.
Character Strength Ranking Overview Under Clear Skies Sharing the Tier List for Under Clear Skies
Under the clear sky, the character strength ranking, often referred to as the "rhythm chart," is most closely watched by those who focus on strength. It also serves as a reference for many players when drawing and cultivating characters at the start of the game. In the current version of the game, characters are roughly divided into three tiers, T0 to T2, based on their performance in actual combat, functionality completeness, rhythm form, and applicability in PVE and PVP. Each tier has its unique characteristics, and there are also some very useful characters that are not on the list.
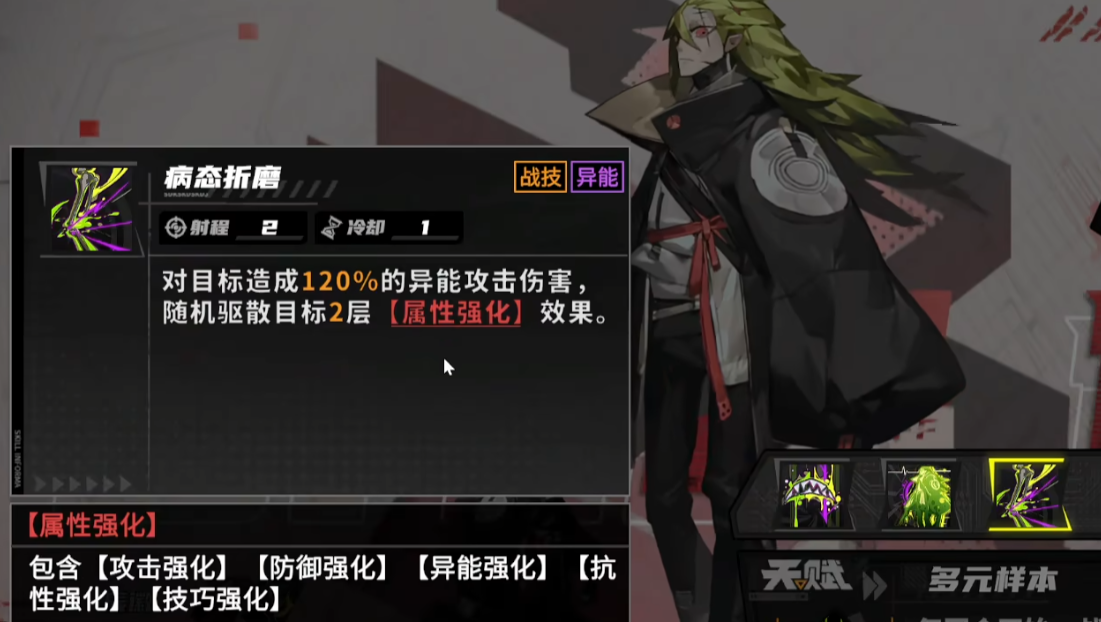
T0: Hilde
The strongest support unit, almost a standard in every efficient lineup, not only possesses comprehensive healing capabilities but also has the functions of dispelling buffs and purifying negative statuses. Her talent, "Diverse Samples," can provide a powerful damage boost to all members when the team has three or more different professions, greatly enhancing the overall combat efficiency of the team.
In addition, the rhythm form "Hannibal" brings broader support capabilities, adding area damage reduction and attack enhancement buffs while casting healing skills, further broadening Hilde's support dimensions. Although her second rhythm form "Unicorn" also has certain AOE control abilities, its practicality is lower, and its priority can be placed later. Overall, Hilde's strength is reflected in two dimensions: "versatility" and "stability." She ensures team survival and provides output support, making her a true T0 character.
T1: Shane, Tina Nix, Silon Bayne, Polaris, Li, Wiz, Vincent, Crane Tang, Cedric, Leno
Shane, as the most representative SR command role, although cannot compete with Hilde in terms of functionality, is still a reliable healer under limited resources, more suitable for single support, lacking group buffing or dispel abilities, and is applicable for early transition.

Tina Nix, specializes in extreme healing, with significantly higher healing output than Hilde in her base form, and also has dispel and shield skills, suitable for combat environments requiring high-frequency healing. Lacking in buffing support, her second rhythm form "Violent Sweep" focuses on DOT and fixed damage, but due to the delayed trigger mechanism of DOT in Clear Sky, it is inefficient in practice and not recommended for priority unlocking.

Silon Bayne, a typical burst AOE, has wide coverage map skills in any rhythm form, especially the second form, which allows infinite resurrection as long as energy is not depleted, making him strong in over-level battles and PVP, one of the most worthwhile investment damage dealers in the current version.
Polaris, purely an output role, with straightforward skill sets, such as ignoring guards and range-based fixed damage, allowing for stable performance in direct confrontations. The rhythm form "Mockery" provides AOE direct damage and range increase, making him a threat in group combat. However, the "Avalanche" form, although focused on counter-damage, requires taking damage first before dealing it, and its survivability is not particularly strong.
Li, a special agent role with a mix of high output and support. Not only can he self-buff to increase attack, but he can also apply fixed damage and energy reduction to enemies. His rhythm form "Milleag" enables two actions per turn and releases high AOE skills; the second form "Scorpio" is designed for PVP, with the ability to dispel buffs and reduce enemy energy, disrupting the enemy's action rhythm.

Wiz, not only has basic damage reduction and healing mechanisms, but at high awakening stages, he can also gain a resurrection shield, allowing him to stay on the field for a long time in both PVE and PVP. The rhythm form "Insect Revolution" provides invincibility and debuff effects, making him the most worthwhile shield to cultivate currently.
Vincent, as the only shield in the mechanized soldier profession, has an advantage against warrior classes. His second form "Nidhogg" can convert defense enhancement into attack, theoretically providing extremely high burst, suitable for use with roles like Shane that have defense enhancement mechanisms.

Crane Tang, through the "duel" mechanism, suppresses the single-target output capability of the enemy, while his normal attacks and battle skills can be converted into high fixed damage after reaching four-star awakening, with a conversion rate of up to 40% after six-star awakening. The second form "Whirlwind" grants him high mobility and re-attack upon kill, supplementing his AOE ability, making him still usable in group combat.
Cedric, an aerial role with high mobility, his rhythm form has stealth and high-ratio map AOE skills "Final Judgment," suitable for various high-mobility mission maps. Although currently only one rhythm form is implemented, its tactical significance and burst capability are sufficient to support its T1 positioning.
Leno, a single-target output, with extremely high self-buffing and violent output capabilities. The second form "Fugalo" gives him aerial role characteristics and large-range AOE abilities, allowing him to clear fields in PVE and have kiting potential in PVP, making him a highly scalable long-range attacker.
T2: Slime, Morel, Huiger
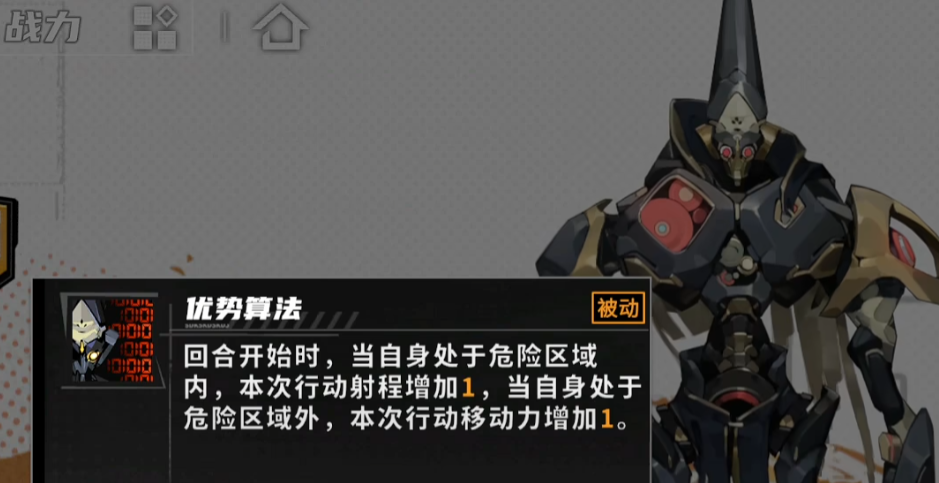
Although each has decent mechanisms, their actual combat performance is slightly inferior. Slime has good control and late-game burst, but relies on warm-up, not as plug-and-play as other high-burst characters. Morel's rhythm form and base form have conflicting mechanisms, unable to benefit from the movement bonus provided by the advantageous algorithm. As a mixed damage dealer, Huiger has a high fixed damage ratio but weak survivability, especially in the guard position, where he cannot compare with Wiz and Vincent.
Practical SRs:
Witt Hart, a good secondary DPS and damage booster in single-target environments; Carter King, with excellent output and single-target paralysis; Yaga, with good damage capabilities, similar mechanics to Leno, and is a lower-tier alternative.
The character strength ranking under the clear sky reflects these characters' basic stats and mechanism advantages and disadvantages in combat. T0 and T1 characters are certainly worth prioritizing, but in specific stages and environments, many T2 and even SR characters can still play significant roles. Often, a reasonable lineup and tactical execution are key, rather than simply relying on stacking numbers.
Overview of the Double Helix Rhythm Rankings Which hero is the strongest in the Double Helix Rhythm Rankings
There are many characters in the Double Helix, and their strengths vary greatly. It can be said that each character, when taken individually, seems to be quite strong. Because of this, it might be difficult for everyone to determine the truly powerful characters. This ranking of the Double Helix rhythm chart will help you easily solve this problem. In this character strength rhythm chart, we will introduce several of the currently more dominant characters in the game.

Double Helix Rhythm Chart Ranking:
1. Fina
Fina is a universally applicable character in all modes of the Double Helix. In the game, there is only one character with the light attribute, which is Fina. Fina's first skill, "A Warm Afternoon," can directly inflict light attribute damage on enemies. The "Noisy Afternoon Tea" can directly switch between different fields, and during its use, it can also inflict 1 instance of damage corresponding to the field's attribute every 2 seconds.
2. Saki
Saki is a wind-attribute character in the game with a defense capability as high as 225 points. Her "Cocoon Illusion" skill can directly generate an illusion on the spot. This skill can be used at any time, and enemies cannot interrupt it. After the illusion is generated, the enemy's movement speed will decrease, and 5 seconds later, it will deal 1 instance of wind-attribute damage to the enemy.
3. Rebecca
Rebecca is a 5-star rarity water-attribute character. Rebecca primarily attacks enemies through summoning creatures. Her 1st skill, "Lingering Touch," can summon a moon jellyfish, which inherits 100% of Rebecca's attributes and can inflict water-attribute damage on surrounding enemies. A maximum of 3 summoned creatures are allowed on the battlefield simultaneously.
4. Fusoo
Fusoo, also a 5-star rarity character, is a water-attribute healer. Her 1st skill, "Lifting the Sinking," can summon a creature named Yunshu, which provides healing and sanity restoration to teammates. This summoned creature can heal and restore sanity to teammates every 3 seconds.
5. Linn
Linn, a fire-attribute attacker, has traits such as "Fully Focused," "Adventure," and "Impression: Chaos." Her "Fatal Bloom" can fire a special bullet at the enemy, which not only inflicts fire-attribute damage but also has a laceration effect.
In the Double Helix rhythm chart, besides the heroes mentioned above, there are many other characters. However, in terms of strength, the characters introduced by the editor are undoubtedly the strongest and are also worth acquiring.
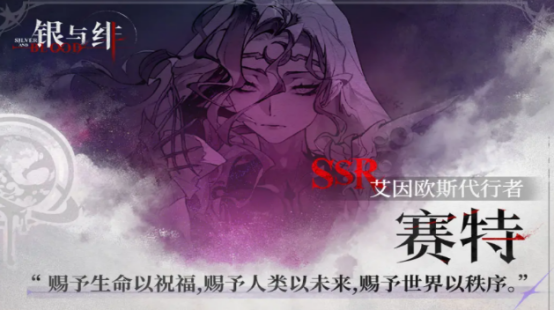
Silver and Crimson Character Tier List Overview
Silver and Crimson, as a highly popular dark-themed strategy card mobile game, will present many powerful enemies after the start. Players use different card characters to release powerful skills to fight against them. The Silver and Crimson character tier list is a topic worth more players' attention, as this game features a large number of hero characters. Each hero has their own attributes and skills, suitable for completely different battle scenarios. Next, follow the editor to see the specific content introduction.
Set is ranked first in this game, which is due to his relatively strong overall strength. Whether it's damage capability or healing, he exerts excellent influence in all aspects. He is also one of the best assistants for many players. When experiencing the game, you can choose this character first because he provides good support to the entire team. For example, when teammates encounter health issues, he can provide healing to increase their health points.
Next is Akebala, another character not to be missed, who plays a crucial role in the whole team by providing good healing and accelerating attack abilities for more teammates. This is closely related to his own advantages, as he possesses excellent magical damage, making him an outstanding support character.
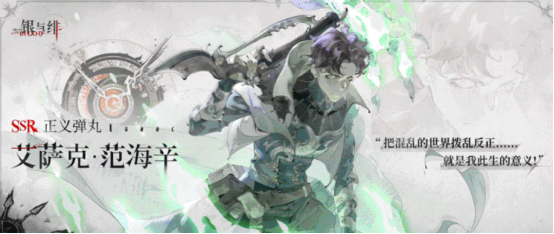
Van Helsing also has extremely strong output capabilities, especially during long-range combat, where he is very popular. In the team, he not only demonstrates high physical damage to enemies but also becomes a valuable assistant to more players with his superb long-range output skills.
These are the specific introductions to the content of the Silver and Crimson character tier list. After reading these introductions, many players should have a better understanding of these characters. Each character has its own strengths, but during the selection process, players can correctly pick based on their actual needs and the situation of the enemies. Due to space limitations, the editor has only summarized a few representative characters today.
Introduction to the Dragon Soul Traveler Tier List: Which Characters are on the Dragon Soul Traveler Tier List?
In Dragon Soul Traveler, different spirits not only have their own powerful skills but also provide unique tactical coordination in battles. As players delve deeper into the game, its pace gradually reveals a unique charm. Today, we will introduce the rhythm chart of Dragon Soul Traveler. In this guide, we will discuss some spirits with a fast pace and significant impact on the battle, which can help players achieve breakthroughs during their adventures and inject more vitality into the fights.
Poseidon, a top-tier mage, is a heavy hitter on the battlefield due to his initial crowd knockback effect and the chilling effect of his skills. Especially when facing enemy groups, he can maximize damage output through precise skill combinations, triggering elemental reactions like evaporation or rapid cooling. When in low health, his invincibility and self-healing mechanism allow him to make a critical comeback. If you want to quickly and effectively eliminate enemies, Poseidon is an excellent choice to invest in.
Next up is Athena, a top guardian whose strength speaks for itself. She not only provides powerful shields for her teammates but also has the ability to taunt groups, stabilizing the team's formation amidst chaotic enemy attacks. More importantly, her counterattack skills can heal her when she takes damage, allowing her to both withstand heavy blows and retaliate against enemies. Whether in the early or late game, Athena is always a core character worth developing for new players.
Marielise, as the core damage dealer for the Arcane and Wilderness factions, is a warrior with skills that are not only low-cost but also highly damaging. Her ultimate skill can be frequently cast and comes with healing effects, allowing her to maintain strong pressure on enemies even at low health. Especially in the early stages of the game, her impressive damage output and healing abilities can greatly assist you, helping you sustain your fighting power in tough battles.
Hades, an assassin known for his extremely high single-target damage, can deal a staggering 740% damage with a single attack, and his ability to summon clones adds considerable tactical depth. Every time he kills an enemy, his ultimate skill resets, providing higher potential for damage. Hades' flexibility allows him to easily win in regular battles and also achieve a comeback in more challenging fights through efficient operations.
The White Tiger, while initially not as strong as Hades in terms of damage, has great potential in the later stages. Her attacks cannot crit, a feature that, when equipped with the right attack speed, allows her to ignore enemy physical defenses and deal terrifying sustained damage. Therefore, the White Tiger is suitable for patient development; as her star level increases, she can unlock an ultimate skill with dispelling effects, providing more control and damage support in battles.
Fenrir, a distinctive assassin, has an ultimate skill that can interrupt enemy casting and reset quickly. In the early stages, her seamless ultimate skill cycle helps players easily clear out enemies and increase the battle pace. With relatively low ascension difficulty, it is recommended that all players develop her to at least purple 6-star, using her ultimate skill to quickly eliminate enemies and deplete their combat power one by one.
Ifrit, as a marksman, has an ultimate skill that can cause screen-wide explosive damage, enhanced by both elemental and arcane faction bonuses, making her performance in real battles almost perfect. Not only does she deal high damage, but she also has a large attack range, making her an indispensable core damage dealer in almost any team. Additionally, her armor reduction effect can help save a slot for an armor-reducing role in the lineup, making her a powerful asset in various playstyles.
Finally, Scheherazade, a priest with powerful healing and buffing abilities, is one of the strongest healers. She not only provides abundant healing but also gives additional buffs to teammates while restoring their health, significantly enhancing survival in battles. Whether in team battles or challenging high-difficulty dungeons, Scheherazade can provide stable logistical support to your lineup.
This concludes the introduction to the rhythm chart of Dragon Soul Traveler. By understanding these powerful spirit characters, players can make reasonable development decisions based on their lineup needs, not only improving their combat power but also welcoming more challenges in their adventures. Each character has a role, and mastering their rhythms and combinations is key to achieving ultimate victory in the world of Dragon Soul Traveler.
Introduction to the Realm Blade Sound Rhythm Tier List and Strength Recommendations
Players in "Jingjie Dao Ming" can obtain many characters for use in battles through draws, and they can be paired into teams to go out on missions. Therefore, mastering the tier list is very important, as it helps to find the currently strong characters. What the editor brings today is an introduction to the "Jingjie Dao Ming" tier list. The characters recommended by the editor next are all currently strong, and those who can make it to the rankings are very worth developing.

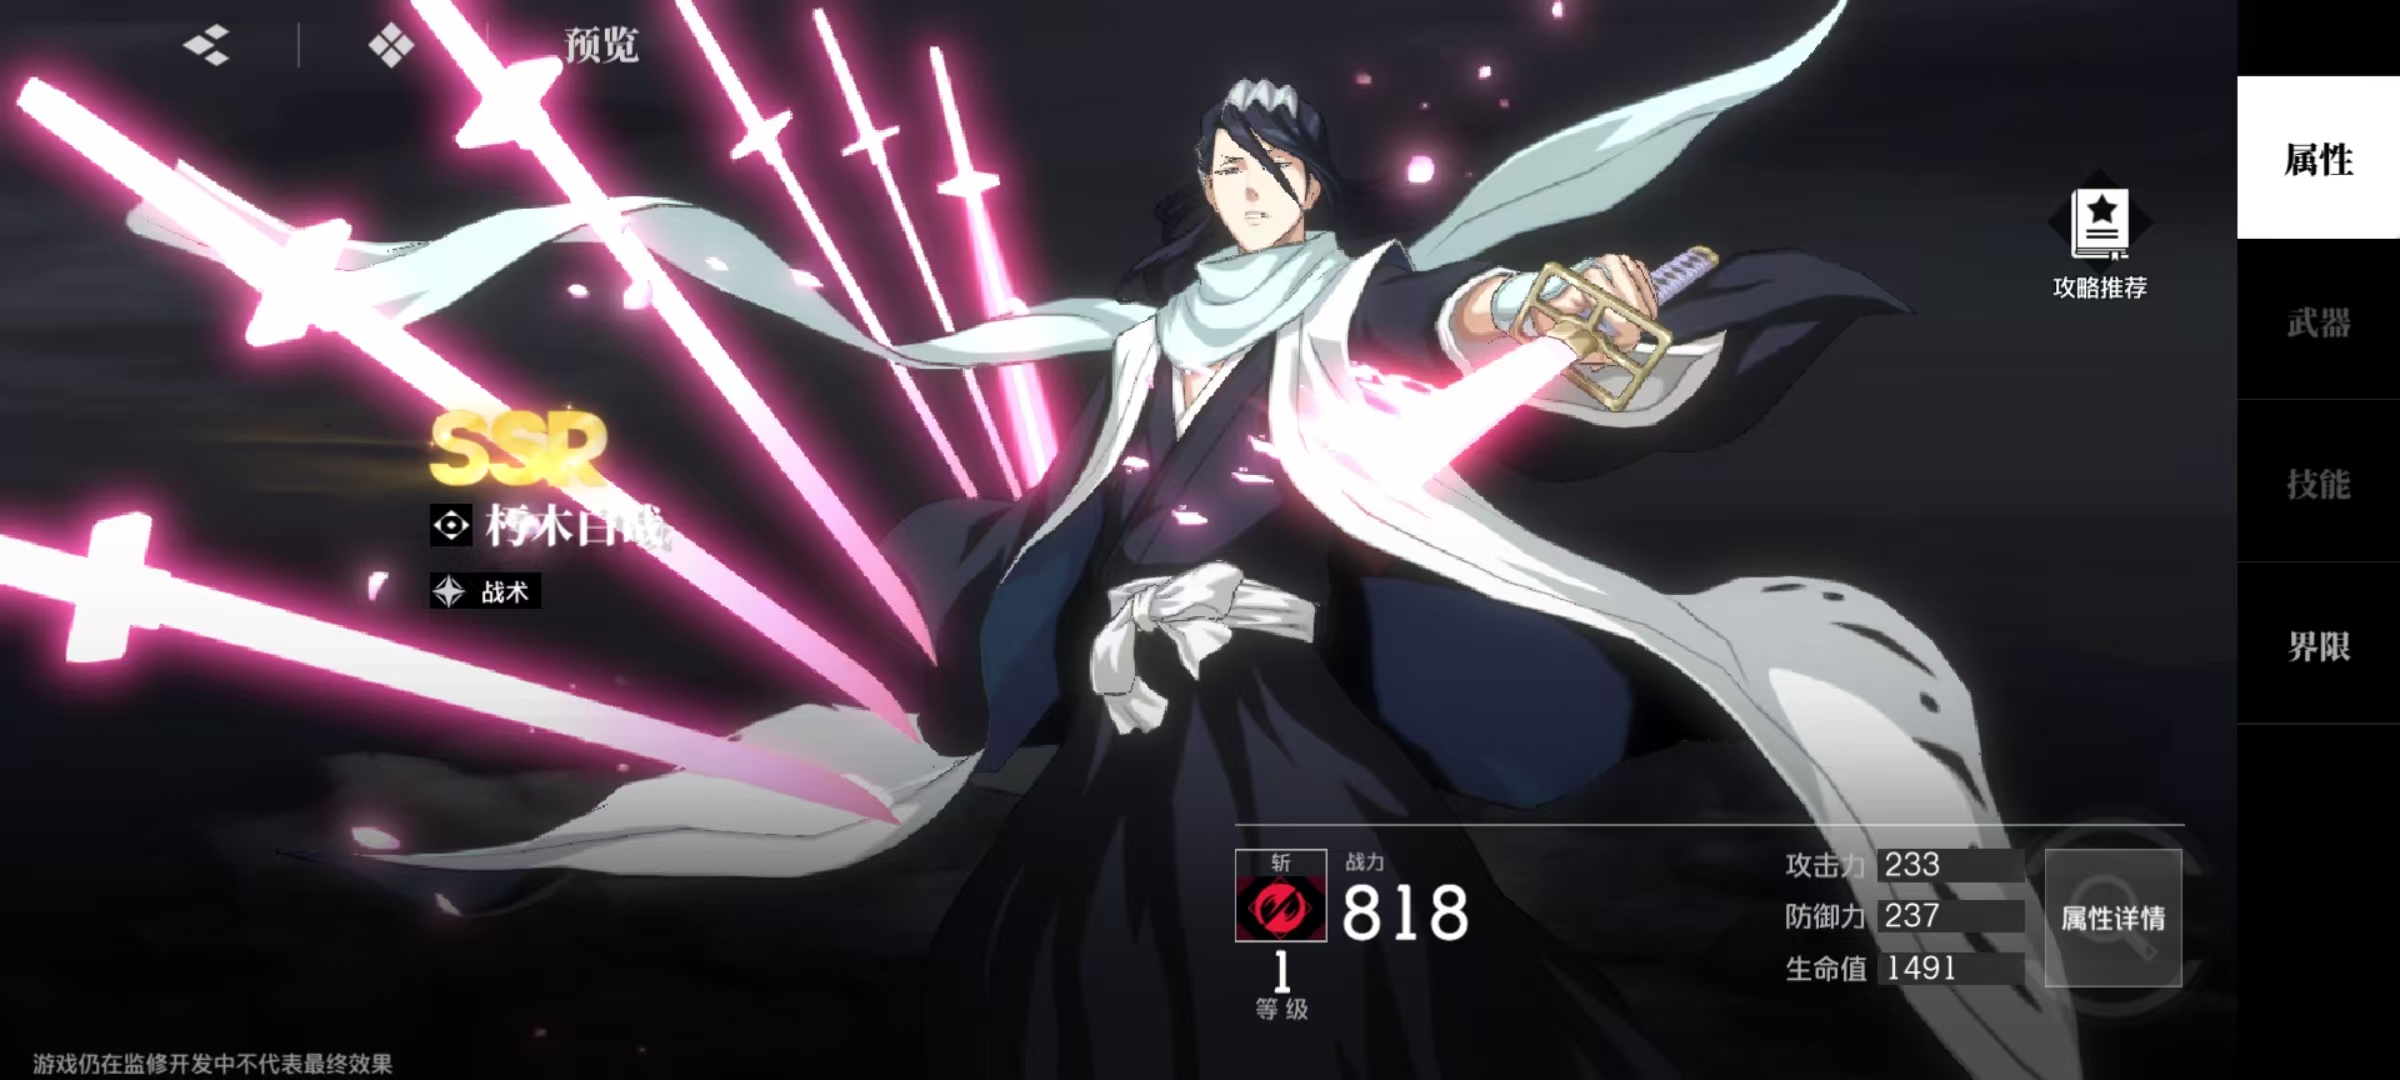
Ranking first in strength on the tier list, of course, is the limited character Ichigo Kurosaki with his Bankai. This is also the first limited hero in the game currently. He is the core of close-range single-target damage, capable of quickly releasing continuous attacks. As long as players master certain techniques, they can substitute high-frequency normal attacks, resulting in very high output in actual combat. Additionally, he can directly mark distant enemies using his skills, then quickly rush to their side for damage, combining burst damage with high mobility.
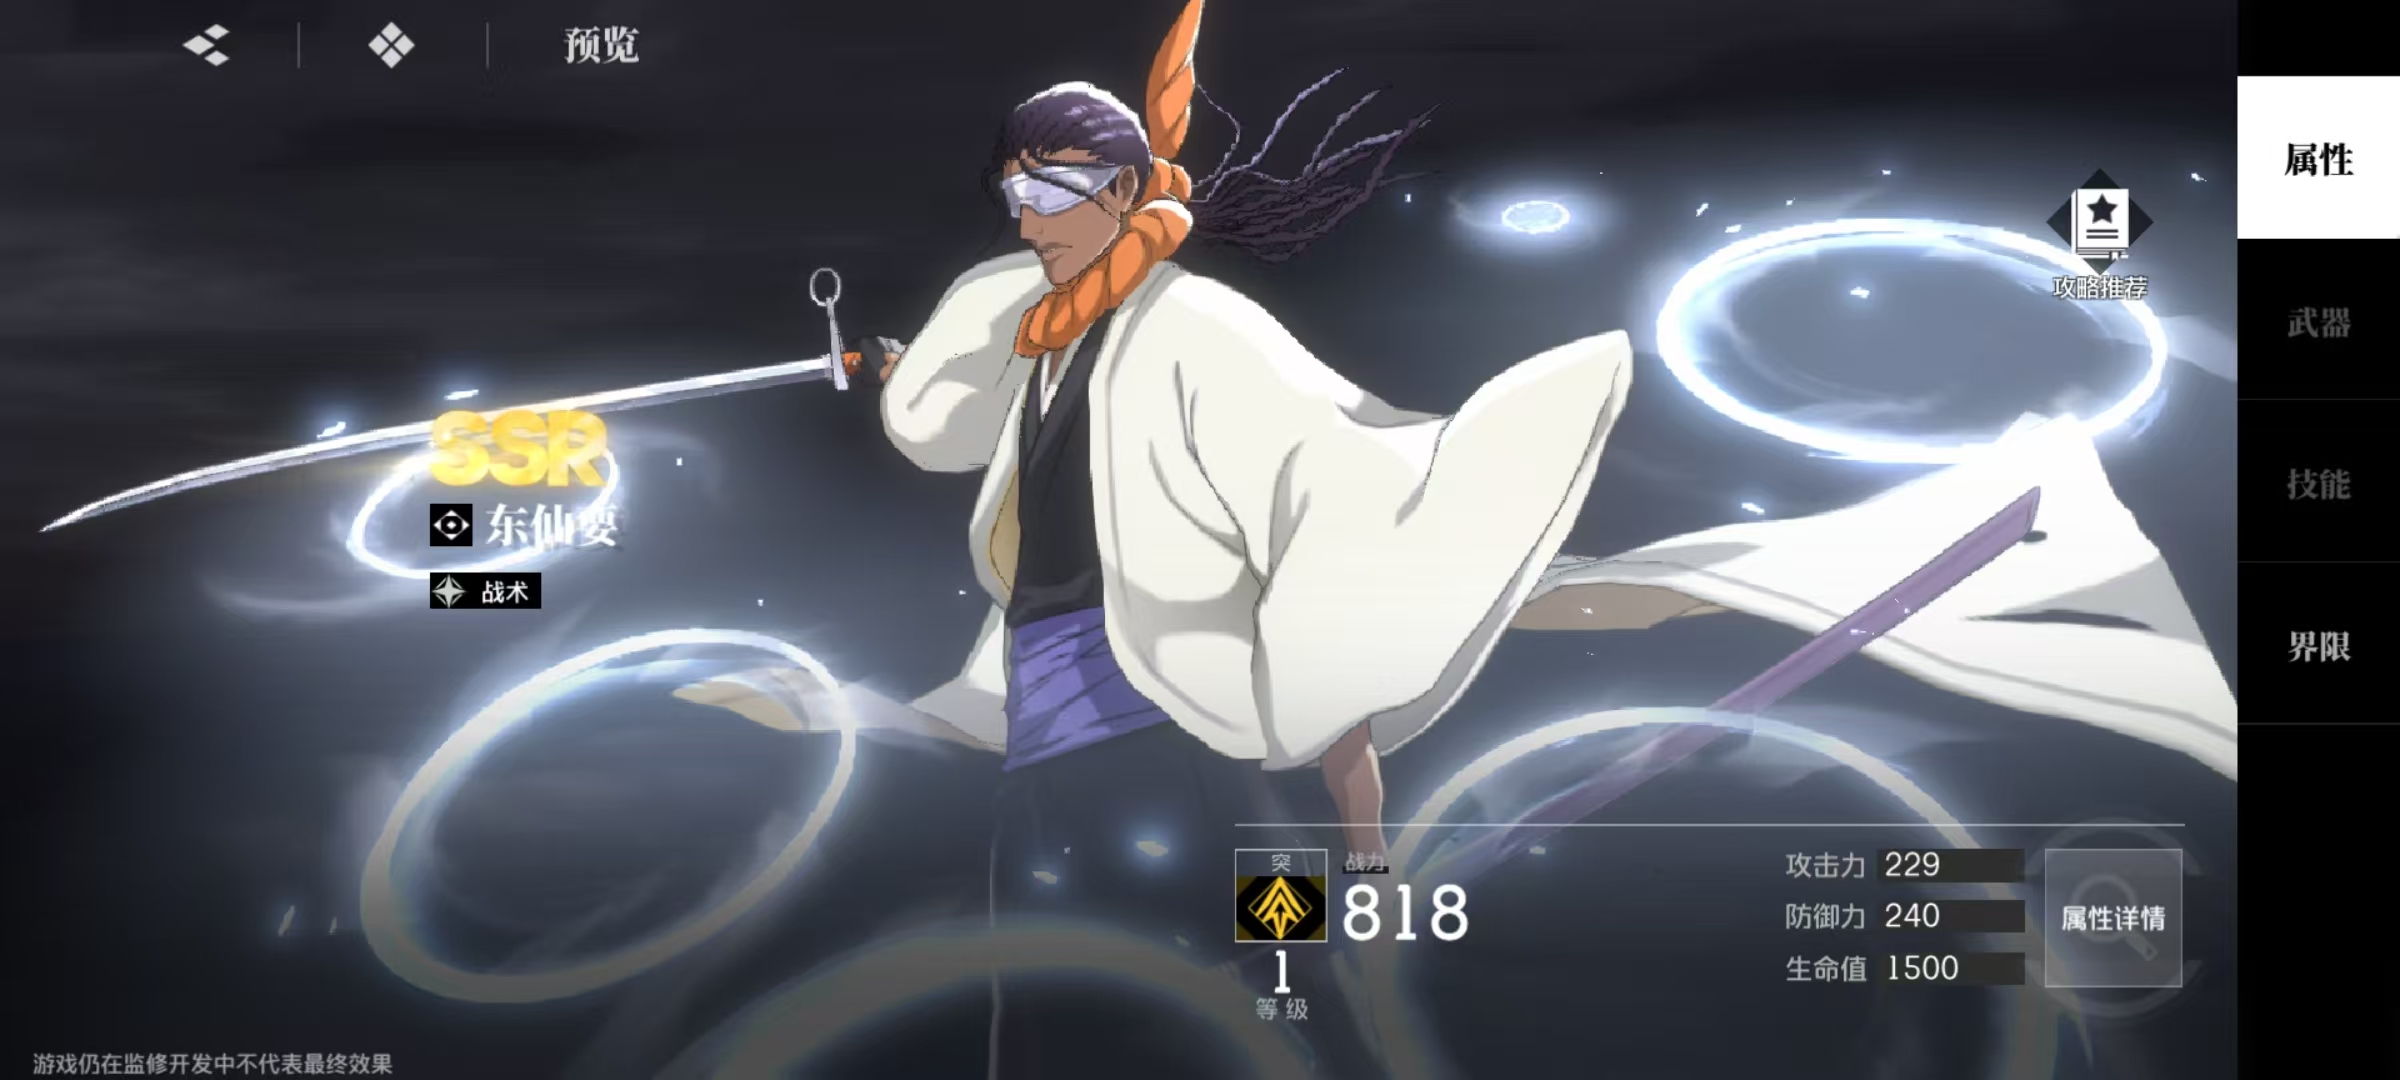
Ranked second is Byakuya Kuchiki, a tactical character who can perform powerful single-target damage and tactical support at mid-range. While maintaining high-frequency background damage, he can significantly weaken the enemy's resistance to slash attacks, and also has the advantages of team enhancement and burst damage. Ranked third is Kaname Tosen, who is also a strategic decision-maker. He performs well in terms of damage, support, and survivability. In battle, he can stack a large number of trauma states on enemies, greatly reducing their resistance to sudden attacks, and can also use his skill mechanisms to prematurely detonate the stacked trauma layers on the opponent. This early settlement allows for controllable high burst damage, and also has the advantage of enhancing the team.
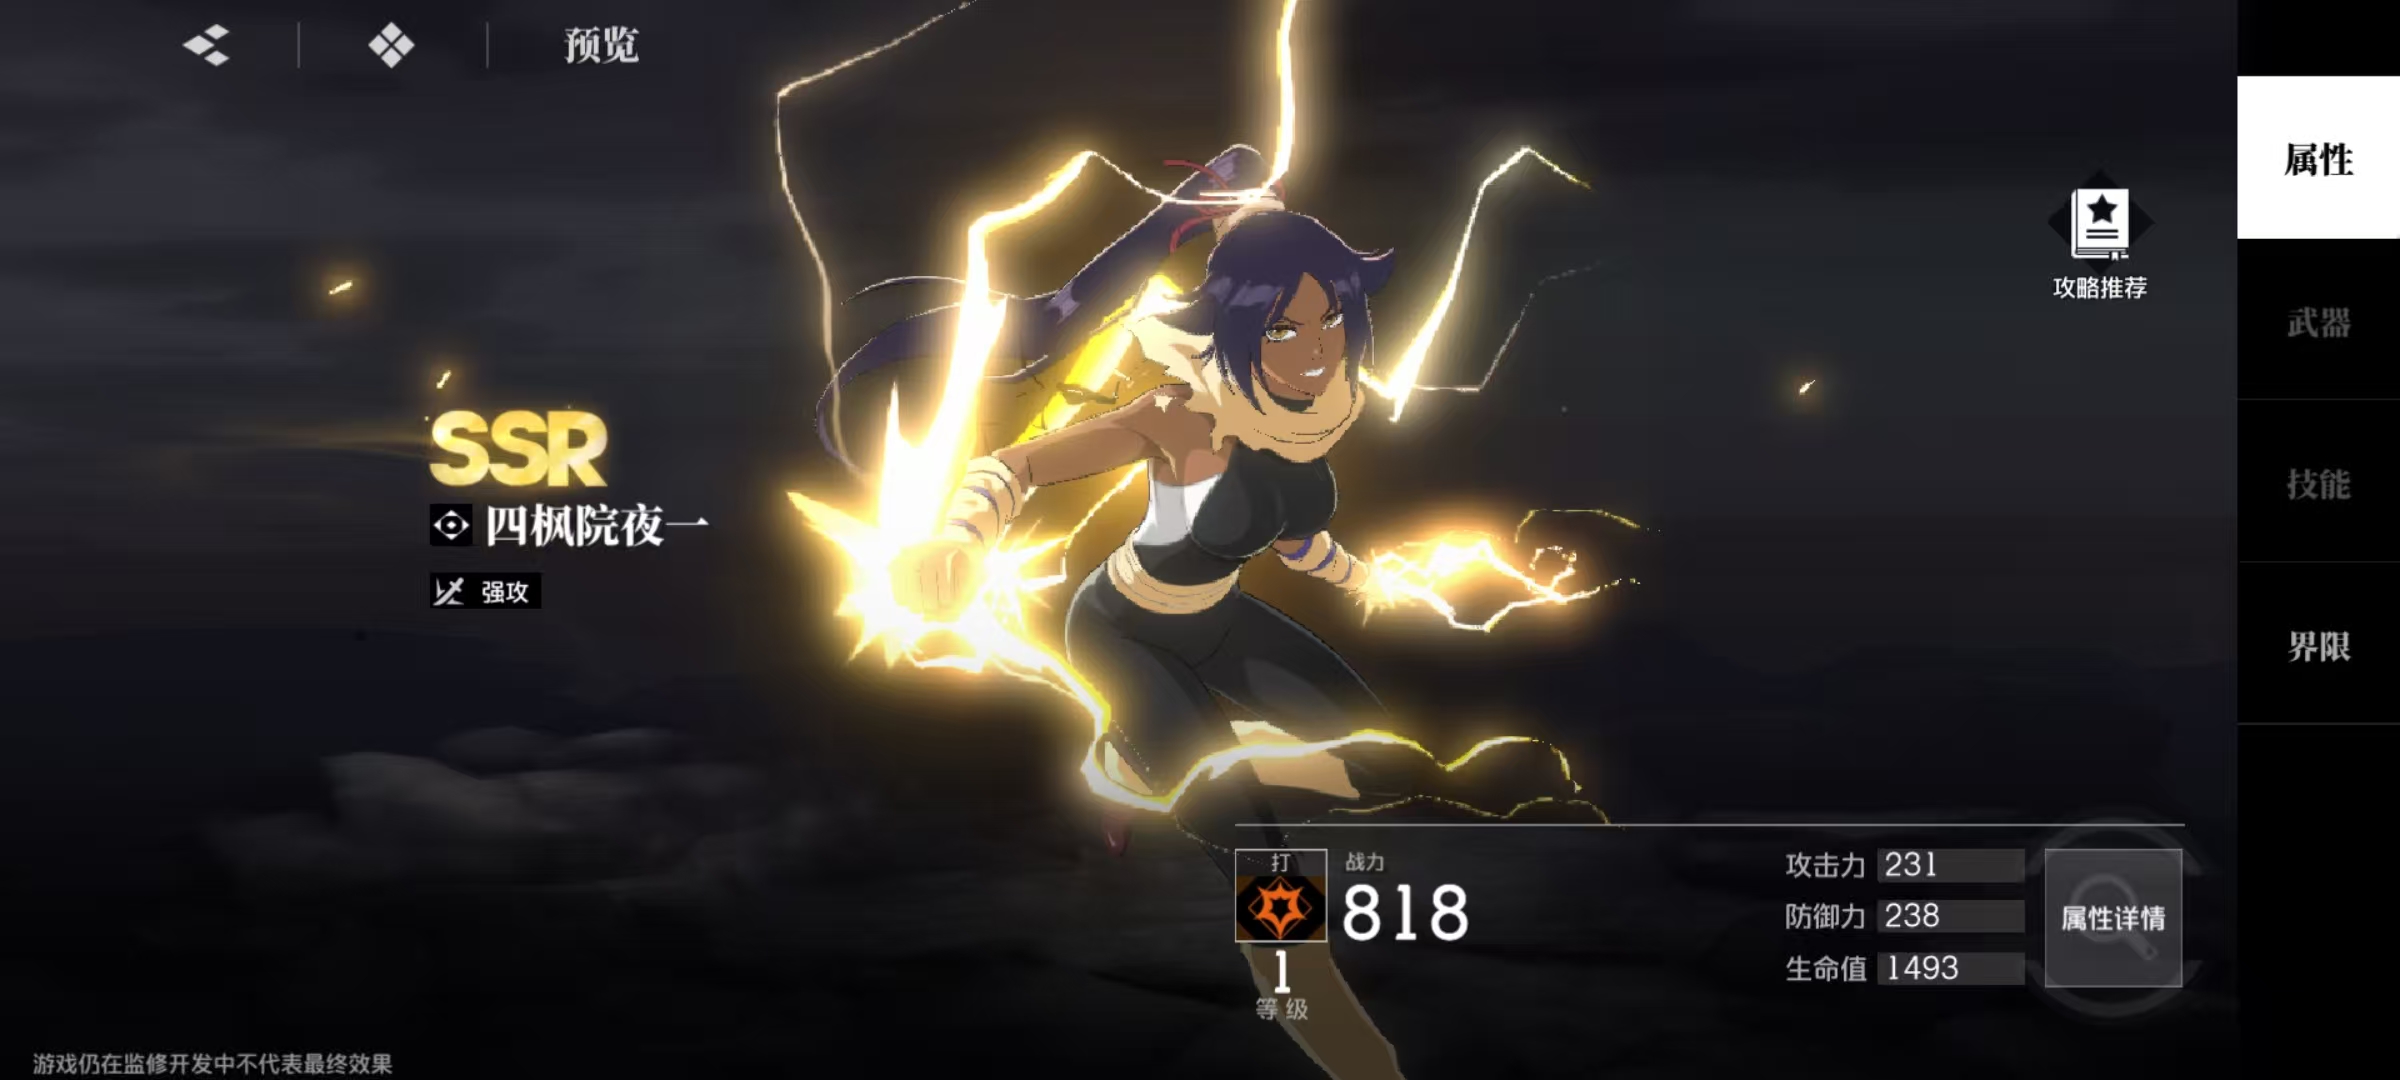
Ranked fourth is Yoruichi Shihoin, a strong offensive character who is also good at close-range single-target damage. Her core ability is dodge counterattack. As long as she can maintain combo hits, she can gain high damage bonuses, possessing the ability to continuously deal damage in battle, along with high mobility and strong survivability. Of course, using her does come with some difficulty, requiring more practice to get the hang of it.
It is hoped that the "Jingjie Dao Ming" tier list introduction brought by the editor today can help everyone better understand the currently strong characters. If you can draw these stronger characters, be sure to focus on cultivating them and practice their combat operation techniques more. This game is quite technical, and if not operated properly, the advantages cannot be fully utilized.
Ither Rhythm Tier List Sharing Which Characters in Ither Are Stronger
The rhythm chart of Yise is something many players need, as in this fantastical world, there are too many interesting characters, each with their own moves and passives, making it hard for everyone to decide which one to choose. Therefore, for the sake of everyone's gaming experience, the following rhythm chart will analyze the characteristics and advantages of various powerful characters, allowing everyone to make wise choices based on their team's needs.
1. Victor
While he is not difficult to obtain, he also has decent damage reduction and increase, suitable for early game exploration. His basic attack uses brute force to pick up a weapon and smash the opponent, dealing 90% damage in three segments to a single target. If his health is below 40% when used, he will also recover some health. His passive skill increases his attack by 16% final damage and reduces damage taken whenever his health drops by 10%. His ultimate move continuously attacks the target, dealing 120% damage in four segments, deducting 40% of his current health before releasing, and converting 120% of that into a shield.
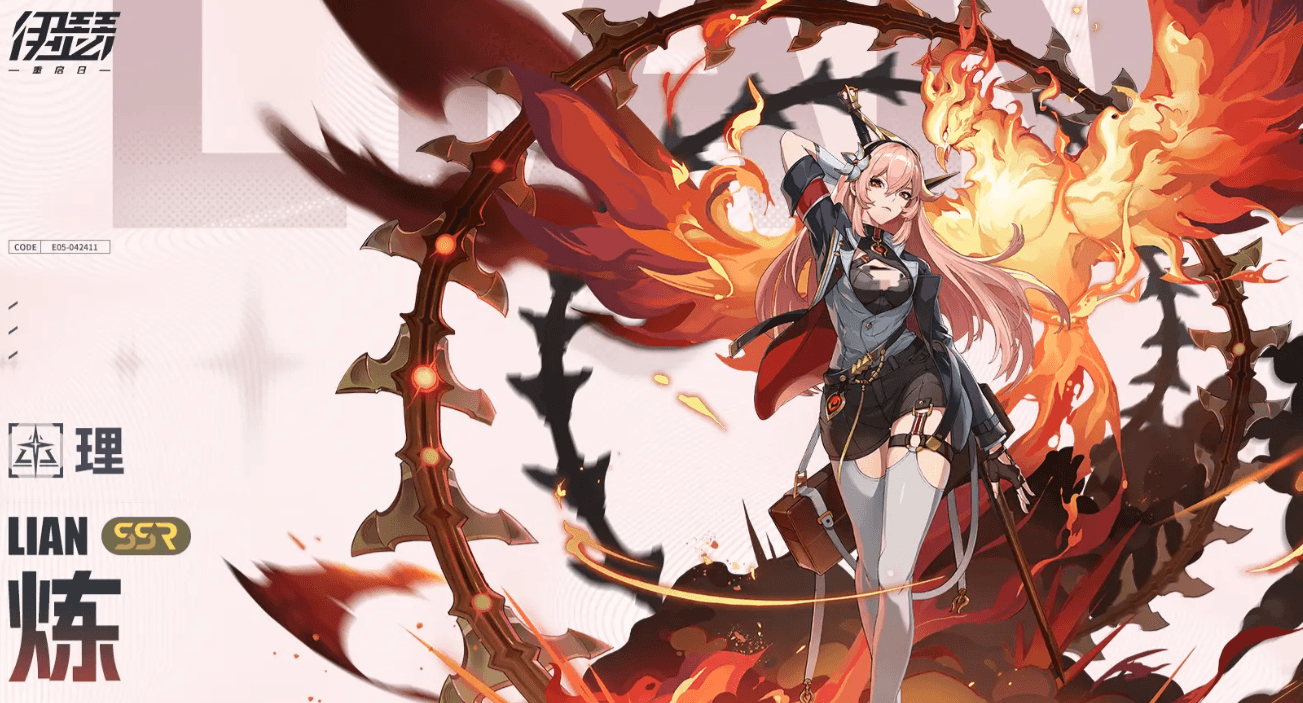
2. Lian
Lian is effective in both single-target and group scenarios. Her basic attack releases flames around her sword, performing consecutive slashes, each dealing 90% damage in three segments to a single target and recovering some health. Her passive increases her damage by 10% for every buff she has, stacking up to 5 times. Her skill fires multiple phoenixes at the target, attacking a single enemy 3 times, with an additional phoenix being fired for each buff she has. Her ultimate releases all her energy, summoning a phoenix to deal 260% damage to all enemies, with a 65% chance to absorb 20% of the target's action progress.
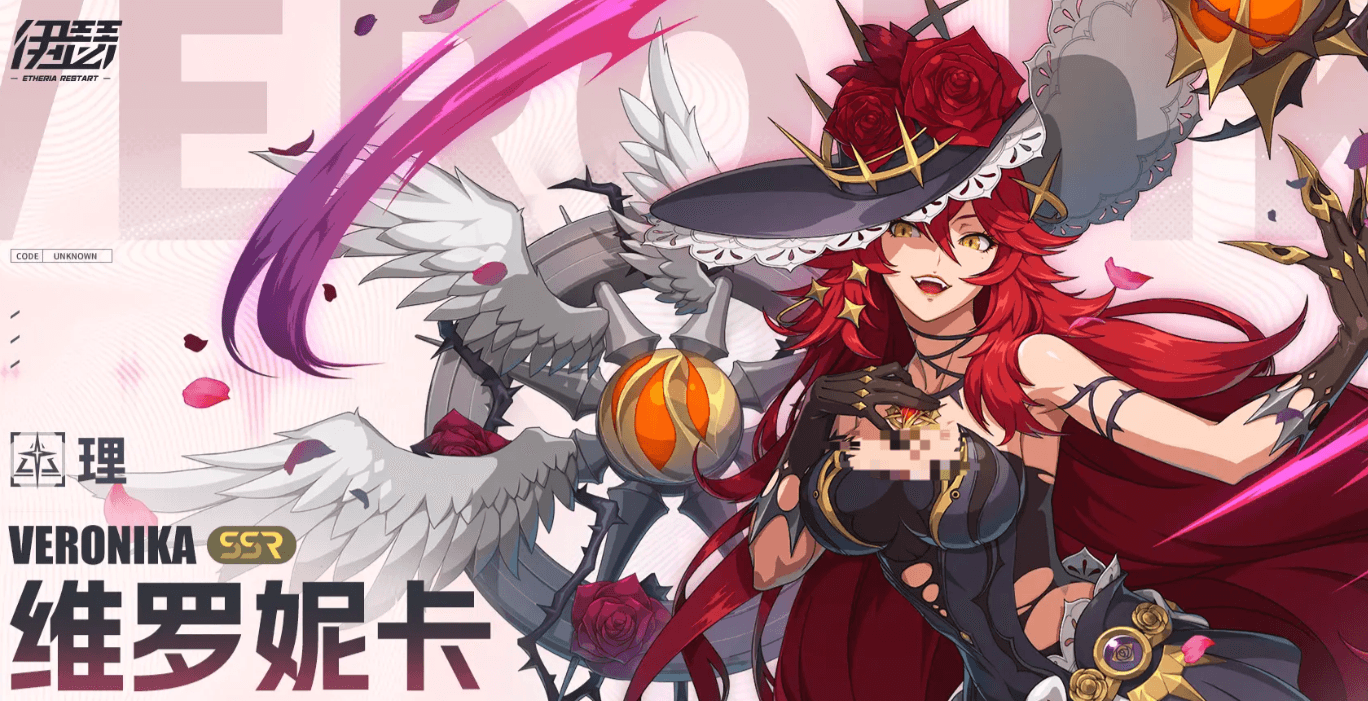
3. Veronica
She is a support character who combines damage and functionality. Her passive increases her speed by 35% when she takes damage. Her basic attack deals 240% damage to a single enemy, with a 40% chance to reduce the target's attack for 2 turns. Her skill removes a portion of the enemy's total health, equivalent to 20% of her maximum health, and then grants a 2-turn shield to all allies. Her ultimate deals 420% damage to a single enemy, steals all buffs from the target, and spreads her buffs to all allies, finally adding a 1-turn soul guard that prevents allies' health from dropping below 1 point.
4. Hyeon
Her special passive effect as a damage dealer allows her to perform exceptionally well in PVP environments. Her basic attack deals 130% damage in two segments to a single enemy, with a 25% chance to add a 2-turn healing prohibition. Her passive immediately recovers 60% of her maximum health and uses her ultimate when she is about to die, with a 4-turn cooldown. Successfully defeating a target also revives all fallen allies, and defeated enemies cannot be revived. Her ultimate consumes 50% of her current health to deal 480% damage to the enemy, ignoring 6.5% of the target's defense for every 40% of her maximum health lost.
5. Xia Da
She relies on teammates to provide buffs and passive stacks, but once fully obtained, her damage is terrifying. Her basic attack deals 90% damage in three segments to a single enemy, with a 15% chance to steal one buff from the target. When her Heartfire is at full layers, the stealing probability increases to 80%. Her passive gains 1 layer of Heartfire for every 4 buffs she receives, up to 3 layers, increasing her attack by 25% per layer. Her ultimate deals 200% damage to all enemies, with a 60% chance to reduce their defense for 2 turns. For each layer of Starfire she has, the cooldown of this skill decreases by 1 turn, and it also adds an extra 100% damage segment.
6. Diting
His mechanism is excellent; his skill marks the enemy with the lowest health, increasing the critical hit chance of the next attack on them by 60%, with any excess critical hit rate converted into critical damage. His basic attack deals 260% damage to a single enemy, with a 30% chance to add 2 turns of vulnerability. His ultimate first deals 450% damage to a single target, then raises his gun to attack the marked enemy again.
Above is the rhythm chart of Yise. Some of the characters introduced above are strong in terms of damage, while others excel in support. Everyone can choose and cultivate their teams based on their own needs, allowing them to play to their strengths and help new players smoothly embark on exciting adventures.
What is the Crocean World Rhythm Ranking? Sharing of the Crocean World Power Ranking
This game is about to launch in the Chinese server and meet everyone soon. As a game that has been operating for a long time, there is already a general ranking of character strengths. Below, I will tell you what the rhythm chart of the Misty World is. If you still don't know how to choose characters, then you must follow my steps closely. The following will bring you an analysis of the character strengths in this game, as well as sharing the characteristics of each character with everyone.
Ⅰ. T0 Strength:
1. Xiao Meng: Occupation - Attack, PVE Strength S, PVP Strength S+, BOSS Strength S+. Characteristics: Strongest single target output, part of damage ignores armor, immune to control and charm.
2. Julius: Occupation - Defense, PVE Strength S+, PVP Strength S+, BOSS Strength A. Characteristics: 3-target output, 100% armor taunt T, 3-target stun.
3. Xin Zhi: Occupation - Attack, PVE Strength S+, PVP Strength S+, BOSS Strength A. Characteristics: 3-target output, EX fixed damage, part of damage ignores armor, debuff enhancement.
4. Ashlyka: Occupation - Attack, PVE Strength S+, PVP Strength S+, BOSS Strength A. Characteristics: 99.8% damage reduction taunt T, unstable full team stun, counterattack, debuff damage reduction mobility armor.
5. Alice: Occupation - Attack, PVE Strength S, PVP Strength S, BOSS Strength S+. Characteristics: 2-target output, immune to control.
6. Rodnia: Occupation - Attack, PVE Strength S, PVP Strength S, BOSS Strength S+. Characteristics: Strongest single target output, most damage ignores damage reduction coefficient, immune to continuous damage.
7. Charisa: Occupation - Attack, PVE Strength S+, PVP Strength S, BOSS Strength A. Characteristics: 3-target output.
8. Leafa: Occupation - Defense, PVE Strength S+, PVP Strength A, BOSS Strength S. Characteristics: 95.1% damage reduction T, normal attack 30% recovery, focus fire, debuff all abilities.
9. Klim: Occupation - Support, PVE Strength S+, PVP Strength S, BOSS Strength A. Characteristics: Single target support, sequential single target mental disruption.
10. Qu: Occupation - Support, PVE Strength S, PVP Strength S, BOSS Strength S. Characteristics: 3-target support, percentage recovery, buff armor damage reduction, dispel control.
11. Skadi: Occupation - Attack, PVE Strength S, PVP Strength S, BOSS Strength S. Characteristics: 2-target output, 80%+ fixed damage.
Ⅱ. T1 Strength:
1. Mo Jun: Occupation - Defense, PVE Strength A, PVP Strength S+, BOSS Strength A. Characteristics: 384% damage reduction taunt T, normal attack 18% recovery, debuff attack critical rate.
2. Lulula: Occupation - Defense, PVE Strength S, PVP Strength S, BOSS Strength A. Characteristics: 330% damage reduction taunt T, immune to charm.
3. Jing: Occupation - , PVE Strength S, PVP Strength S, BOSS Strength S. Characteristics: 100% armor taunt T.
4. Aletha: Occupation - Defense, PVE Strength S, PVP Strength S, BOSS Strength A. Characteristics: 98.0% damage reduction T, 3-target mental disruption.
5. Franca: Occupation - Support, PVE Strength S, PVP Strength A, BOSS Strength S. Characteristics: 3-target support, buff attack critical rate.
6. Ying Cao: Occupation - Support, PVE Strength S, PVP Strength A, BOSS Strength S. Characteristics: 3-target support, buff attack critical rate.
7. Cynthia: Occupation - Defense, PVE Strength S+, PVP Strength A, BOSS Strength B. Characteristics: 3-target output, damage ignores evasion reflection, debuff reflection.
8. Vespal: Occupation - Firepower, PVE Strength S+, PVP Strength A, BOSS Strength B. Characteristics: 3-target output, 6 teammates skip charging.
The above is the guide on what the rhythm chart of the Misty World is, provided by the editor. The editor summarized the positioning of the above-mentioned characters and their practical strength in various scenarios. You can choose based on your actual needs, hoping to be helpful to everyone.
What is the beehive in Don't Starve Together? Introduction to the beehive in Don't Starve Together
In Don't Starve Together, the Beehive is not only the home of bees but also an important way for players to obtain valuable resources such as honey and beeswax. "What is the Beehive in Don't Starve Together"? The Beehive in the game does more than just produce honey; it will refresh into a more advanced Beehive at specific times. This article will detail the functions of the Beehive, construction methods, and usage tips.
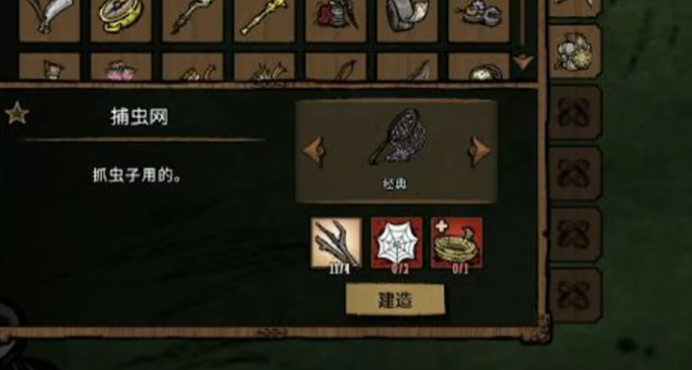
The Beehive in Don't Starve Together has two main functions: one is to produce honey, and the other is to serve as a habitat for bees. Honey is an important food source that can restore the player's health and hunger. Additionally, honey can be used to make various delicacies and potions, enhancing the player's survival capabilities. Moreover, flowers around the Beehive will attract butterflies, providing additional resources for the player. To build a Beehive, players first need to unlock Science 2, then collect four bees, which can be caught using a Bug Net.
The Bug Net requires Science 1 to unlock and is made using two spider webs, four twigs, and one rope. Finally, use the Science Machine to craft four planks from wood. After collecting all materials, open the crafting menu next to Science 2, find the Beehive option and click to craft. Once completed, place the Beehive in the desired location and wait for the bees to move in and start producing honey. Planting flowers around the Beehive can attract more bees, increasing honey production. Additionally, flowers will attract butterflies, providing extra resources.
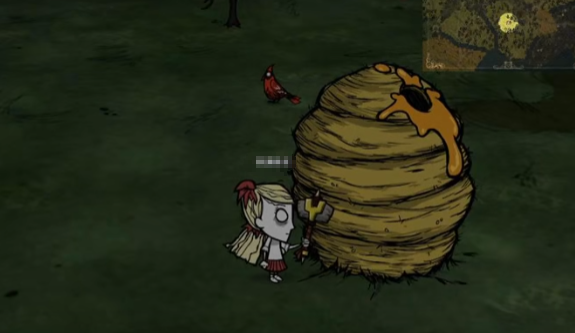
In Don't Starve, the frequency of honey collection varies by season. Generally, honey can be collected daily in autumn, every two days in spring and summer. In winter, since bees are inactive, no honey can be collected. When collecting honey or approaching the Beehive, be cautious of bee attacks, especially Killer Bees, which actively attack players. Therefore, it's best to wear protective gear or use ranged tools when collecting honey. Besides honey, bees also drop valuable resources like beeswax. Beeswax can be used to make various practical equipment and items, such as wax candles and wax armor.
Well, the Beehive in Don't Starve Together is an important resource production point. By building and using the Beehive, players can obtain abundant honey and other valuable resources. When building and using the Beehive, players should pay attention to collecting materials, planting flowers, regular harvesting, and preventing bee attacks to maximize the utilization of this resource point.
Recommend


Strategy

A Guide to Zhetian Fanchen Yiyue Sharing Tips for New Players on How to Play Zhetian Fanchen Yiyue
Introduction to the Public Beta Time of Zhetian Fanchen Yeyi When is the public beta for Zhetian Fanchen Yeyi?
How is Zi Yue from Zhetian Fanchen? Introduction to Zi Yue from Zhetian Fanchen
What are the Luhida Origin redemption codes? Sharing of Luhida Origin mobile game gift codes
Lu Xida Origin Team Recommendations Lu Xida Origin Team Guide
Lu Xida Origin Strategy Sharing: Beginner's Guide to Lu Xida Origin
