
Watcher of Realms
Game Introduction


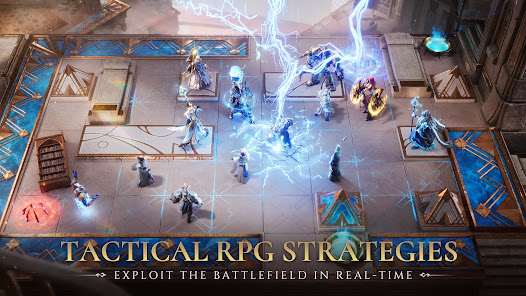


Hot Strategy
Overview of Overwatch NERF Crossover Content What are the contents of the Overwatch NERF crossover event?
This Overwatch 2 NERF collaboration officially launched on August 5, 2025, with the toy brand NERF, and the event will last until August 18 (a total of 14 days). The following article will provide an overview of the Overwatch NERF collaboration content, which will focus on weapon skins, showcasing a fun and vibrant color scheme inspired by foam toys. It also includes an exclusive brawl mode. If you're interested, keep reading.

【biubiu Accelerator】Latest Version Download
》》》》》#biubiu Accelerator#《《《《《
1. Overview of Core Collaboration Content
1. Exclusive Game Mode: NERF or Nothin’
Rules: An 8-player free-for-all, with the first player to achieve 20 eliminations winning.

Hero Mechanics:
Heroes are randomly assigned at the start (Mercy and Valkyrie do not participate in this mode);
Heroes change after each elimination; if no elimination is achieved, the hero changes after three deaths, and no hero is repeated throughout the game;
All skill cooldowns are reduced by 80%, ultimate charge is retained upon death, and resets to 15% when switching heroes.
Map Pool: Includes 10 selected maps such as King's Row, Hollywood, Dorado, Eichenwalde, Blizzard World, and Paris.
2. NERF-Themed Weapon Skin List
Free to Obtain:
Tracer: Gelfire Pros (unlocked by completing event challenges).

In-Store Direct Sale/Bundles: (All weapon skins can be equipped independently and combined freely with existing hero appearances.)
Cassidy: Legendary skin (includes NERF Maverick pistols + Vortex Football grenades);
Genji: Slingerang (shuriken) + Power Blast Bat (super power baseball bat);

Baptiste: Loadout Galactic Commander;

Hanzo: Big Bad Bow;

Mei: Super Soaker XP100, classic water gun design;

Soldier: 76: N Series Pinpoint.

3. Event Rewards and Challenges
Free Rewards: Unlockable by completing in-game challenges, but note that progress is limited, and rewards can only be obtained through the "NERF or Nothin’" mode.

Themed sprays, player icons, foam dart weapon charms;
Tracer exclusive weapon skin "Gelfire Pros";
40,000 Battle Pass experience (accelerate season progress).
4. In-Store Limited Bundles
NERF Super Bundle: Includes all 7 weapon skins for one-click collection; individual skins can also be purchased separately, requiring "Overwatch Coins."

This collaboration is the first time Overwatch 2 has focused on weapon skins rather than hero appearances. The development team emphasized that the iconic orange and yellow colors, plastic texture, and exaggerated structure of NERF toys must be realized while maintaining the contours of the heroes' weapons. For example, Mei's Super Soaker needs to maintain the size ratio of her original freeze gun. Cassidy's legendary skin even reimagines the character: the brim of the hat is flipped, the arm is NERF-ified, and even the ammo belt is replaced with foam darts.
To quickly complete the challenges, it is recommended to focus on playing "NERF or Nothin’" to unlock Tracer's skin and experience rewards. If you are interested in the new weapons, you can try them out in the mode before deciding whether to purchase the in-store skins. Finally, for game settings, it is suggested to enable high frame rate mode and take advantage of the 80% cooldown reduction to perform high-frequency combos.
Of course, a good internet connection is essential, and you can use the biubiu Accelerator, which has been upgraded with a new technology architecture, using the Pallas 3.0 engine (dynamic multi-line optimization/AI anti-jitter), and also features an esports dedicated line tuned by champion player Aixleft (Xiaodingdong). Be sure to give it a try.

Currently, there are also user benefits upgrades, with the code 【biubiu never disconnects】you can directly add 72H. If it's a new account, the system will automatically give the account 24H, totaling up to 96H. Enter the specified code, and it takes effect immediately. Call your gaming buddies to claim it together.

The Overwatch NERF collaboration event content has been fully introduced. This event attracts players with a "low barrier, high reward" design of free rewards (such as Tracer's skin and 40,000 experience points). The classic elements of NERF toys (like the Super Soaker water gun and foam darts) are integrated into the game, evoking childhood memories for multiple generations of players. It looks like a lot of fun, so come and see it in the game.
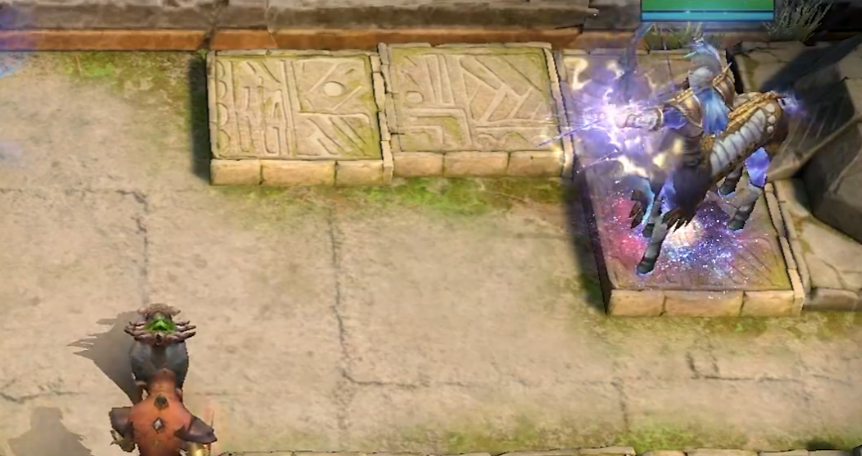
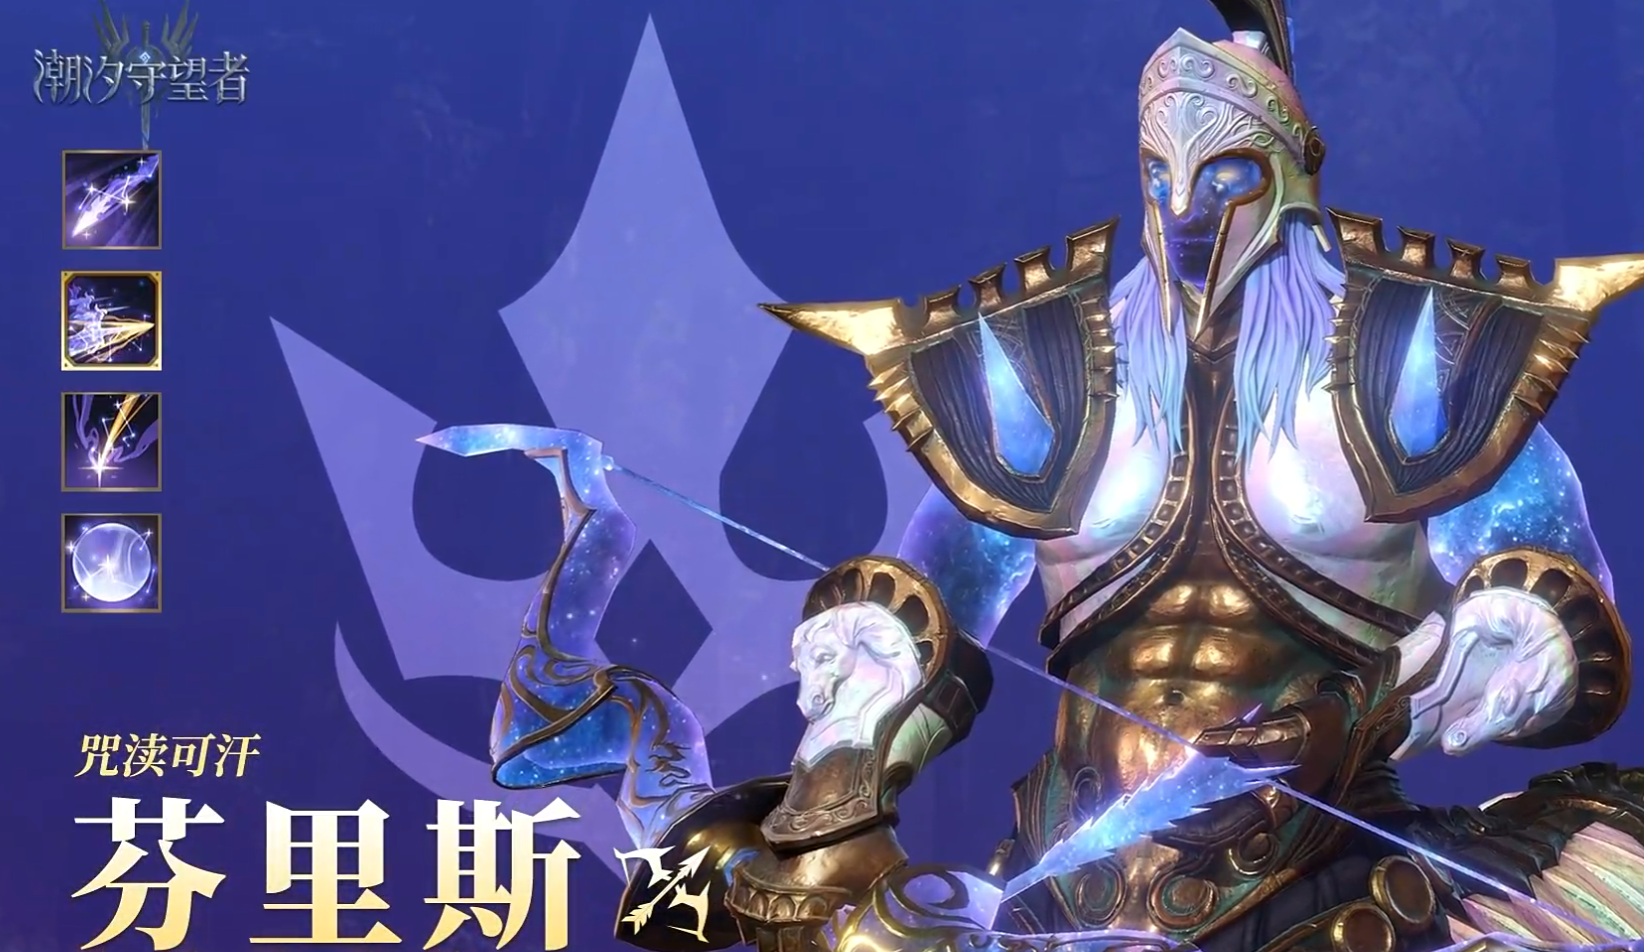
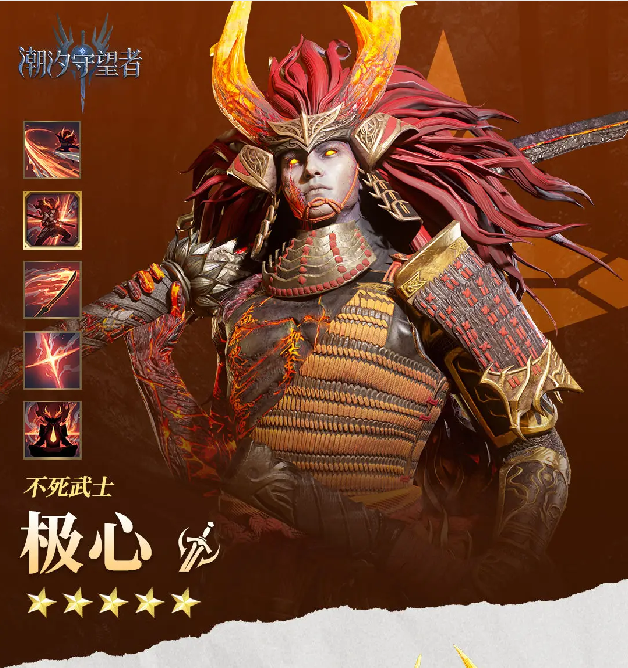
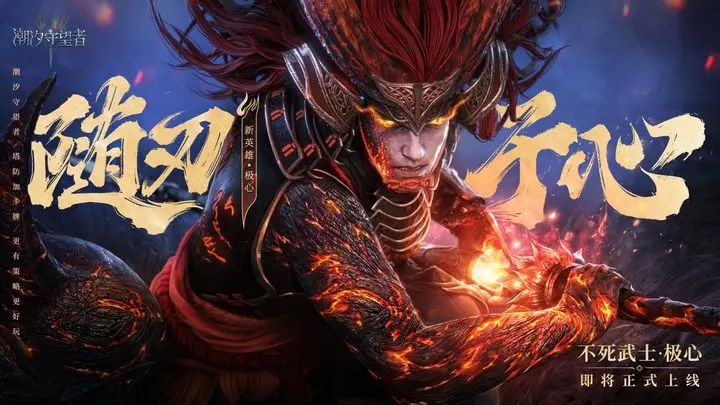
Tide Watcher Fenris Introduction How is Tide Watcher Fenris?
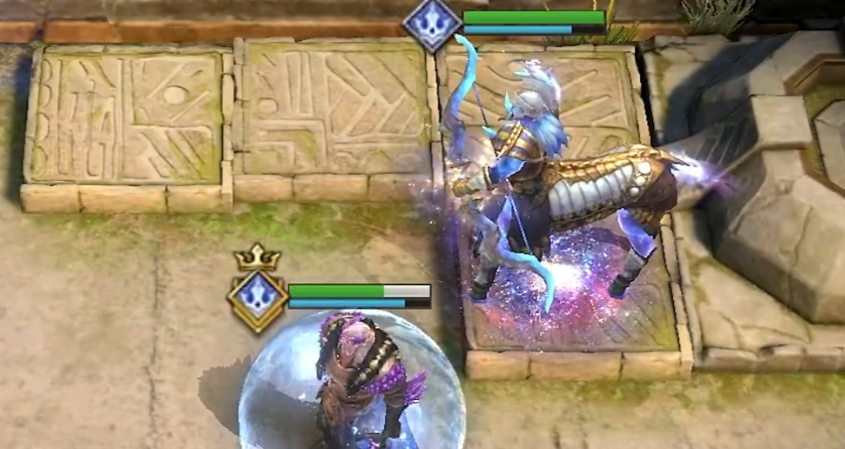
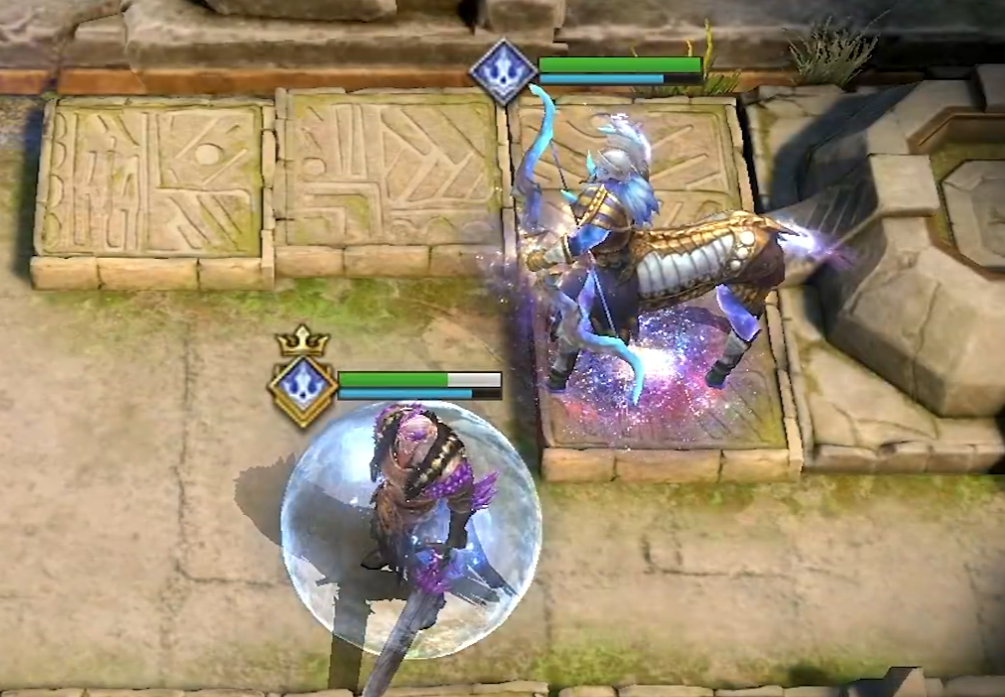
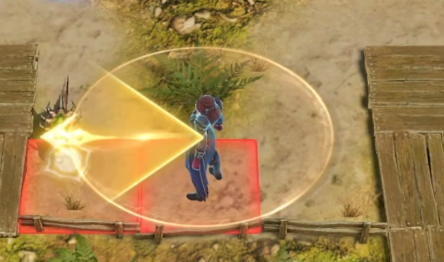
Tide Watcher Fenris, as the brand new 5-star legendary hero in the Polaris version, has sparked a lot of discussion among players upon its reveal. Everyone is both excited and doubtful - is this hero worth drawing? Today, I will bring you an introduction to Tide Watcher Fenris. The answer is actually not complicated; the key lies in your need for the lineup. If you are looking for a powerful shooter who can provide area damage, buffs, and have some control abilities, Fenris is definitely a good choice.
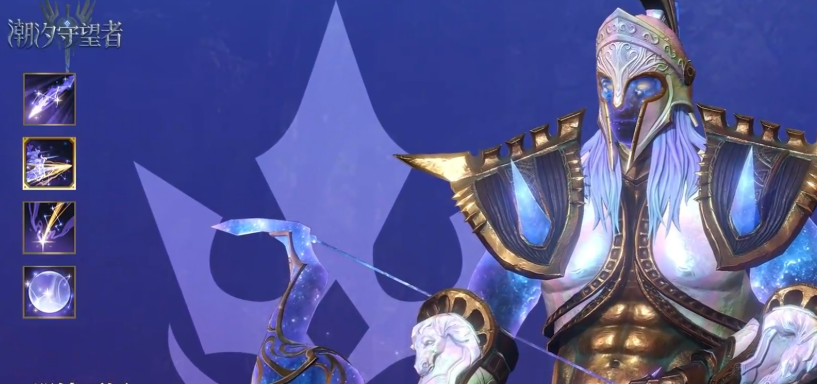
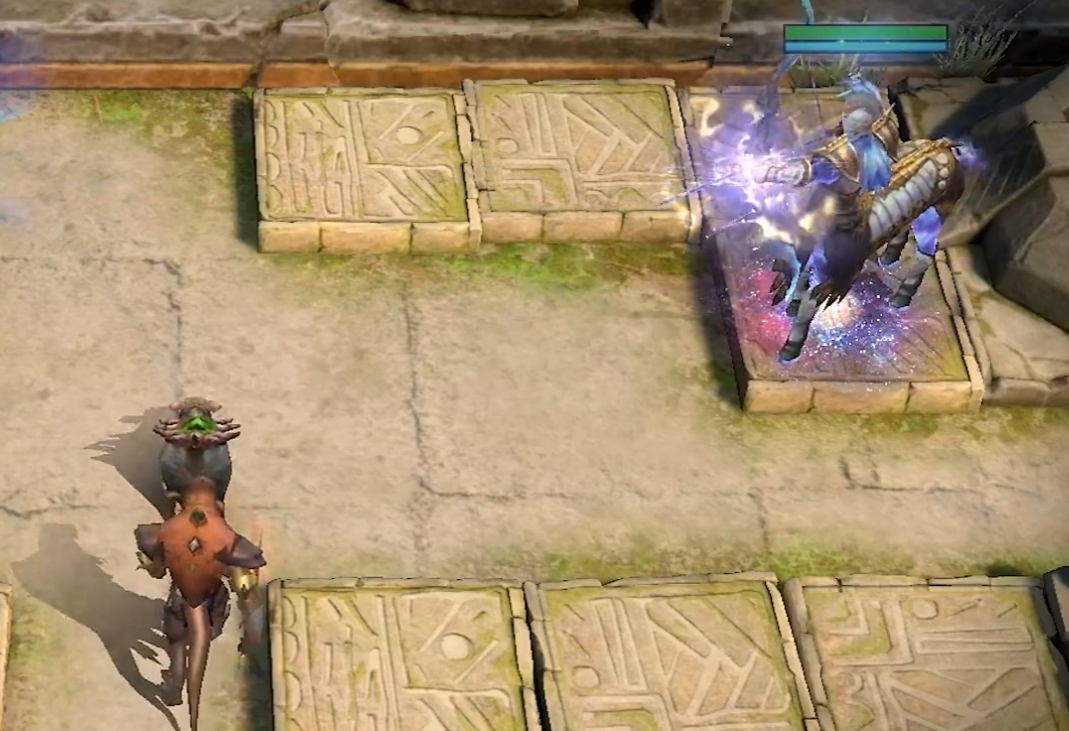
Firstly, Fenris's basic attack characteristics are quite impressive. It can attack up to five enemies and prioritizes airborne units. This allows Fenris to efficiently provide stable damage output when facing aerial enemies. Although the damage value itself may not be lethal in one hit, its consistent multi-attack effect is sufficient to deplete the enemy's stamina over prolonged battles.
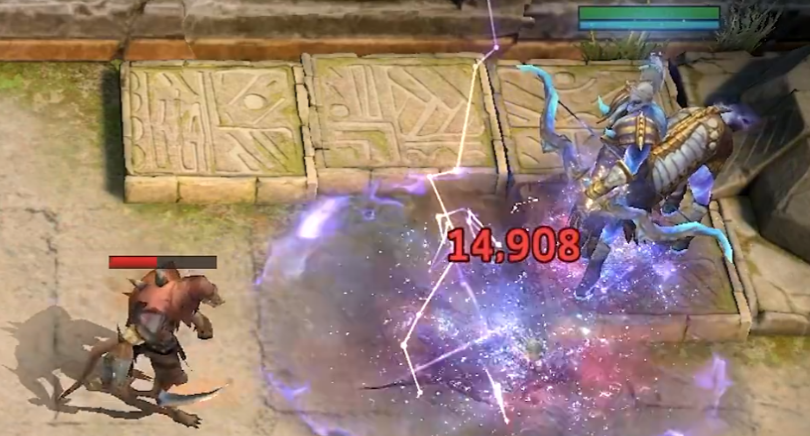
Fenris's auto-skill "Stellar Burst" provides him with excellent area damage capability. Whenever an enemy enters the attack range, this skill deals 300% damage to a target and also affects up to five surrounding enemies, causing 220% damage. The mechanism that triggers every 12 seconds ensures Fenris maintains a high frequency of output during battles, especially when the enemy group is dense, making this skill particularly effective.
More interestingly, Fenris's "Shield Blessing" skill is more than just a regular buff; it triggers rage recovery on allies with shields. For Fenris himself, if he has a shield, his rage recovery speed gets an additional 1% boost. This mechanism provides very practical energy accumulation for the entire team, especially beneficial for those teammates who rely on skill output.
His talents should not be overlooked either. When Fenris carries a shield, his basic attack range is increased, meaning he can attack enemies from a greater distance. This not only reduces the risk of being exposed to the enemy's attack range but also effectively slows down the enemy's approach, enhancing survival capabilities.

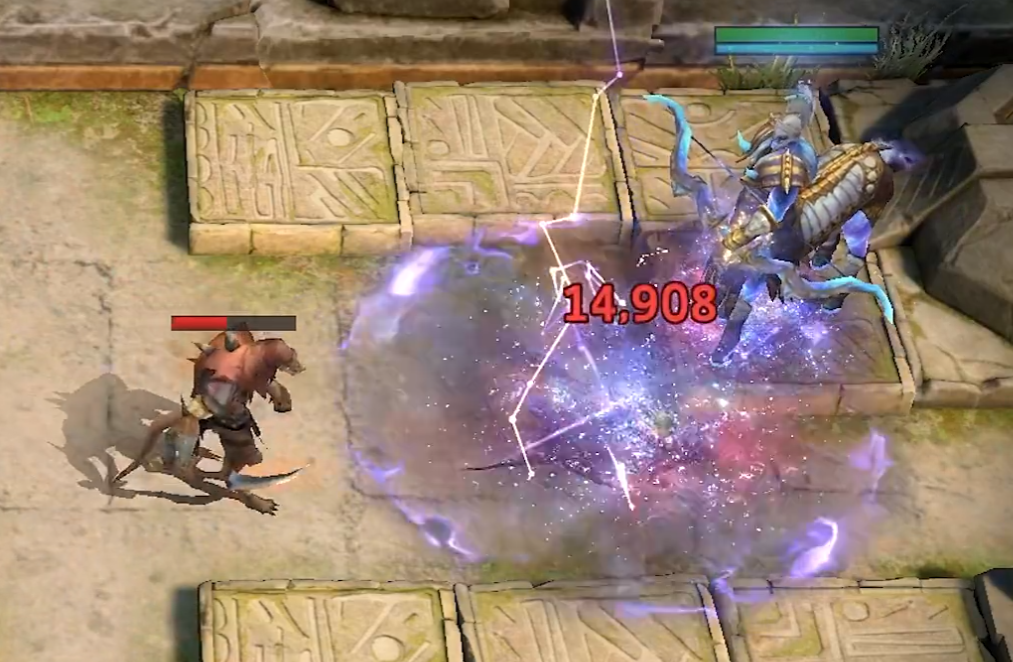
As for the ultimate skill "Tidal Star," Fenris takes it up a notch. This skill not only deals 600% area damage to up to 10 enemies but also comes with a stun effect, completely disrupting the enemy formation for a short time. After using the skill, Fenris also gains a fairly substantial shield lasting 10 seconds, with the shield value equivalent to 50% of his maximum health, providing extremely strong survival assurance.
The above is the content of the introduction to Tide Watcher Fenris. Fenris is a hero very suitable for various tactical configurations. If you encounter him while drawing cards, consider adding him to your team for a try. His area damage, control, and shield buff effects can add a lot of color to your battles. In both regular dungeons and arenas, Fenris can provide strong support and output for your lineup.
How is Fenris the Tide Watcher? Analysis of Fenris the Tide Watcher's Strength
Tide Watcher Fenris, as a brand new 5-star legendary hero, has been confirmed to officially debut in the "Polar Heart" version. Many players are very excited after hearing this news, but at the same time, they are also quite conflicted about whether to draw him or not. So, how is Fenris? This article will introduce his skill analysis and strength, providing a reference for those who are conflicted. If you want to know more, keep reading below.
Fenris's basic attack can hit up to 5 enemies, causing 100% damage. This basic attack prioritizes attacking enemy air units. His auto-skill "Starburst Arrowfall" triggers when an enemy enters his attack range, dealing 300% damage to a single target and 220% damage to up to 5 additional enemies around it. This auto-skill triggers every 12 seconds.
His "Shield Blessing" provides rage recovery effects to teammates who have shields on the field. If he himself has a shield, he gains an additional 1% rage recovery. His talent increases his basic attack range when he carries a shield, allowing him to attack enemies further away.
His ultimate move "Tidal Star" knocks back up to 10 enemies within its range with a force of 2, dealing a total of 600% area damage to them, and simultaneously inflicting stun. Finally, it grants him a shield equal to 50% of his maximum health, lasting for 10 seconds.
Fenris has a basic attack that targets air units, can cause various area damages, and helps himself and his teammates gain rage recovery benefits. Moreover, his ultimate move can directly stun multiple enemies. Overall, he is a fairly functional area-of-effect shooter. Although his overall damage output is not extremely high, placing him in the North Mirror faction should yield unexpected results.
The strength analysis of Tide Watcher Fenris ends here. After reading, if you like him, you can go to the game and try to draw him. Finally, I hope every player can successfully draw Fenris, build a strong lineup with him, and help clear various stages to achieve victory.
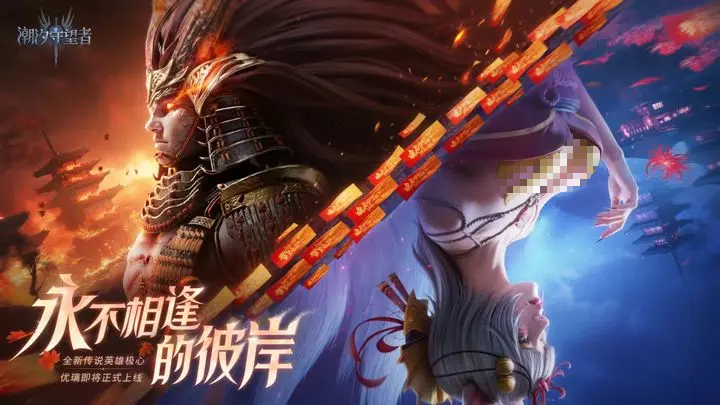
Tide Watcher Yuli Introduction How is Tide Watcher Yuli
The brand new five-star hero "Phantom Flame Nine-Tailed Fox · Yulie" in Tidal Watcher has attracted a large number of players' attention as soon as it was launched. Her enchanting artwork, combined with the powerful bond bonuses, is destined to make her a highly sought-after target. Today, I will introduce Yulie from Tidal Watcher. Yulie not only has a charming appearance but also performs impressively in battle, possessing strong offensive capabilities and formidable survivability.

Yulie's basic attack design is very unique, with a wide range, and her basic attacks prioritize airborne units, hitting them accurately no matter how high they fly. Each of her basic attack combos has an amazing effect, hitting enemies within range twice, each dealing 50% damage. Whenever her basic attacks reach 6 times, her innate skill triggers, sending out the Spirit Fox Orb, dealing a significant blow to the enemy. This skill not only attacks a single target but can also affect up to 4 surrounding enemies, dealing 160% of her attack power as damage, and randomly selecting enemies within the area to continue outputting, continuously dealing 50% damage.
More notably, Yulie's skills work together seamlessly, especially her passive skill "Fox Enchantment," which gives her greater control when attacking enemies. The activation of her innate skill and ultimate move will add a defense reduction effect on the enemy for 3 seconds. During this time, the enemy is more susceptible to Yulie's true damage attacks. This means that Yulie can not only deal impressive damage in a short period but also help reduce the enemy's defenses, significantly boosting the team's overall damage output.
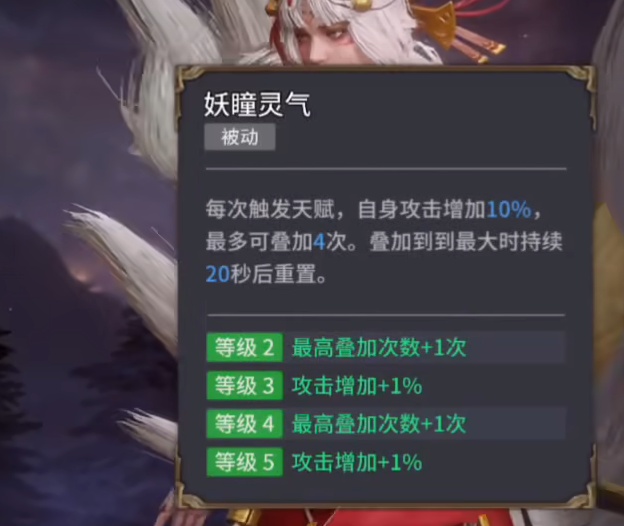
Yulie's second passive skill, "Spirit Eye Aura," is one of her secret weapons for damage output. Every time her innate skill triggers, it increases her attack power by 8%, stacking up to two times, fully enhancing her combat potential. When stacked to the maximum, this effect lasts for 20 seconds, giving her a powerful sustained damage capability. During this time, her attack power gradually increases, making Yulie a much more threatening presence in battle. This passive skill not only makes her damage output more violent but also perfectly embodies her trait of becoming stronger as the battle progresses, making her increasingly difficult to defeat in high-intensity confrontations.
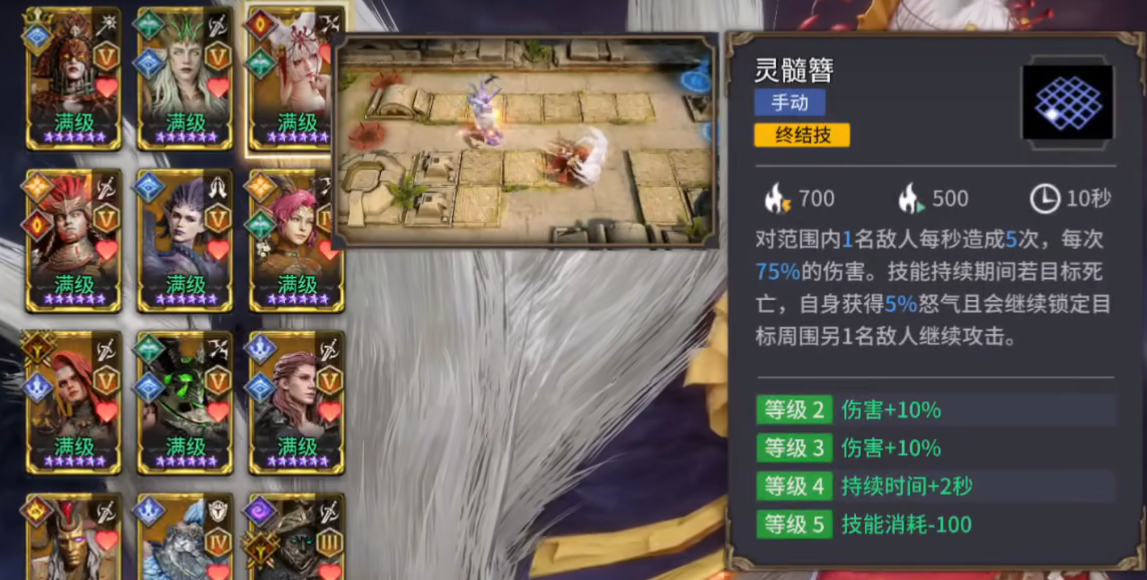
As for her ultimate move, "Spirit Essence Hairpin," it is also a striking feature. It attacks the designated enemy 5 times per second, each dealing 55% damage. A special design is that if the enemy dies during the skill duration, Yulie gains 5% rage and continues to lock onto other enemies around the target, continuing the attack. This sustained damage output ability allows her to play a significant role whether in clearing the field or countering the enemy's core, making it a fantastic skill that must be used strategically to ensure delivering overwhelming damage, thus winning the match.
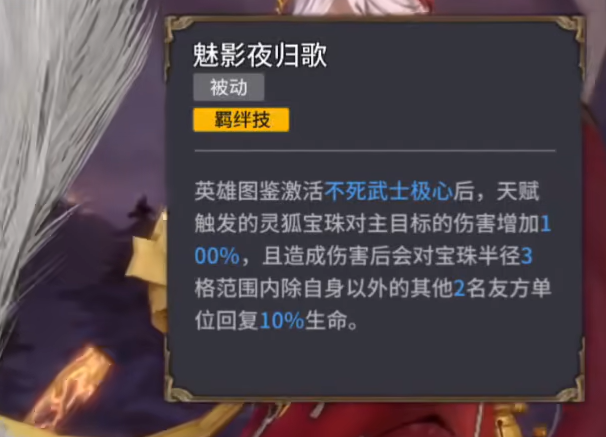
If you activate the bond skill "Phantom Night Return Song" with Jixin, Yulie's innate skill will further increase its damage, with the Spirit Fox Orb's damage increasing to 100%. Additionally, after the skill is released, she will also restore 10% health to 2 friendly units around her. This effect not only enhances Yulie's damage output but also provides survival assurance for her teammates, allowing them to continue fighting safely in the team. This way, players can unleash even greater strength in this team composition, ensuring effective team output and not dragging the team down.
This is the content of the introduction to Yulie from Tidal Watcher. Yulie is a very versatile hero who not only provides significant help in terms of damage output but also reduces the enemy's defenses and boosts her teammates' survivability through her skills. Her skill mechanics are also well-suited for high-frequency attacks, allowing her to accumulate more advantages in battle. If you have enough resources, it is absolutely worth investing in her and letting her play the most valuable role in your lineup.
How to Play TideWatcher Yuli Introduction to TideWatcher Yuli's Skills and Gameplay
How to play Tide Watcher Yuli? Yuli is a brand new 5-star legendary hero about to be released alongside Extreme Heart. The artwork of "Phantom Flame Nine-Tailed Fox · Yuli" looks absolutely stunning and full of allure, naturally making many players very eager to get this character. However, players are even more eager to learn about the character's skill set and gameplay in advance. This guide will introduce the skills and gameplay of this character, so let's learn together.

The talent effect triggers after every 6 normal attacks. At this point, she throws out a spirit fox orb dealing 160% attack damage to the target and 4 surrounding enemies. Then, it continues to deal damage 6 times randomly within the range, with each hit dealing 50% damage.
Normal Attack: Attacks a random enemy unit within range twice, each hit dealing 50% damage. Normal attacks will prioritize airborne units. Passive 1 "Fox Charm," the talent and ultimate skill will apply a 3-second defense reduction effect on hit targets, making enemies with reduced defense more susceptible to true damage.

Passive 2 "Spirit Aura," each time the talent is triggered, her attack power increases by 8%, stacking up to 2 times. When the maximum stack is reached, it resets after 20 seconds. Ultimate Skill "Spirit Essence Hairpin," attacks one enemy within range 5 times per second, with each hit dealing 55% damage. If the enemy dies during the skill, she gains 5% rage and will continue to lock onto another unit near the target for further attacks.

Bond Skill "Phantom Night Song," after activating Undying Samurai Extreme Heart in the hero codex, the spirit fox orb triggered by the talent deals 100% damage to the primary target. After dealing damage, it also heals 10% HP to 2 other friendly units within a 3-tile radius, excluding herself.

Have you all learned how to play Tide Watcher Yuli? This brand new 5-star marksman hero not only has considerable damage output but also comes with some additional buff effects. She has strong sustained attack capabilities and even possesses some healing abilities. Those with resources should definitely try to acquire her.
Tide Watcher Jixin How is Tide Watcher Jixin? Analysis of Tide Watcher Jixin's Skill Strength
How is Tide Watcher Jixin? Jixin is a brand new five-star legendary hero introduced in the game, set to officially launch on 7.17. This is a warrior struggling at the boundary between humans and demons, wielding a demon blade and using unparalleled swordsmanship with outstanding blocking ability. Many players are curious about this new hero, wondering about his strength. The following will provide a detailed analysis of his skill strength, so let's find the answers below.
Firstly, the talent effect allows him to perform Iaido on the farthest enemy within the ultimate skill range every 40 seconds. Each time a basic attack deals damage, it reduces the cooldown of Iaido by 1 second. A basic attack deals 100% physical damage to one enemy. Passive 1 "Blade of Breaking Momentum," when performing a block during Mirror Water Stillness, increases attack power by 20%, with the enhanced effect lasting for 10 seconds.

Passive 2 "Swallow Return," after Iaido and Residual Flame Blade end, there is a 15% chance to immediately launch an attack in the opposite direction, which cannot trigger this effect again. Bond Skill "Wanderer's Night Return Path," once the Hero Codex activates Phantom Flame Nine-Tailed Yurika, using Iaido will restore 10% of health, and using Residual Flame Blade can restore 25% health.
Ultimate Skill "Mirror Water Stillness," sheathes the blade and, after preparing for up to 8 seconds, performs an additional Iaido. During the sheathing period, if direct damage is received, it will be blocked, and Iaido will be launched prematurely; if a block is triggered within 3 seconds of entering the sheathing state, Residual Flame Blade will be used instead, and no basic attacks can be performed during the sheathing period.
Residual Flame Blade: Dashes in the target direction and slashes, dealing 240% area damage to up to 6 targets along the path, and also dealing 480% damage twice to one of the targets, while being immune to other damage during this period. The specific effect of Iaido is just to reduce the number of attacks on a single enemy by one.
Everyone should now have a thorough understanding of the skill effects of Tide Watcher Jixin. His main method of dealing damage can inflict extremely high amounts of damage to enemies, while also being able to counterattack through blocking, and has very strong sustainability. In summary, this character can be called a hexagonal warrior, incredibly powerful, and well worth acquiring.
Tide Watcher Fyrosa Play Guide Introduction to Tide Watcher Fyrosa's Skills and Gameplay
Today, I will be sharing with you the gameplay guide for Fairsa, the Tidal Watcher. Fairsa, as a newly introduced five-star warrior character, brings fresh strategic thinking to players' battles. She weaves through the battlefield with a sharp mind and keen weapons, maintaining a delicate balance between humans and demons. Her formidable strength and unique charm attract many players. Next, I will delve into an in-depth analysis of Fairsa's gameplay strategy in the game.

Fairsa's basic attack has a unique damage pattern, mainly targeting single enemies. When attacking, she deals physical damage to the target while also inflicting magical damage. This means that during the basic attack phase, Fairsa can deal both physical and magical damage, greatly enhancing her damage output against enemies. When Fairsa herself is in Demon Hunting Moment, the damage dealt to enemies increases, further strengthening her damage output during this period, making her a powerful damage dealer on the battlefield. Upon entering the battlefield, Fairsa immediately gains the Demon Hunting Moment. This skill effect lasts longer than the 6 seconds triggered by a basic attack, and each time she obtains the Demon Hunting Moment, she also receives an additional rage boost.

Fairsa's ultimate move, Shadow Sword Dance, is extremely powerful, dealing 5 instances of physical damage and 5 instances of magical damage to the enemy. This multi-segment physical and magical mixed damage makes Shadow Sword Dance highly effective against enemies with various types of defenses. Whether facing enemies with high physical defense or high magical defense, it is difficult for them to withstand the continuous strikes of this skill. In battle, when Fairsa accumulates full rage, choosing the right moment to unleash Shadow Sword Dance can instantly turn the tide of battle. For example, when an enemy key character has low health but still poses a threat, using Shadow Sword Dance can directly eliminate them, removing the core fighting power of the enemy.
In the early stages of combat, prioritize using Fairsa's basic attacks to quickly accumulate attack counts and trigger the Demon Hunting Moment. When facing scenes with numerous small monsters, first perform basic attacks on the small monsters, enter the Demon Hunting Moment quickly, then switch targets to attack the enemy's key characters. Utilize the advantage of increased attack speed to deal significant damage to key targets. During the Demon Hunting Moment, maintain the attack rhythm on the enemy, trying not to interrupt the basic attacks, to fully leverage the effect of increased attack speed.

The gameplay guide for Fairsa, the Tidal Watcher, has been fully covered. Players can summarize their experience in-game operations and maximize Fairsa's gameplay. In the magical world of the Tidal Watchers, explore more unknown tactical combinations, challenge higher difficulty levels, and reap more gaming fun and achievements.
How is Tidehunter Fisheye? Analysis of Tidehunter Fisheye's Strength
How is Tidewatcher Feisha? The Tri-Blade Demon Hunter Feisha is a brand new warrior character. As a five-star hero, she possesses a sharp mind, and of course, her weapons are also very sharp. As a new, cool female hero, players naturally have high expectations for her abilities. Below, we will analyze the hero's strength from the perspective of her skills, so let's dive into the details below.

Talent: After 6 normal attacks, she can gain a "Magic Moment" that lasts for 6 seconds, specializing in attack speed. Normal attacks mainly target a single unit, attacking one enemy and dealing 75% physical damage plus 75% magical damage. Although normal attacks can only target a single unit, they can deal both physical and magical damage, and reaching the corresponding number of hits can also grant other effects, making them quite practical.
One of her passives, "Hunting Magic Power," increases the damage dealt to enemies by 30% when she has the "Magic Moment." If she has a shield, the damage effect gets an additional 20% boost. The main purpose of this passive is to enhance the hero's own output, maximizing her attack power.

The second passive, "Adrenaline Burst," allows her to immediately gain the "Magic Moment" upon entering the battlefield, which lasts for 10 seconds. Each time she gains the Magic Moment, she also receives an extra 5% rage. The main effect of this passive is to improve her energy recovery, enhancing her sustainability.

Finally, her ultimate skill, "Shadow Sword Dance," deals 5 instances of 100% physical damage and 5 instances of 100% magical damage to a single enemy unit. The release form of the ultimate is relatively simple, but it has extremely powerful attack power, with 5 instances of magical damage plus 5 instances of physical damage, making its output very strong.
We have now clearly introduced the skill details of Tidewatcher Feisha. Now, friends, you should all understand this warrior hero. Her strength is unquestionable, not only does she have good survivability, but her output is also quite significant. Moreover, her skills are relatively easy to operate, making her suitable for everyone to quickly get the hang of.
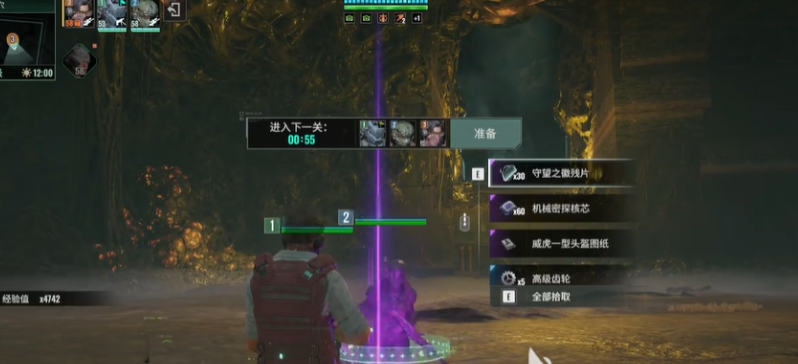
How to Farm Shattered Lands Watcher's Emblem Fragments Sharing Methods for Farming Shattered Lands Watcher's Emblem Fragments
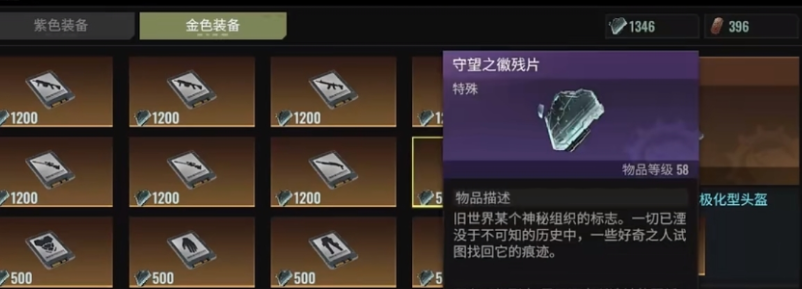
Shards of the Watcher's Emblem are a material that players must obtain in the later stages of the game in the Shattered Lands. This material, when synthesized, can be exchanged for blueprints of golden-tier weapons and equipment. As such, many players want to collect these shards. The question then arises: how and where to farm Shards of the Watcher's Emblem in the Shattered Lands? Let's delve into this topic together today.
When players want to farm Shards of the Watcher's Emblem, they should first know that there is a level restriction for obtaining these shards. Only after reaching level 58 with your character can you acquire them. Once you have reached level 58 and have collected the required number of Shards of the Watcher's Emblem, you can go to the blueprint merchant to exchange them for golden weapon blueprints.
When using Shards of the Watcher's Emblem to exchange for blueprints, it's also important to understand that different blueprints require different quantities of shards. In the Shattered Lands, blueprints are divided into weapon blueprints and armor blueprints. Before making an exchange, you need to check the required number of shards.
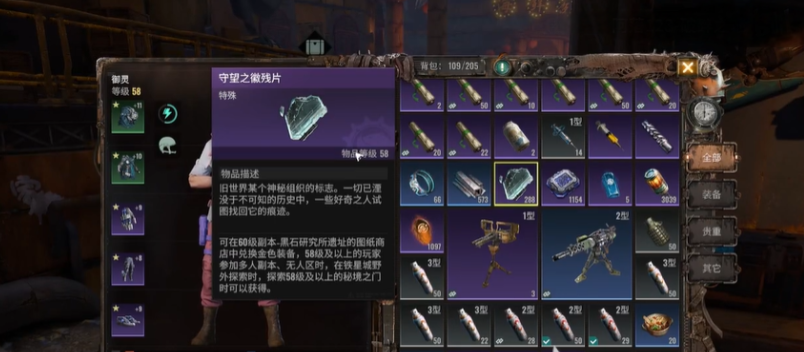
There are mainly four ways to obtain Shards of the Watcher's Emblem, which include multiplayer dungeons, no-man's land adventures, wilderness exploration, and secret realm exploration.
1. Multiplayer Dungeons
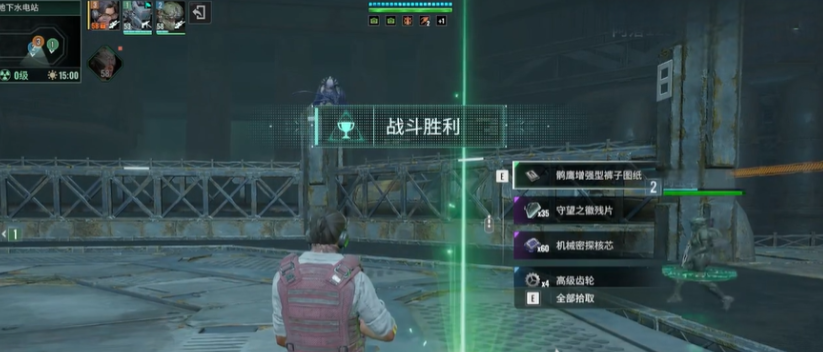
Multiplayer dungeons are one of the more common methods for players to obtain Shards of the Watcher's Emblem in the game. Players can get these by participating in multiplayer challenge dungeons. Defeating the dungeon boss will yield a large number of shards, while defeating minor monsters may also give a small amount of shards.
2. No-Man's Land Adventures
The no-man's land in the Shattered Lands is a very mysterious and perilous place. Players who venture into the no-man's land can also obtain Shards of the Watcher's Emblem.
3. Wilderness Exploration
When adventuring alone, players can explore the wilderness outside Ironstar City. Not only can we find some important materials, but with a bit of luck, we might also come across Shards of the Watcher's Emblem.
4. Secret Realm Exploration
If players above level 58 want to obtain a large number of Shards of the Watcher's Emblem, they can explore the secret realms designated for levels 58 and above.
This concludes the guide on how to farm Shards of the Watcher's Emblem in the Shattered Lands. As a rather special material, we all need to collect these shards once we reach level 58. Only by gathering enough shards can we obtain the desired golden weapon blueprints.
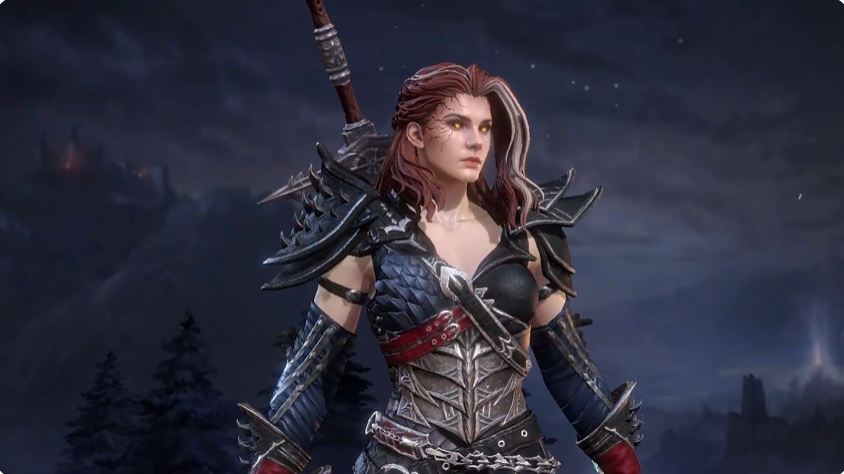
Tide Watcher Jera Introduction How is Tide Watcher Jera
Tide Watcher Jera, the Golden Lioness, is a name that sounds mighty and awe-inspiring. Today, I will introduce Tide Watcher Jera to you. As a new five-star warrior hero in the Order's Arrival version, Jera's appearance gives off a sense of immense power, as if she was born to defend the battlefield. Just from her looks, she seems like an unshakable fortress, but her true strength lies in her skills and combat style.

Let's take a look at the skill set of this Golden Lioness. First, her innate ability increases her maximum health by 30%, and when her health is higher, enemies' attacks on her become more "painful," with up to a 30% vulnerability effect. This allows her to deal more damage, making her both durable and powerful on the battlefield. Her basic attack, although seemingly ordinary, can easily take out enemies with its physical damage. The effect of dealing 100% physical damage to a single target already enables her to quickly defeat enemies in the early stages, achieving impressive kills one after another.

Her passive skills make her even more formidable on the battlefield. The first passive, "Damage Boost," allows her to continuously deal powerful damage in the arena, making her damage output as fierce as a beast, whether it's clearing minions or fighting enemy heroes, putting immense pressure on opponents. The second passive, "Sacred Rage Counterattack," is Jera's highlight. Every time she performs three attacks, the fourth attack not only boosts damage to 150% but also triggers a special effect: she deals additional damage based on the damage she has taken, ignoring defenses. In simple terms, she can not only endure but also counterattack! For every hit she takes, she returns three times the damage. More importantly, this effect resets each time, allowing her to continuously increase her output in prolonged battles, truly becoming a character that constantly "grows stronger."
"Rage Mark" is another unique skill of Jera on the battlefield. When she attacks enemies, she applies a rage effect, causing continuous damage, and enemies without the rage mark find their damage to Jera reduced by 20%. This skill undoubtedly greatly enhances her resistance, especially when facing multiple enemies, she can stand firm in the front line like a rock, not easily falling down.

The most exhilarating is her ultimate skill, "Heart of Valor." Once activated, Jera immediately recovers 75% of her health and significantly increases her maximum health and damage output. Even more impressively, if this skill is activated a second time, its effects become permanent. This means that once Jera meets the necessary conditions, her combat capability will see a qualitative leap, making her a king-level presence on the battlefield.

This concludes the introduction of Tide Watcher Jera. She is a powerful warrior who not only has sufficient offensive capabilities but also possesses extremely strong survivability. Her skills and innate abilities make her stronger the longer she fights, just as her title, "Golden Lioness," suggests. This hero can deliver powerful attacks and provide a solid shield for the team.
Recommend


Strategy

A Guide to Zhetian Fanchen Yiyue Sharing Tips for New Players on How to Play Zhetian Fanchen Yiyue
Introduction to the Public Beta Time of Zhetian Fanchen Yeyi When is the public beta for Zhetian Fanchen Yeyi?
How is Zi Yue from Zhetian Fanchen? Introduction to Zi Yue from Zhetian Fanchen
What are the Luhida Origin redemption codes? Sharing of Luhida Origin mobile game gift codes
Lu Xida Origin Team Recommendations Lu Xida Origin Team Guide
Lu Xida Origin Strategy Sharing: Beginner's Guide to Lu Xida Origin
