Pokémon UNITE
Game Introduction


Hot Strategy
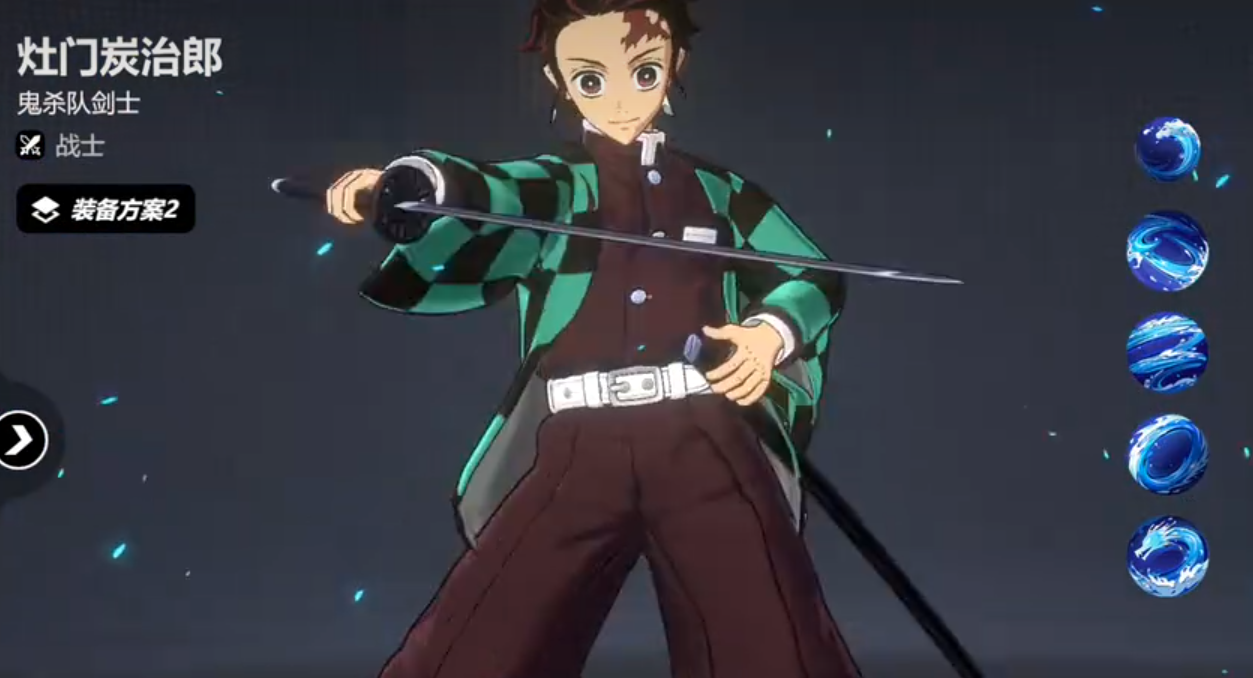
Gathering of Comic Stars: How is Tanjiro? Introduction to Tanjiro in the Gathering of Comic Stars
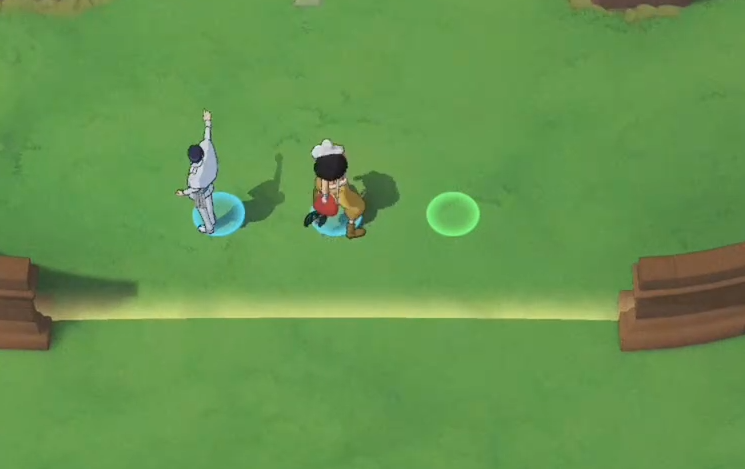
Tanjiro is a Demon Slayer with a scar on his left forehead. His personality is very kind and gentle. In order to save his sister who has turned into a demon, he embarks on a journey to slay demons. Many fans also really like this character and are curious about how he performs on the game battlefield. So, let's introduce Tanjiro. Friends who are interested, please take a look at the following content.
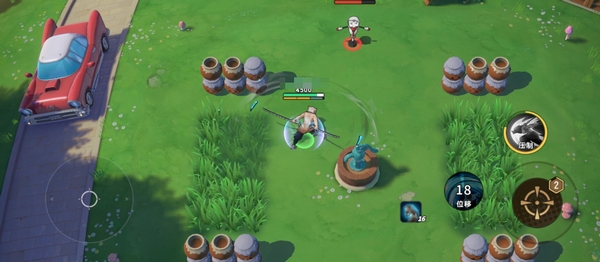
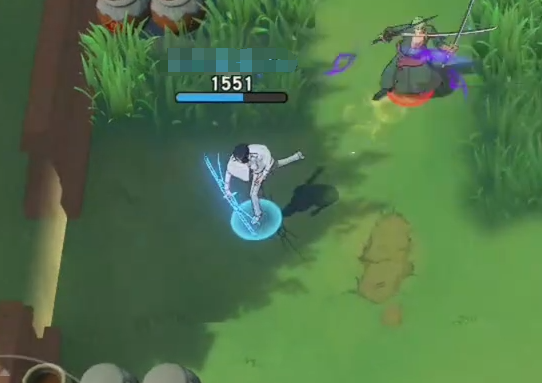
Tanjiro's passive "Water Surface Slash" will, after using a skill, replace the next basic attack with a "Water Surface Slash". This slash, upon release, will charge to the enemy's side causing 105 physical damage. If it hits, it will also restore 30 energy points to himself. His "Tide Strike" will perform two slashes forward, each dealing physical damage.
After using, the move will be replaced by "Thrust" within 6 seconds. Using "Thrust" will quickly draw the sword in a designated direction, dealing certain damage to enemies along the path. His "Twisting Vortex" will deal 3 strikes to enemies within range and cause a 0.5-second stun effect. At the same time, the vortex created will attract damaged enemy targets.
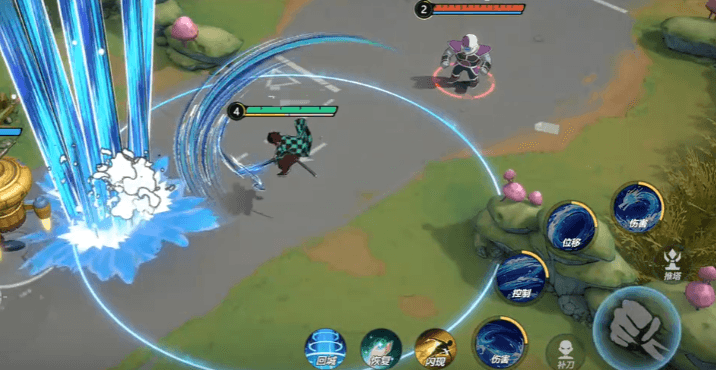
After using, the move will be replaced by "Waterfall Basin" for 6 seconds. Clicking to use again, Tanjiro will strike enemies within a designated circular area. His "Water Wheel" will attack in a specified direction, dealing certain physical damage to hit enemies. Awakening potential to level 1 allows the move to be replaced with "Flowing Dance" after 6 seconds. Clicking then will quickly reposition towards the designated direction, attacking enemies within range, during which he is in an untargetable state.
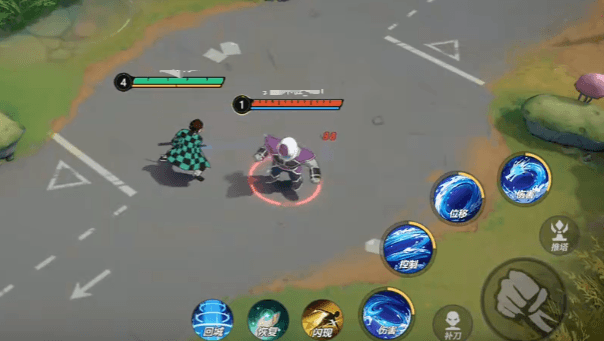
His "Life Flow Rotation" will rapidly charge forward and slash continuously 5 times. Each slash will deal certain physical damage and knock back the target. During the release, he will be in a霸体状态 (This part seems to be missed in the translation, should be: "During the release, he will be in a Super Armor state"). Activating potential one can make the damage of this move even higher.
The introduction of Tanjiro in the manga star gathering ends here. This character has good mobility and area-of-effect damage, and also comes with Super Armor and untargetable effects. After reading, if you like him, you can experience him in the game. I believe everyone will be impressed by his power.
Comic Stars Grand Assembly: How is Inosuke Hashibira? Analysis of Inosuke Hashibira's Skills in the Comic Stars Grand Assembly Mobile Game
Inosuke Hashibira is a popular character from Demon Slayer, who also appears in the mobile game Manga All-Stars. As a tank character, how does Inosuke Hashibira perform in Manga All-Stars? This section will introduce the characteristics of this character, detailing its specific skill and talent effects, to help you use this character more flexibly in various gameplay modes. If you're interested, come and take a look!
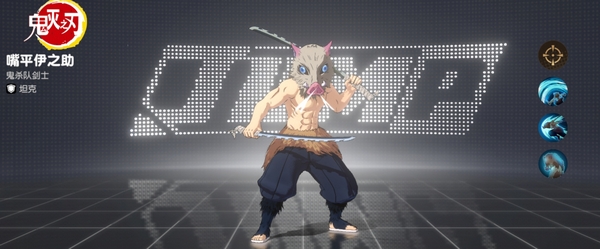
His role is as a tank, with his basic attack being an area attack, capable of dealing damage to enemies within a fan-shaped range. It's important to note that in this game, basic attacks also require energy and cannot be used unlimitedly. Therefore, it's necessary to master the rhythm and effectively land basic attacks, avoiding random swings while moving.
Then there's his passive ability: while moving, he can accumulate shields, gaining one layer of shield for every 100 distance moved, which can absorb 1.25% of maximum HP in damage. The maximum number of layers is 16, equivalent to a 20% maximum HP shield. After awakening the Boar Skin set, he can stack up to 26 layers, providing a 32.5% maximum HP shield. When not moving for 1.5 seconds, the shield decreases by one layer per second, so it's essential to keep moving.
After using his small skill, he enters a burst rush state for 3 seconds (4.5 seconds after awakening), and upon colliding with an enemy target, he releases a Tusk Tear, dealing damage to targets within range. Hitting enemies with basic attacks can reduce the cooldown of this small skill. So, playing Inosuke involves constantly repositioning and finding targets to collide with.
His ultimate skill is a suppression move, allowing him to ignore everything and charge straight ahead, suppressing the first hit target for 1 second (1.5 seconds after awakening) and dealing damage. With talent support, using the ultimate skill instantly stacks 16 layers of the passive, ensuring he doesn't get immediately focused and taken down when charging into the enemy lines.
Overall, Inosuke Hashibira's skill mechanism in Manga All-Stars aligns well with his tank role. Continuously running to stack passives and gain high-layer shields, using small skills to hit enemies and deal damage, and using the ultimate to quickly suppress enemies, working well with teammates to focus and take down targets. He is a very flexible character and relatively easy to get started with.
The Comic Stars Grand Assembly: How is Zenitsu Agatsuma? Introduction to Zenitsu Agatsuma in the Comic Stars Grand Assembly
When it comes to the popular works of the moment, many people will definitely mention the grand assembly of manga stars. The characters in this work are basically all popular characters from JUMP comics, and many people are fans of this comic. The gameplay of the work is also very distinctive. How is Zenitsu Agatsuma in the grand assembly of manga stars? Many people don't know much about this character in the work, which is why they ask about it online.
Zenitsu Agatsuma, this character is from the popular anime Demon Slayer, and he is a member of the main team trio. He is very timid, quite lecherous, and uses Thunder Breathing, but only knows the first form. When extremely panicked, he falls asleep, and at this time, his strength becomes very strong. Overall, he is one of the comedy roles in the work, and his overall battle record in the anime is still quite good.
In this work, when this character attacks, there will be a Thunder Mark, which can stack up to 3 layers. This mark allows us to instantly move to the enemy's side within a certain range and deal damage. This skill also determines that the character has a great advantage in terms of rushing forward, making him very suitable as an assassin.
His damage skill can deal a 4-hit combo to enemies within a certain range. This skill can be used in conjunction with the Thunder Mark. You can first use the Thunder Mark to instantly move to the enemy, then directly use the damage skill to perform a 4-hit combo on them. With sufficient attack, it can cause considerable damage.
The skills of this character are very flexible, making his playstyle very agile. However, his survival ability is somewhat lacking, so players need to use his flexible movement to maneuver, in order to maximize his mobility.
The above is the explanation of how Zenitsu Agatsuma is in the grand assembly of manga stars. The advantages and disadvantages of this character are very obvious. For everyone, the difficulty of using him is relatively high, but once used well, the player will be the coolest one on the field.
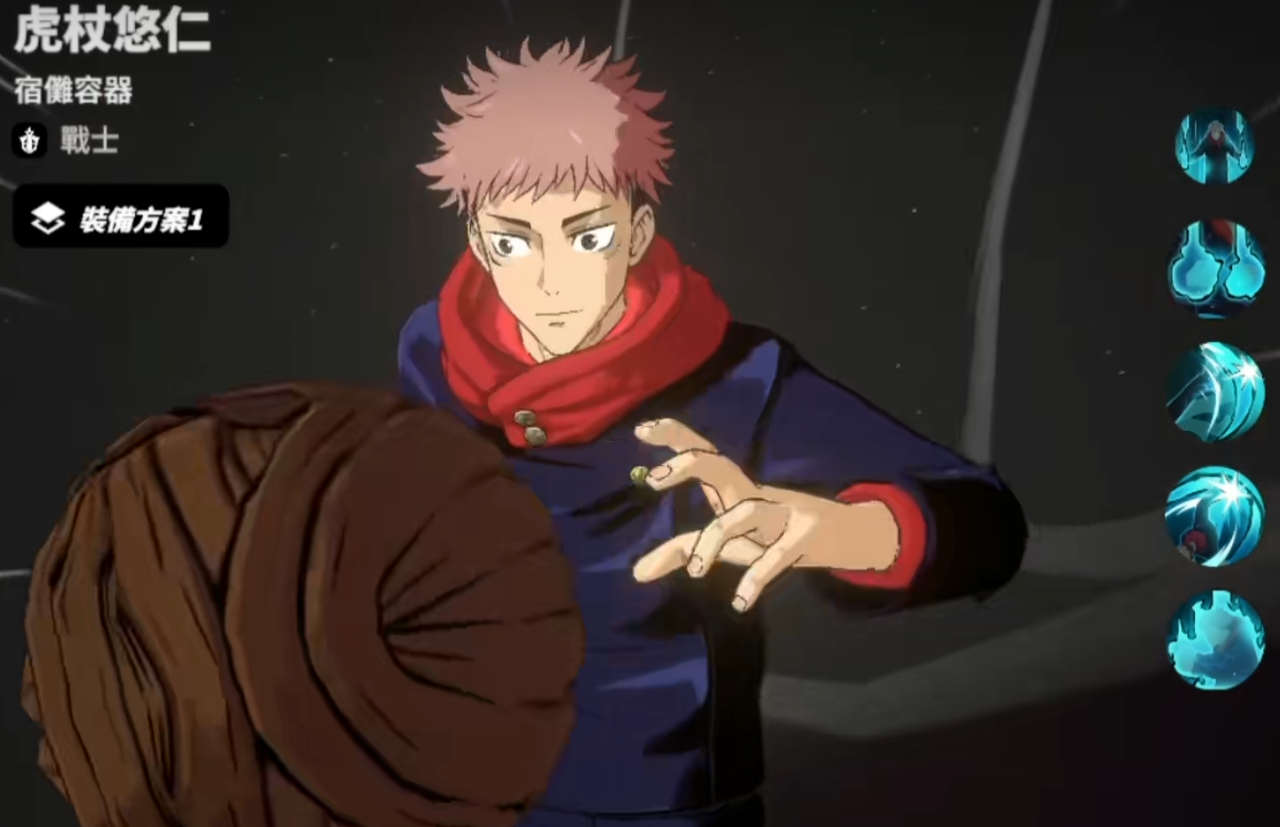
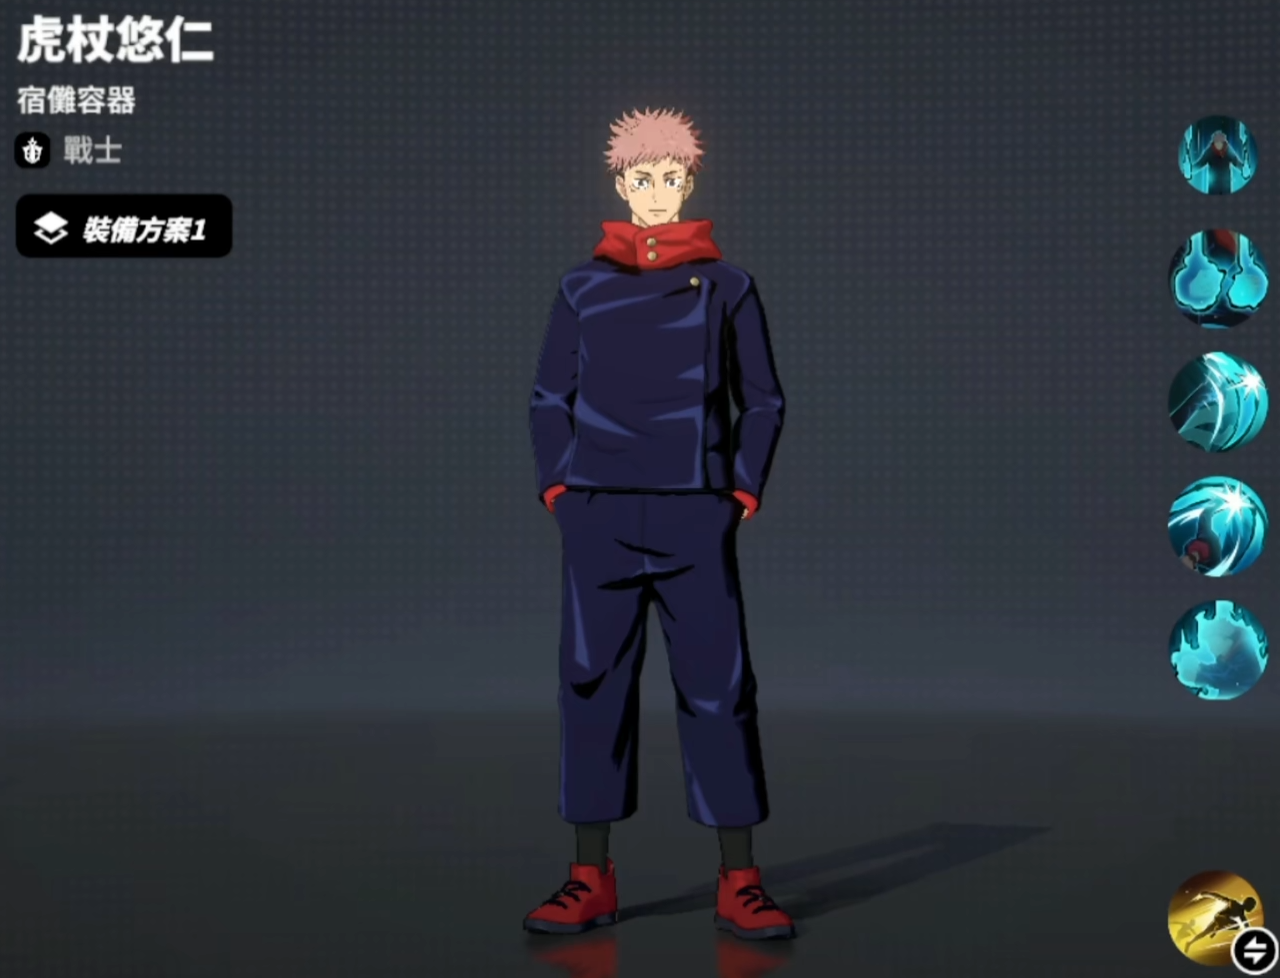
Comic Stars Grand Assembly: How is Yuji Itadori? Introduction to the character Yuji Itadori in the Stars Assembly
Yuji Itadori, as the core protagonist of Jujutsu Kaisen, becomes a highly distinctive warrior-type character in the game with his signature Black Flash mechanism and unique physical combat style. So, how is Yuji Itadori in the grand assembly of manga stars? According to the latest version data, Yuji Itadori ranks at the forefront among T1 level characters, especially excelling when facing enemies with night attribute weaknesses. This article will comprehensively analyze the combat characteristics and skill mechanisms of this "Jujutsu High Physical Education Student," helping everyone quickly master the entire combat system from basic operations to advanced tactics.
Role Positioning
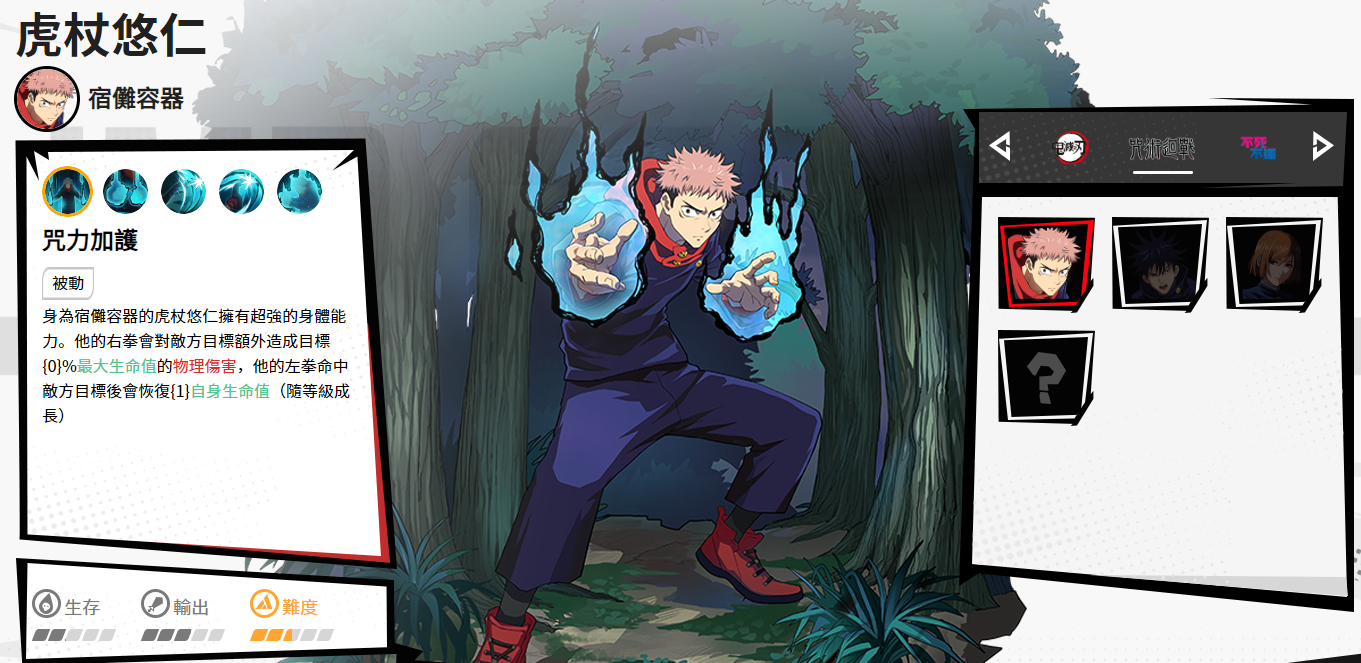
In the game, Yuji Itadori is positioned as a burst-type fighter specialized in physical combat. His SSR card "Jujutsu High" is known for its stable output cycle and Black Flash burst mechanism. Triggering the Black Flash effect through skill combos can cause a terrifying burst of 2.5 times the base damage, while the ultimate move "Cursed Energy Rampage" is guaranteed to trigger Black Flash, dealing 1479.2% physical damage to a single target and adding a 45.1% physical vulnerability effect. Test data shows that under ideal combo conditions, Yuji Itadori's burst damage within 10 seconds can reach 4200% equivalent damage, ranking him among the top five physical outputs in the game. Additionally, his third skill "Flying Kick" provides a 33.1% physical boost and ultimate value recovery, forming a perfect output cycle. Another notable feature is his excellent survivability. After hitting an enemy, Yuji Itadori can recover his own health, and with the passive skill "Sukuna's Vessel" providing poison/soul dual-attribute resistance, he has stronger endurance in melee than regular fighters. Compared to high-burst but fragile characters like Tanjiro or Sasuke Uchiha, Yuji Itadori achieves a better balance between output and survival.
Character Traits
Yuji Itadori also has obvious weaknesses. His attack range is relatively limited, with his main output methods being close-range skills, making him vulnerable to kiting-type characters. At the same time, although the Black Flash mechanism is powerful, it requires precise skill chaining, which is difficult to consistently perform in fast-paced small-scale conflicts. Compared to characters like Naruto Uzumaki or Satoru Gojo, who excel in area-of-effect damage, Yuji Itadori relies more on teammates to create an output environment. This character demands high critical hit management and skill chaining. The key to unleashing his potential lies in reasonable skill release order and position selection. The basic output cycle follows a three-stage structure: "Buff - Burst - Harvest." Start by using the second skill to increase critical hit rate; immediately follow with the third skill to gain physical boost and recover ultimate value; then use the first skill to test for Black Flash trigger; finally, release the ultimate move to finish off the enemy when their HP is below 40%. This cycle, in the ideal environment of the training ground, can cause about 4500% equivalent damage within 10 seconds, ranking him among the top three in fighter-type characters.
Character Tips
Mastery of the Black Flash trigger technique is a must for advanced players using Yuji Itadori. By observing the battle rhythm and focusing on output during the enemy's control skill cooldown, the benefits of Black Flash can be significantly increased. Data shows that during the buff period of the second skill, Yuji Itadori's Black Flash trigger rate can reach over 35%, a 75% increase from the base value. A commonly used technique by experts is "Critical Hit Prediction," where they immediately follow up with a skill when the critical hit effect appears during a normal attack animation, slightly increasing the probability of triggering Black Flash. Management of physical buffs needs special attention. The physical boost provided by the third skill lasts for 4 turns, and ideally, a high-damage skill or ultimate move should be connected before the effect disappears. Also, pay attention to the duration of the critical hit buff from the second skill (3 turns), avoiding forced output after the buff fades. In practice, under double buffs, Yuji Itadori's skill damage is more than 60% higher than normal. Tactics against different enemy types should also be flexibly adjusted. When facing high-mobility characters, reserve the third skill to counter their movements; against tank-type enemies, prioritize triggering the physical vulnerability effect; and against control-type teams, wait for the enemy's key skills to go on cooldown before engaging. The in-game enemy information interface can be used to check opponents' attribute weaknesses and plan strategies in advance.
Summary

Yuji Itadori's ultimate value accumulation takes time, so it's important to plan the skill usage rhythm reasonably. Generally, keep the ultimate value above 70% to handle unexpected situations. After capturing the Cursed Energy Source, you can play more aggressively, using frequent skill usage to suppress opponents. For new players, the development of Yuji Itadori is suggested in three stages: 1-20 levels focus on basic combos and critical hit equipment; 20-40 levels refine skill cycles and buff management; after 40 levels, start researching advanced tactics and team synergy. Complete daily character tasks to obtain exclusive resources and gradually improve operational proficiency.
This concludes the complete content on how Yuji Itadori performs in the grand assembly of manga stars. Whether you are a loyal fan of Jujutsu Kaisen or a competitive player who enjoys steady fighters, Yuji Itadori offers a unique gaming experience. He doesn't require flashy operation techniques, yet every perfect Black Flash burst can be filled with a sense of accomplishment. On the battlefield where manga stars shine, this "Jujutsu High Physical Education Student" is waiting for you to write his combat legend.
Comic Stars Grand Assembly: How to Play as Naruto Uzumaki, Guide and Strategy for Playing Naruto Uzumaki
This issue will answer how to play Naruto Uzumaki in the manga star gathering game. Naruto Uzumaki is one of the simplest heroes in the Naruto part of the game, and you can claim him right after entering the game. However, many people who haven't played this type of game before may not be clear about his specific gameplay. So, next, I will introduce the gameplay guide for Naruto Uzumaki.

Naruto is a warrior character with both offensive and defensive capabilities in the game. He can take the lead in many modes, which is not only because he has a high health panel but also because his passive gives him a high damage reduction shield at the start. He can use this shield to absorb a lot of damage from opponents at the beginning. Therefore, when pairing up, you can let your teammates choose some high-damage ranged backline characters. After Naruto absorbs the damage, the backline teammates can then follow up with their attacks, making it easy to eliminate an opponent. This tactic is especially useful in regular three-on-three point matches, as the main goal in this mode is to gain points by eliminating opponents.
Aside from using the initial shield to absorb damage, Naruto can also deal multi-hit damage to enemies through basic attacks. However, being a Naruto series character, he is limited by chakra, and each basic attack consumes one chakra. But because Naruto has tankiness, his overall fault tolerance is still quite high. After finishing a set of basic attacks, you can slowly pull back. Naruto's basic attacks are longer than expected, as he summons a clone to charge at the opponent, so you don't need to wait until you're close to press the basic attack button.
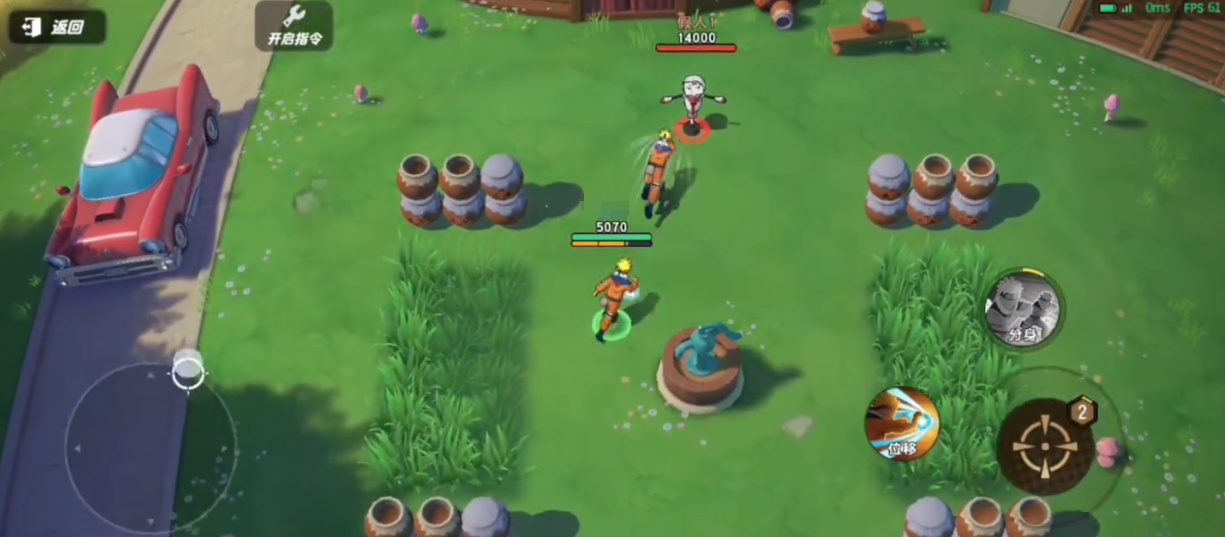
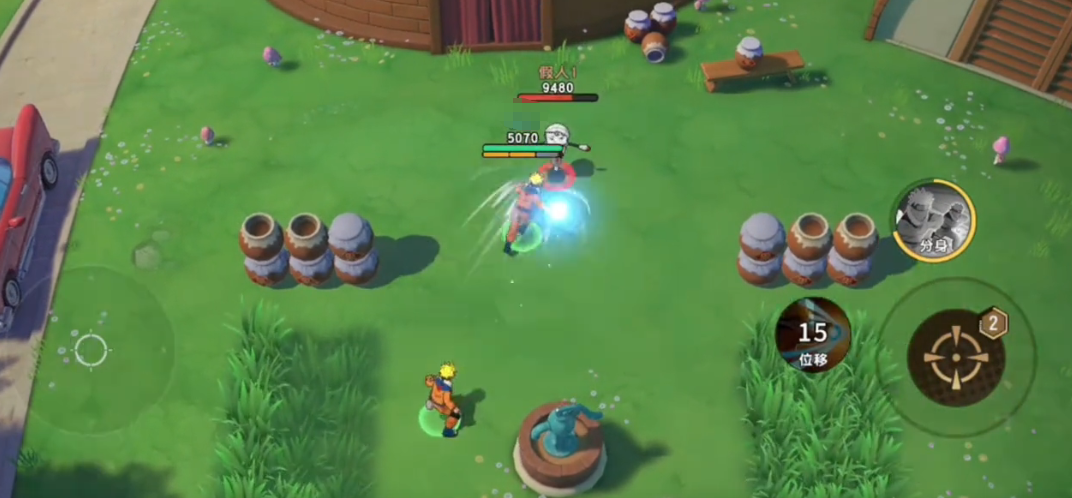
Naruto's active skills are also well-configured, including a displacement and a clone skill, which is quite faithful to the original anime. His first skill is to summon a Rasengan and dash forward, dealing damage to enemies upon reaching the endpoint, making it a skill that combines displacement and output.
However, in actual combat, this move should be used more cautiously, as its cooldown time is not short, and the displacement speed is relatively slow. It's difficult to use it to surprise the enemy with a burst of damage. It's recommended to wait for your teammates to engage the enemy first, then use this move to follow up and add more damage.
The damage of the Rasengan itself is average, and it requires reaching the endpoint to deal damage. Additionally, the damage value of the Rasengan is not high, and the hit area is small, so it's basically only effective against single targets. In practical use, it's more about using the displacement to get close and then following up with a three-hit combo to supplement the damage.
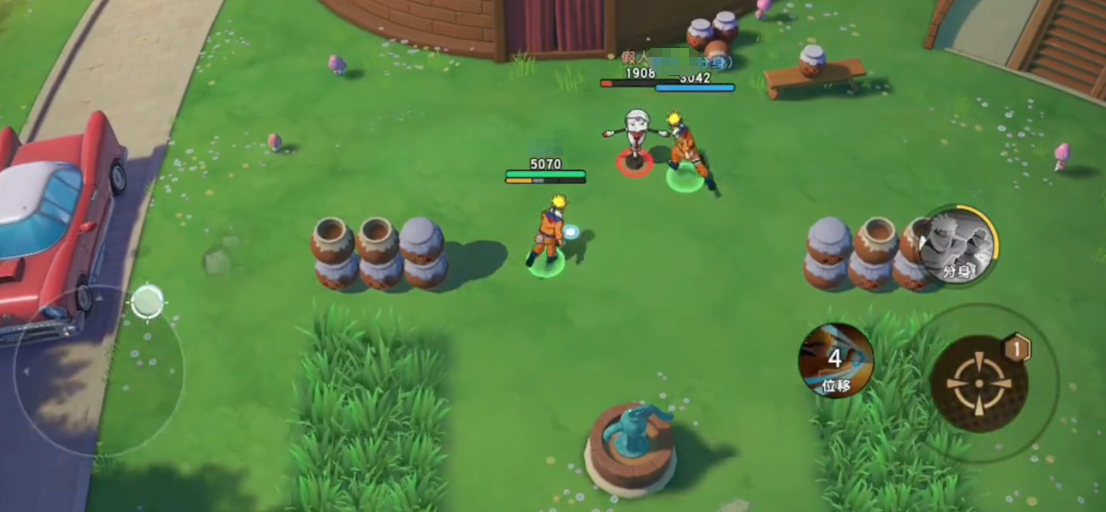
For his ultimate skill, he creates a clone to mimic his actions in battle. The clone summoned by Naruto cannot mimic his skills, only his basic attacks. Therefore, before using it, make sure to reserve three chakra slots, so that you can immediately perform a double three-hit combo with the clone once it is summoned.
It's worth noting that when Naruto summons a clone, the clone will only appear next to Naruto without much displacement. So, it's impossible to directly hit a distant enemy by summoning a clone. If the ultimate is ready but the enemy is far away, it's better to use the first skill to get closer, and then summon the clone for a basic attack combo.
The clone lasts for a long time, so it can be used repeatedly in a match after it is summoned. However, the clone also has a health bar, and its total health is only about half of Naruto's. Therefore, in actual combat, you should protect the clone appropriately to avoid it being killed too quickly, allowing it to maximize its value in sustained battles.
Team composition in actual combat is also very important for Naruto. In the mainstream three-on-three mode, it's best to pair him with teammates who have control and stable output, such as Uryu Ishida, who can continuously deal ranged damage, or Gaara, who can control the battlefield from a distance. Especially Gaara, who has a lot of slow and control skills, and also has some AOE output, can help Naruto effectively pin down the opponent. After Naruto follows up and summons a clone, he can usually deliver a full burst of damage. However, whether it's Naruto himself or these teammates, their development level cannot be lagging behind; both potentials and one awakening are essential.
That's all for the guide on how to play Naruto Uzumaki in the manga star gathering game. The above-mentioned strategies are very practical for Naruto. By following these ideas in actual combat, you can easily defeat your opponents. Additionally, Naruto's development value is also good, and you can directly invest resources into cultivating him after claiming him at the start.
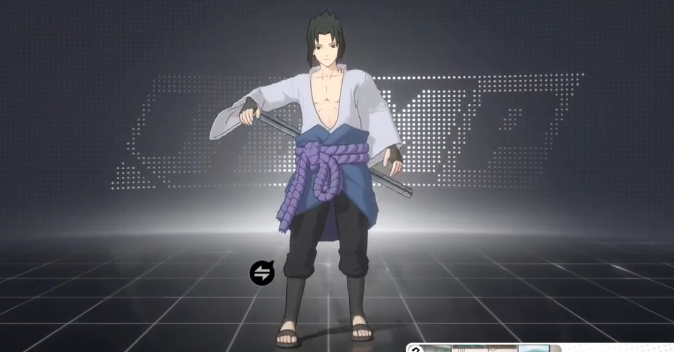
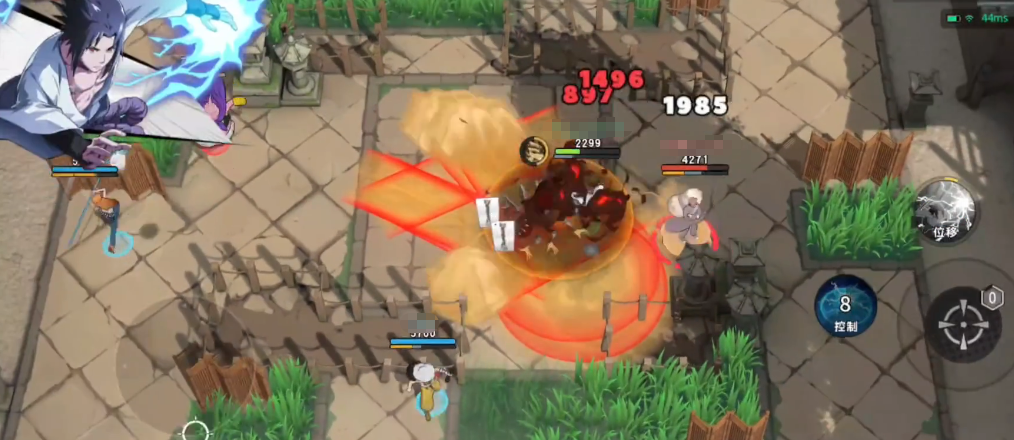
How to Play as Uchiha Sasuke in Comic Stars Grand Assembly: A Guide to Playing Uchiha Sasuke
In this episode, we will address the question of how to play Uchiha Sasuke in the manga star gathering. Uchiha Sasuke is a very powerful assassin-type hero in the game, with excellent damage and mobility, and can perform very well in various gameplay modes. So, next, I will introduce his playstyle to everyone. Those who are interested can learn about it together!
Sasuke's official role is an infiltrator, and he has high base attack stats, so whether it's normal attacks or skills, he can deal considerable damage. His normal attacks are very special; whether in close combat or at a distance, he can perform fast combos. In a one-on-one situation, enemies will not have time to react before being hit hard, so in actual combat, Sasuke should start with normal attacks. When he gets close, he automatically uses the Kusanagi sword to attack the enemy, with a large range of continuous slashes and some knockback effect. At a distance, he automatically uses shurikens, also with multiple hits, long range, and high accuracy.
Sasuke's normal attacks are his main source of damage. When using them, pay attention to energy consumption. Although he can perform up to three normal attacks in a short time, each one consumes energy, and Sasuke's maximum energy is only three bars. Therefore, after a burst of attacks, he should retreat and wait for energy to recover before going back to use another three-hit combo to punish the enemy.
Additionally, in the popular point competition mode, Sasuke can also regenerate health when out of combat. Since his health is not very high, if he fails to quickly kill the enemy during a trade, he might be killed. Therefore, after a burst, Sasuke should immediately retreat to regenerate health.
If he cannot retreat by moving, he can use his skills. Sasuke has two active skills. The first active skill can stun and damage enemies around him. This skill can be used when being stuck by enemies. After stunning, he can immediately pull away, which has a high success rate. Of course, since this skill has a very short wind-up, it can also be used for offensive purposes. The most common use is to follow up with a three-hit combo right after releasing the skill, usually allowing the opponent to take full damage from the normal attacks.
Of course, besides its fast release speed, the stun duration is not as long as one might think. Compared to Gaara, who specializes in crowd control, the control duration and range are much weaker. However, if used to assist in chasing or pulling away enemies, the effect is still excellent, especially when used in combination with the second skill.
Since Sasuke's second skill is a displacement, he can use it to move closer to the enemy, then immediately follow up with the first skill to seamlessly stun the enemy. Of course, after stunning the enemy, it is also very convenient to escape using the second skill.
Besides displacement, Sasuke's second skill also deals significant damage, almost directly reducing the enemy's health by half. The only downside is the long cooldown. Therefore, in actual combat, it is not recommended to use it to clear minions. It is best to wait until the enemy hero appears and then use this skill to get close. After getting close, make sure that subsequent attacks hit, as hitting with normal attacks and other skills can help reduce the cooldown of the second skill, perfectly solving the problem of its long cooldown.
It is worth noting that Sasuke is also a hero who greatly benefits from cultivation and timing. After activating two potentials through cultivation, he can further speed up energy recovery and ultimate cooldown, while also unlocking key passive skills. The passive skill allows Sasuke to check the enemy's energy and skill range. By knowing the remaining energy of the enemy, Sasuke can better judge who to target. Choosing an enemy without energy to target will significantly increase the success rate.
Additionally, checking the enemy's skill range, although not very useful for veteran players familiar with all heroes, is very helpful for new players. It allows you to quickly understand both yourself and your enemy after mastering Sasuke, ensuring that you always maintain a safe distance. For enemies who know about Sasuke's ability, they will instinctively be intimidated and not easily use all their skills on Sasuke, indirectly increasing Sasuke's own room for error.
So, that's all the answers to how to play Uchiha Sasuke in the manga star gathering. Sasuke's playstyle is very rich, and although you need to pay attention to the timing of each skill, his cultivation value is very high. As long as the cultivation level is sufficient, even beginners can quickly master him. So, if you like, go ahead and give him a try!
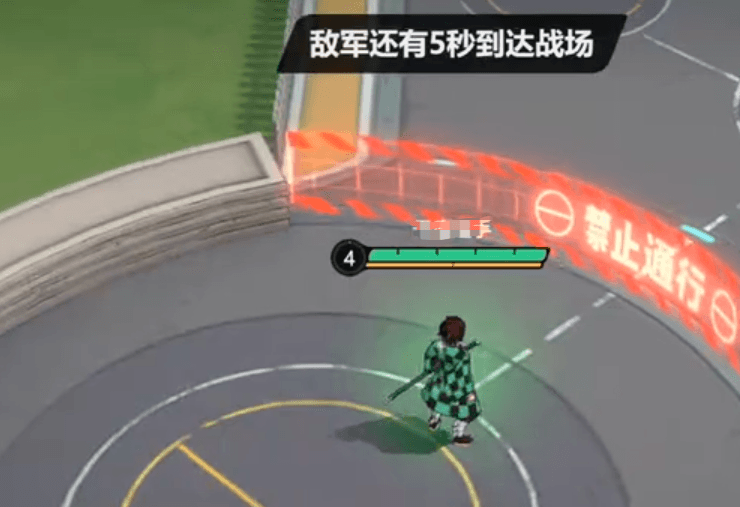
Comic Stars Grand Assembly Beginner's Guide Analysis of Comic Stars Grand Assembly Beginner's Playstyle
This issue brings a beginner's guide to the comic star grand assembly, with the game itself offering various gameplay modes that can satisfy the needs for character development and ranked competition. However, new players may not be very familiar with these aspects when they first start, so in the following, I will introduce some gameplay ideas suitable for new players. If you need it, come and check it out!
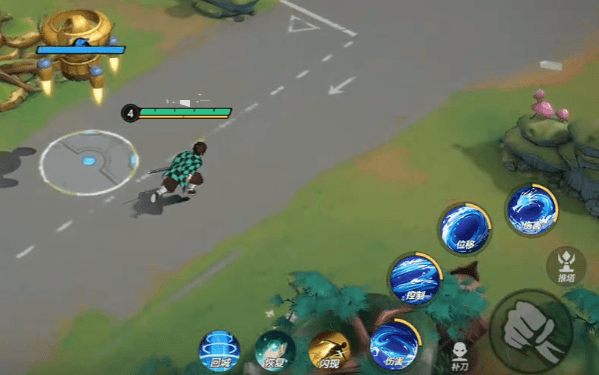
For new players, the first thing to understand is its operation and gameplay modes. The controls are similar to those of typical mobile games, with the left joystick for movement and the right joystick for attacks and skills. However, the basic attack button cannot be pressed continuously; it requires a certain amount of time to recharge before attacking.
The most classic gameplay mode is the 3v3 point match, where points are earned by defeating opponents. When one side reaches ten points, they win. There are two ways to win in this mode: the first is to quickly coordinate with teammates to complete ten kills, but this has high requirements for individual skill and team composition. Individual skills require a long time to hone, while team coordination, besides timely signals for offense and retreat to communicate with teammates, also requires understanding the principles behind team composition. First, you need at least six characters with abilities level six or above for the ranking matches, and to ensure compatibility with various random teammates, at least four of these six characters should be leveled up to the maximum level nine.
After reaching level nine, characters can unlock dual potentials plus one talent, significantly increasing their overall combat power. Additionally, if conditions permit, you can also draw the character's awakening, which greatly enhances the character after awakening. As for which four characters to level up to nine, my recommendation is two melee and two ranged. For melee, you can train a tank and an assassin, which can limit the enemy's output in the 3v3 point match mode. If training two ranged heroes, you can choose a marksman and a mage; the former ensures continuous physical damage, while the latter provides strong AOE burst and control.
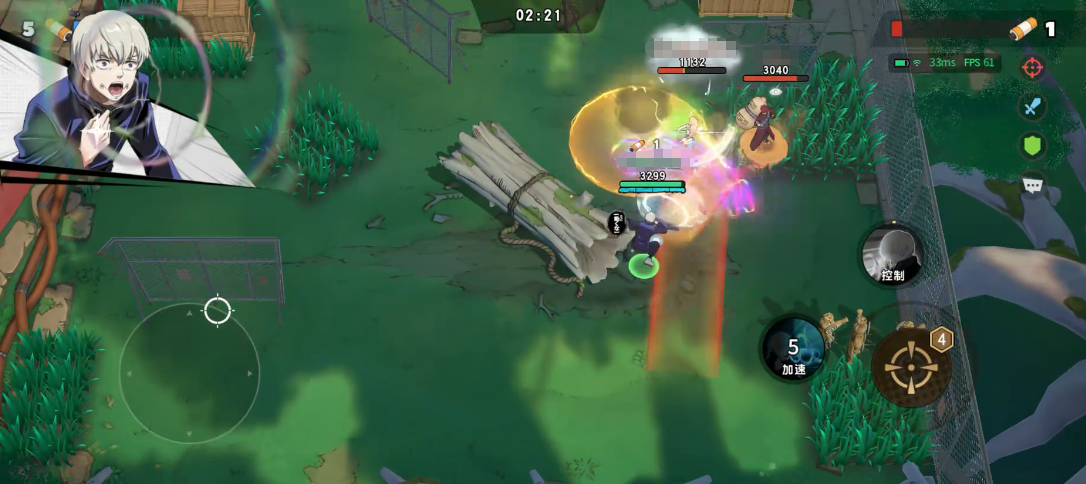
Besides the point match, the game's other gameplay modes are also quite fun, with the more popular ones being Scroll Battle, Talisman Match, and Brawl. In the Scroll Battle mode, the winning rule is for one side to collect ten scrolls first and then hold them for over eighteen seconds to win. Although this mode is also a 3v3, the priority of killing is much lower. In the early stages, you should prioritize finding the scrolls dropped on the map and quickly gather them to ten, then immediately regroup with your teammates and retreat.
Do not rush into battle upon seeing an enemy, as this could result in you being killed and the scrolls falling into the enemy's hands. Of course, if you are in a disadvantageous situation, the strategy changes slightly. You need to try to quickly strike down the opponent, kill them, and then grab the scrolls, making long-range marksmen and mages more effective in this mode.
In the Talisman Match, the overall gameplay idea is similar to the Scroll Battle, with the main difference being an additional step of killing a spirit. After killing the spirit, talismans drop, and collecting eight and maintaining possession for a period grants eight points and victory. Thus, the key strategy is to seize the eight talismans first and then retreat with your teammates, avoiding being alone and focusing on defense to win by dragging out the time.

The Brawl mode has some variations. At the beginning, it allows you to choose a spawn point. Before choosing, try to communicate with your teammates and select positions close to each other. This way, you can support each other faster after landing, and if you find a buff unsuitable for yourself, you can directly notify nearby teammates to pick it up.
The buffs in this mode are very powerful, so the most important thing for new players entering this mode for the first time is to focus on collecting them. Try to avoid fighting enemies before obtaining the buffs, as having a buff will significantly increase your chances of winning. However, this mode has a mechanism similar to the shrinking circle in battle royale games, so after collecting buffs from one area, always observe the map and remind your teammates in advance to escape towards the center of the map together.
Finally, hero selection in the Brawl mode is also crucial. Choose heroes with displacement and speed boosts, as this will make running across the map faster and prevent you from missing buffs due to the shrinking circle.
Above is the complete content of the beginner's guide to the comic star grand assembly. These gameplay tips are very practical for new players. Different modes require different operations and strategies, so there should be changes in team composition and tactics.
Overview of the Gameplay Modes in Comic Stars Grand Assembly What are the gameplay modes in Comic Stars Grand Assembly?
This issue brings an overview of the gameplay modes in the comic star assembly game, which gathers a large number of comic characters and offers a rich and interesting variety of gameplay. In this test version, it can be observed that the previous gameplay modes have been innovated. Next, I will introduce the main gameplay modes to everyone, so don't miss out if you're interested!
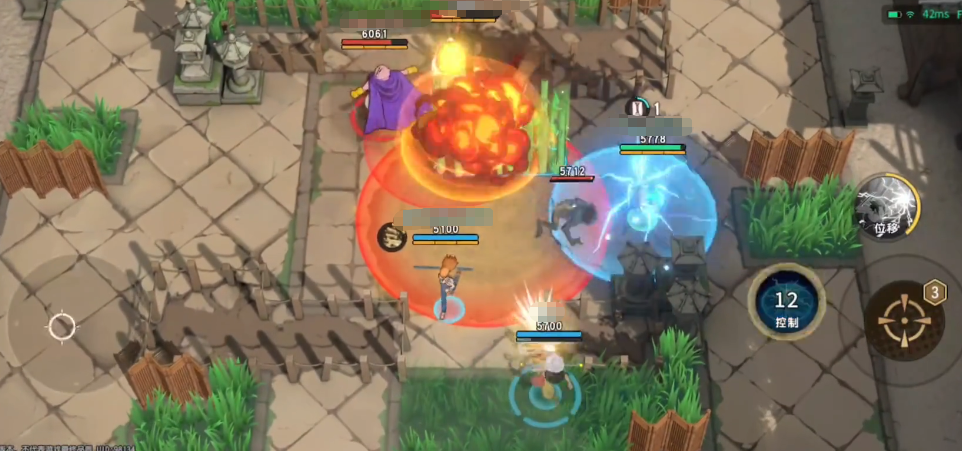
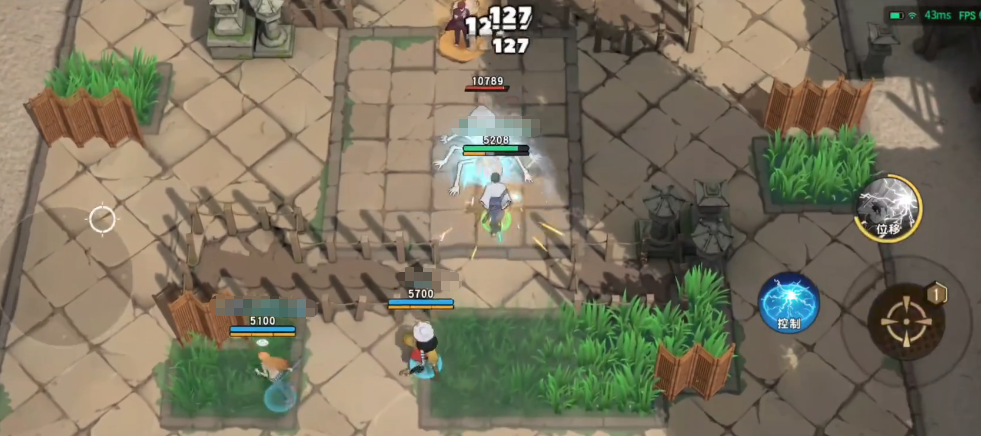
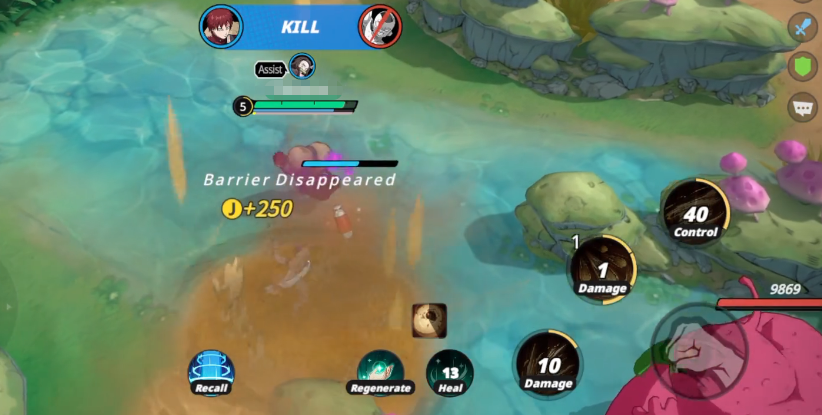
Currently, there are mainly four gameplay modes in the game. The first one is the standard 3v3, with each match lasting three minutes. The team with the most kills at the end of the time wins. If the kill count is the same when the time ends, there will be overtime until one team reaches ten kills. This mode has recovery points where heroes can go to regain health.
Compared to other modes, this one has the lowest difficulty and is the most classic. It does not require very high individual skills; just control your own health, go to the recovery point in time when low on health, and avoid being singled out and killed. There are also some requirements for the team composition. Below the Platinum rank, you can freely mix and match, but after reaching Platinum, it's best to include close-range tanks like Luffy and Majin Buu to absorb damage, along with a long-range shooter like Uryu Ishida for stable output.
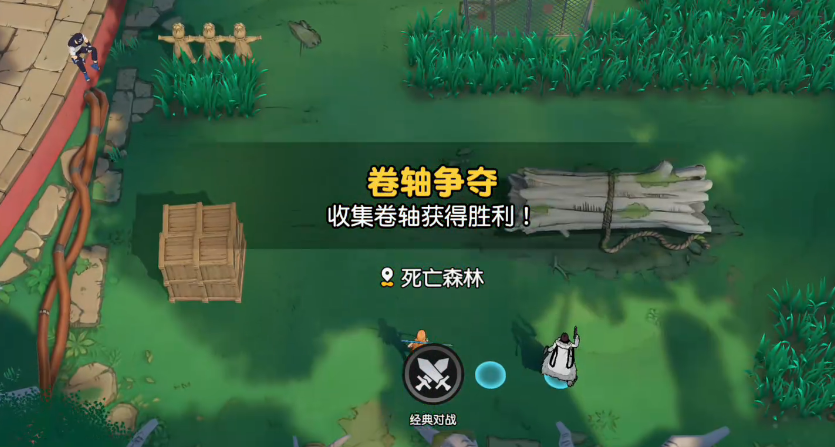
The second mode is the Scroll War, which has almost no difference in map from the standard 3v3, mainly taking place in the Forest of Death. The scale is still 3v3, but the win condition shifts from kill counts to scroll collection. As the game starts, scrolls will gradually spawn at various locations on the map. Each team of three players must operate their heroes to collect these scrolls. When a team collects ten scrolls and maintains this for a while, they win.
It's worth noting that scrolls held by players can be stolen through kills, making the strategic depth stronger than the regular 3v3. In this mode, shooters like Uryu Ishida and assassins like Sasuke are more advantageous, as they can harass from a distance and quickly raid enemies holding scrolls, thus turning the tide of the match.
This mode also emphasizes teamwork. In the early stages, players need to split into three paths to gather scattered scrolls as efficiently as possible. After collecting the scrolls, they should quickly converge at a single point to defend against the enemy team's attempts to steal the scrolls.
The third mode is a 1v1 martial arts tournament, which is more combat-oriented. The map used is the martial arts arena from Dragon Ball. In this mode, each team has only one player, but they can choose three heroes to form their team. The gameplay is similar to many fighting games, where heroes take turns to fight 1v1. When one hero falls, another from the team takes over. The player who defeats all the enemy team's heroes first is the winner.
This mode tests the individual player's skill level and the depth of their hero pool. Not only do players need to be proficient with each hero in their team, but the heroes' development levels should also be high. Although a team only has three heroes, to ensure a high win rate, multiple teams with different styles are needed. This way, you can switch to a suitable team based on the enemy's lineup.
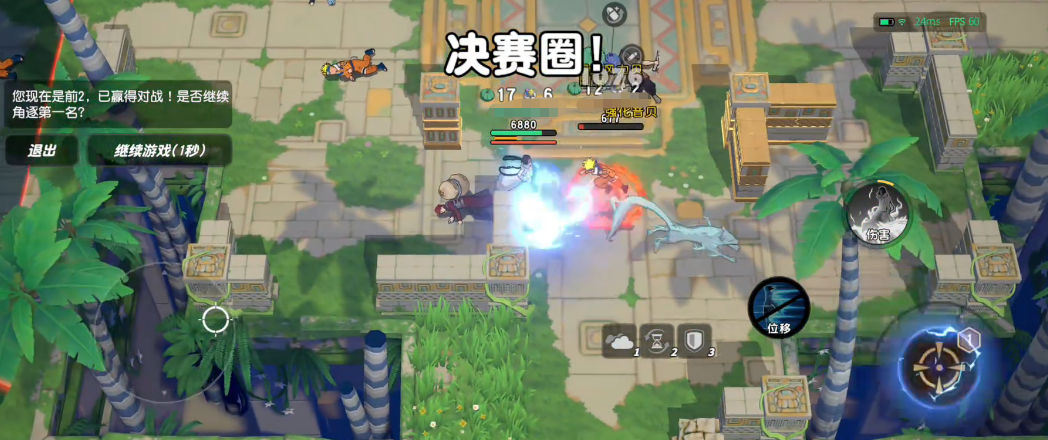
The last mode is a battle royale-style free-for-all, using a 10v10 format, making it the largest-scale mode in the game. At the start, players choose a spawn point and land at the corresponding location on the map. They then need to collect items that spawn on the map to give their heroes powerful buffs.
This mode also includes a shrinking circle mechanism. As the game progresses, the map shrinks toward the center, forcing both teams into encounters. Before the circle shrinks, you need to communicate with other players on your team to ensure everyone has the necessary buffs and that you are not too far apart. This prevents anyone from being left behind and picked off by the enemy when the circle shrinks.
That concludes the overview of the comic star assembly gameplay modes. Each of the four modes in the game has unique creativity and objectives. Different heroes perform differently in each mode. Overall, the game's playability is stronger than before, so don't miss out if you're a fan.
Comic Stars Grand Assembly: How to Play with Gaara Comic Stars Grand Assembly Gaara Gameplay Guide
Many people wonder how to play Gaara in the game "Comic Stars Grand Assembly." In this game, Gaara is a mage hero with relatively simple skill mechanics, making him suitable for beginners. The following will introduce his gameplay from aspects such as skills and equipment. If you want to play Gaara well, you can learn about it. He is quite easy to lead the team to victory when played well.
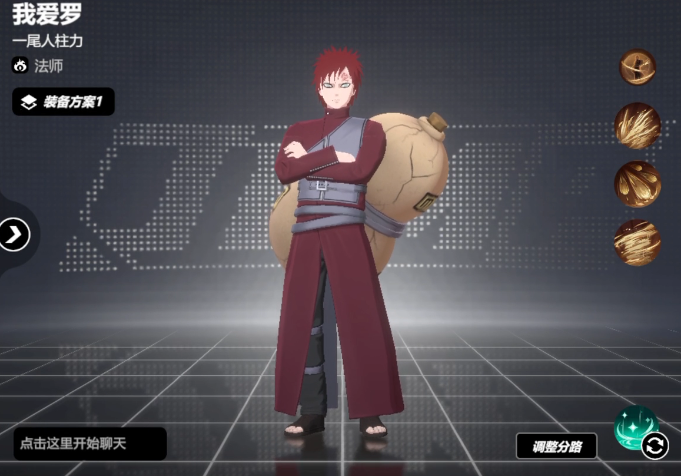
Although Gaara is positioned as a mage, in actual combat, he mainly uses the large area of effect (AOE) of his skills to restrict enemy movement, thus achieving crowd control. It is recommended to pair him with teammates who have mid-range physical damage capabilities to ensure the team's sustained output. In terms of equipment selection, you can configure several different sets based on the situation of the match. However, since Gaara is a mage and has high spell power scaling, all equipment should focus on increasing magical attack. Among these, Cursed Mask and Book of Magic are the most essential. These two pieces of equipment provide a significant amount of magical attack and health, allowing Gaara to deal massive damage while maintaining some durability. Additionally, they have unique effects that can increase the damage of his skills and allow him to regenerate health through skill damage.

There are many mage items that Gaara can choose from, and you can freely switch them based on your needs during the game. To play Gaara well, it is crucial to understand his skills. First, let's look at his passive, which has two effects. The first effect allows him to generate a shield of up to 500 points by using his skills. Therefore, before the shield is fully generated, you need to avoid being hit by enemies, and use the edge of your skills to deal damage. Once the shield is full, you can engage in close combat to unleash your firepower.
The second effect of his passive is that after receiving a fatal attack, he becomes immune to control and quickly regenerates health within five seconds, but cannot move during this time. This is similar to the passive resurrection in other MOBA games, giving Gaara extra room for error. You can use this time to call for teammate support.
Most of Gaara's other skills are offensive. His first skill has very high burst damage, releasing a sand waterfall in a straight line, causing significant AOE damage. However, this skill only has a base damage multiplier of 68%, so it is important to upgrade his potential early to gain an additional 8% multiplier. When fully upgraded, his first skill will also create a sand pit at the end of the skill, which can be used in combination with other skills. Therefore, when using this skill, you need to pay attention to the position at the end of the skill to ensure it is in the path where the enemy will pass, creating a surprise ambush effect.
His second skill, Sandstorm, is his main offensive skill, which can be stored up to three times. It is best not to use it unnecessarily, but it can be used to quickly clear minion waves due to its short cooldown of less than two seconds. Like his first skill, it also leaves a sand pit at the location where it is used, and the sand pit can slow down enemies standing on it. After upgrading his potential, this skill gains additional spell power and extends the duration of the sand pits created by his first and second skills. Notably, this skill can reduce the cooldown of his passive, so try to walk on your own sand pits as much as possible to speed up the cooldown of your passive, providing better protection against mistakes.
His ultimate skill creates a Sand Coffin, dealing massive AOE magic damage and a 1.5-second control effect at the location of the previously created sand pit, continuously pulling enemies toward the center of the sand pit. This skill is very powerful for controlling the battlefield in smaller maps.
Since there are multiple game modes, Gaara's strength varies in different modes. It is recommended to use Gaara in the Scroll War and Exchange Meeting modes, as these modes have smaller maps and more frequent battles, allowing his AOE damage and strong crowd control to be utilized effectively.
The above is a complete guide on how to play Gaara in "Comic Stars Grand Assembly." The tips mentioned above are very useful for playing Gaara, helping you to better utilize his crowd control abilities and work more effectively with your teammates to defeat enemies.
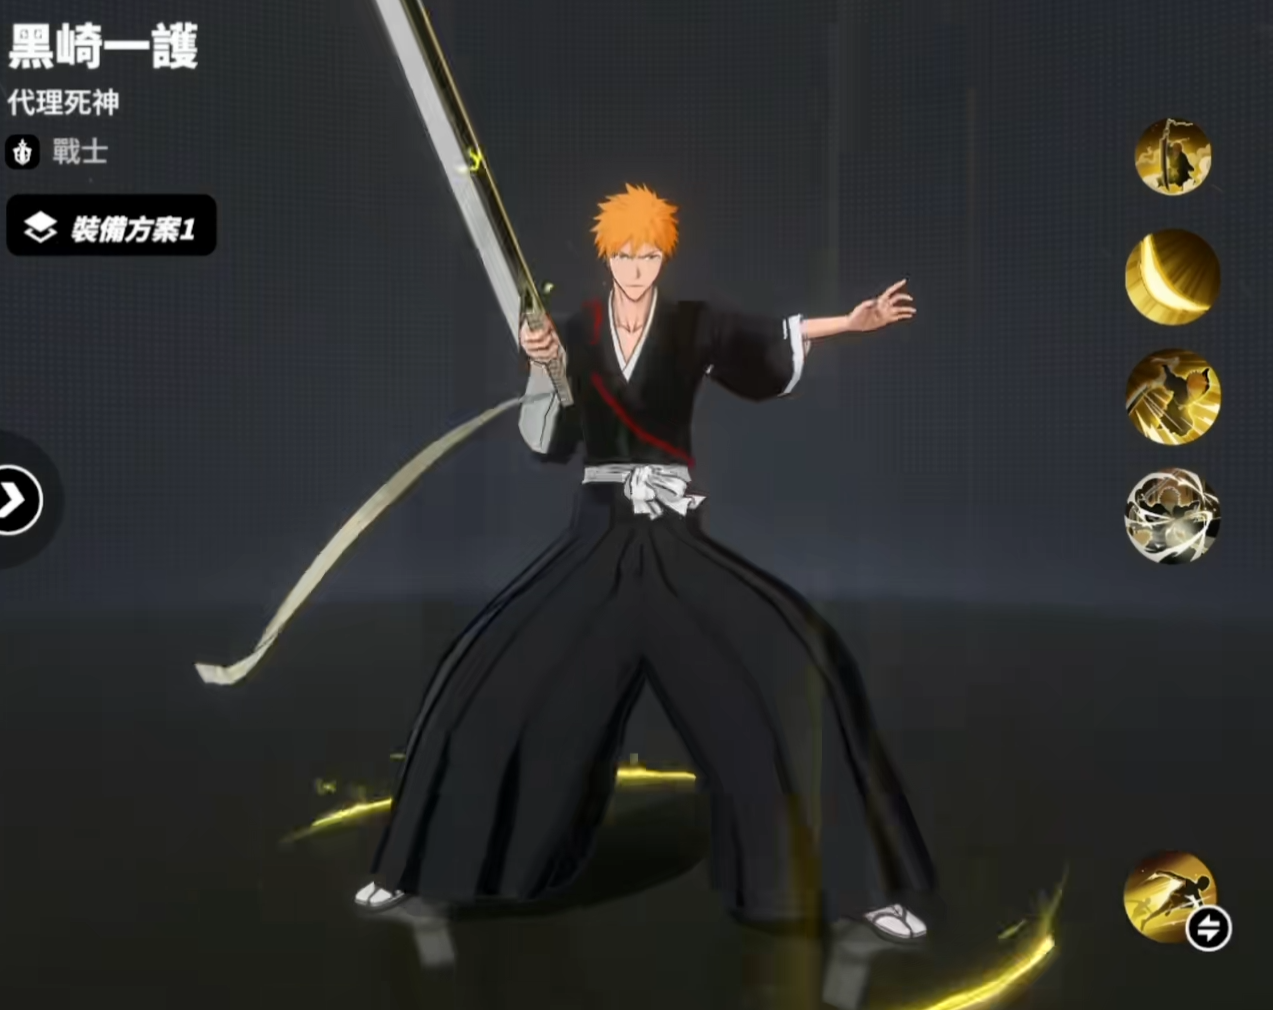
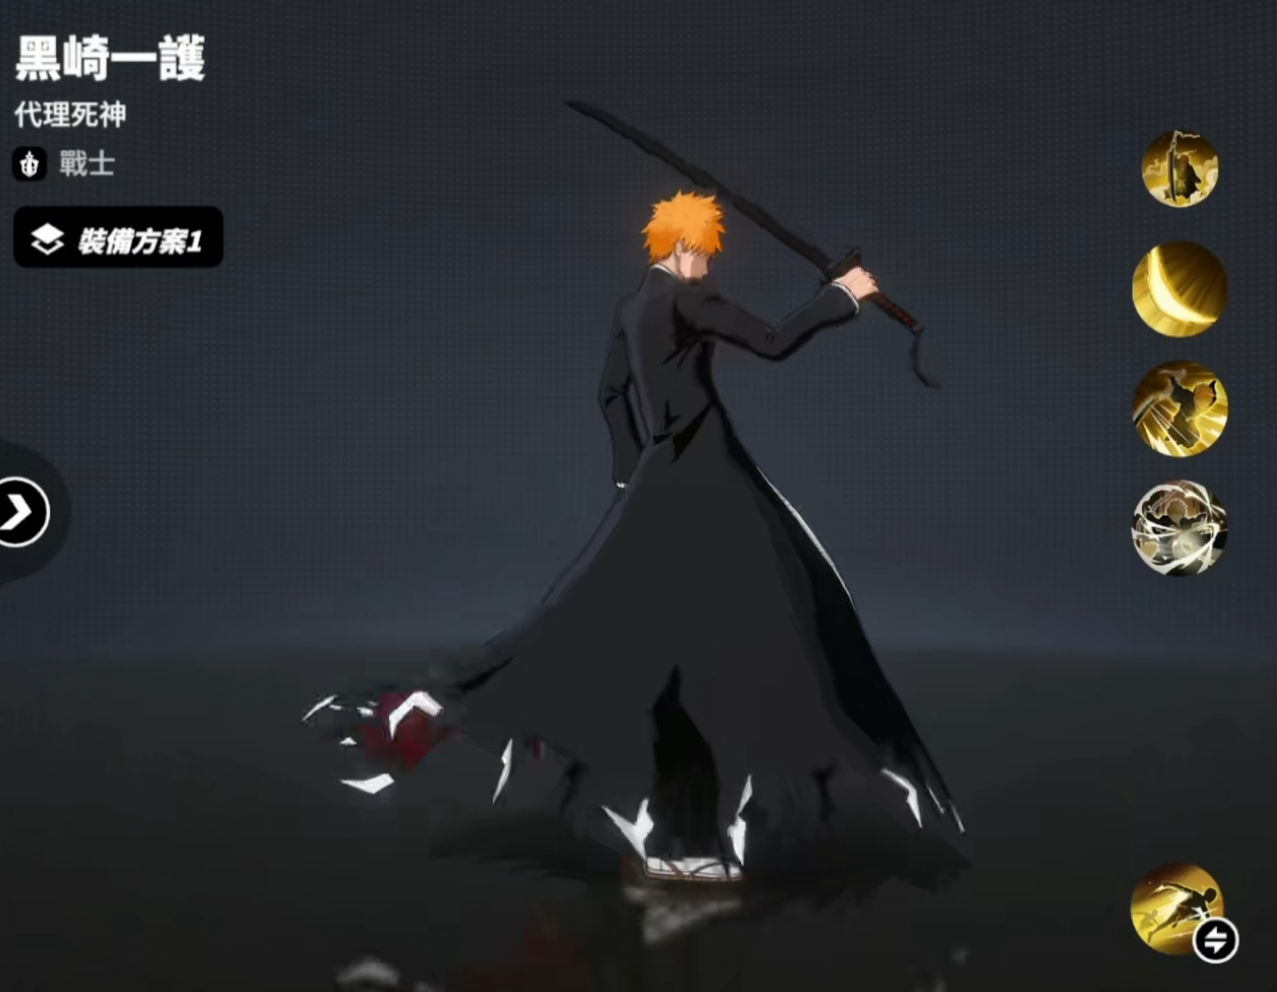
Is the manga character gathering with Ichigo Kurosaki fun? Introduction to the character of Ichigo Kurosaki in the star assembly
Ichigo Kurosaki, as the core protagonist of the Bleach series, has become a uniquely distinctive warrior-type character in the manga all-star gathering with his iconic Zanpakuto and unique spiritual pressure combat system. Is Ichigo Kurosaki fun to play in the manga all-star gathering? This article will comprehensively analyze Ichigo Kurosaki's role positioning, skill characteristics, operational techniques, and team composition based on the latest game data and player feedback, helping players master the combat essence of this "Substitute Shinigami."
Core Advantages
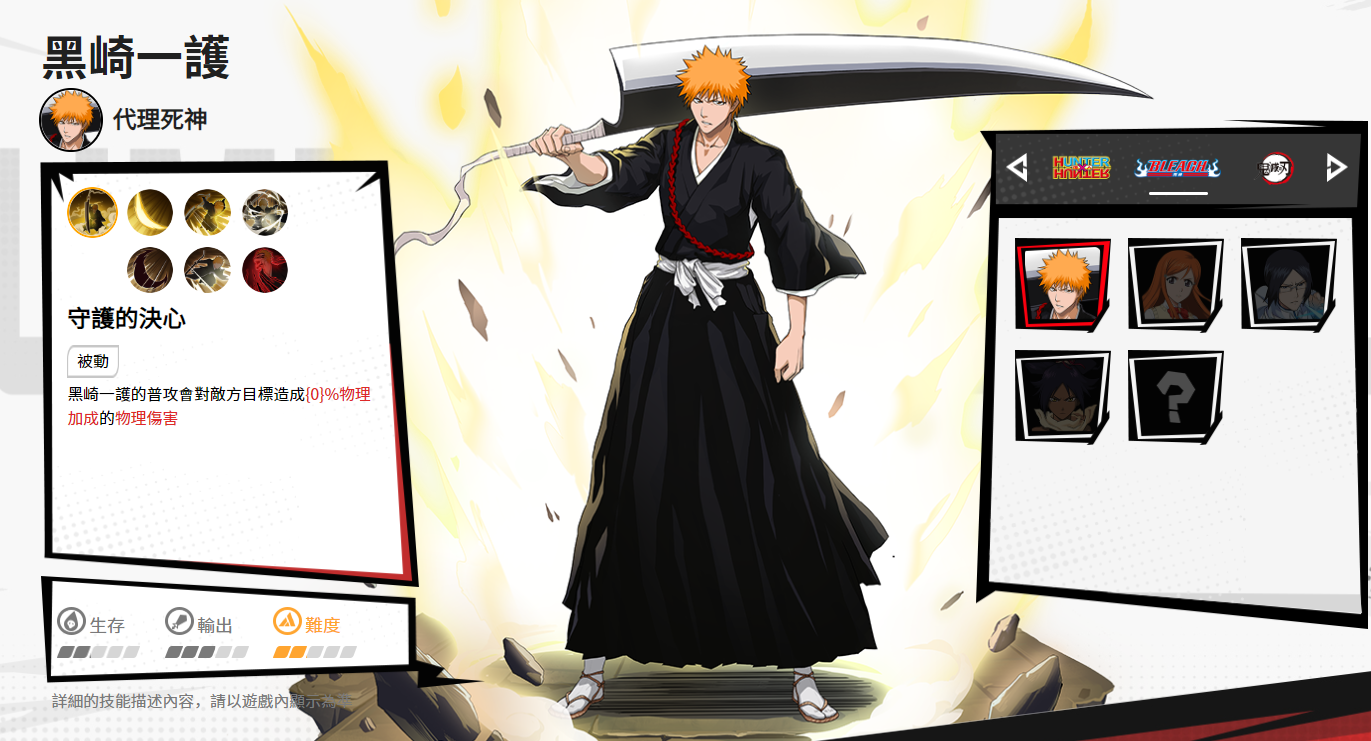
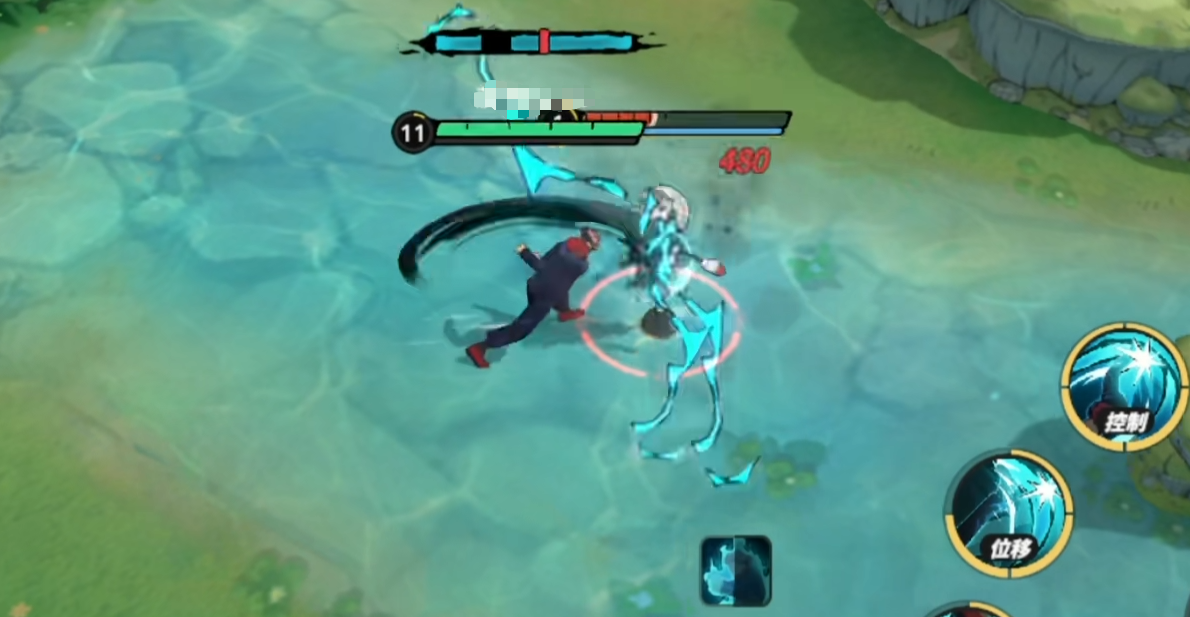
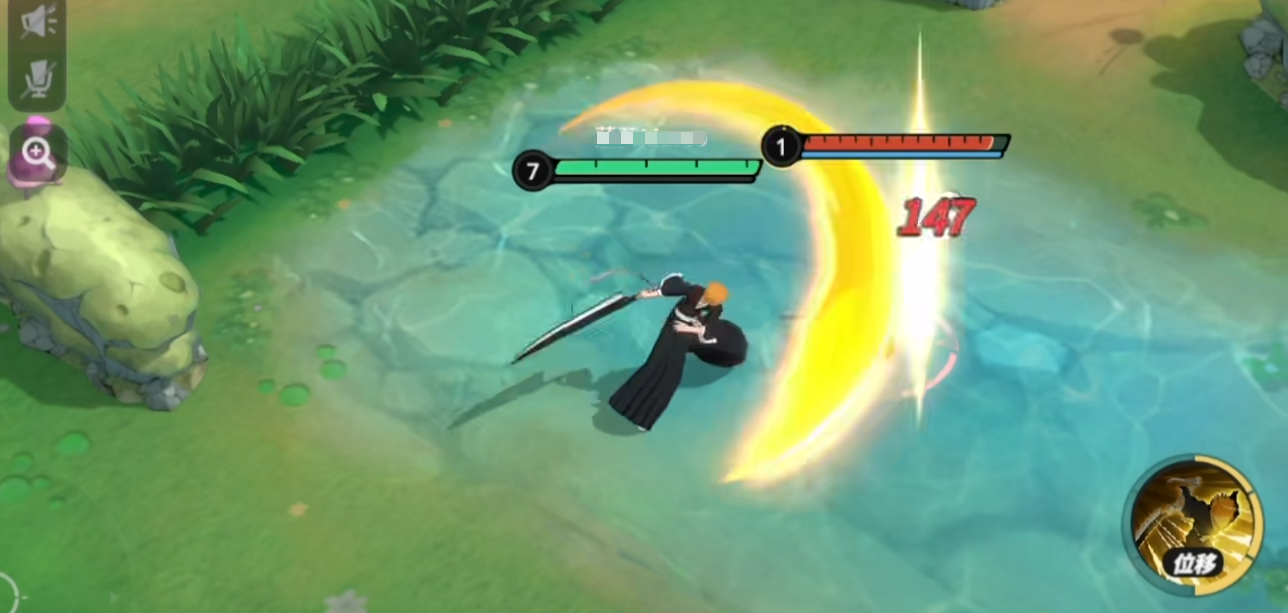
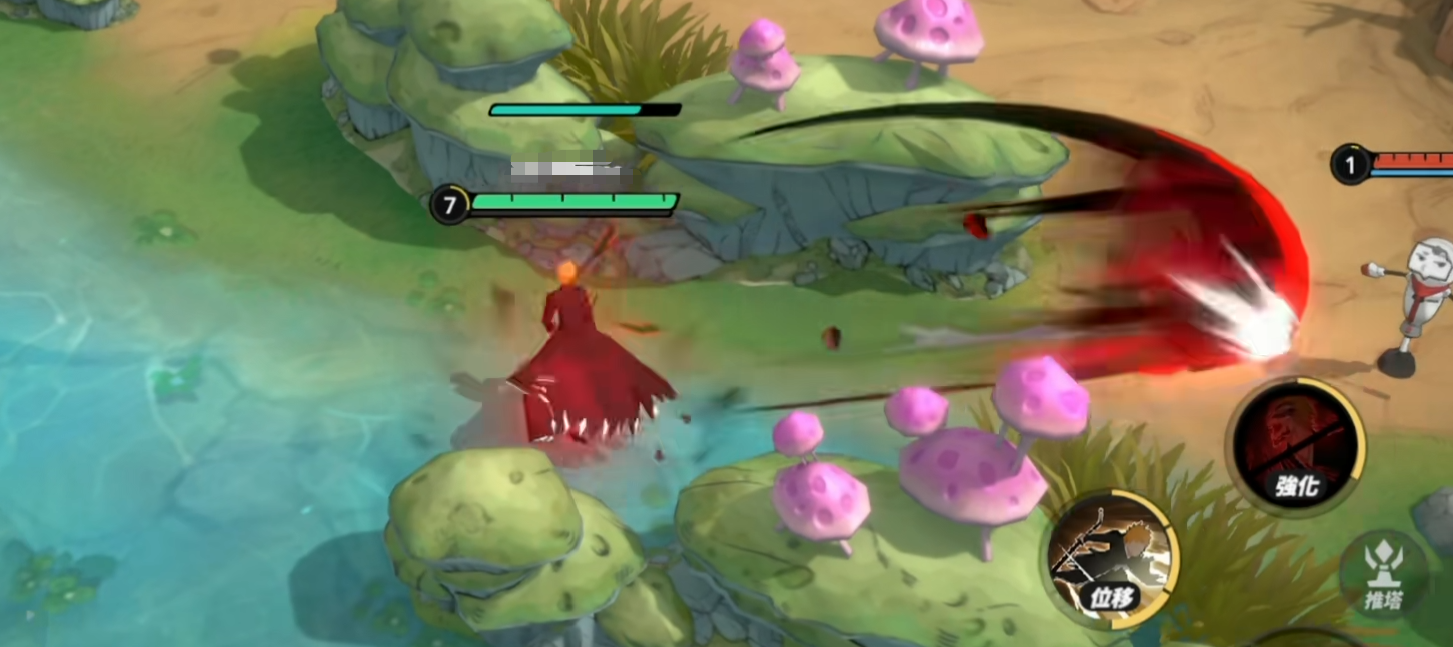
In the current game environment, Ichigo Kurosaki is a powerful T1 level character, although not reaching the T0 level like Monkey D. Luffy or Son Goku, he still ranks among the top in the warrior category. Compared to Naruto Uzumaki's tailed beast transformation mechanism or Yuji Itadori's physical burst, Ichigo Kurosaki focuses more on spiritual pressure accumulation and form transformation tactical choices. Multi-hit attacks and form transformation systems. By accumulating spiritual pressure through normal attacks and skill hits, when the spiritual pressure reaches 100%, the "Bankai" form can be unlocked, gaining a new set of skills and attribute boosts. In Bankai state, his "Getsuga Tensho" skill can deal six-segment area damage with an additional crowd control effect, test data shows that this combo can deal about 2.3 times the total damage of the normal form under ideal conditions. Additionally, his third skill "Flash Step Slash" has excellent mobility, allowing for quick entry into battle or escaping dangerous areas.
Character Traits
However, Ichigo Kurosaki also has obvious weaknesses. As a melee warrior, his initial attack range is quite limited, requiring him to get close to enemies to unleash maximum power. At the same time, accumulating spiritual pressure takes time, making it difficult to quickly enter a strong phase in fast-paced small-scale conflicts. Compared to versatile characters like Tanjiro, who are balanced in both offense and defense, Ichigo Kurosaki relies more on teammates to create an output environment, with relatively weaker solo combat capability in the early stages. In terms of acquisition difficulty, Ichigo Kurosaki is a regular SSR character in the pool, players can randomly obtain him by purchasing "character data cards" from the store (costing 9000 commemorative coins), or by drawing from red treasure chests in event gift boxes. Compared to some limited-time characters, his acquisition path is relatively stable, making him a priority consideration for micro-spending players looking to develop a warrior.
Skill Mechanisms
Ichigo Kurosaki's skill system revolves around "spiritual pressure accumulation" and "form transformation," understanding the effects of each form's skills and the timing of transformations is key to mastering this character. The skill set in the normal form lays the foundation for Ichigo Kurosaki's basic fighting style. Skill 1 "Slash" is the main damage-dealing method, performing three slashes, with the last hit having a slight knockback effect, increasing damage by 5.4% per level upon upgrading. Skill 2 "Getsuga Tensho" serves as a long-range consumption tool, releasing an arc-shaped sword energy wave dealing high single-segment damage, hitting enemies grants additional spiritual pressure. Skill 3 "Flash Step" is the core movement skill, allowing for rapid approach or evasion, and can be used by skilled players to dodge critical skills. The Bankai form is Ichigo Kurosaki's qualitative change stage, which requires manually activating after accumulating 100% spiritual pressure. After transforming, Skill 1 becomes "Tensa Zangetsu," expanding the attack range and adding a bleeding effect; Skill 2 "Enhanced Getsuga Tensho" upgrades to six-segment area damage with an added crowd control effect; Skill 3 "Flash Step Combo" changes to four displacement slashes, applying an armor-breaking status to enemies along the path. It's particularly noteworthy that the Bankai state lasts for 15 seconds, during which all of Ichigo Kurosaki's skill cooldowns are reduced by 20%, and spiritual pressure continuously depletes, automatically reverting to the normal form once exhausted.
Skill Upgrades
Prioritization suggestion: Skill 2 in Bankai form (Enhanced Getsuga Tensho) > Skill 1 in normal form (Slash) > Skill 3 (Flash Step) > Ultimate (Final Getsuga Tensho). When resources are tight, prioritize enhancing core output skills to ensure explosive power after form transformation. Mastering Ichigo Kurosaki's operational techniques requires systematic learning from basic combos to advanced tactics, as this character demands a high level of control over attack rhythm and form transformation timing. Reasonable skill release order and position selection are key to unleashing his potential. Tactics should be flexibly adjusted according to different enemy types. Against highly mobile characters, reserve Skill 3 for dodging; against tanky enemies, prioritize triggering the armor-breaking effect; and when facing control-oriented teams, wait for the opponent's key skills to go on cooldown before engaging. The in-game enemy information interface allows viewing of opponents' skill traits, facilitating advance planning of combat strategies. Spiritual pressure management is also crucial. Ichigo Kurosaki's strength curve is directly related to spiritual pressure accumulation, requiring a reasonable distribution of attack rhythms.
Equipment Pairing
As a character specialized in spiritual pressure, Ichigo Kurosaki prioritizes equipment that boosts attack power and skill effects. The "Zangetsu" set is the optimal choice, directly increasing crit rate by 10% and spiritual pressure acquisition efficiency by 15%. The second-best option is the "Proxy Badge" (Bleach series equipment), providing stable attack bonuses and life steal effects. If neither of these options is available, the "Hollow Mask" is also a good choice, granting a damage-absorbing shield when health falls below 30%.
The above is the complete content regarding whether Ichigo Kurosaki is fun to play in the manga all-star gathering. Whether you're a loyal fan of the Bleach series or a player eager to climb the ranks with warrior characters, Ichigo Kurosaki offers a unique gaming experience. He differs from traditional tanks or assassins, but it is precisely this meticulously planned fighting style that makes every perfect form transformation incredibly cool.
Recommend


Strategy

A Guide to Zhetian Fanchen Yiyue Sharing Tips for New Players on How to Play Zhetian Fanchen Yiyue
Introduction to the Public Beta Time of Zhetian Fanchen Yeyi When is the public beta for Zhetian Fanchen Yeyi?
How is Zi Yue from Zhetian Fanchen? Introduction to Zi Yue from Zhetian Fanchen
What are the Luhida Origin redemption codes? Sharing of Luhida Origin mobile game gift codes
Lu Xida Origin Team Recommendations Lu Xida Origin Team Guide
Lu Xida Origin Strategy Sharing: Beginner's Guide to Lu Xida Origin
