
The Extraordinary Ones
Game Introduction


Hot Strategy
Feifei Reunion Priest Strategy: How to Allocate Points for the Priest
As one of the three major professions, the Cleric can heal and buff teammates, ensuring the team's sustainability, making it an indispensable role in the team. Since many new players who enjoy participating in team battles do not know how to allocate points after choosing this profession, the following guide on the Cleric will share key skills and point allocation schemes so that everyone can play the Cleric well.

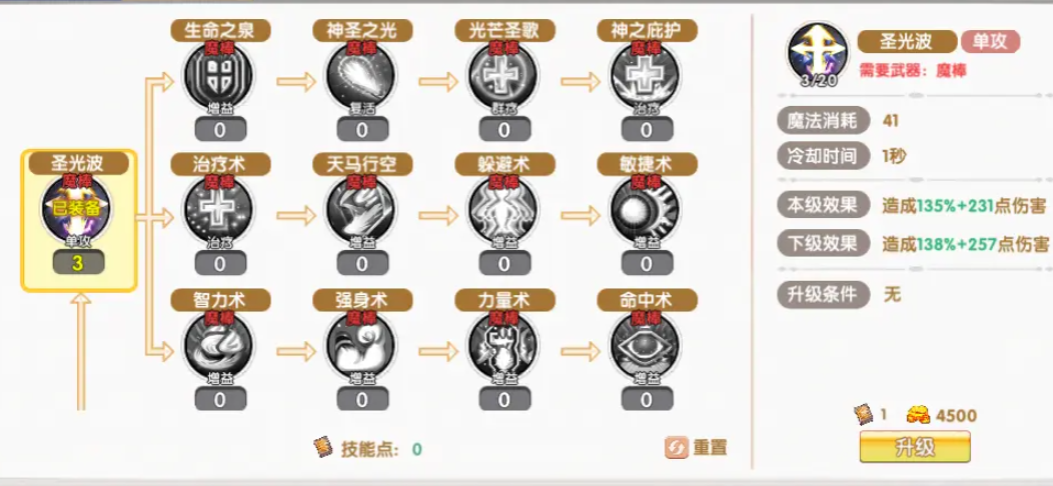
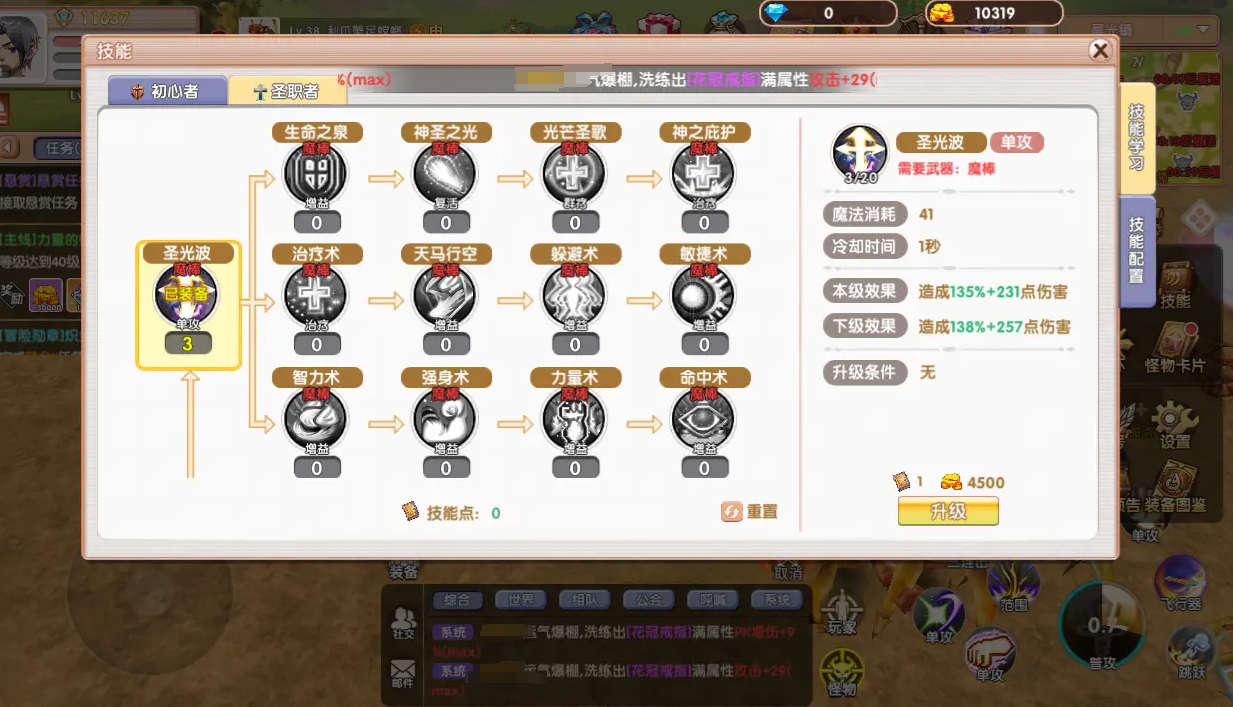
The Cleric has very strong tactical flexibility. His Healing, Holy Light, Divine Protection, and other abilities can help teammates recover health. Among them, Holy Light can even directly revive fallen teammates, while "Hammer of Punishment" can stun enemies and interrupt powerful bosses' critical skills.

In actual combat, these moves can be flexibly used, adjusting the proportion of output and healing according to the team's actual situation. It is recommended to use "Holy Light" for high single-target healing and purification effects when tanks or core damage dealers are in danger.
Divine Protection should be used when teammates are near death, instantly restoring 20% of their maximum health to prevent them from being killed by a one-hit kill. During this time, you can appropriately use "Hit Rate Boost" to increase your teammates' hit rate, which is useful against high-dodge bosses and PVP environments. Before the battle starts, you can use "Strength Blessing" to boost the entire team's physical attack power.

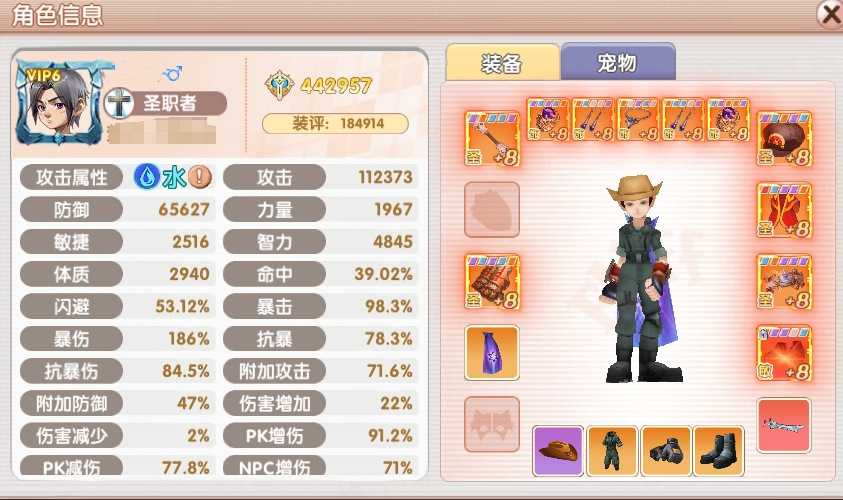
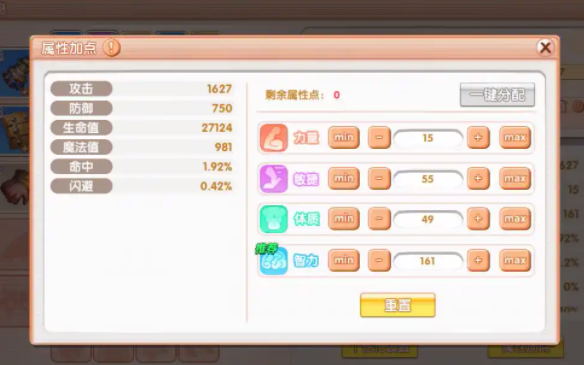
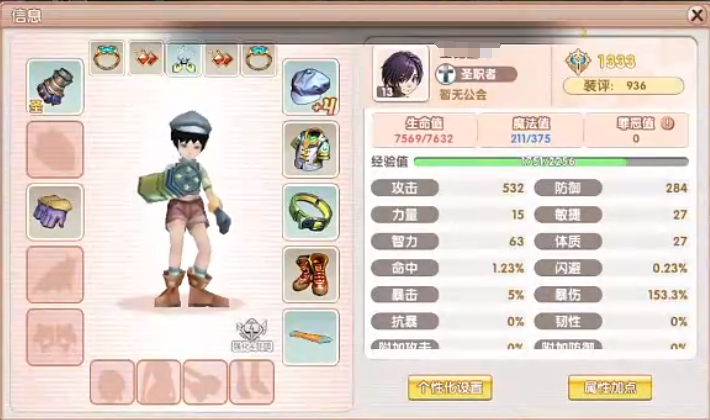
In terms of attribute allocation, prioritize increasing intelligence, as this increases the amount of healing. You can also add some points to vitality to ensure your own survival. Always pay attention to your teammates' health, using healing to ensure their safety, and use "Holy Light Break" and other abilities to supplement damage when your teammates' health is not at risk.
This concludes the guide on the Cleric in Feifei Reunion. This profession is very rare in high-difficulty dungeons and is perfect for social players who enjoy teamwork. If you decide to choose this profession, you can follow the above guide to flexibly allocate points and use skills, allowing the Cleric to play its due role in the team.
How to Play the Support Cleric in Flyff Reborn: A Guide to Playing the Support Cleric in Flyff Reborn
In the Feifei Reunion game, the support cleric is the most important healer in the team. Unlike damage dealers, the support cleric focuses on healing, buffing, and resurrecting teammates, acting like a behind-the-scenes hero on the battlefield. How to play the support cleric in Feifei Reunion? Today, I will share with you the gameplay of the support cleric in Feifei Reunion. Let's take a look at the strategy for this class.

The support cleric mainly uses wands or staves as weapons, and it is recommended to choose equipment with healing bonuses, such as the "Healing Staff · Aurora," which can significantly enhance the effect of area-of-effect (AoE) healing. For armor, the "Angel Wings" set is very suitable for support clerics, not only increasing healing crit but also providing damage reduction to teammates, greatly enhancing the overall survivability of the team.
In terms of skills, the support cleric must master several core abilities. For example, "Fountain of Life" is a large-scale AoE healing skill that is particularly useful against AoE damage in dungeons; "Holy Light" is a high-burst single-target healing skill that can also cleanse negative status effects; "Divine Protection" is a critical life-saving skill that instantly restores a large amount of health when a teammate is near death, often saving the main tank from falling; and "Resurrection" makes you the safety net of the entire team, preventing the disruption of the battle rhythm due to casualties.
For attribute points, it is suggested to primarily increase intelligence, which boosts your healing and buffing power. Once intelligence reaches 150 points, it triggers the healing crit mechanism, further increasing your healing output. Constitution can also be increased slightly to improve your health and defense, avoiding being too fragile.
In actual combat, the support cleric needs to read the battle rhythm. At the beginning of a dungeon fight, you can first cast "Fountain of Life" to create a healing field, then apply buffs like "Strength Blessing" to maintain the good condition of the whole team. When facing a boss's burst skill, prepare to cast "Holy Light" or activate "Divine Protection" in advance to protect the main DPS or tank. In PvP, reaction speed is more critical, requiring timely anticipation of enemy focus targets and using heals or resurrections at key moments to turn the tide of battle.
This is the complete guide on how to play the support cleric in Feifei Reunion. Although the support cleric does not deal damage, without a competent support, the team can easily wipe out during challenging dungeons, high-difficulty bosses, or PvP. Therefore, do not underestimate their role.
Introduction to the Reunion of Feifei with the Cleric How to Allocate Points for the Reunion of Feifei with the Cleric
Feifei Reunion constructs a three-dimensional dream world where each player can take on a role and continuously embark on adventures in this vast world. There will be many professions, and before starting an adventure, each player can choose a profession they like. The introduction of the Cleric in Feifei Reunion is what we will share next. If you want to play as a support role, you can use the Cleric for continuous healing, protecting the team's life. You can also choose to be a burst-type character, assisting the entire team in combat. Specific details will be shared with everyone below.
In the game, there are many different professions. The Cleric is a profession with dual styles, allowing each player to unlock different combat abilities based on their positioning. First, during battles, you can use the support style to make the character a guardian of the team. At this time, the character uses weapons such as staves and wands. Alternatively, you can make it a melee burst character, serving as a control support in the game. Under this style, the character uses gloves. The specific choice of which style depends on the player's personal combat needs.
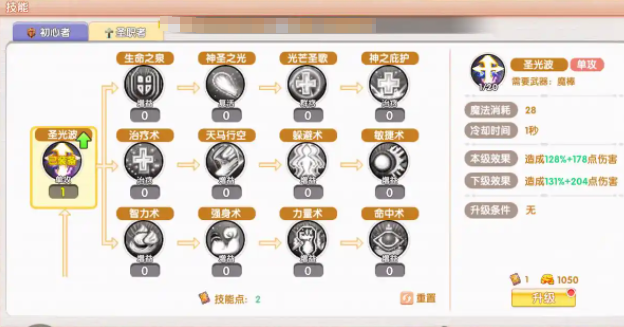
Under these two professional styles, each player can allocate points to give the character corresponding abilities, which is also to allow players to meet their own needs. First, for the support style, players can use the Fountain of Life to perform large-scale group healing, which is very suitable when the entire team has been damaged. If a single character is damaged, Holy Light can be used, providing high single-target healing. This can also add some purification effects. If already in a near-death state, Divine Protection can be directly triggered, using this skill to restore 20% of the character's health, preventing oneself or teammates from being instantly killed by opponents.
The Resurrection spell can be used to revive teammates in the game, similar to the functions of the Fountain of Life and Holy Light. Characters can also use the Hit Spell to increase the hit rate of all members of the team. If you want the team to have stronger attack power, you can use the Strength Blessing, utilizing it before the battle starts to enhance the overall ability of the team.
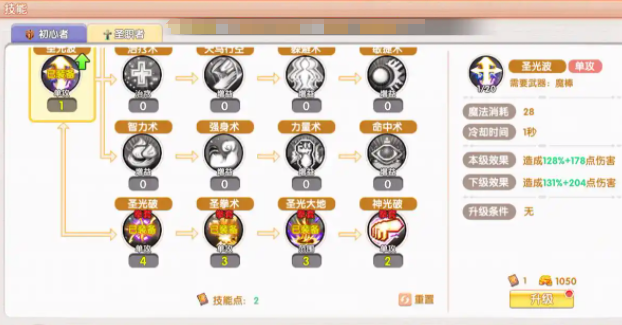
If you prefer the violent Fist Master style, you can use Holy Fist, allowing the character to gain extra damage, and during attacks, there is a 20% chance to stun the opponent for 1.5 seconds. Divine Light can also increase damage, and this skill is very suitable for PvP combat. If you need to deal large-scale AOE damage, such as clearing out small monsters or controlling the bloodline in a team, you can use Holy Ground.
If the player chooses a support type style, it is suitable to use their own skills to help the entire team ensure their survival. Alternatively, you can choose an attack type style, allowing for close-range burst damage, significantly enhancing the team's capabilities.
Regarding the Cleric in Feifei Reunion, the introduction ends here. This is a profession that many players choose at the beginning, mainly because there are two styles to choose from later on. Players can choose an attack type style to help the team in combat or a support type style. No matter which one is chosen, it can bring a lot of help to the team.
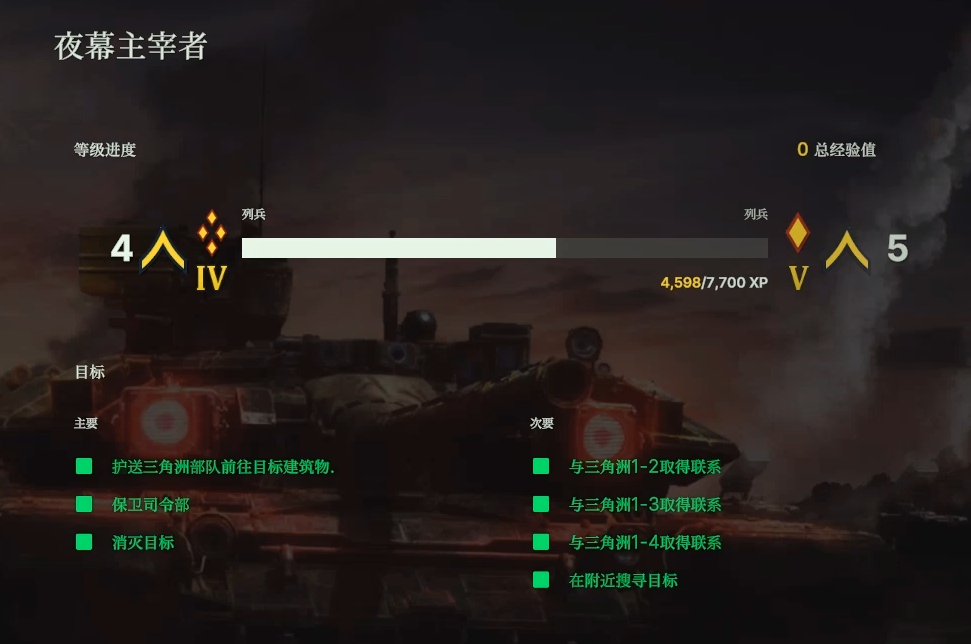
How to Pass the Single Player Campaign of Night Dominator as US Forces in Broken Arrow; Guide to Completing Night Dominator at the Highest Difficulty for US Forces in Broken Arrow
This mission is a night raid by the Delta Force, and although it's said to be the easiest level, it still presents a significant challenge on the highest difficulty. The Delta Force has a brief invincibility period, but time is very tight, so there are certain skills involved in using it. This article provides a detailed guide on how to pass the single-player campaign of Broken Arrow as the US Night Dominator. If you haven't completed the highest difficulty yet, don't miss this one. I hope my approach can help everyone.
【biubiu Accelerator】Latest Version Download
》》》》》#biubiu Accelerator#《《《《《
Initial Deployment and Air Power Scheduling
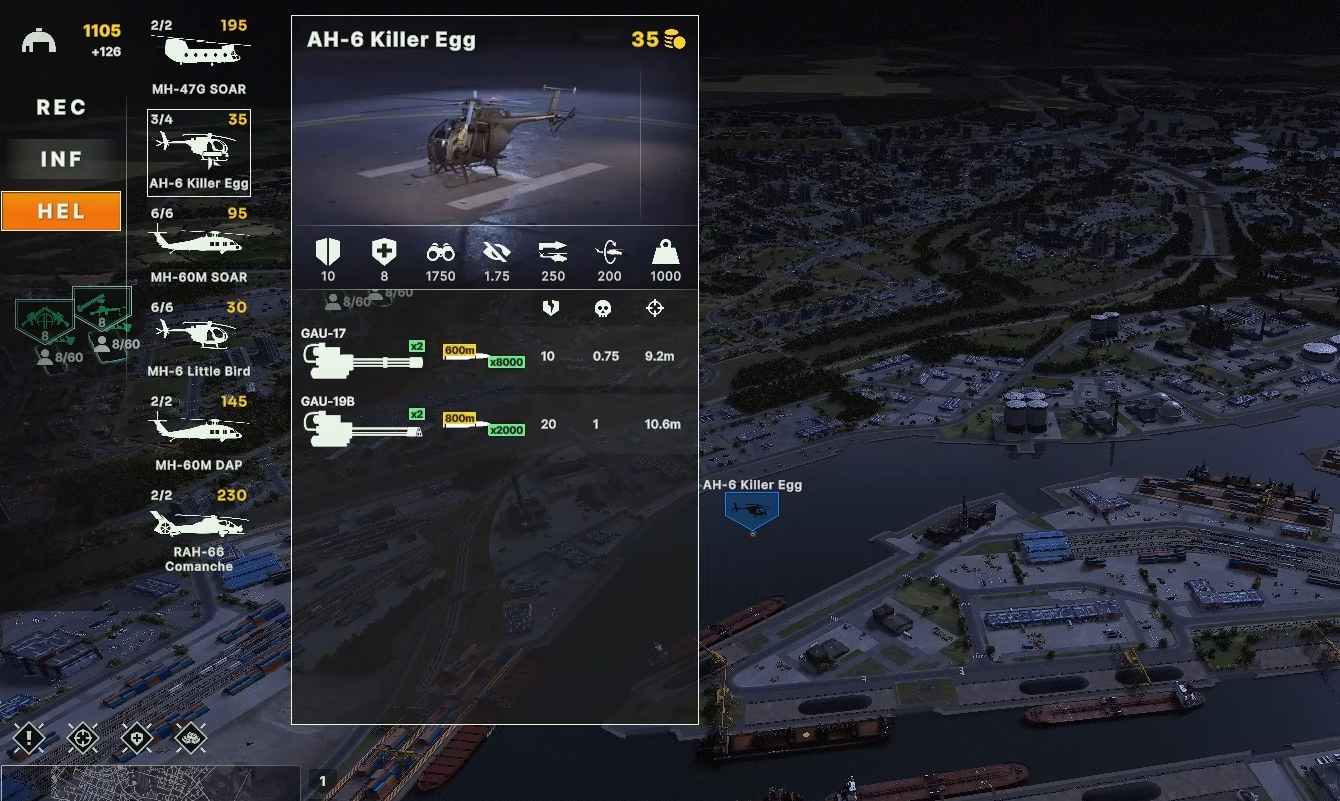
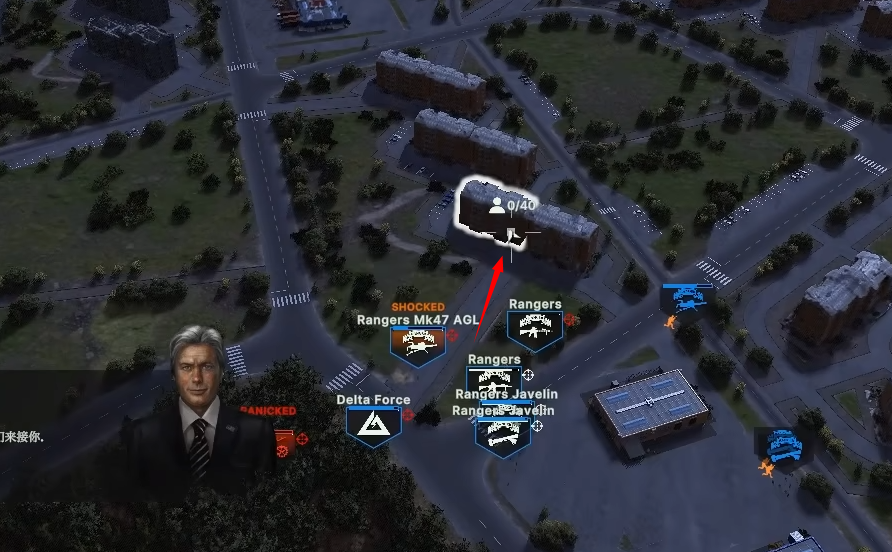
At the start, you have four Little Birds and four Black Hawks, but the core combat force is the four Delta squads with invincibility (initially invincible). Key strategies:
Ignore Escort: There's no need to protect the Delta squads before they enter the underground passage; focus resources on deploying other units.
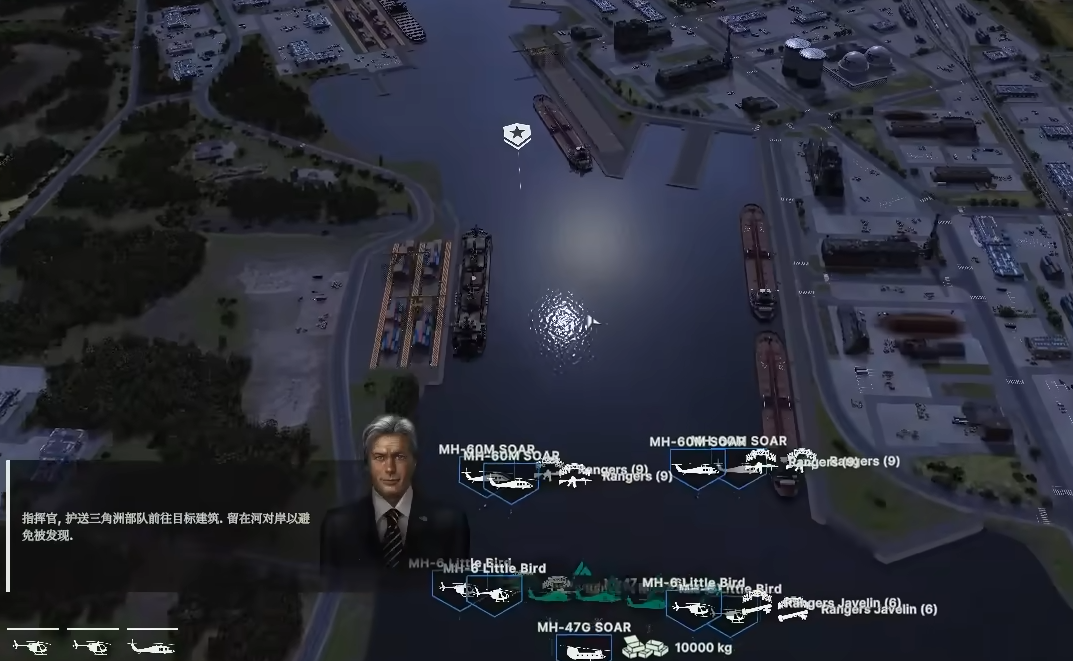
Airborne Landing Sites:
Chinooks and Little Birds land in the central open area of the map, serving as a support hub for later operations.
All Black Hawks hover at the top of the high-rise building around the corner ahead (to avoid ground fire).
Infantry Deployment:
The rocket squad occupies the two buildings below, blocking the street view.
The main Rangers force advances towards the center, but one squad should remain at the initial high-rise (to prevent flank attacks).
Call in a Black Hawk carrying an anti-tank team (Javelin) and two reconnaissance Little Birds (unarmed) for mobile support.
Mid-Game Advance and Rescue Operation
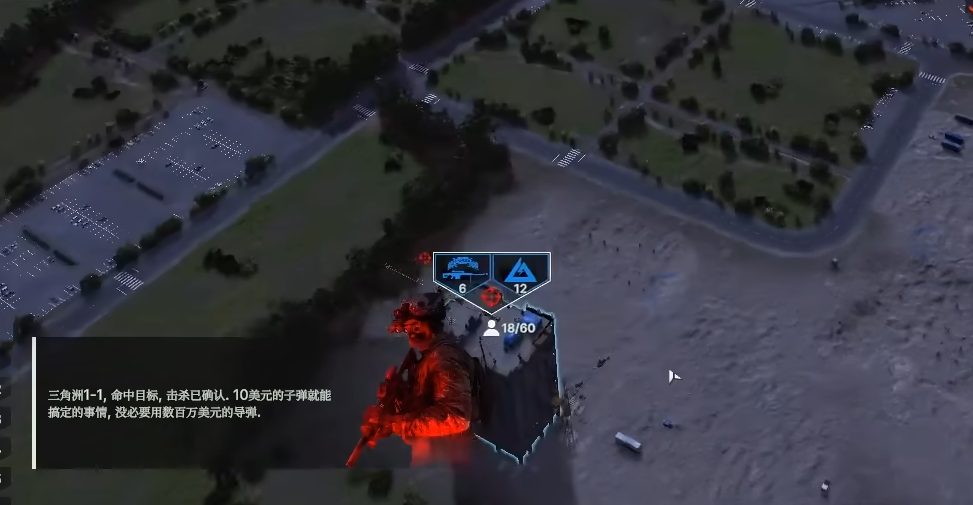
Objective: Capture all six points within 5 minutes and simultaneously complete the rescue of the Delta Force.
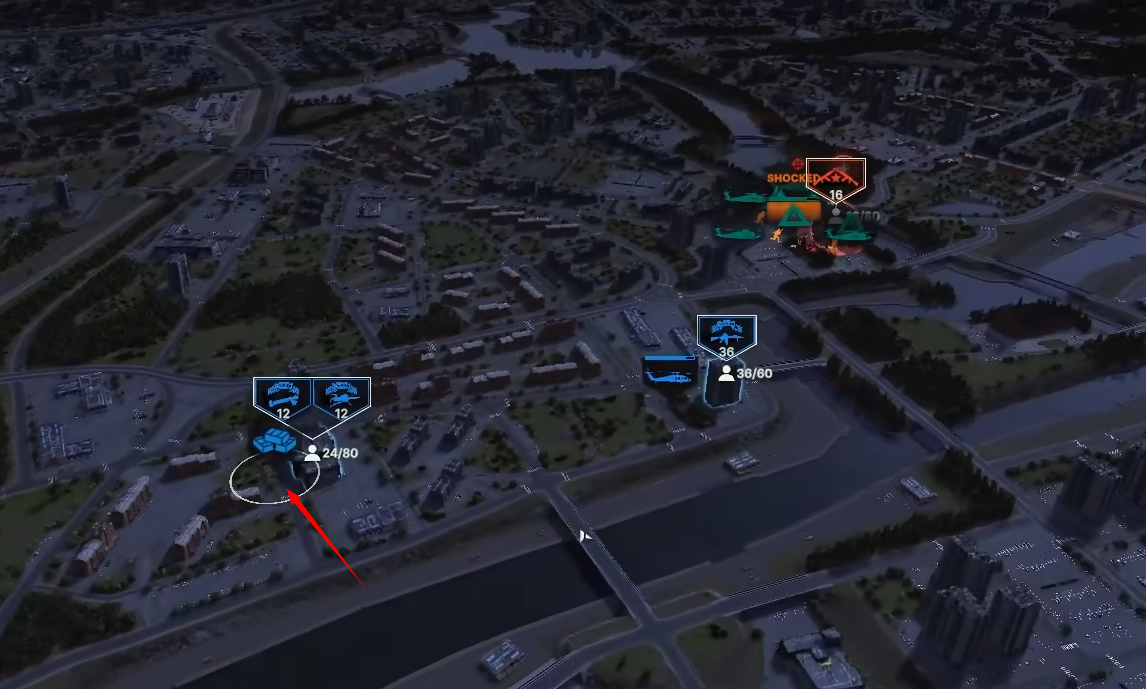
Rapid Point Capture:
The Rangers directly occupy the buildings surrounding the two squares, controlling four points immediately (the points disappear after capture, no need to defend).
When ambushed by enemy thermobaric rocket squads, immediately gather the initial eight squads to assault the fifth point (do not split forces). Use grenade soldiers to suppress the thermobaric rocket squads first, avoiding close combat.

Command Center Mechanism:
The command center building does not need to be defended; the system judges that the invisible Delta units continuously occupy the point, never losing it.
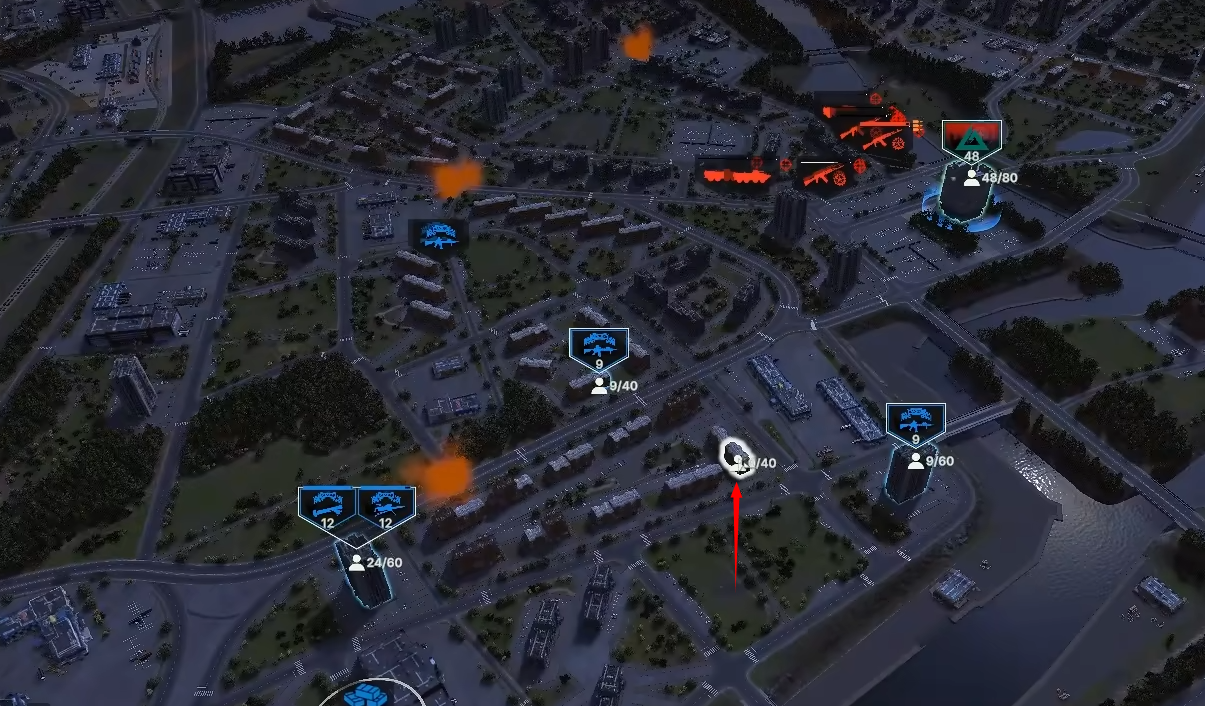
Delta Rescue:
First and Second Squads: Regular rendezvous, just fly the Black Hawk near the point to meet up.
Third Squad (spawns in the center of the enemy formation):
Accumulate 8-9 helicopters (including decoy aircraft), launch a "death charge" to break through the air defense network, and right-click to instantly complete the rescue. Be sure to return immediately, staying more than 2 seconds will result in being shot down.
After the rendezvous, the Delta Force gains smoke grenades (4) and extremely high combat power, which must be escorted into the point at all costs.
Final Point Capture and Objective Elimination
Dual Line Decisive Stage:
Main Assault:
The main force (including the rescued Delta Force) pushes the fifth point, with grenade soldiers suppressing the enemy anti-tank squad, and Rangers coordinating with the Delta Force to occupy the point.
Solo Infiltration:
The unrescued Delta Force flanks through the building ruins, using smoke and crawling when encountering enemy thermobaric rockets, preserving strength until support arrives.
Final Objective:
The sixth point requires a sniper to manually eliminate a high-value target (cruise missiles are prohibited). The pre-deployed sniper team needs to occupy a high vantage point (such as the top floor of the command center), aim and kill with one shot. If the sniper is killed, an emergency drop of a replacement team is required. While assaulting the sixth point, the main force should advance to attract fire, and the Delta Force should penetrate the flank with smoke.
Gold Medal Unlocking Points and Bug Avoidance
Essential Conditions:
All Delta Force members must be successfully rescued, with no teams wiped out.
All six points must be captured before the 1-1 squad communication (15 seconds before the countdown ends).
The final objective must be killed by the sniper (otherwise, it triggers the "target kill failure" bug).
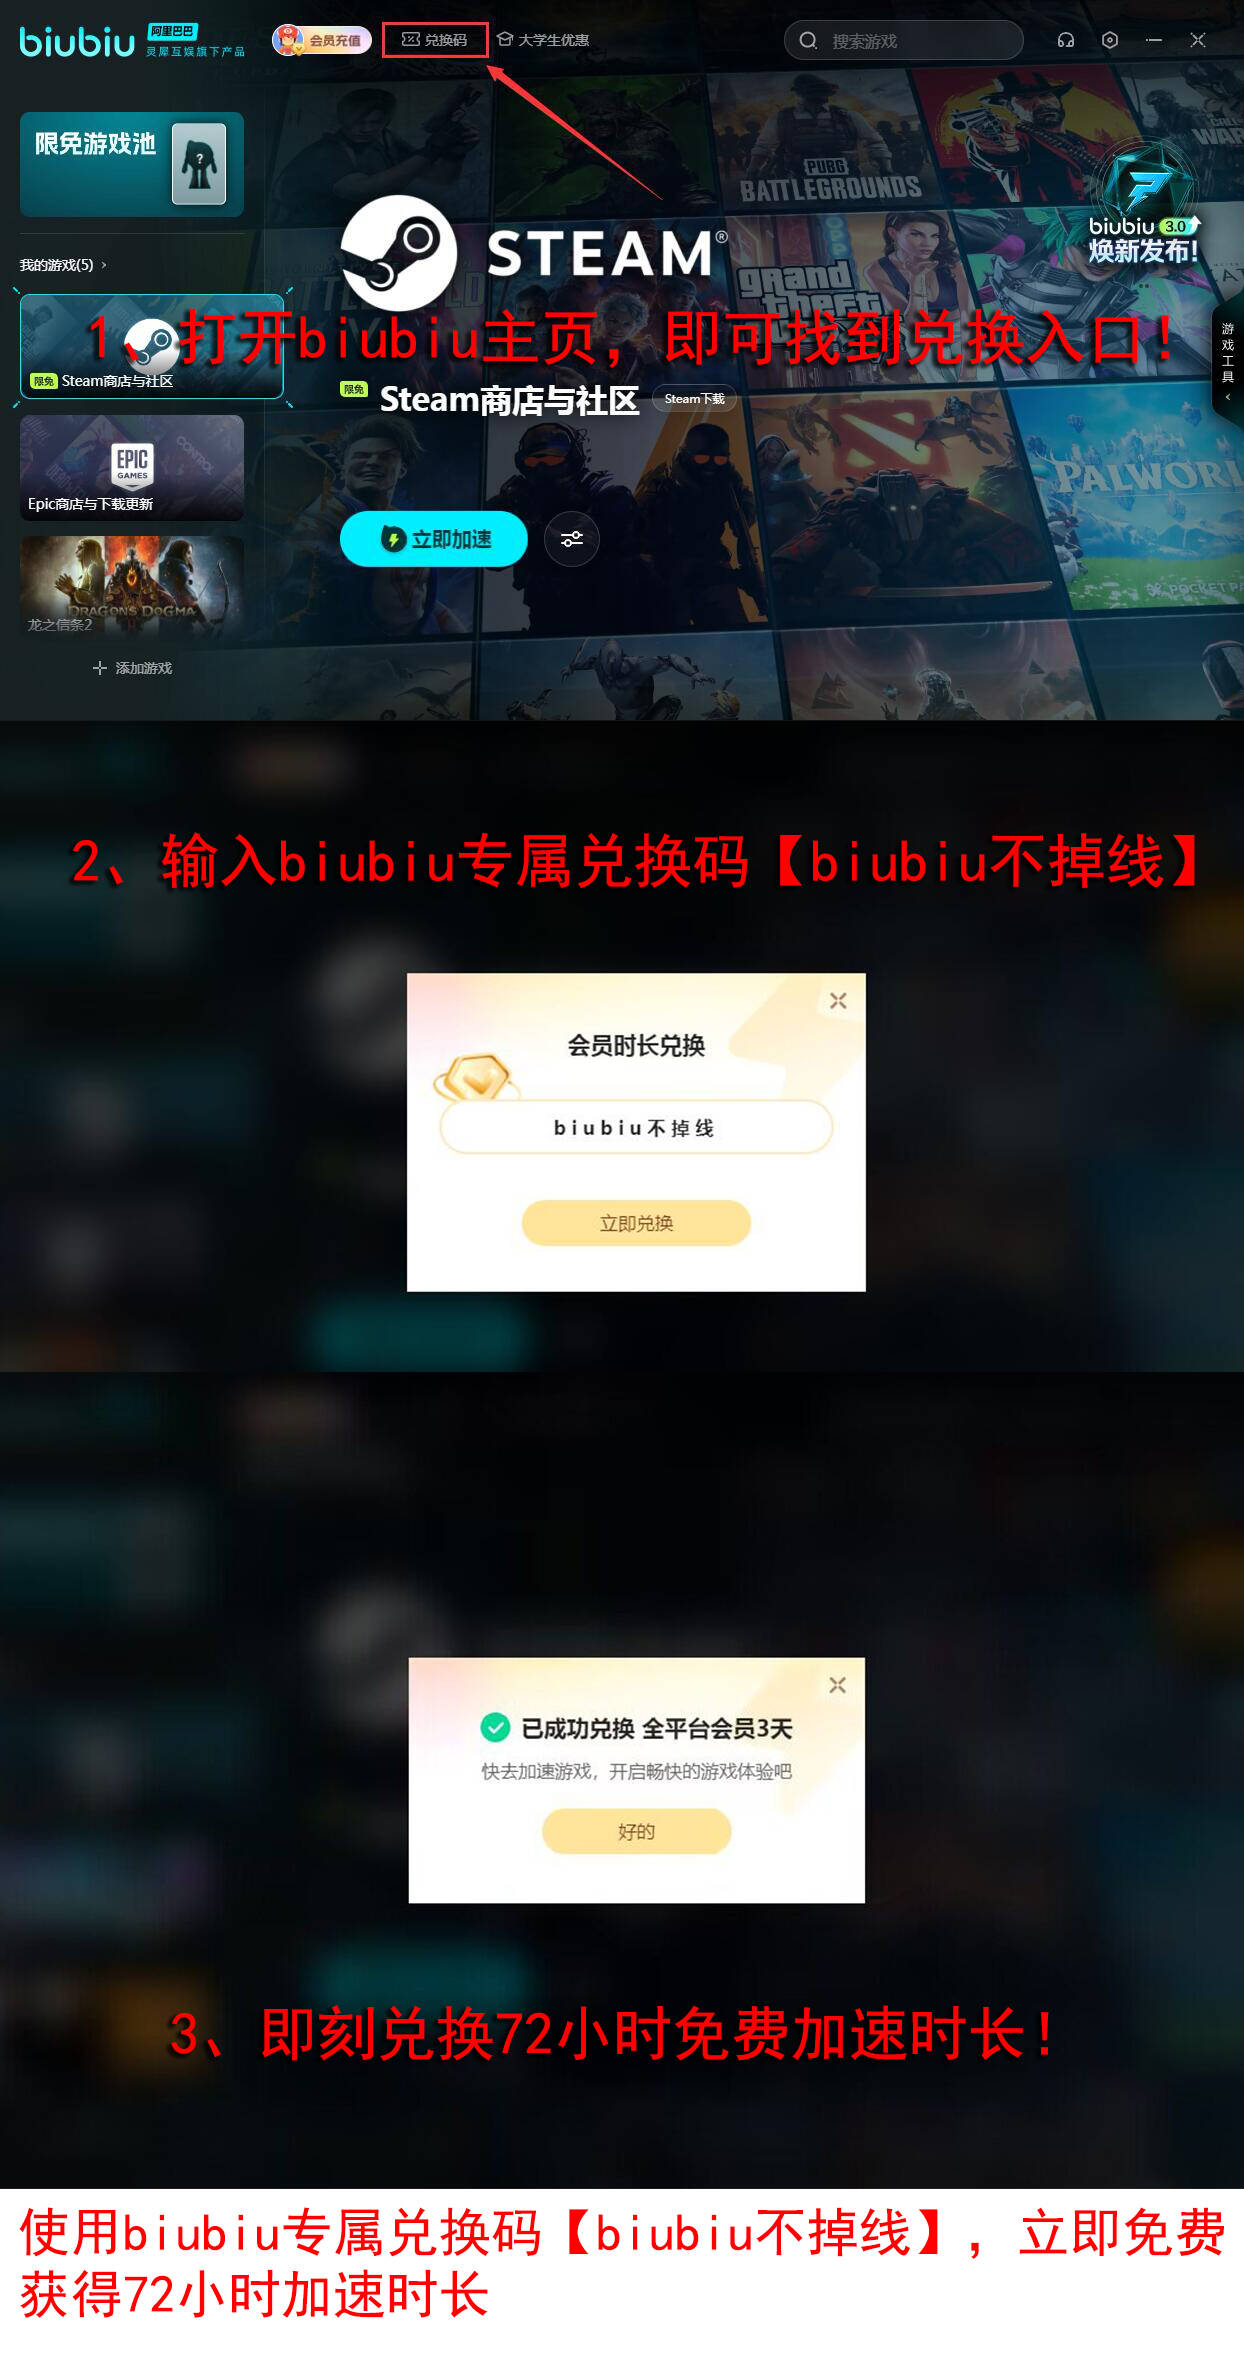
Finally, pay attention to your internet speed. When others are struggling with 200ms latency, it's recommended to use biubiu's black technology to keep the latency under 50ms! More excitingly, from June 17 to July 4, we're launching the craziest Broken Arrow acceleration event in history: Free! Every day, you can also participate in a lottery, with the grand prize being a game copy.
New users who register now get super bonus benefits. The system will give you 24 hours upon registration, and entering the code 【biubiu non-stop】 will grant you an additional 72 hours, bringing your VIP duration to 96 hours! This applies to all platforms, including mobile, PC, and console, and the time automatically stacks without any calculations! Don't miss out on this wave of benefits; act now.
In summary, the guide for completing the highest difficulty of the US Night Dominator in Broken Arrow is covered here. The overall strategy revolves around "quick point capture during the invincibility period - helicopter sea rescue - sniper final kill," strictly controlling the countdown rhythm. The entire process takes about 18 minutes, focusing on avoiding three major traps: misuse of missiles, divided forces, and delayed rescue. If the medal is not unlocked and the conditions are met but the chapter does not unlock, it's recommended to immediately reload the mission and disable 4x speed (to avoid delayed judgment). Also, pay attention to the target kill bug, ensuring the sniper aims and shoots manually, rather than guiding with markers.
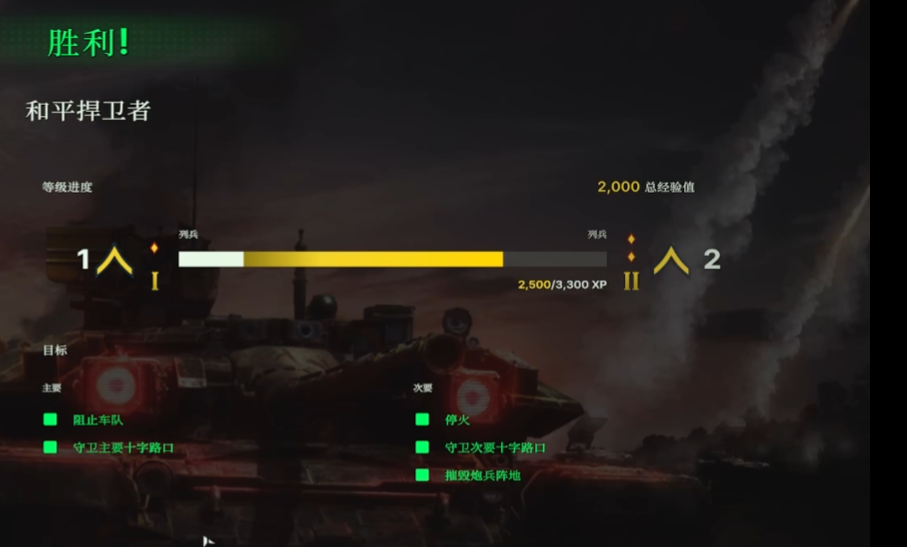
How to Complete Peacekeeper in Broken Arrow Single Player Campaign and Tips for Clearing Peacekeeper in Broken Arrow Single Player Campaign
The 5v5 battle mode provided officially is indeed varied and exciting, but sometimes players also want to play some single-player projects. This strategy game actually has a learning curve; the single-player campaign can be adjusted to an easy difficulty, but it still requires effort to complete. If you want to learn how to complete the Broken Arrow single-player campaign and Peacekeeper, you must read the introduction content that follows from the editor, and only after learning it will you be able to pass through.

【biubiu Accelerator】Latest Version Download
》》》》》#biubiu Accelerator#《《《《《
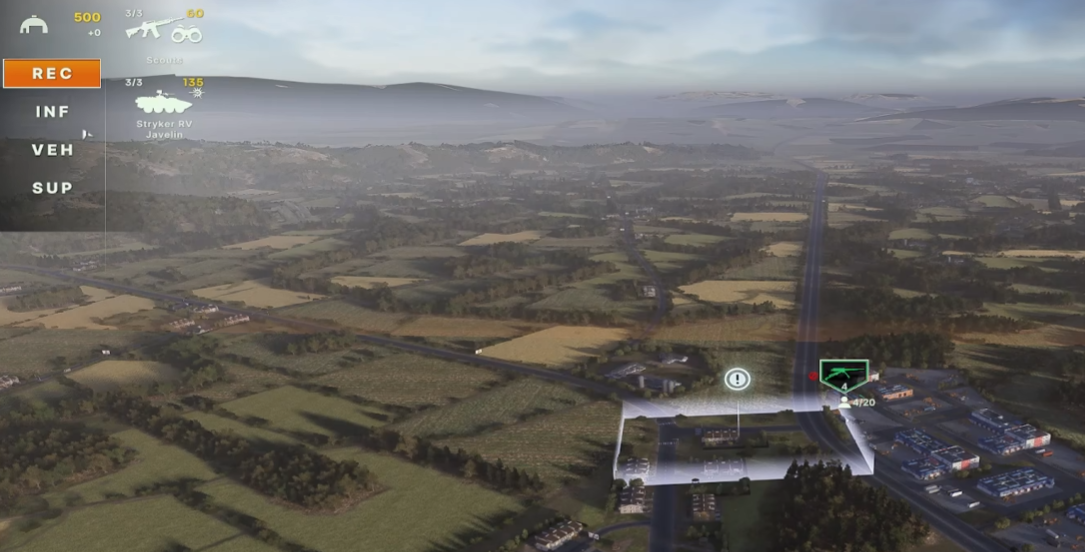
You can view the single-player mode as different levels under various circumstances. In this round, players need to use some small tricks; the wheeled infantry tactics are more convenient for obtaining victory.
Place a Stryker RV Javelin armored vehicle at the intersection. After they reach the location, disperse them as soon as possible to guard each intersection. Note that vision is very important; otherwise, insufficient vision can easily lead to the armored vehicle being unable to defeat the infantry. Here, you can use your favorite reconnaissance squad paired with the armored vehicle in combat.
After the first batch of armored vehicles arrives, immediately add subsequent forces, ensuring that each crossroad is continuously guarded. At this point, the enemy forces have already been mobilized, with air support as well. Don't send out planes right away, as they can easily be shot down by the enemy's anti-aircraft defenses.
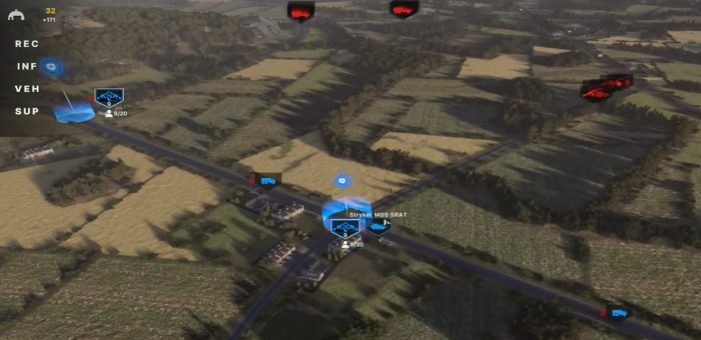
Deploy the ground-based air defense system, lining them up in a row on the front line, to destroy approaching enemy tanks and infantry from a distance. Dispatch reinforcements for the raiding squad, and don’t forget the logistics vehicles, gradually filling up the battle area.
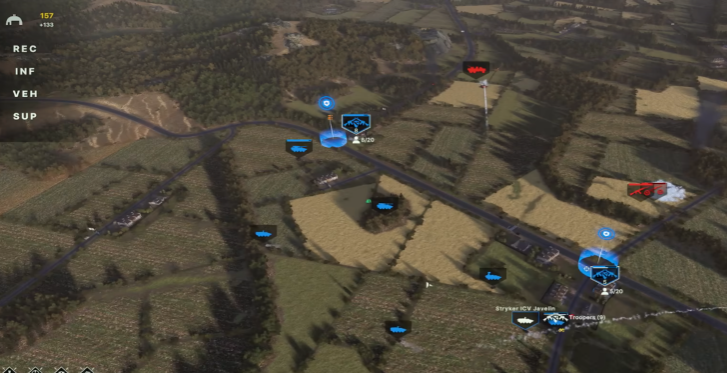
The enemy's firepower will prioritize refreshing near the base. Operate the missiles to attack this area first, ensuring the integrity of the frontline. Continuously reinforce throughout the process, using a war of attrition to repel the enemy.
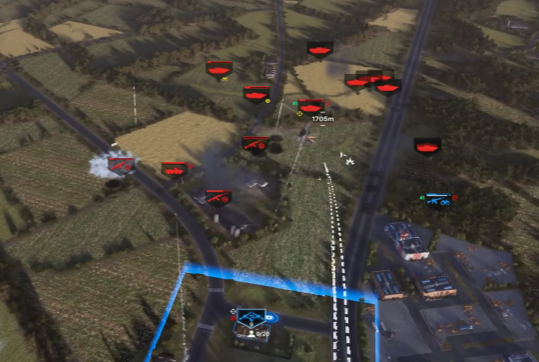
After deploying the ground missile units, you can then dispatch the aircraft. At this time, the enemy's tank and infantry offensive becomes more intense, and we also need to dispatch infantry, armored vehicles, and air power in rotation until we intercept the enemy convoy, hold the crossroads, and use firepower to destroy the artillery positions until the ceasefire.
During the period from 【June 17th to July 4th】, using biubiu, we can enjoy the free service for Broken Arrow. Completing the acceleration tasks allows you to participate in a lottery, and if you're lucky, you might win the game itself as a grand prize, which is also quite nice.

Don't miss out on the basic benefits. There's a free command [ biubiu no disconnection ] for everyone to use, which can give you 72 hours of acceleration service time. Additionally, new users who just registered receive the most benefits, as they already have 24 hours of acceleration time, totaling 96 hours for new users.

We've introduced the tips for completing the Broken Arrow single-player campaign and Peacekeeper. Even on the easy difficulty, the pressure is not small. Since the single-player mode involves AI-controlled enemy forces, there may be instances of monster stacking or aircraft crashes. Don't panic if there's a small mistake; just stay calm and follow the methods recommended by the editor, and you'll be able to pass through quickly.
How to defeat the Night's Cavalry in Elden Ring: Guide for fighting the Night's Cavalry
For a cooperative battle royale game, or a monster-slaying type, there must be a variety of monsters and map types; otherwise, players will lose the sense of novelty. In addition to a rich variety of small monsters, the official has provided 8 final challenge bosses. How to defeat the Night Incarnation in Elden Ring's Nightfall? Everyone, come and take a look. I'll introduce the strategy to you, and once you learn it, defeating this monster will be much easier.
【biubiu Accelerator】Latest Version Download
》》》》》#biubiu Accelerator#《《《《《
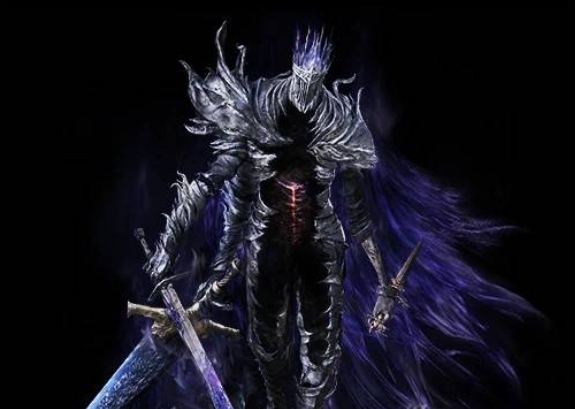
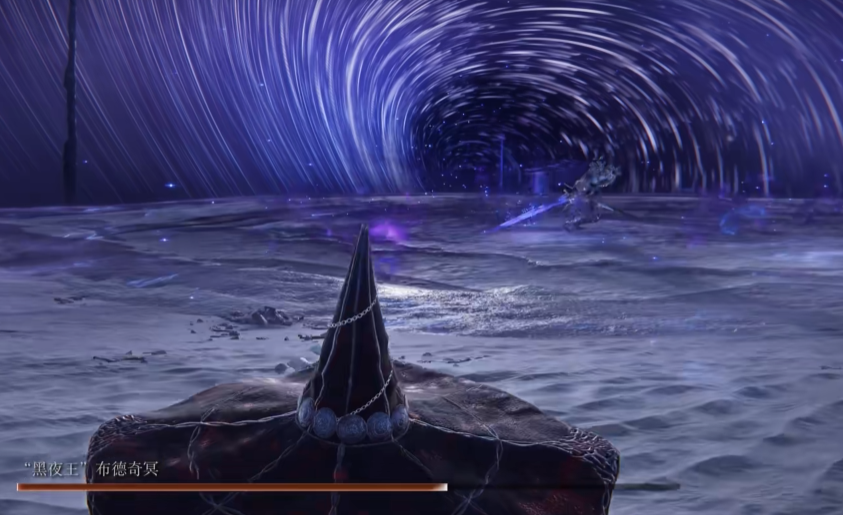
He is the most mysterious "Night King," the origin of the night, and can be considered as the final boss. We need to successfully defeat the other 7 Night King bosses before we can unlock this monster. Since it's a team play, even if some players haven't completed the 7 boss tasks, they can still enter the challenge if invited by someone who has. The monster has two full health bars, and the second phase is more aggressive. The weakness of the monster is the Holy attribute, so it's advisable to bring more relics with this element.
In the first phase, his attack methods are mostly melee combos, such as horizontal slashes and small steps forward for continuous slashing. When fighting, you can familiarize yourself with the attack patterns, similar to the move sets in Souls games, and find gaps to deal damage. Note that each slash and thrust is a prelude to the subsequent stages, and they can be easily dodged with careful observation.

During this phase, do not use too many healing flasks, as resources will not reset in the second phase, and the demand will be high. You can fight close to the boss, which can prolong his attack wind-up, and counterattack after confirming safety. A balanced team composition is suitable, for example, Iron Eye for long-range attacks and rescuing teammates from a distance, Rogue for team buffs, and Executor for high damage.
In the second phase, the monster will change form and absorb elemental power. Each time its health decreases by 25%, it will switch elemental attributes. Note that although the moves do not change, each attack will leave an area of elemental damage. Be sure to recognize the aura and roll out of the area continuously to avoid damage. It is recommended to roll forward or to the side, as it is safer. Rolling backward may easily lead you into the area and result in instant death.
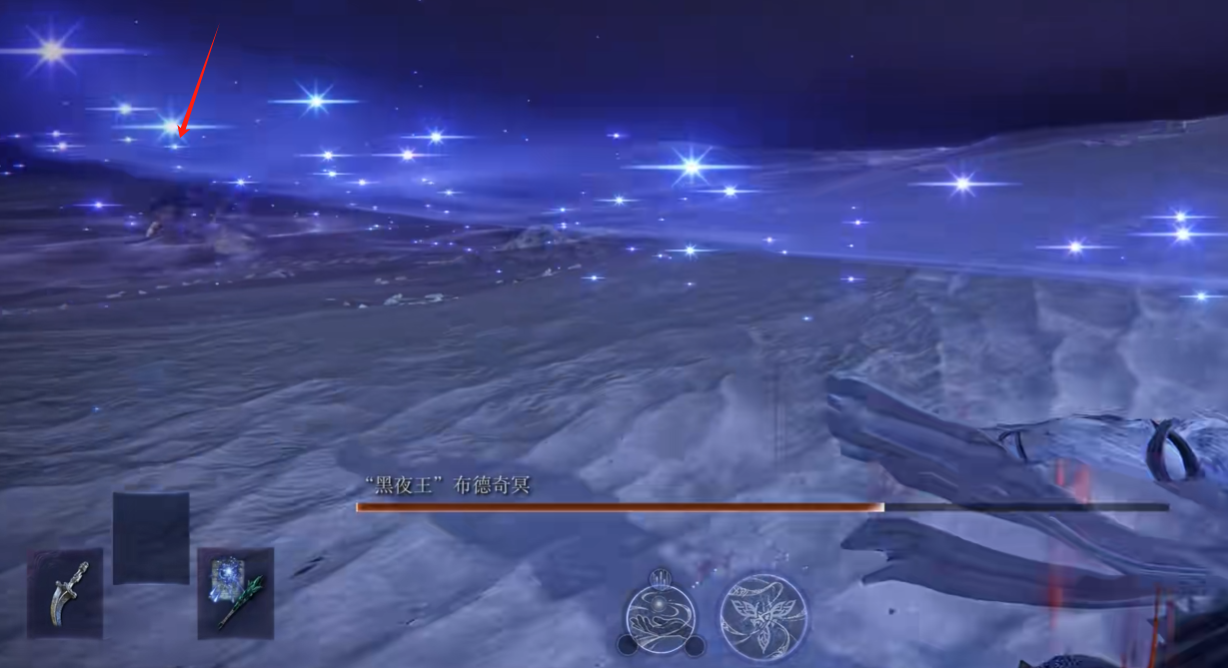
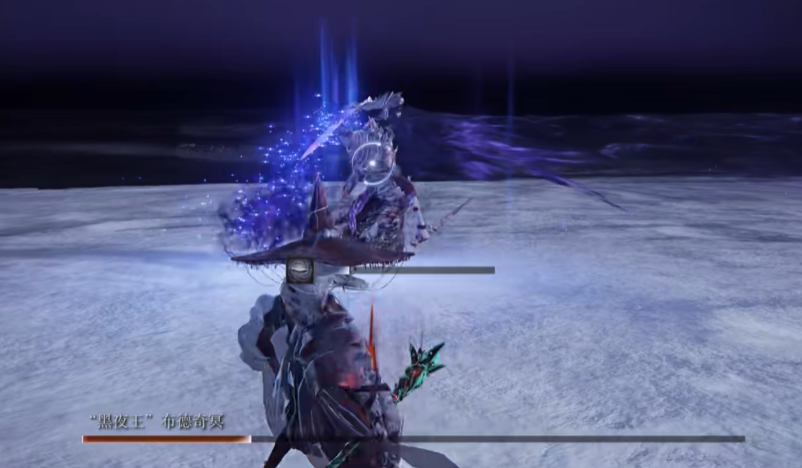
Each time the monster's health drops by 25%, it will unleash a special move. The start-up action is ascending into the air. When you see this state, run to the edge of the battlefield and stay as far away from its landing point as possible. After successfully surviving, note that the monster will have a stagger when it lands. Immediately seize the opportunity for the whole team to deal damage, and use any high-damage ultimate moves at this time.
The recommended strategy is, if you have a Rogue, release their skills after the monster switches elements to increase the team's damage and gain a shield. Iron Eye should save their skills to rescue fallen teammates immediately after the boss's special move, ensuring that the output force remains strong. During the fight, no matter how fast the pace, do not panic. Calmly identify the elemental changes, dodge the elemental damage areas, and then concentrate on dealing damage during the stagger and cooldown periods of the monster's skills.
Such a challenging boss, everyone definitely wants to challenge it online. From May 30 - June 13, we can activate the acceleration service here at biubiu, and it's in a free trial period. Let's play together, no disconnection in multiplayer, better cooperation, and faster success in the challenge.
There are many benefits to claim on the homepage of biubiu. After seeing the redemption bar in the image below, use [biubiu no disconnection] to get 72 hours of service time. New users actually enjoy the benefits upon registration, with 24 hours of acceleration time, which means new users will have a total of 96 hours. Share this good news with your team members, and let's all use it together.

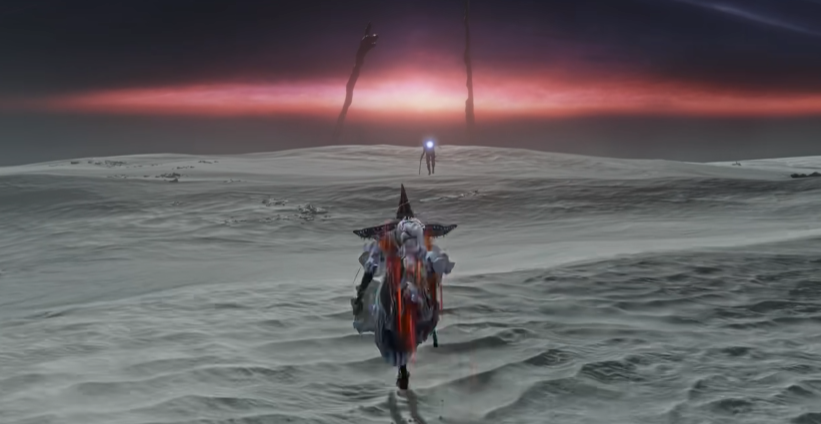
The guide for defeating the Night Incarnation in Nightfall is complete. After successfully killing this monster, each player can return to their Roundtable Hold and talk to the NPC at the cliff's edge, then proceed to the ending cutscene. After watching the main story, you have completed the quest. You can then freely engage in ranked matches, and at this point, you have unlocked the final outfit set. Make sure to earn enough money to buy it, as it makes your character look very stylish.
A Comprehensive Guide to the Nameless One's Dragon Slaying Crafting Recipes Sharing the Nameless One's Dragon Slaying Crafting Recipes
The complete synthesis table of Nameless Dragon Slayer is certainly something that many brave players would want to know. In the game, there are three types of synthesis operations: cooking, alchemy, and forging. These three methods not only satisfy the food needs of players in the game but also produce a large amount of weapons and equipment. This time, I will specifically bring you the complete synthesis table of Nameless Dragon Slayer, hoping this content can help everyone~
In the game, since the synthesis methods are divided into three categories, the recipes also need to be categorized.
The cooking synthesis table is as follows: Pearl Rice requires one portion of rice and one portion of water; Golden Fried Rice requires one portion of rice and one egg; Crystal Rice Ball requires one portion of rice and one portion of pepper. If players want to make beverages, they can use one portion of water plus one portion of fruit to make Flavorful Juice, one portion of water plus fish to cook Real Fish Soup, and one portion of water plus cassava to make Cassava Stew.
In the game, fruits can also be directly made into food. Two portions of fruit can make several servings of fruit, and one portion of fruit plus one portion of flour can be made into a Peach Pie.

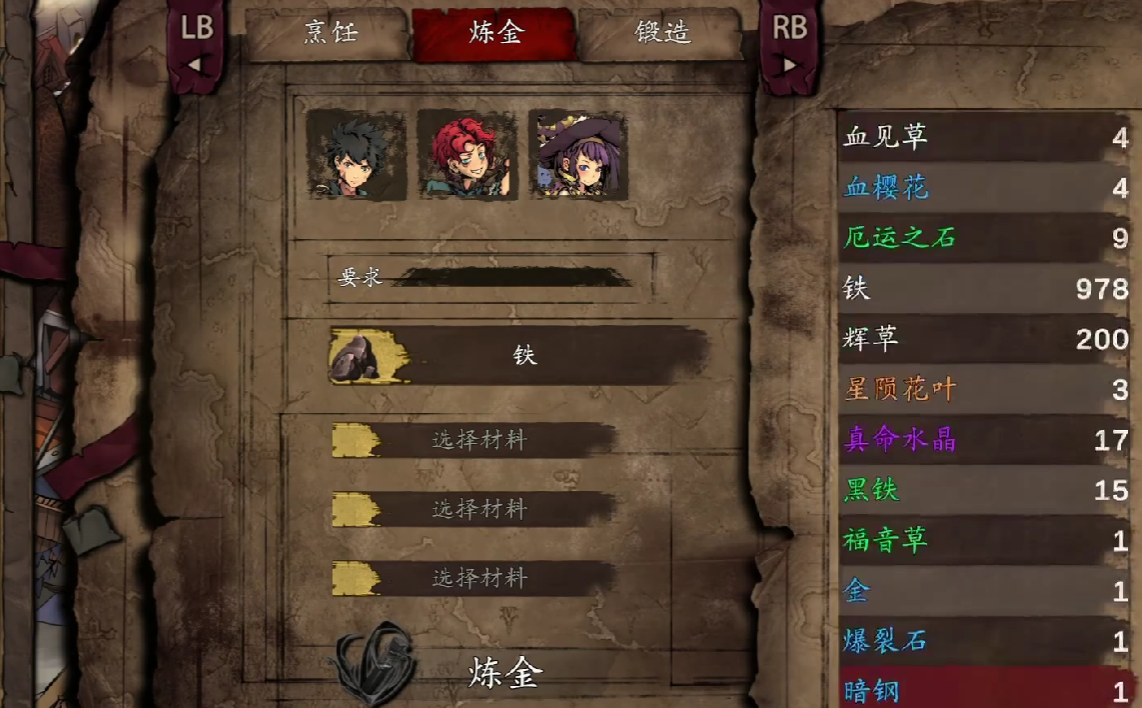
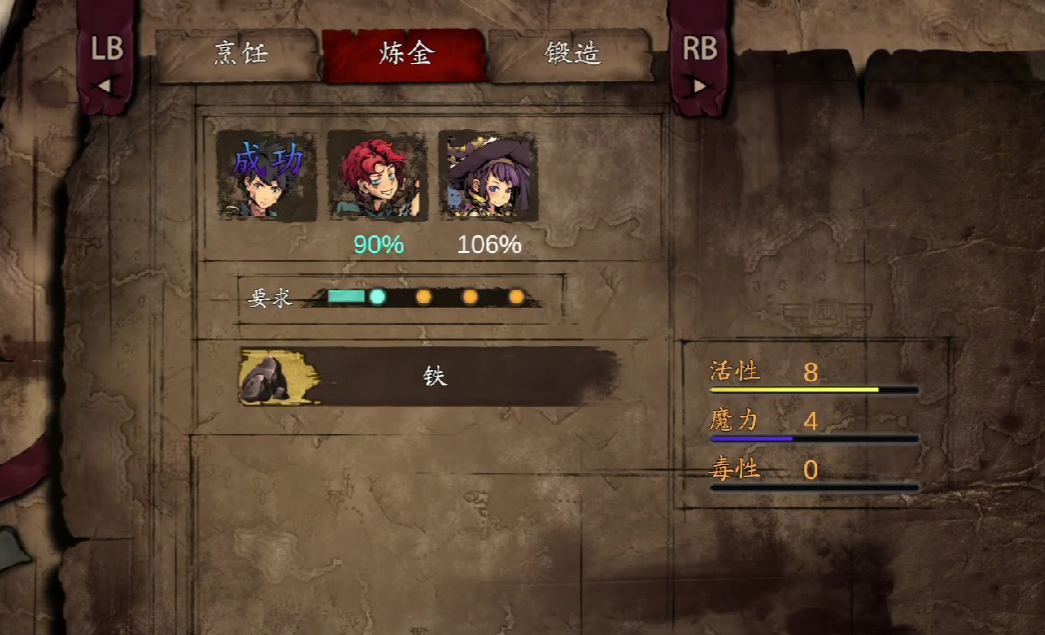
In terms of alchemy, players can use two iron blocks to create Dark Steel, or use one gold block and two silver blocks to create Origin Stone.
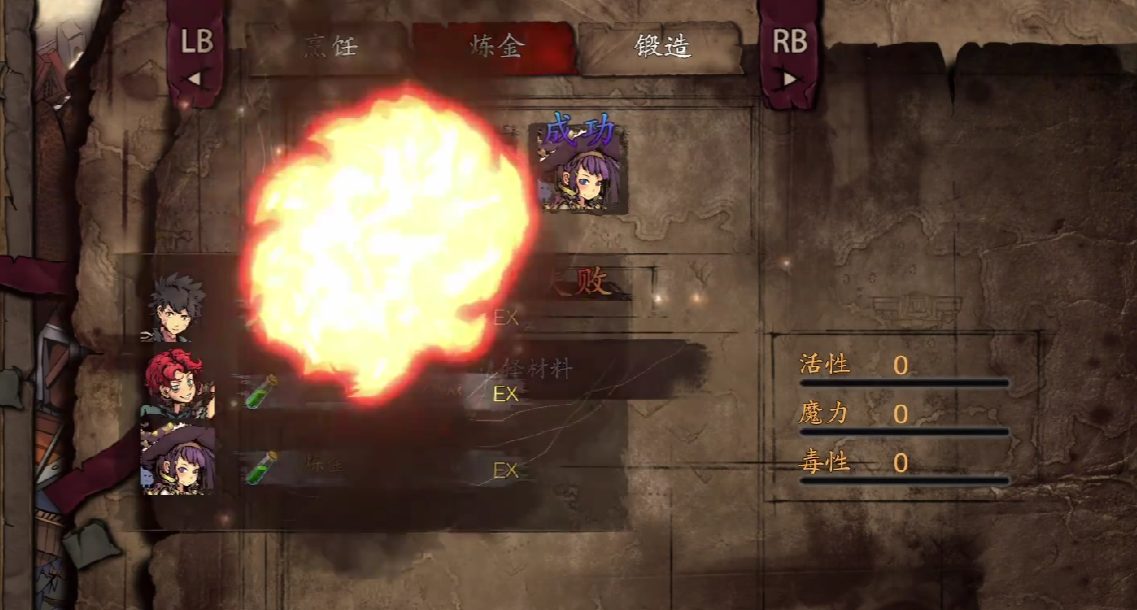
Origin Stones and Dark Steel are very important basic materials in the game. Of course, if a player fails during alchemy, there is still a certain probability of producing high-attribute equipment base items.
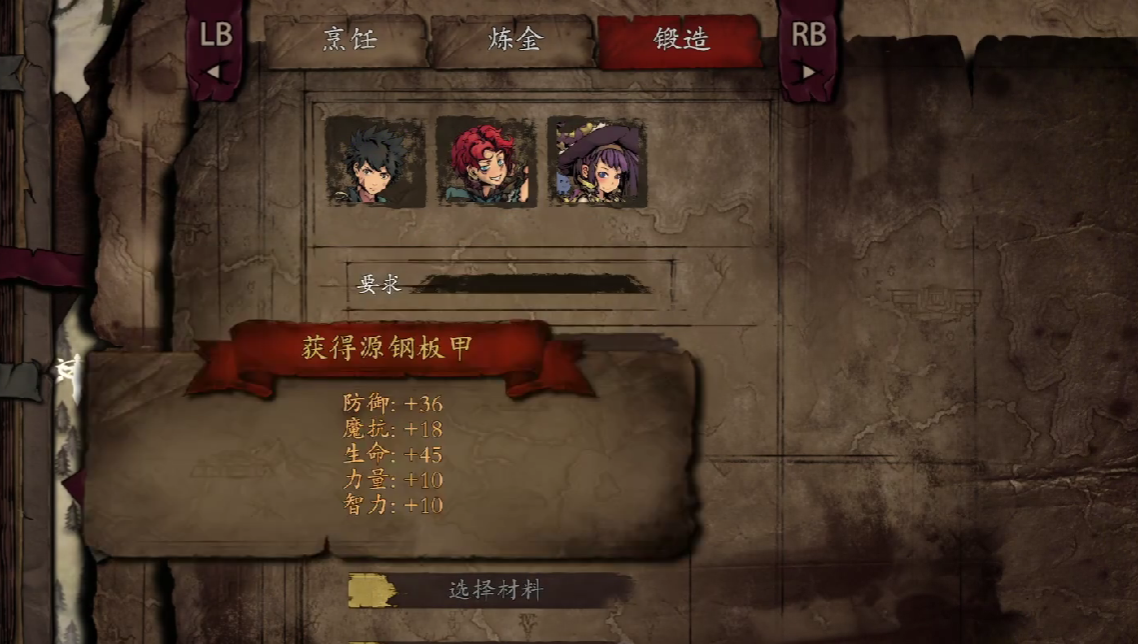
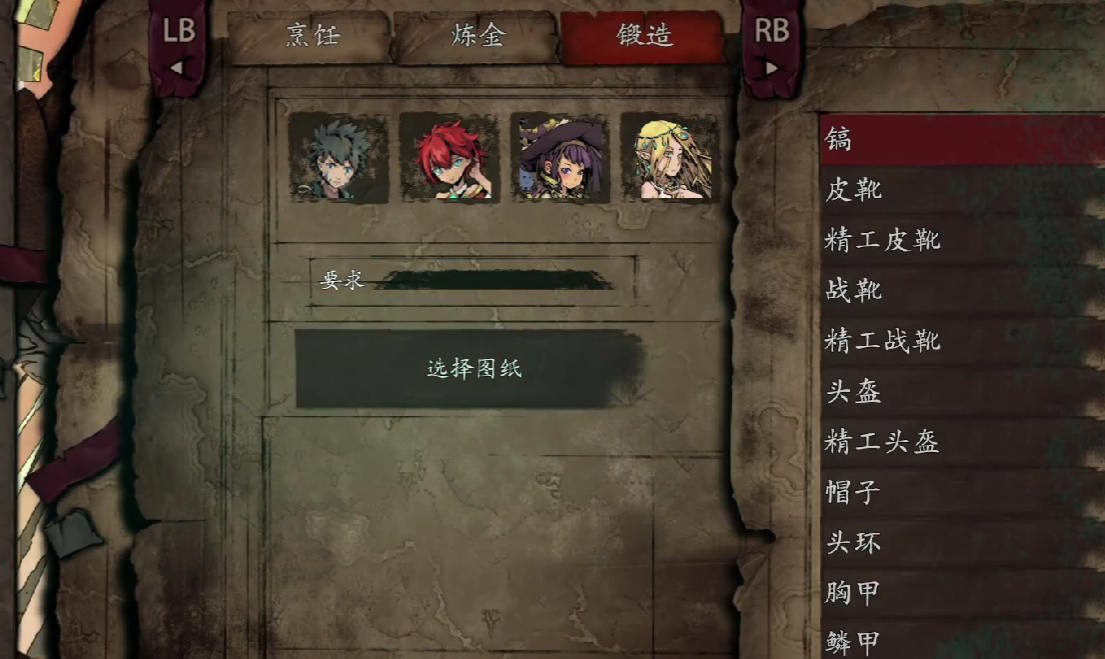
In terms of forging, there are two basic pieces of equipment in the game that can be forged by players: the Dark Steel Sword and the Dark Steel Chest Armor and Helmet. These two basic weapons require two portions of Dark Steel and one portion of Dark Steel and one Dragon Scale, respectively.
For top-tier equipment, players need to consume Origin Stones. Specifically, an Origin Sword requires one Origin Stone and two silver blocks, while Origin Armor requires two Origin Stones.
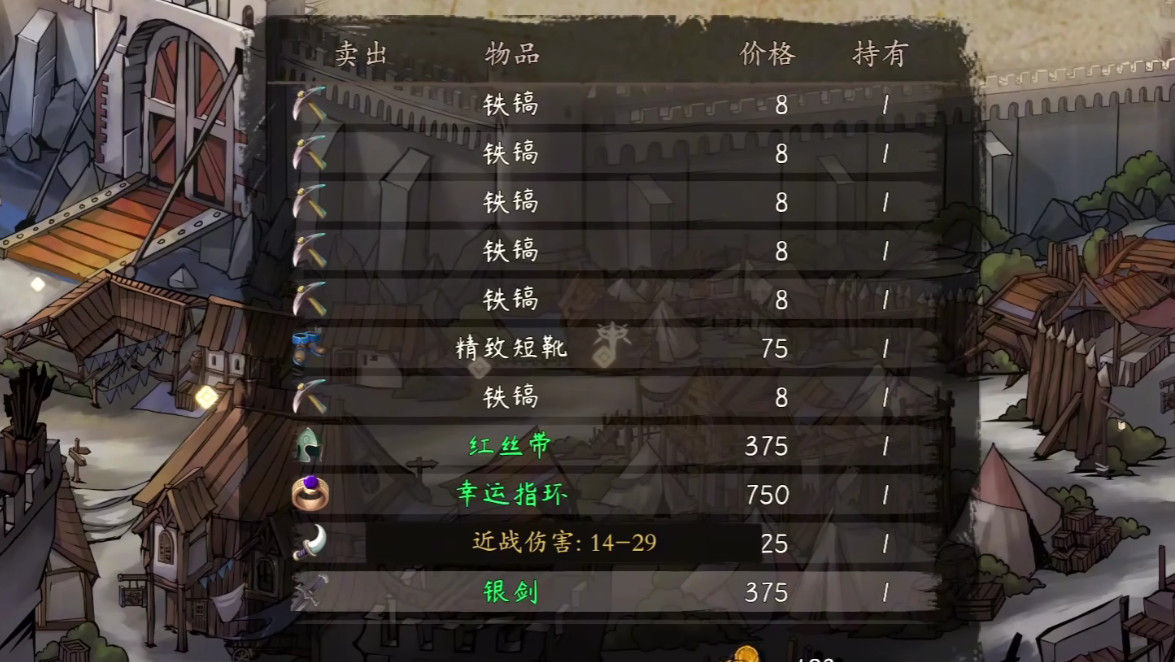
The above content is all about the complete synthesis table of Nameless Dragon Slayer that I have brought to you this time. After forging, players can actually place the items they have forged directly in the exchange for sale. I hope that after reading this content, everyone can continue to experience the game.~
Analysis of the Nameless One's Dragon Slaying Crafting Table Detailed Introduction to the Nameless One's Dragon Slaying Crafting Table
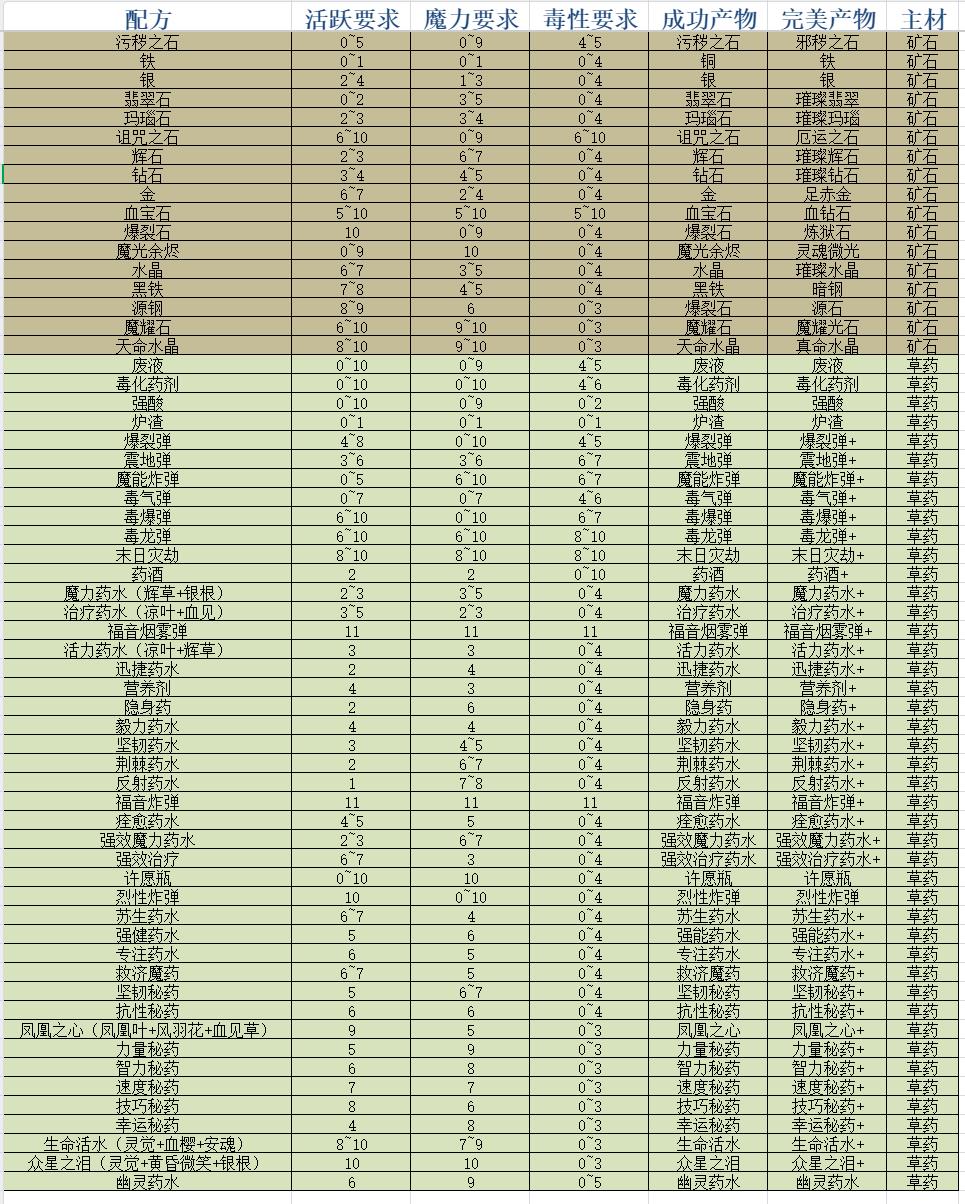
What exactly does the Nameless Dragon Slaying Synthesis Table contain? This is certainly a question that many alchemists are puzzled about. In the game, alchemy is the most important method for crafting items, and the amount of materials required to make various items needs to be handled with caution by players. In this edition, the editor has brought you the details of the synthesis table in the game, hoping that this content can help all the brave adventurers out there~
In the game, if players want to craft weapons and armor, they can use the following synthesis schemes.
The first is the crafting of the Dark Steel Sword. Players need to add two pieces of dark steel to craft the Dark Steel Sword. If a perfect attribute is triggered, it can provide a 30% critical hit rate bonus. Of course, players can also make a Dark Steel Chestplate, which requires one piece of dark steel and one dragon scale to craft.
Origin Stones are the type of material consumed in the largest quantity in the game. It requires players to add two gold ingots and one silver ingot to create an Origin Stone. If the crafting fails, it will produce an Explosive Stone, but a golden Explosive Stone can be exchanged for a Radiant Agate. Overall, the benefit of crafting Origin Stones is relatively high. Players can also use Origin Stones to make a longsword, which requires the consumption of two silver and one Origin Stone to craft.
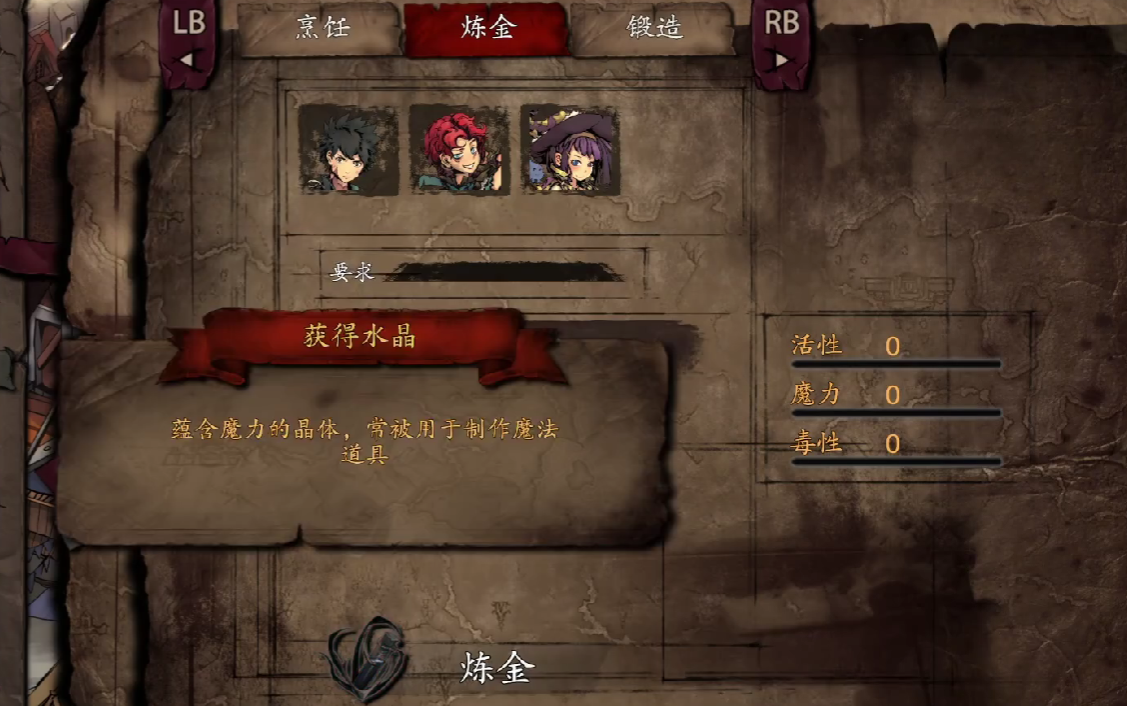
In the game, players can also use the alchemical boiler to make blue potion. Only one Glowgrass is needed to craft it, but the quality of the blue potion is closely related to the player's alchemy level.
The second item that can be crafted using the alchemical boiler is the Wishing Bottle. Dragon scales can be directly used to make Wishing Bottles, with one dragon scale producing two Wishing Bottles. A Wishing Bottle allows for a random wish, with a chance to obtain rare equipment.

Of course, players can also use alchemy to make dishes. For example, using one portion of rice and one portion of clear water, Pearl Rice can be made, which increases the maximum health by 40 points and the maximum mana by 10 points. Jade Rice, on the other hand, requires the use of mushrooms, ten-thousand-leaf vegetables, and one portion of rice to craft~
The above content is the complete introduction to the Nameless Dragon Slaying Synthesis Table brought to you by the editor in this edition. In the game, the success rate of alchemy is not only related to the materials invested by the player but also to the player's alchemy experience. After reading this content, I hope the players can go into the game and experience it for themselves~
Analysis of the Meaning Behind the Name of the Nameless One's Dragon-slaying Orb
What are the meanings behind the names of the Dragon Slaying Orbs of the Nameless? The actual names of the orbs can directly affect their effects. In this article, I will specifically introduce the meanings behind the names of the orbs in the game "Dragon Slaying of the Nameless." This content will cover the basic attributes and acquisition methods of the orbs, hoping to help the players~
There are four types of orbs in the game, representing the Brown Orb, Frost Orb, Three Trials Orb, and Abyss Orb.
The Brown Orb requires players to reach the Abyss Rift and thoroughly defeat the elite monsters within. There is a certain probability that the treasure chest of the elite monsters will drop the Brown Orb. The Brown Orb can increase the base defense value and critical defense value of the character. These two values have a good effect for players who use sword skills.
The Frost Orb comes with an ice attribute enhancement effect. In the game, players need to enter the Core of Extreme Cold and defeat the boss inside to obtain this orb. Although the effect of this orb only enhances the ice attribute skill, it is a must-have for mage characters.
The other two orbs require players to complete high-difficulty challenges. The Three Trials Orb requires players to defeat all bosses in the Dragon Soul Altar, which includes Fire Dragon, Shadow Dragon, and Frost Dragon. These three different types of bosses will drop three kinds of orbs, namely the Eye of the Fire Dragon, Spine of the Shadow Dragon, and Heart of the Frost Dragon. These three orbs can be equipped by corresponding classes.
Mages can use the Fire Dragon, warriors can use the Shadow Dragon, and archers, who specialize in ranged attacks, can use the Frost Dragon's orb. The difficulty of obtaining these three orbs is the highest in the game.
The Abyss Orb requires players to clear the Hell map and defeat the final boss, the Nameless One, to obtain it. This orb can increase the damage output of all attributes and comes with an additional special damage skill effect.
The above content is the complete introduction to the names of the Dragon Slaying Orbs of the Nameless. In the game, players can also create special orbs through the alchemy function. I hope that after reading this content, the players can actually go into the game and experience it for themselves~
A Detailed Guide to Slaying Dragons and Alchemy for the Nameless: How to Perform Alchemy in Nameless Dragon Slaying
The Alchemy Guide for the Nameless Dragon Slayer is something many players who want to make potions in the game are very interested in. Alchemy is a very important synthesis method in the game, and players must complete alchemy to obtain basic building materials within the game. This time, the editor brings you an alchemy guide for your reference, hoping that this content can help everyone.
At the beginning of the game, players are not given the ability to perform alchemy. They must wait until the first chapter of the game's story is completed. Once the player enters the main city, they will receive instruction from an alchemist and thus fully learn alchemy.
However, at the early stages of the game, the player's alchemy level is very low, and the number of items they can create is minimal. It is recommended that players start with simple alchemy to upgrade their level, such as making blue potions, etc. Players can use one leaf of cool grass and one ash grass to make a vitality potion. In the early stages of the game, players can pick a large amount of these items in the wild, then enter the alchemy table and use the boiler method to continuously improve their alchemy level.
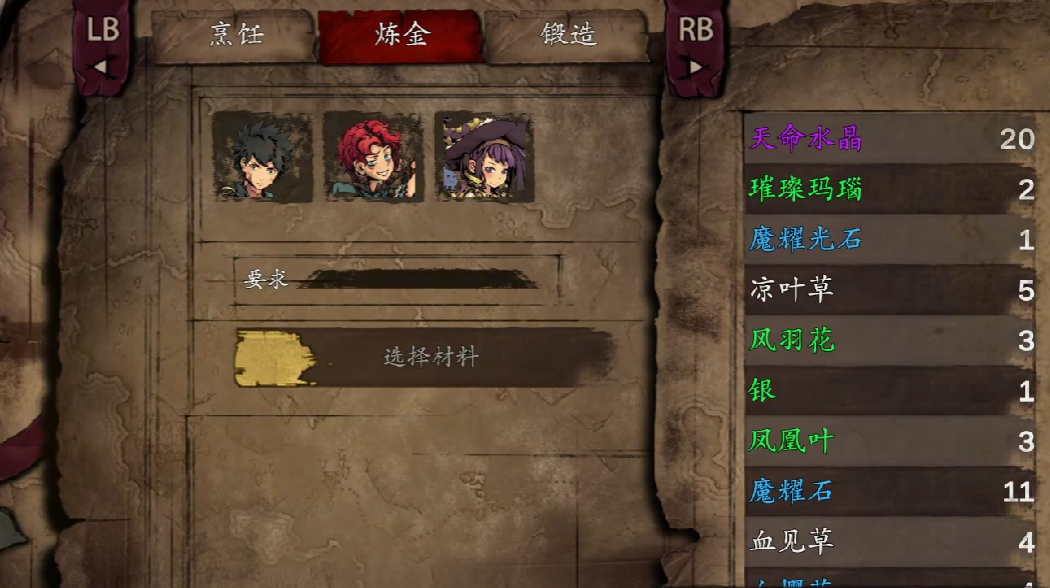
When the player's alchemy level improves, they can try to make some higher-level herbs. For example, players can use two ash grasses to make one blue potion, or four ash grasses to make a wish bottle. Of course, players can also use one iron and one ash grass to make a jade agate. Two jade agates plus one grass material can be made into a burst stone.
If the player's alchemy level has reached above 30, they can directly use two gold ingots and one silver ingot to make an ore. The ore is an important base material for creating endgame sets in the game, which players should try to obtain as much as possible in the early stages of the game.
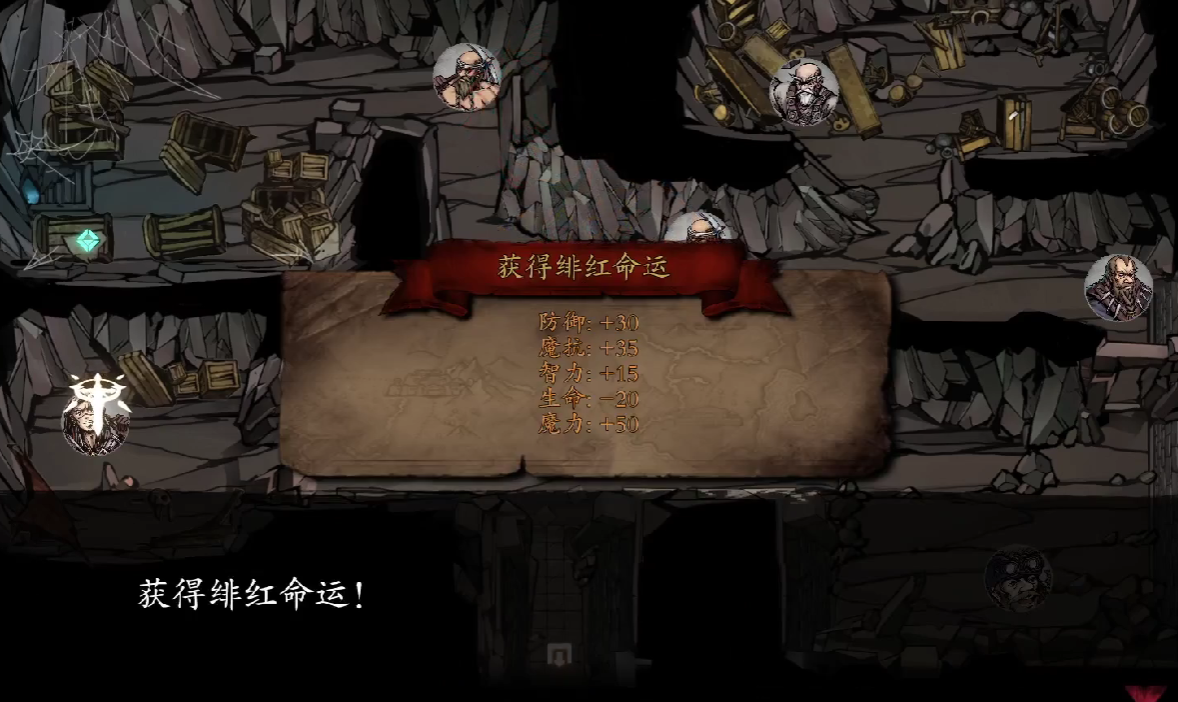
In fact, it is recommended in the game that players increase the alchemy level for all characters. Only when the alchemy level reaches above 30 can players make the Fate Crystal in the game.
The above content is the complete introduction to the Alchemy Guide for the Nameless Dragon Slayer, specially brought to you by the editor this time. In the game, even if the player fails in alchemy, they can still gain some alchemy experience. Overall, there will be no loss. I hope that after reading this content, everyone can actually go into the game and experience it for themselves~
Recommend


Strategy

A Guide to Zhetian Fanchen Yiyue Sharing Tips for New Players on How to Play Zhetian Fanchen Yiyue
Introduction to the Public Beta Time of Zhetian Fanchen Yeyi When is the public beta for Zhetian Fanchen Yeyi?
How is Zi Yue from Zhetian Fanchen? Introduction to Zi Yue from Zhetian Fanchen
What are the Luhida Origin redemption codes? Sharing of Luhida Origin mobile game gift codes
Lu Xida Origin Team Recommendations Lu Xida Origin Team Guide
Lu Xida Origin Strategy Sharing: Beginner's Guide to Lu Xida Origin
