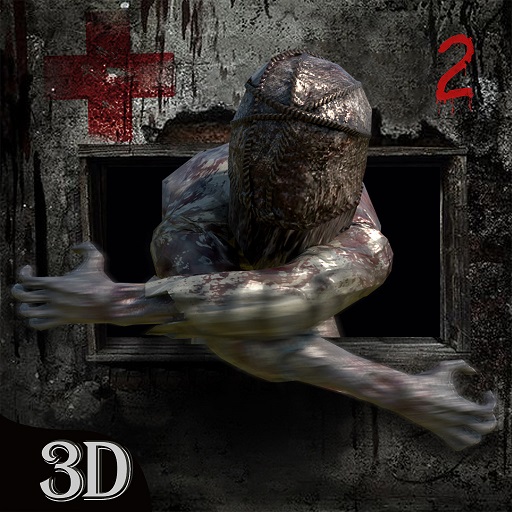
Endless Nightmare 2: Hospital
Game Introduction


Hot Strategy
How to Defeat the Maid Boss in Lost Castle 2: A Preview of the Nightmare Maid Boss
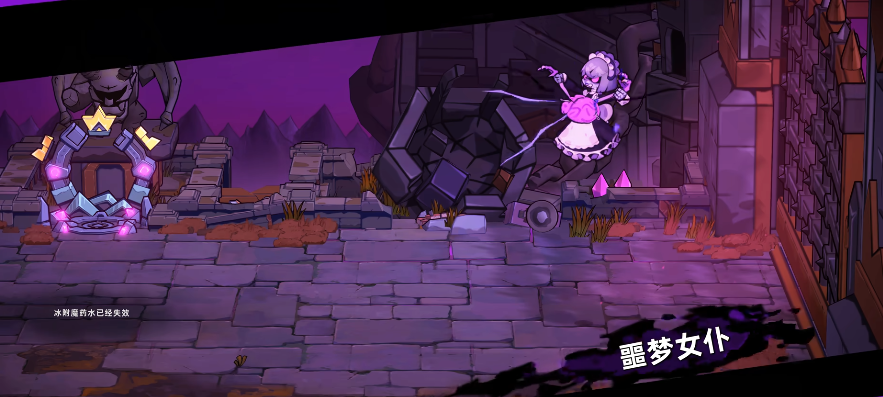
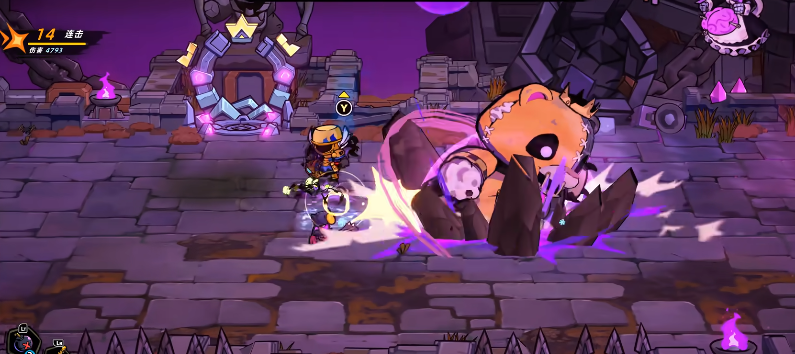
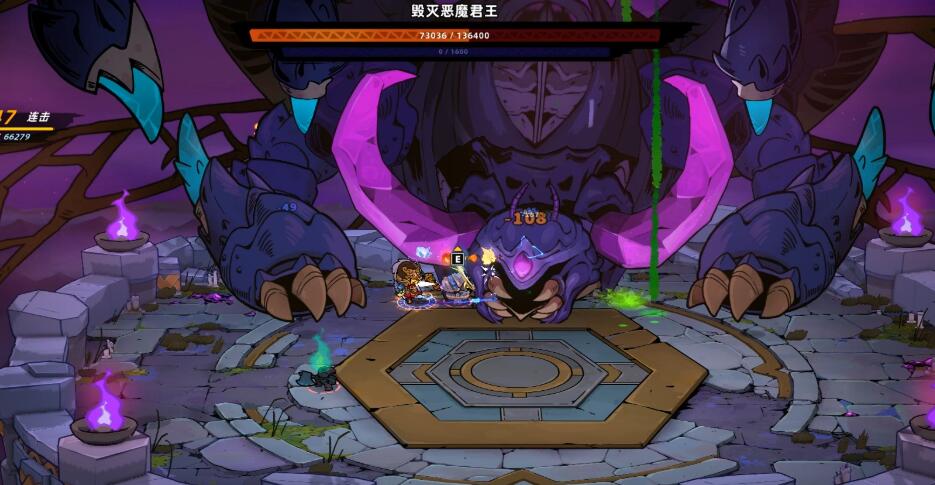
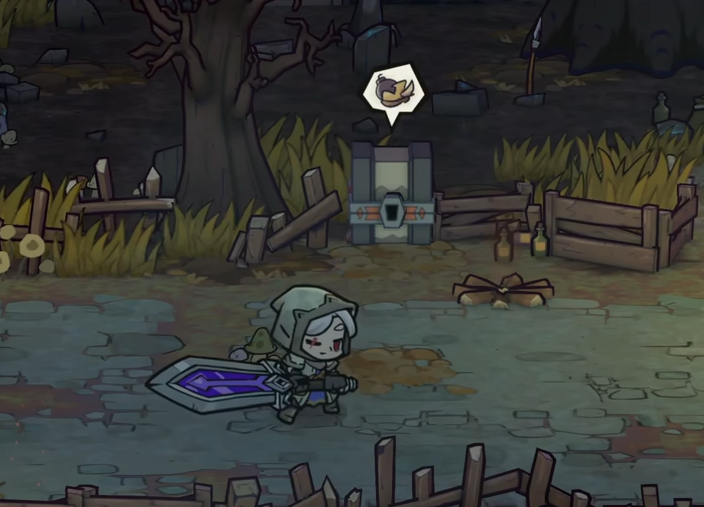
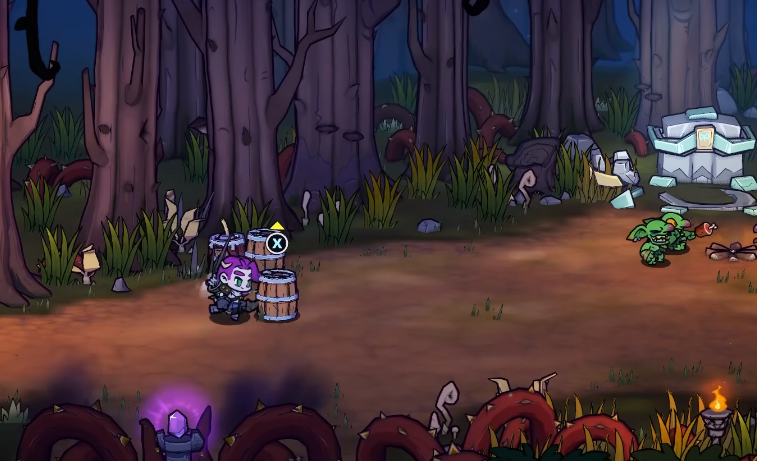
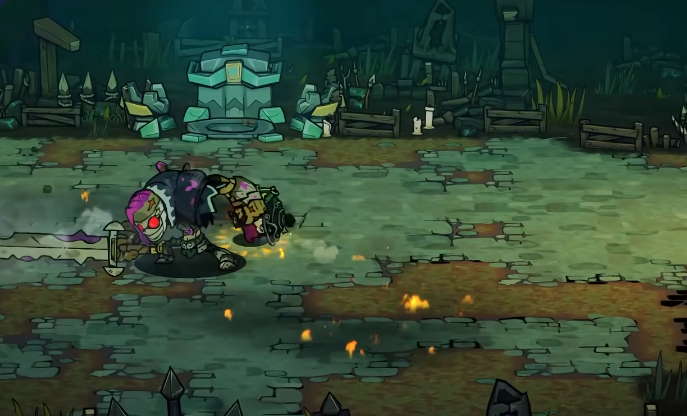
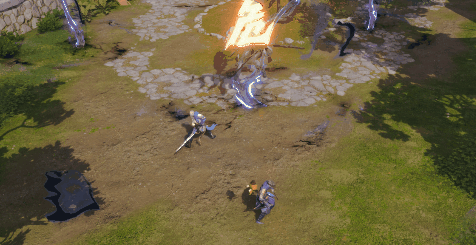
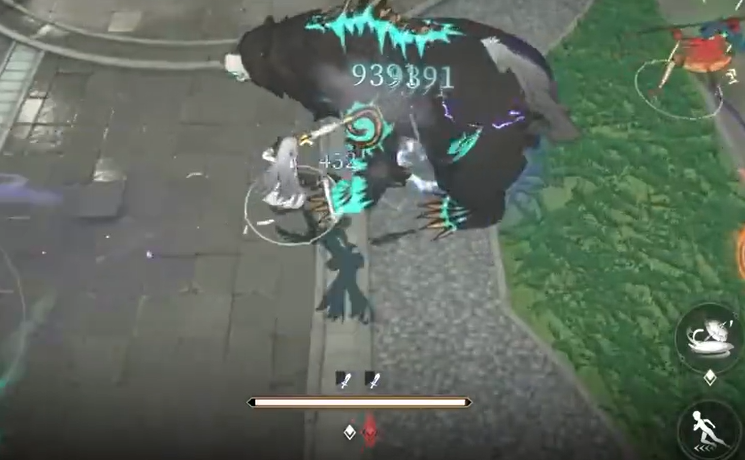
As the new Boss added in the Nightmare difficulty of "Lost Castle 2", the Nightmarish Maid appears in the remade Castle Bridge level, with its design integrating high-mobility combos, environmental interactions, and phase transition mechanics, making it one of the most challenging battles in the current version. So how do you defeat the Nightmarish Maid Boss in Lost Castle 2? The appearance of this Boss will also come with new weapons (Dual Blades - Puppet Bear Claws, Bow - Nightmare's Arrival, Phantom Lantern) and armor "Ominous Maid Outfit" as drops, while providing the core material "Nightmare Shreds" for the alchemy system. Let's take a closer look below.
【biubiu Accelerator】Latest Version Download
》》》》》#biubiu Accelerator#《《《《《
I. The core mechanism of the BOSS is the dual-form transformation logic,
1. Human Form (80%-100% HP):
Puppet Threads: Fires three tracking threads, which upon contact, cause binding and continuous health loss (15% of maximum HP per second). This can be resolved by rolling continuously or having teammates attack the threads to free you.
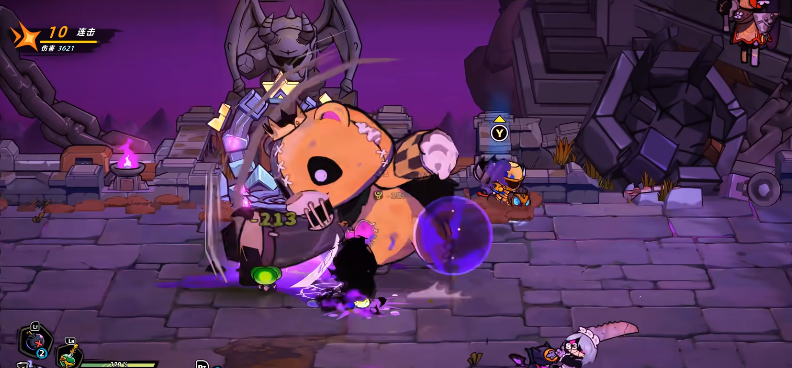
Maid Rush: Quickly darts behind the player and launches a three-hit claw combo, with the final hit causing knockback. Key to breaking this: Move sideways at the moment she starts her dash to avoid the entire combo.
2. Puppet Form (HP < 80%):
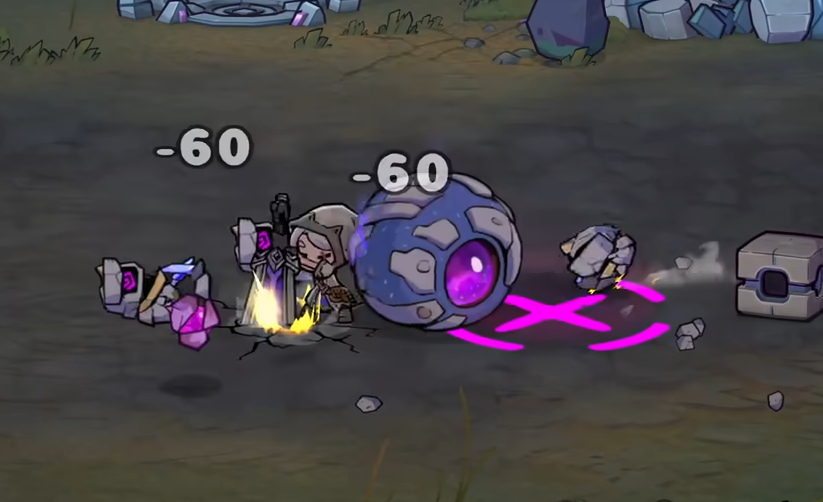
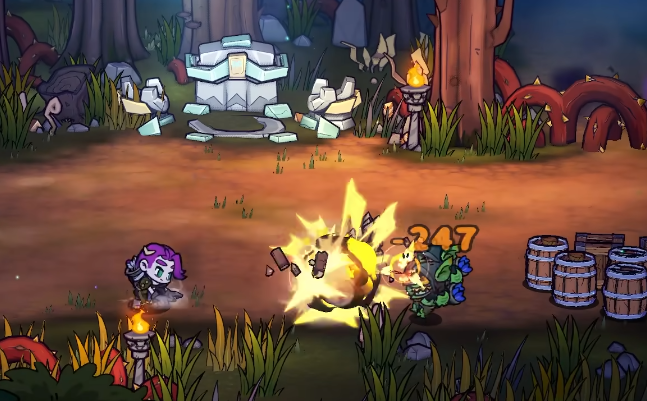
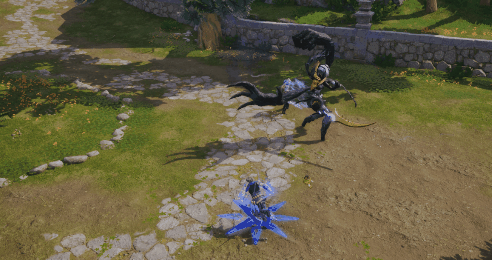
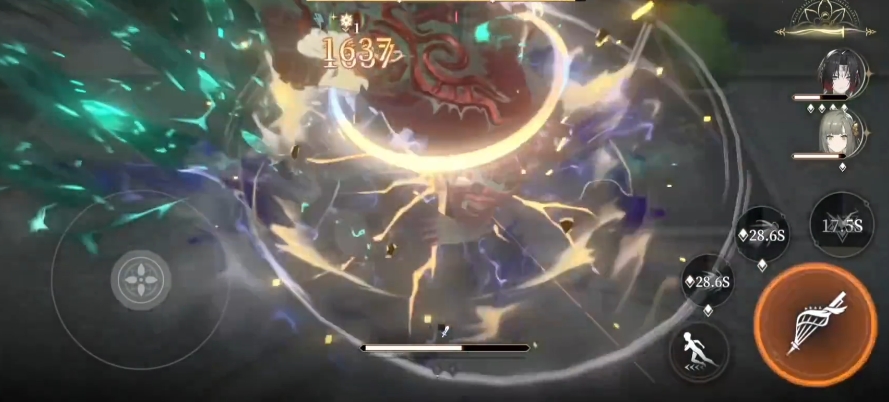
Bear Claw Ground Slam: Jumps up and slams the ground, generating a ring-shaped shockwave. The center area causes stun, while the edges only deal damage. Strategy: Stay close to the Boss to avoid the center, or retreat to the edge of the shockwave in advance.
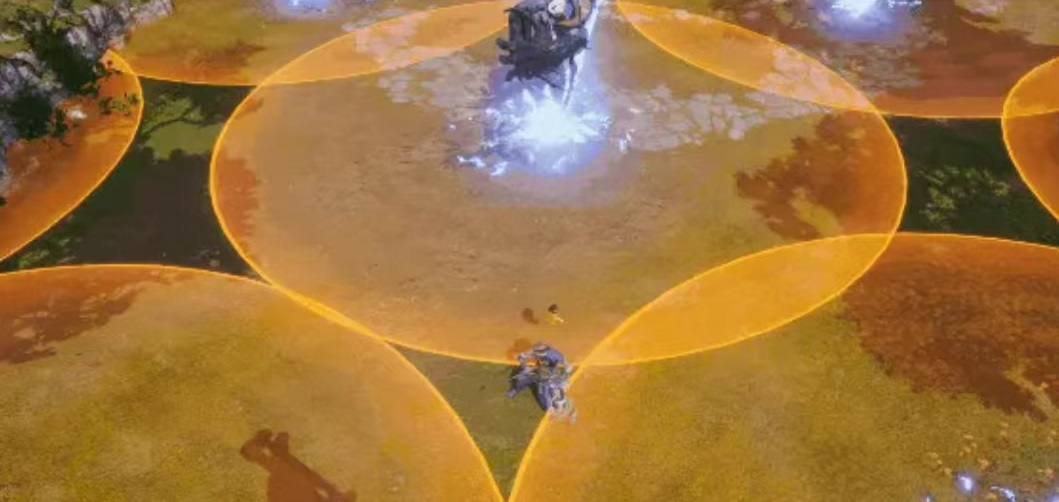
Nightmare Zone: Summons an expanding purple mist area, where being inside the mist continuously stacks "Erosion" (each stack reduces damage taken by 10%, full 5 stacks result in instant death). Priority should be given to destroying the "Phantom Lanterns" at the edge of the field to stop the mist from spreading.
During the battle, environmental interaction mechanisms are also introduced, randomly triggering bridge collapses, forming isolated areas. Ranged classes need to predict their movements to avoid getting trapped, while melee fighters can use the height difference after the collapse to perform jump slashes. Additionally, explosive barrels that spawn on the map can be attacked to explode, dealing 10% of the Boss's maximum HP as fixed damage and interrupting her casting, making them a key resource for speedrunning.

II. Strategies
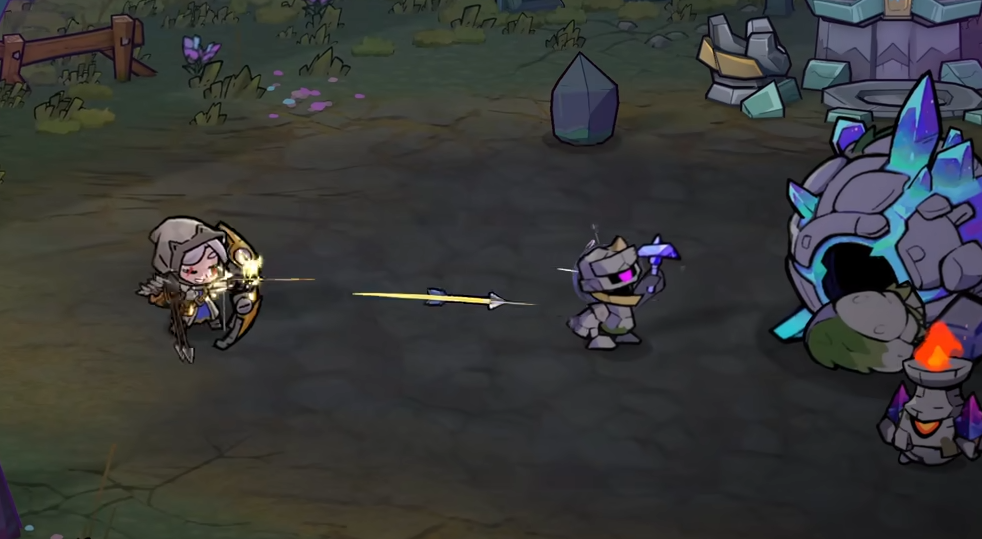
Preferred Weapons: Dual Blades - Puppet Bear Claws: The exclusive skill "Rending Whirl" allows ignoring the thread bindings and directly dashing behind the Boss, serving as a safe means of output during the human form. And Wand-type weapons: Use teleportation skills (such as Void Wand) to avoid the ground slam shockwave, while consuming the puppet form from a distance. During the phase transition, stop attacking when the Boss’s HP drops to 85%, clear the lanterns on the field in advance, and set up explosive barrels. As soon as it transforms, detonate the barrels to skip the first summoning of the nightmare zone.
III. Recommended Equipment and Build Suggestions
Targeted Armor and Relics
Ominous Maid Outfit (Boss-specific drop): Immune to stacking "Erosion" layers, essential for survival in the puppet form.
Nightmare Knight Doll (new treasure): Summons a knight illusion to attract the Boss's attacks, lasting 8 seconds, with a 25-second cooldown, providing a crucial breather for the team.
Erosion Resistance Ring: Reduces fog area damage by 50%, a must-have for those who struggle.
Output-oriented Build Combinations
Dual Blade Burst Build: Puppet Bear Claws (primary weapon) + Berserker Emblem (critical rate +30%) + Blitz Talisman (attack speed +50% for 3 seconds after rolling).
Bow Control Build: Nightmare's Arrival (primary weapon) + Lantern Trap (place delayed explosives) + Slowing Quiver (hit reduces movement speed by 40%).
In the current version, the "Ominous Maid Outfit" and "Nightmare Knight Doll" are key pieces of equipment for reducing difficulty. It is recommended to accumulate materials through multiple runs and prioritize their synthesis. In the early stages, the "Poison Staff Slowdown Build" can be used to extend the output window, transitioning to the "Dual Blade Critical Hit Build" for speedrunning once proficient. If the Boss's stats are adjusted in the future, focusing on the "Bow Penetration Build" could achieve safe distance suppression. This battle not only tests operational precision but is also the ultimate test of resource planning abilities (such as reserving explosive barrels, economic distribution), perfectly aligning with the "hardcore roguelike" design philosophy of "Lost Castle 2."
Another important point to note is the network. If you encounter lag while fighting the Boss, it might result in a wasted attempt. Therefore, it is recommended to use the biubiu Accelerator, which not only provides smooth, lag-free gameplay but also handles multiple updates without fear, increasing download speeds by 3-5 times. Enter the secret code [biubiu no disconnection], and get 72 hours of membership experience directly! More surprisingly, first-time registrants enjoy an additional 24 hours bonus, totaling 96 hours of extended usage time.
In summary, the preview of the Nightmarish Maid Boss in Lost Castle 2 is as mentioned above. The dual-form transformation of the Nightmarish Maid requires players to seamlessly switch between "high-speed response" (human form) and "environmental control" (puppet form), while the bridge collapse and expanding fog zone further emphasize the core tactics of spatial utilization. Solo challenges rely on specific weapons to break through (such as dual blades piercing threads, wands dodging ground slams), while team collaboration places more emphasis on role division (tank, controller, DPS triangle chain) and scene interaction (explosive barrel interruptions/removal of lanterns).
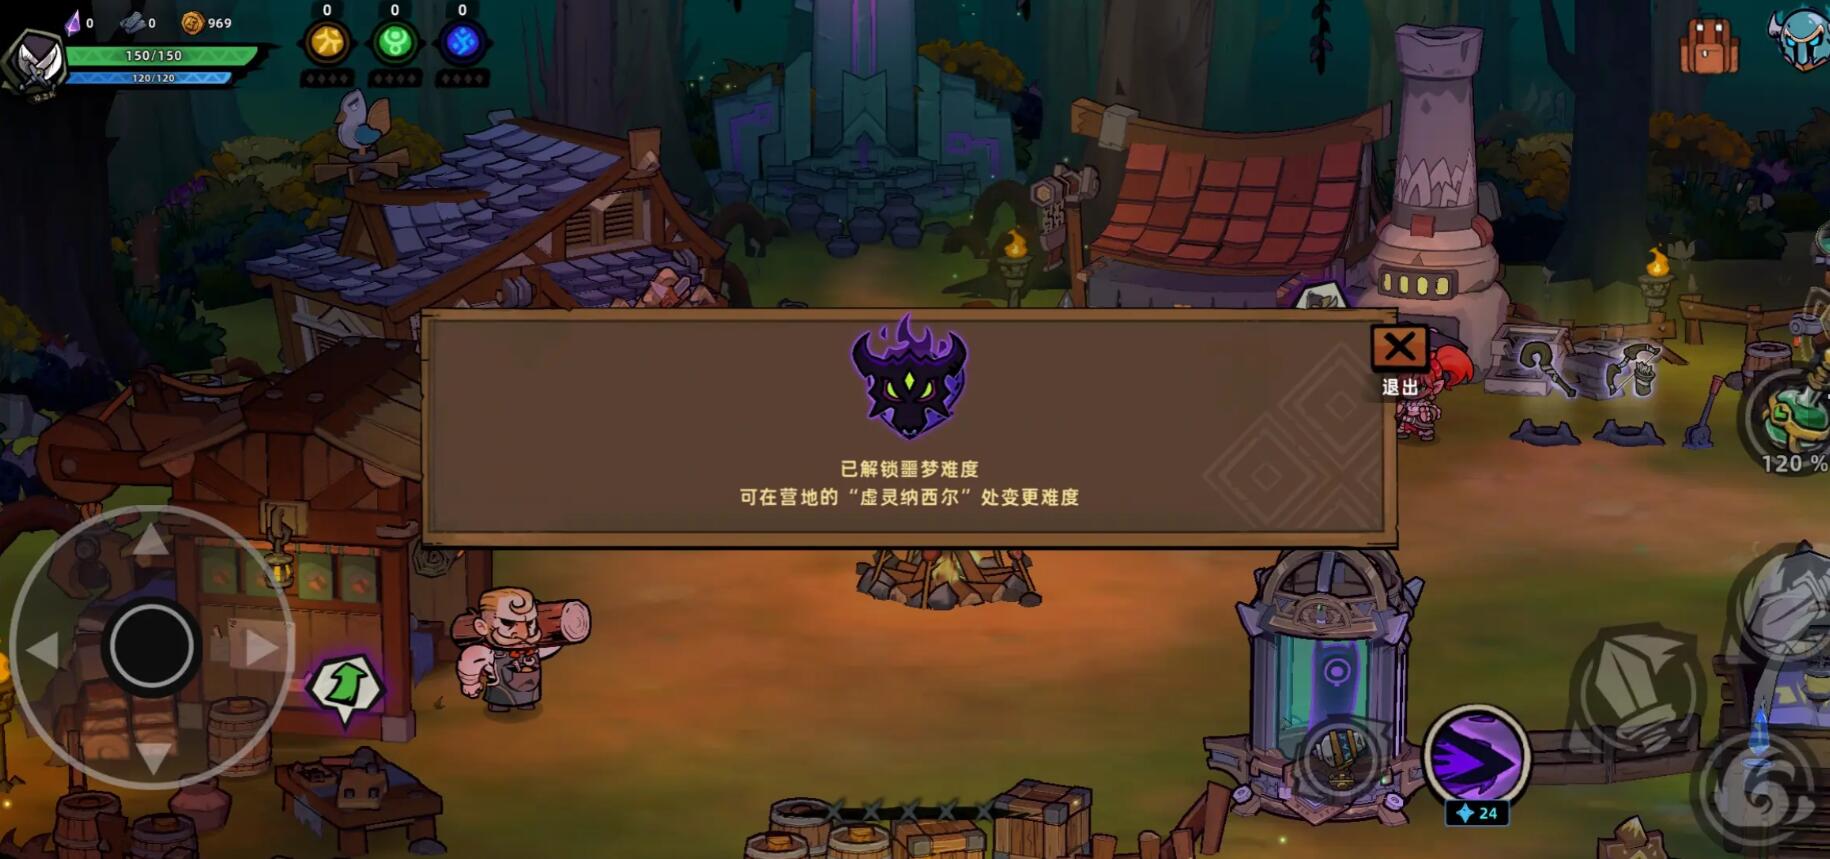
How to unlock nightmare difficulty in Lost Castle 2 How to change to nightmare difficulty in Lost Castle 2
The nightmare difficulty in Lost Castle 2 is the ultimate challenge mode of the game. Compared to the normal difficulty, the attack power, health, and attack frequency of enemies are significantly increased. At the same time, hidden bosses and rare drop rewards have been added. Today, I will share how to unlock the nightmare difficulty in Lost Castle 2. In fact, unlocking the nightmare difficulty requires completing specific conditions, while adjusting the difficulty involves in-depth mechanisms within the game. The following information will help you efficiently tackle high-difficulty challenges.
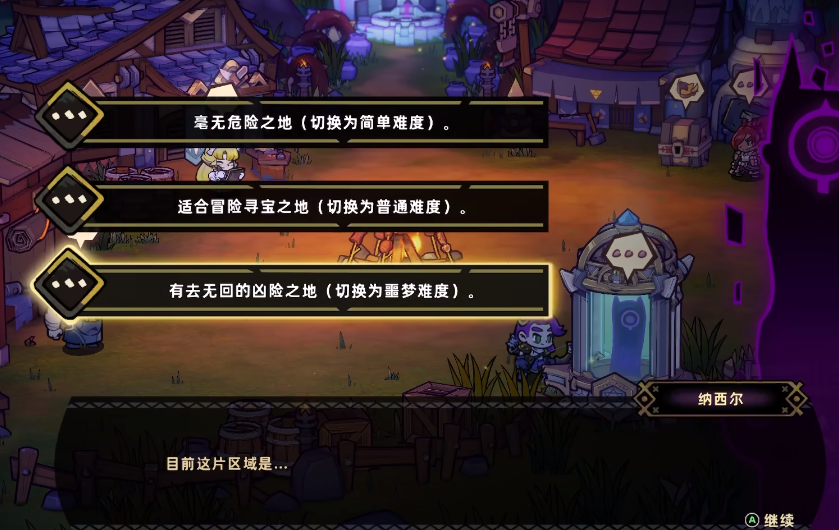
Nightmare difficulty is not initially selectable; players need to first complete a run (defeat the final boss, "The Fallen Treasure Hunter") and then, in the second and third runs, hold the "Soul Crystal Core" item to unlock it. After completing the run, return to the castle hall, find the Wraith Nasir in the lower right corner, and choose "Yes" in the dialogue to activate the nightmare mode. The nightmare difficulty itself cannot be directly downgraded, but players can use the "Ethereal Nightmare Device" (from the endgame NPC Nia) to adjust the nightmare depth (similar to New Game+). Each increase in depth increases enemy strength, but also offers richer rewards.
Compared to the normal mode, the nightmare difficulty has significant differences. All basic enemies' attack power is increased by 60%, and the attack rhythm is noticeably faster. Some regular small monsters will also evolve into more dangerous "demonized elite" forms. The changes in boss battles are even more apparent, with not only doubled health but also more complex and varied attack patterns. Special bosses like the "Reaper" may randomly appear in the first four stages to ambush players. Resource management becomes stricter, with fewer treasure chest drops and rarer healing potions. Every decision can affect the success or failure of the run.
Of course, there are some tips for gameplay. I recommend a few classes: the heavy armored knight, with its excellent survival capabilities, is a top choice for beginners, while the fel mage, skilled in long-range attacks, can provide stable firepower support for the team. For weapons, the greatsword, which balances attack and defense, the staff for safe distance output, and the agile spear are all good choices. In terms of item preparation, the mandrake flower for resurrection and large health potions are essential, while potions with unclear effects should be used cautiously, as they reduce the margin for error and have low cost-effectiveness.

So, that's how to unlock the nightmare difficulty in Lost Castle 2. However, for players who want to challenge higher nightmare depths, it is recommended to progress gradually. First, fully adapt to the behavior patterns of the current difficulty's enemies, and then gradually increase the debuff effects to raise the challenge level. Additionally, teaming up can significantly reduce the initial challenge difficulty. Once familiar with the mechanics, try soloing. Through continuous skill refinement, players can ultimately obtain rare soul stones and precious hero relics!
How to adjust the nightmare difficulty in Lost Castle 2? How to unlock the nightmare mode in the Lost Castle 2 mobile game?
In the genre of roguelike games, Lost Castle has always had a relatively high reputation. The game's graphics may not be very outstanding, but the gameplay is easy to get into and highly replayable. Recently, the sequel to this game has been widely discussed among many players. So, how do you adjust the difficulty to Nightmare in Lost Castle 2? Many people are interested in the Nightmare difficulty, but they don't know how to enter this mode.
Nightmare difficulty is currently the highest difficulty in Lost Castle 2. If players want to select this difficulty, they first need to unlock it. Players must first complete all levels of the first three playthroughs. After that, starting from the fourth playthrough, a dungeon before the fifth level boss will refresh with an NPC. Then, we need to talk to them, and after three consecutive conversations, we can obtain the Soul Crystal, allowing us to choose the Nightmare difficulty in the game.
Before entering this difficulty, players need to be fully prepared, as the enemies in this difficulty are the toughest to deal with. Additionally, there are hidden bosses in the game, and if players' levels and equipment are not adequately prepared, they can easily die in this difficulty.
Currently, under the Nightmare difficulty, all attributes of the enemies will significantly increase. Especially after the fourth level, the enemies' health and attack power increase noticeably. At the same time, some levels will refresh with a new hidden BOSS, the Reaper, which players need to be cautious about.
Currently, two builds are recommended for this difficulty. The first one is the Poison Damage build. This build has a high self-healing ability and fault tolerance, allowing us to withstand the boss's attacks. The second build is the Ice Staff, which relies heavily on positioning but provides stable damage output.
The above explains how to adjust the difficulty to Nightmare in Lost Castle 2. In the Nightmare mode, our survival will be greatly challenged. Before starting, players need to refine their chosen build. In addition, we also need to have a high level of skill to pass through smoothly.
How to choose the Ethereal Nightmare in Lost Castle 2? How to activate the nightmare mode in Lost Castle 2?
In this issue, I will introduce how to choose the Phantom Nightmare in Lost Castle 2. This is one of the game modes, and there are certain requirements to participate in this mode. Next, I will share the game's settings with everyone. Players who feel that the regular mode lacks challenge can enter the Phantom Nightmare mode. This mode is very difficult, so it won't be unlocked at the beginning but requires completing specific tasks. Below, I will share all the relevant settings.
Phantom Nightmare actually refers to the nightmare difficulty in the game. There are four difficulties to choose from: easy, normal, hard, and nightmare. These difficulties will not all be unlocked at the start; they need to be challenged one by one by the player. To answer how to choose Phantom Nightmare, if a player has successfully unlocked all the difficulties, they can directly select it from the bonfire at the main camp. At this point, all the difficulties will be available, and players can choose based on their current needs.
If the nightmare mode is not unlocked, the player first needs to complete three playthroughs in the game, finishing all the tasks in the normal, easy, and hard difficulties, and defeating the final boss. Only then can the nightmare mode be unlocked. After completing the challenge, the character will enter the castle hall, where there will be a wizard. The player can choose to talk to this wizard, who will give two options. Choosing "yes" will directly enter the nightmare mode, while choosing "no" will return to the main page. You can switch to the nightmare mode when you want to challenge it.
The nightmare mode in the game is very difficult. All the bosses have stronger combat power, and their overall health, defense, speed, and attack speed are also increased. In addition to these big bosses, the small monsters in the game will also use encircling tactics, making the difficulty even greater for players. Furthermore, the drop rate of equipment used in the game will decrease. Not only do the opponents become stronger, but the acquisition of resources for the player also becomes more challenging.
In this hard mode, there is also an additional hidden boss. Players can challenge it in the game. After reaching the fourth level, they can destroy the statue in the scene, unlocking a hidden path. Following this path, they can reach the boss's lair and fight to get a large amount of rewards. During the battle, survival should be prioritized, and then gradually familiarize yourself with the monster's attack patterns, allowing for timely counterattacks during the intervals of the opponent's attacks. New players can try using long-range attack roles like mages or archers to avoid getting too close to the enemy, thus preventing significant loss of health.
What was shared above is how to choose the Phantom Nightmare in Lost Castle 2. To choose the hard mode, you first need to complete the challenges of other modes to unlock this mode. After unlocking, you can directly join the game to challenge. Players can also choose to exit first and then go to the bonfire to select the corresponding difficulty when they want to challenge. The specific methods have been shared, and everyone can follow the above instructions to unlock and start a higher difficulty level for the challenge.
How to clear the Nightmare difficulty of the Four Directions in Sangokushi Fantasy Continent 2: Ballad of the Warlord
There are many gameplay elements in Three Kingdoms Fantasy Land 2, such as increasing the difficulty of bosses from the main storyline and placing them into "Nightmare Revisited". Many players get stuck on the first level, not knowing how to pass the Nightmare Difficulty Quadrant of the Ballad of the Warlord in Three Kingdoms Fantasy Land 2. Below, I will share a strategy for passing this level in the Ballad of the Warlord at nightmare difficulty. In fact, there is a trick to this level; once you understand the principle, it's quite easy to clear.

The core enemies in this level are Zhang Chunhua and Jian Shuo. Although these two bosses do not have particularly high health, some regular damage-dealing generals can handle the damage task. However, the design of the game mechanics determines that the difficulty of the battle does not lie in mere numerical confrontation.
Each turn, fireballs fall from the ceiling causing additional damage, and the "Death Decree" mark summoned by Jian Shuo in the back row cannot be removed by conventional means, only through healing to remove it. Without group healing, your team's health will quickly drop, and combined with Zhang Chunhua's high-burst skills and the suicide mechanism of the Assassin, it's easy to result in a team wipe.
There is one general who can easily deal with such mechanisms, and that is "Qiao Shu", which can be considered a countermeasure card. Her talent and ultimate skill allow teammates to heal through normal attacks, and her unique healing mechanism perfectly counters the continuous suppression effect of the "Death Decree" mark. Her ultimate also provides mass healing, directly removing all "Death Decrees". More importantly, the fireballs falling from the ceiling are considered "normal attacks" in the game's judgment mechanism, triggering Qiao Shu's healing ability. Therefore, as long as you ensure Qiao Shu has a good foundation, you can stabilize the team's health.
In actual combat, another detail is to prevent enemy Zhang Chunhua from using her ultimate skill in the first turn, which greatly reduces the risk of being wiped out early and gives your team time to set up and heal. Generally speaking, as long as the level is high enough (level 100) and the setup is decent, following the above strategy will allow you to steadily clear the highest difficulty.

This concludes the introduction on how to pass the Nightmare Difficulty Quadrant of the Ballad of the Warlord in Three Kingdoms Fantasy Land 2. In summary, the enemy's health is not very high, but the mechanics are a bit tricky. As long as you master the way to deal with it, especially by utilizing Qiao Shu's healing mechanism, you can easily break the key mechanism and pass smoothly.
How to Defeat Nightmare Xia Ling in Blade & Soul 2: A Guide for the Mobile Game
When players are going through the main storyline in Blade & Soul 2, they will encounter various bosses. Bosses in dungeons can be bypassed, but main storyline bosses must be fought, and Xialing is one of them. Today, I will discuss how to defeat the nightmare version of Xialing in Blade & Soul 2. Many boss fights in the game require a lot of skill, and new players, lacking experience, might struggle here.
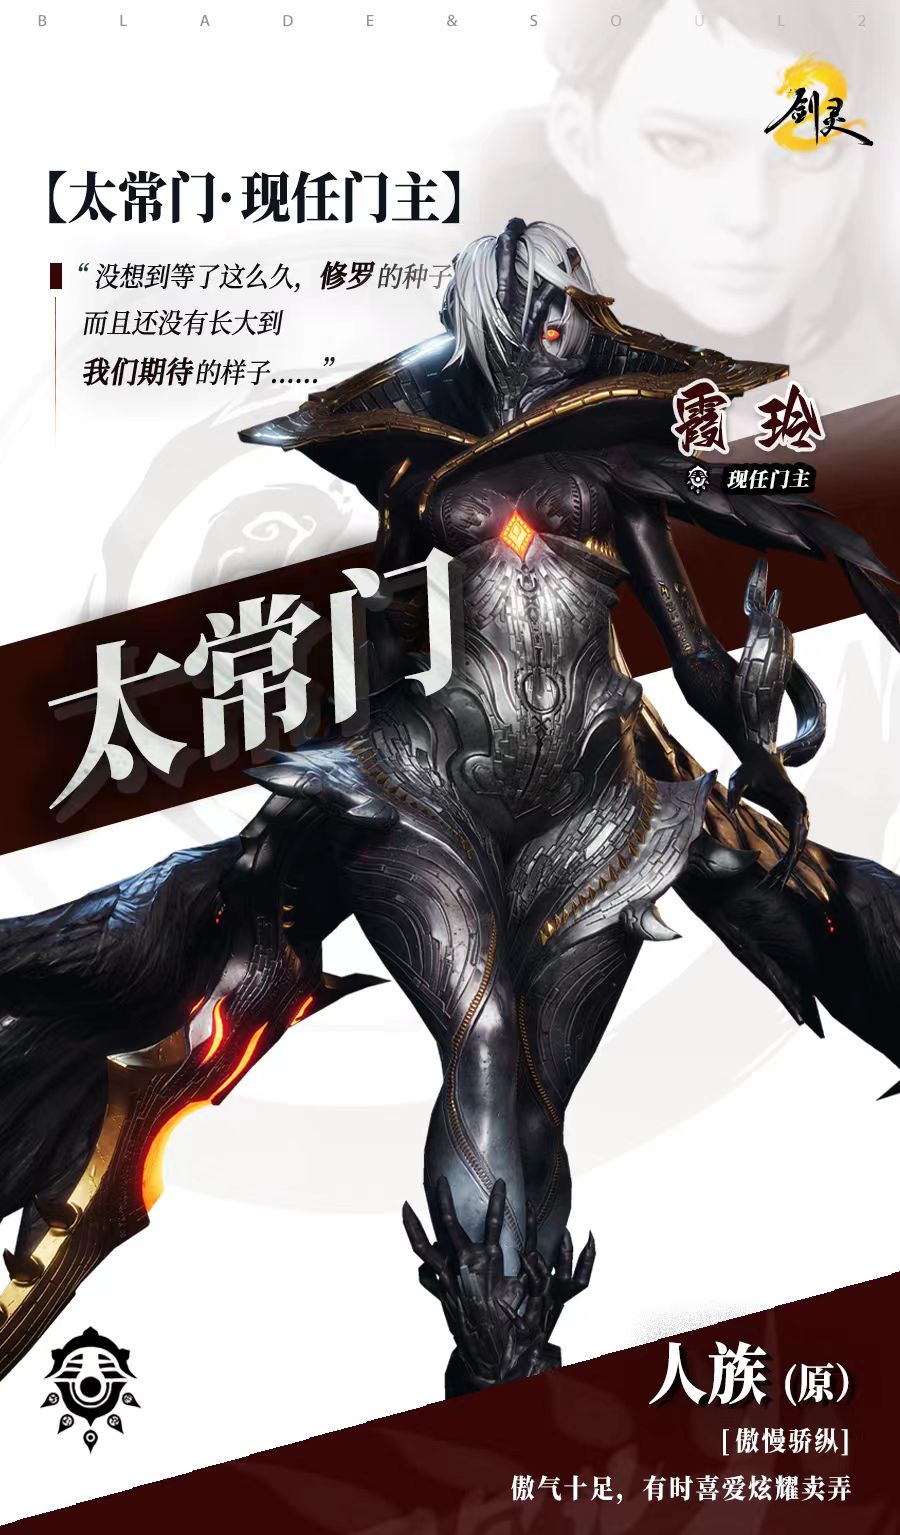
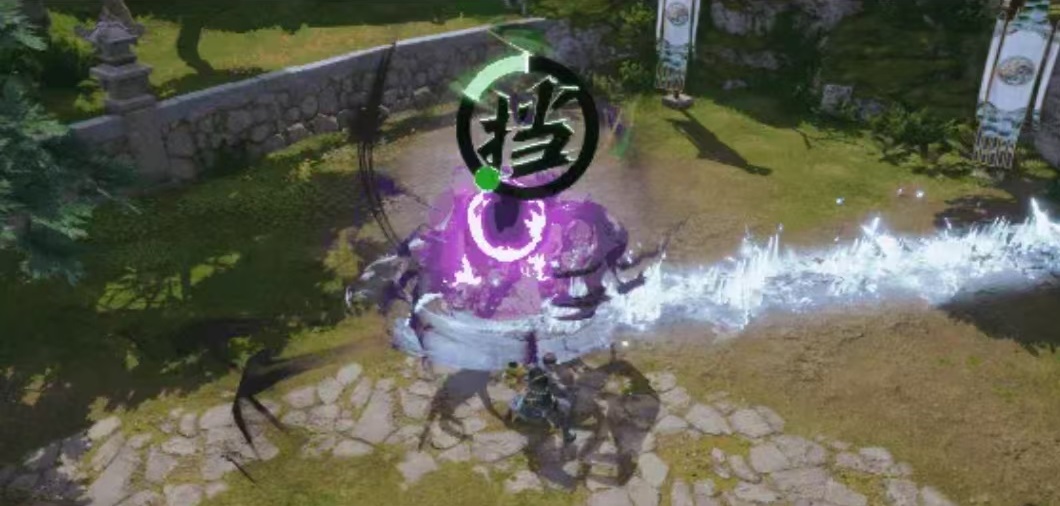
Xialing is the corrupted leader of Taichang Sect, both an elegant sect leader and the third Qi cultivator of Asura, making her extremely powerful. Before the fight, make sure to bring plenty of recovery potions to sustain prolonged combat. The challenging part about this boss is her very fast cooldown on skills. Even with Arang's assistance, the fight remains difficult. Her first skill involves firing purple energy balls from both hands, lasting for 5 seconds, during which a block prompt will appear above your head. Successfully blocking this allows you to interrupt a powerful charging skill of the boss, followed by a satisfying period of high damage output.

When the battle reaches the point where the boss’s health is halved, Xialing will roar, releasing a purple ground-splitting wave in a 120-degree fan-shaped area directly in front of her, causing continuous damage after the ground ripples. You need to roll to the safe zones on either side in advance. This skill is dangerous and must be avoided. This is only the first phase; the second phase follows, with multiple yellow circles appearing on the ground. Stepping into these circles will cause continuous damage. As the skill progresses, the circles become denser and cover a wider area, requiring excellent positioning to dodge using the gaps. It is recommended to use weapons with displacement skills for easier movement.
Subsequently, the boss will launch multiple 180-degree fan-shaped attacks, with the attack speed gradually increasing as the number of releases increases. If hit, you will suffer high damage and become stunned. At this point, circle around at the boss's feet, always attacking from behind. Do not greed for damage output; instead, stay mobile and avoid being hit.
The content above is my answer today to the question of how to defeat the nightmare version of Xialing in Blade & Soul 2. After reading this, you should have a clear idea of what to do in the battle. Knowing these skill effects in advance will allow you to respond promptly, otherwise, you will be overwhelmed by such a dense array of skills.
How to Defeat Nightmare Xia Ling in Blade & Soul 2: A Guide to Fighting Nightmare Xia Ling in the Blade & Soul 2 Mobile Game
In the world of Blade & Soul 2, Xia Ling is a boss that players both love and hate. As a key enemy in the main storyline, her strength can be described as "ferocious," and defeating her is no easy task. How to defeat Nightmare Xia Ling in Blade & Soul 2? Since the challenge is to overcome her, you must go all out, leaving no room for error. Today, we will bring you a guide on how to deal with Xia Ling in Nightmare difficulty, so you can not only stay calm during the battle but also successfully defeat her.
Xia Ling is not just a beautiful and powerful boss; her fighting style is also very complex. First, what's most troubling is her speed. Her attacks are extremely swift, leaving almost no breathing room. Facing her furious attacks, defense and counterattack are equally important. Especially when she is charging up, if you can interrupt her in time, you can launch an attack while she is briefly vulnerable. Remember, when the word "Block" appears above Xia Ling's head and she starts to charge, quickly move in and attack, interrupting her charged skill and catching her off guard.
During the battle, she has a very threatening move - the Roar. Once this move is used, Xia Ling will cause a large area of ground to shake in front of her, and the appearance of cracks signals danger. At this moment, standing on the cracks will result in continuous health loss, and getting hurt is inevitable. Therefore, the instant you see her stand up and roar, you should quickly turn and evacuate the current area, especially within the 120-degree range directly in front of her, where you should never linger. Her roar not only shakes the ground but also causes continuous damage within the crack area, and if you get trapped, healing potions won't be enough to sustain you.
Another attack to pay special attention to is when Xia Ling releases yellow circles on the battlefield. When these circles appear on the ground, they will cause continuous damage, and their coverage is extensive. If you don't dodge them in time, you will be forced to stand within their range, causing your health to drop rapidly. At this point, staying calm is crucial. Try to maintain flexible movement, using your character's mobility to quickly avoid these circles and ensure your survival.
It's worth noting that Xia Ling's attacks heavily rely on her ability to control the battlefield. For example, she not only releases circles but can also summon damaging ground effects at specific locations, so familiarizing yourself with her skill release patterns is key to defeating her. To counter these attacks, it's recommended to choose equipment with displacement skills, which will make it easier to dodge damage. Movement is not only essential for dodging skills but also key to maintaining dominance in the battle.

The above is the content on how to defeat Nightmare Xia Ling in Blade & Soul 2. Defeating the Xia Ling boss is not just about blindly attacking. You need to always maintain control over the battle rhythm, use your displacement skills reasonably, and ensure you can react quickly when she is charging, roaring, or releasing circles. By carefully observing her skill releases and combat patterns, you can effectively avoid damage and find opportunities to defeat her.
Which Nightmare Bosses are in Black Beacon? An Overview of Nightmare Boss Effects in the Black Beacon Mobile Game
In the Black Beacon game, which is full of various challenges, the boss system has set different levels, with nightmare bosses undoubtedly being high-difficulty level existences. They are terrifying in terms of stats, far exceeding ordinary bosses in every aspect. The presence of nightmare bosses in the Black Beacon significantly increases the operational difficulty for players when facing them. Wanting to defeat these nightmare bosses, today's introduction will allow everyone to see their abilities.
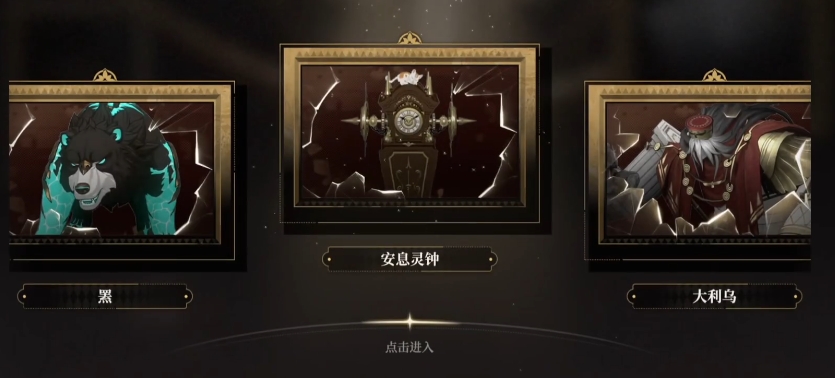
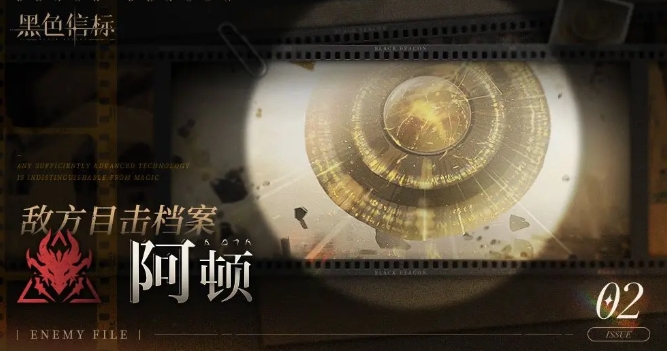
The first nightmare boss to be introduced is Atun. In appearance, it looks like a mysterious and unpredictable planetary instrument. This boss has a unique two-life mechanism, meaning that after its first death, players need to quickly seize the opportunity to use high-burst hero skills to kill it instantly; otherwise, as time goes on, the battle will become increasingly difficult. Atun's combat mechanism is relatively simple, mainly consisting of three skills. The first skill is an amplified laser. When it releases this skill, players must not panic but instead quickly dodge behind it to cleverly avoid the laser's attack range, while also being able to attack.
The second skill is a ranged light wave skill, which covers the entire map once released. To escape the damage from this skill, players have two options: one is through dodging to trigger invincibility frames, thus successfully escaping the dangerous area, and the other is to quickly move to the edge of the map, using the map's edge to avoid the light wave's attack. The last skill is, when Atun's first life dies, it continuously releases a large light array. At this point, players need to remain calm and quickly move to the safe position at the center.
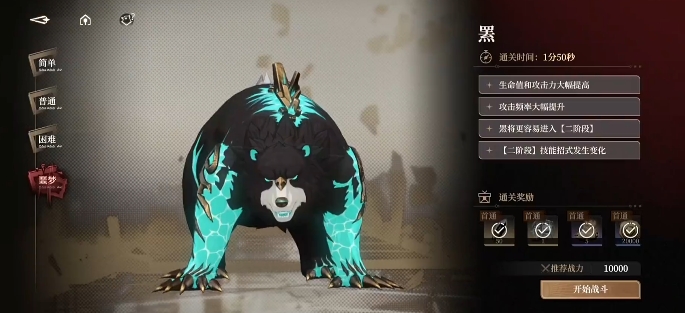
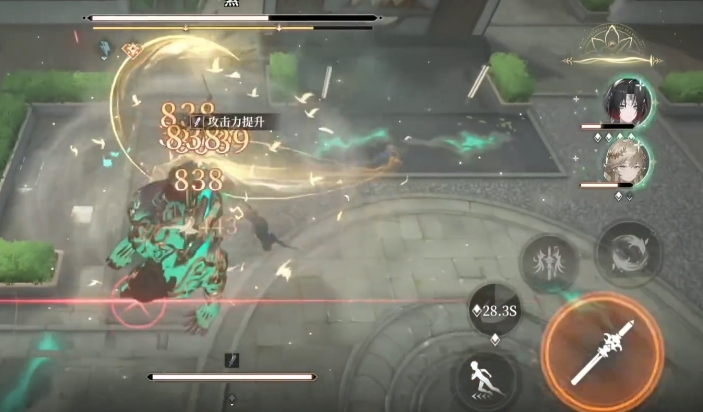
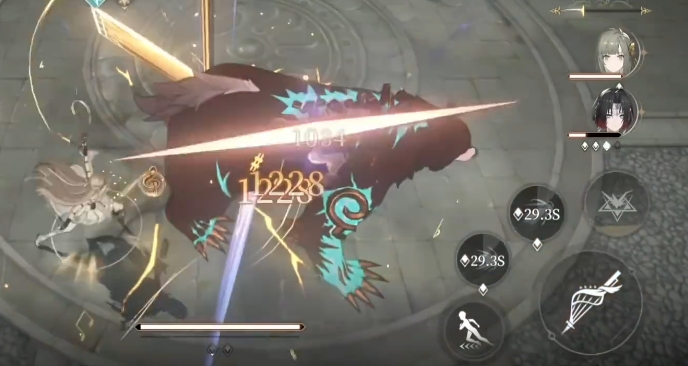
The next nightmare boss to be introduced is Hei, whose image is a majestic big black bear. This boss has a very high attack frequency, especially with its three-segment attack towards the front. Although each segment's attack range is not large, it poses a significant threat to melee characters. If melee characters are not careful, they can easily be hit by its combo. It is essential to turn attacks into dodges, constantly triggering invincibility frames through dodging, effectively depleting the boss's HP. Besides the three-segment attack, Hei also releases a large electromagnetic field, within which players will suffer continuous damage, so they need to avoid it for a period. Players can use ranged characters to attack from outside the field, thus depleting the boss's HP. When Hei is almost defeated, it enters a berserk state, with even more fierce attacks. During this phase, players need to constantly press the dodge button, relying on sharp reactions and precise operations to avoid the lightning attacks.

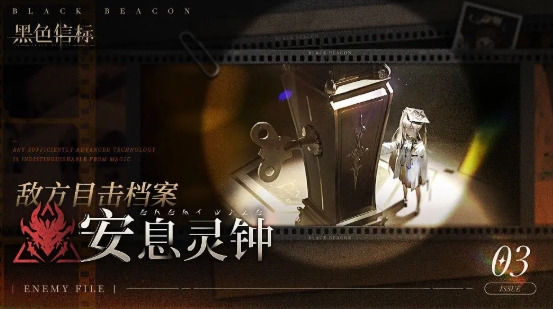
The third nightmare boss is the Resting Bell, which resembles a moving ancient clock tower. The basic attack method of the Resting Bell is to release lightning bombs. Once these bombs land, they continuously emit powerful currents. However, smart players soon realize that as long as they do not step into these fields, they can attack the boss unscathed. But merely avoiding the bombs is not enough; players also need to cleverly utilize the light pillars that appear in the scene. By precisely positioning themselves, they can guide the boss to touch the light pillars, causing it to take massive damage. Whenever the boss's HP drops significantly, it will release rotating lasers around it. Although these lasers rotate slowly, dealing damage while inside them is quite challenging unless players can cleverly use their character's invincibility mechanics to find opportunities to deal damage in the gaps between the lasers. Next, the boss will release a ranged light wave attack, but this time the range is not large, and for healthy characters, they can choose to withstand the damage. In the final stage of the battle, the boss's attack mechanism is just melee claw attacks, which is the time for players to deal damage.
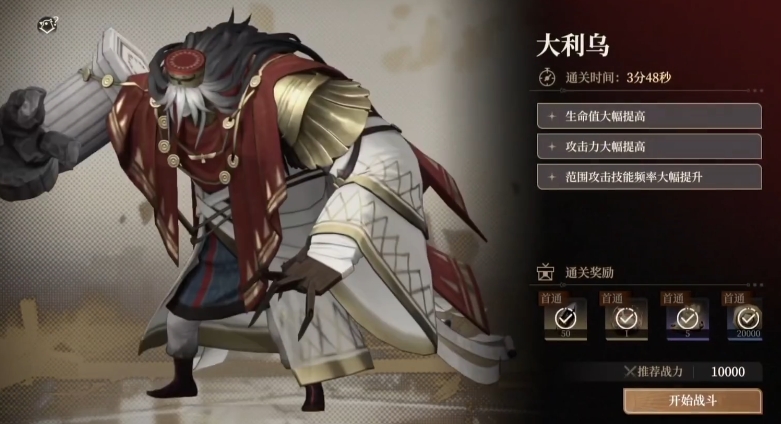
The last nightmare boss to be introduced is Daliu, a beastly orc boss. Daliu's usual attack method is a heavy strike forward, with each strike accompanied by a strong airwave, dealing massive damage to enemies in a small area in front. When facing this attack, players need to dodge flexibly; otherwise, they can easily be hit by this powerful force. Besides the heavy strikes, Daliu also releases an electromagnetic field around it, and if players stay inside for too long, they will suffer intense electric shocks. Therefore, players need to pay attention to their positioning during the battle. When Daliu is almost defeated, it will release a large-scale light wave attack. At this time, players can cleverly hide behind the boss, using its body as cover. Although Daliu's attacks are fierce, its mechanisms are relatively simple. However, its HP is particularly thick, requiring players to use high-burst characters to fight it.
This concludes the introduction to the nightmare bosses in the Black Beacon. Through the detailed introduction of these nightmare bosses, I believe players already have their strategies. As long as players can master the characteristics and countermeasures of each boss, they will surely be able to clear the game.
How to Beat the Black Beacon Nightmare Pat-a-Pat Bear: A Guide to Clearing the Nightmare Pat-a-Pat Bear
In the Black Beacon, chapter bosses are often a hurdle for players on their path to victory. Compared to relatively simple chapter bosses, nightmare-level bosses undoubtedly present a more formidable challenge that players must face. How to defeat the nightmare-level PatPat Bear in the Black Beacon is a common question when tackling this difficulty level. These nightmare bosses not only see a qualitative leap in stats but also have more complex combat mechanics and attack patterns.
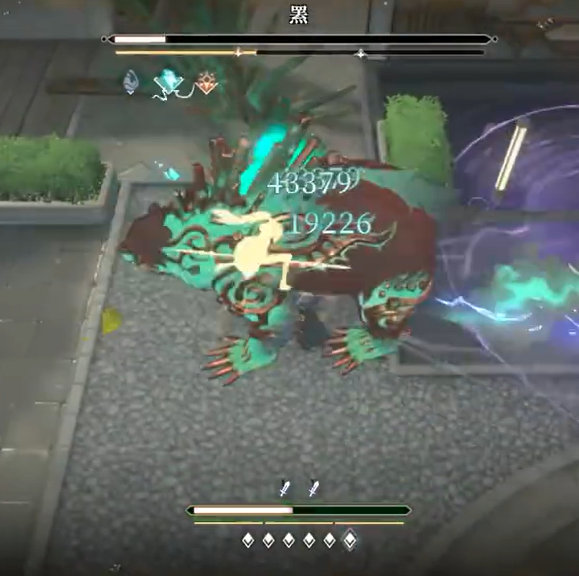
The nightmare PatPat Bear is called Black in the game. Its massive body is covered with black patterns. Black's main attack methods are ground slams and claw strikes. Although these two seemingly simple attacks, when executed at high frequency, become a nightmare for players. If players cannot maintain a high level of alertness and agile dodging skills, they can easily be hit by its consecutive attacks. First, let's take a look at Black's basic attack methods. Its claw strike, although it looks simple, can be quite troublesome if you get hit multiple times.
When it releases a claw strike forward, one might think it's easy to dodge. Indeed, the range of this attack is relatively small, and for players with quick reflexes, it can be avoided rather easily. However, even such a seemingly ordinary attack, if not dodged carefully, can deal a lot of damage. What's more important to note is Black's charged attack. During the charging phase, you will see Black's palm gradually glow red, like burning flames, signaling an impending powerful attack.
As the red light flickers, Black will slam the ground heavily. This attack is much more powerful, and once it hits, players will suffer significant damage. Therefore, when Black is charging up, players must react quickly and dodge to a safe place to avoid being hit by this heavy blow. When Black performs a three-hit ground slam, the entire game screen seems to be shaken by this immense power. During these three slams, you'll find your visual field seems to be magnified by some invisible force.
The already intimidating boss now appears even more gigantic. Black crouches slightly, gathering power, and then slams the ground three times in succession. These three attacks are not only astonishingly powerful but also cover a vast area, almost spanning most of what you can see. Simply moving your character to dodge is far from enough. However, astute players will soon discover a trick: during the three-hit ground slam, there is a brief pause between each attack. Although this pause is very short, it is enough for players to seize the opportunity to counterattack.
During this brief pause, the boss will be in a state of temporary rigidity. At this moment, you can quickly use normal attacks to deal damage to the boss. When Black's health drops to half, it will enter another battle state. You will see it suddenly turn around and sprint towards a corner of the map. During this process, Black is in a state of invincibility, and only its front can take damage. You can take advantage of this opportunity to unleash all your attacks, maximizing the damage dealt to the boss.
Once Black reaches the designated position, it will stop and release a powerful shockwave towards where you are. This shockwave carries immense energy. Immediately after, Black will jump high and then slam down with a gravity attack. This series of attacks requires you to use your dodge skills promptly to avoid them and turn danger into safety. When Black's health is reduced to a sliver, it will enter a berserk state.
At this point, every attack from Black is accompanied by intense lightning. In this state, Black's attack power greatly increases, both in speed and strength. It can easily take you out with a set of skills. At this critical moment, you can use your character's ultimate move to deliver a fatal blow to Black, ending its remaining health. Only by doing so can you avoid being eliminated.
The above are some operational tips on how to defeat the nightmare-level PatPat Bear in the Black Beacon. If you encounter this challenging Black in the game, remember to check the guide provided in this article. These strategies have been tested and proven useful by other players.
How to Defeat the Black Beacon Nightmare Pat-a-Pat Bear: A Strategy Guide Sharing
In the Black Beacon game, the chapter bosses are relatively simple, and as long as the character's level is up to par, they can all be cleared. However, the stats of the nightmare-level bosses have greatly increased, making it very difficult to deal with them easily. Among them, the nightmare Pat-Pat Bear is particularly hard to defeat, and many players will ask how to beat the nightmare Pat-Pat Bear in Black Beacon? Here, I will provide a general strategy for dealing with the nightmare bear to help players improve their kill efficiency.
The nightmare Pat-Pat Bear is called Black in the game. It is a large bear with black patterns, and its attack methods often involve slapping the ground and clawing, which is why it is known as the Pat-Pat Bear. This boss has a high attack frequency, and if you cannot maintain a high level of evasion, it is easy to be killed by consecutive attacks.
Firstly, Black's basic attack is a simple claw strike, aimed forward. The range of this attack is small, and it is generally easy to dodge. Even if you can't dodge, you can take the damage, but avoid taking the charged attack. During the charging phase, the boss's palm will turn red before slamming the ground. You need to dodge as quickly as possible during this phase because the hit from the slam is highly damaging.
Next is the three-hit ground slam. At this point, the visual effect will enlarge, and the boss will perform a three-segment attack, which is powerful enough to instantly kill your character. So, when the three hits are coming, just keep dodging. The attack range is quite large, and it's impossible to completely avoid it just by moving. After the attack, the boss will be in a brief pause state, allowing you to use normal attacks to deal more damage.
When the boss reaches half health, Black will start running to a corner of the map. In this state, the boss is in an invincible state, but only the front part is vulnerable, so you can go all out with your attacks. Upon reaching the position, it will release a shockwave, followed by a heavy gravity attack on the ground. You can dodge using evasion, and then continue attacking.
When the boss is down to one health bar, it will enter a berserk state. In this state, there will be obvious signs, and the attacks will come with lightning. The attack power in this state is significantly increased, making it easy to be taken down in one set. You can use the character's ultimate move to finish off the remaining health.
Most players should now understand how to deal with the nightmare Pat-Pat Bear in Black Beacon. The nightmare Pat-Pat Bear is still quite challenging and requires flexible evasion to complete the kill. It is recommended to use characters with more invincibility skills to handle it!
Recommend


Strategy

A Guide to Zhetian Fanchen Yiyue Sharing Tips for New Players on How to Play Zhetian Fanchen Yiyue
Introduction to the Public Beta Time of Zhetian Fanchen Yeyi When is the public beta for Zhetian Fanchen Yeyi?
How is Zi Yue from Zhetian Fanchen? Introduction to Zi Yue from Zhetian Fanchen
What are the Luhida Origin redemption codes? Sharing of Luhida Origin mobile game gift codes
Lu Xida Origin Team Recommendations Lu Xida Origin Team Guide
Lu Xida Origin Strategy Sharing: Beginner's Guide to Lu Xida Origin
