
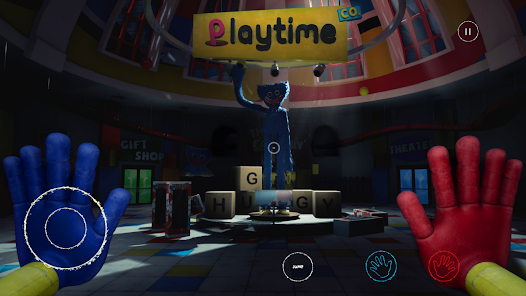
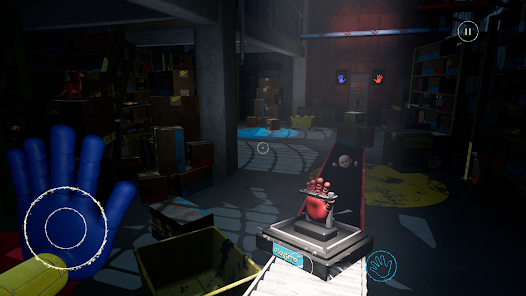
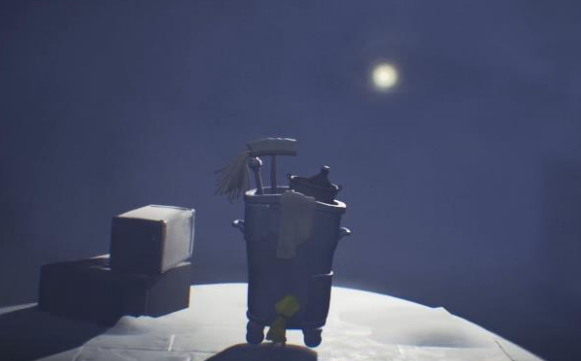
Poppy Playtime Chapter 1
Game Introduction


Hot Strategy
What is the family story in Chapter 1 of Mafia: Definitive Edition? A full walkthrough and analysis of the family plot in Chapter 1 of Mafia: Definitive Edition.
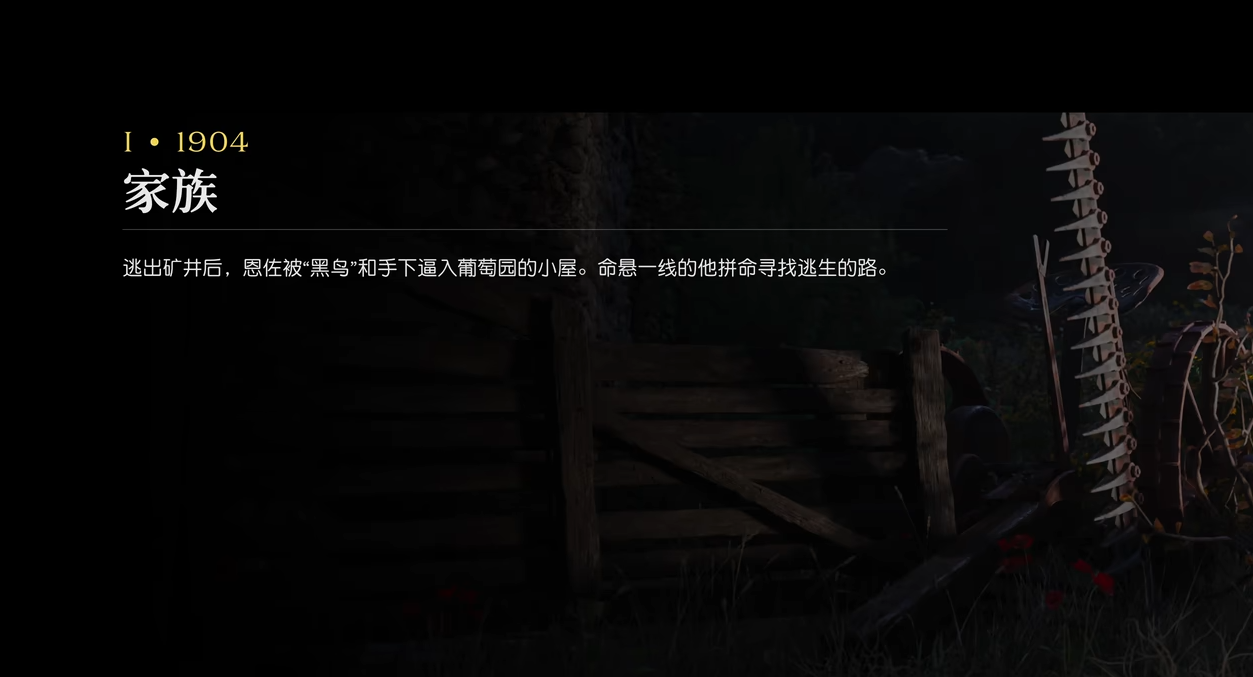
Chapter One, "The Family," follows the conclusion of the prologue's escape, bringing the severely injured Enzo into the heart of the Sicilian mafia power network—the Torisi family's vineyard. Many players are curious about what happens in Chapter One: The Family of the game. This chapter sees Enzo transform from a near-death miner to a vineyard worker, getting his first taste of the mafia family's protection system, and thus officially starting his journey in the underworld.
[Biubiu Accelerator] Download the latest version
>>>>>#Biubiu Accelerator#<<<<<<
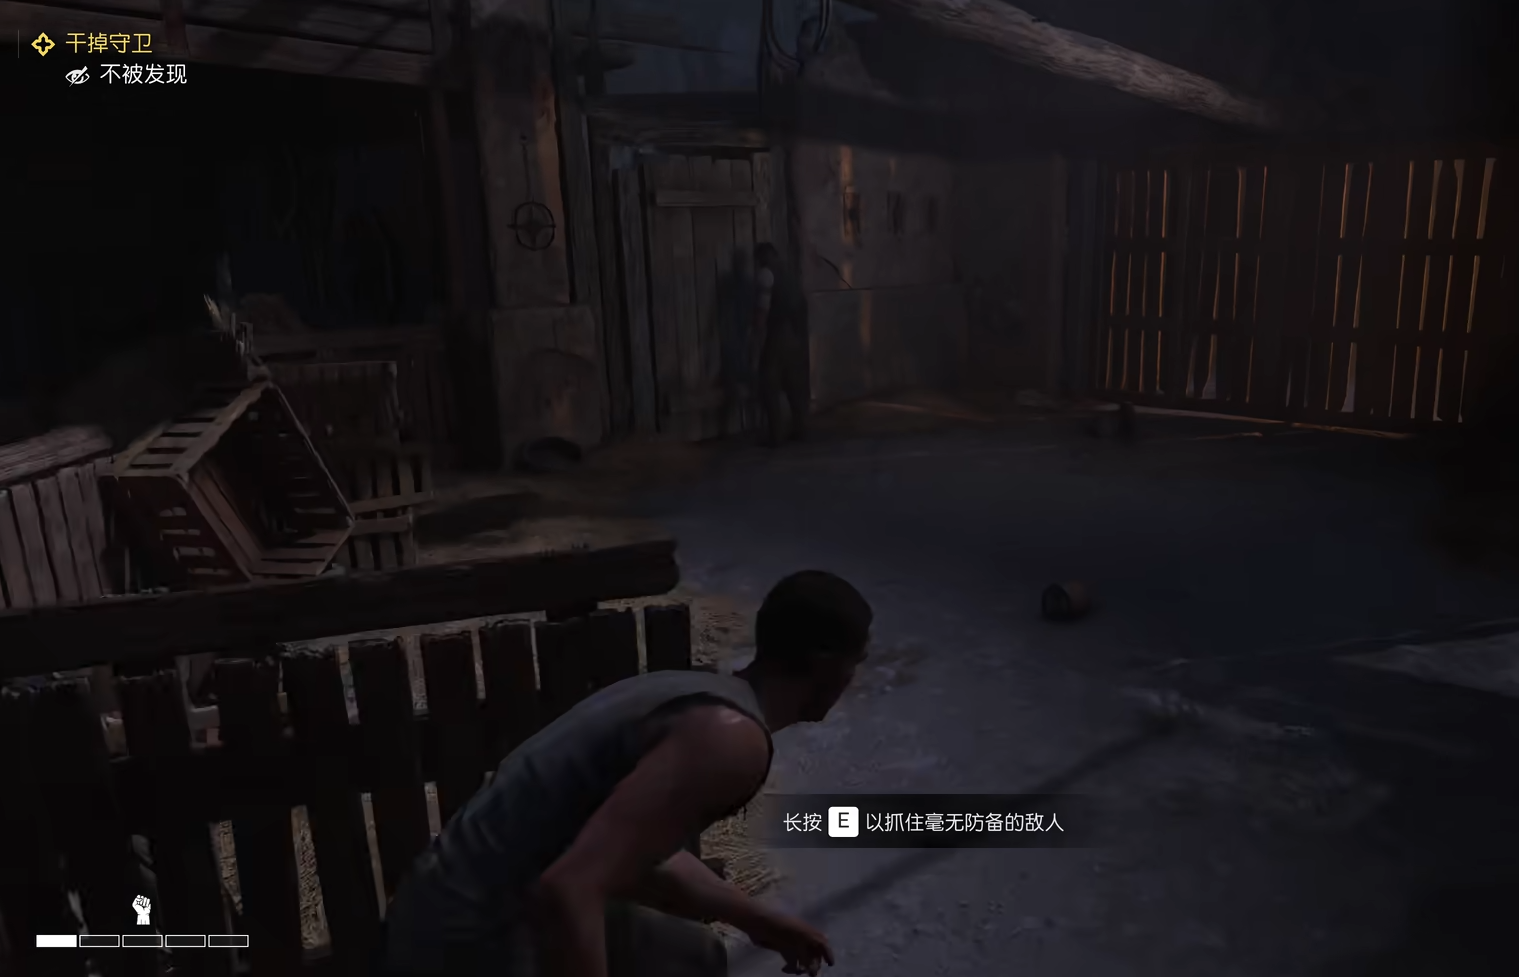
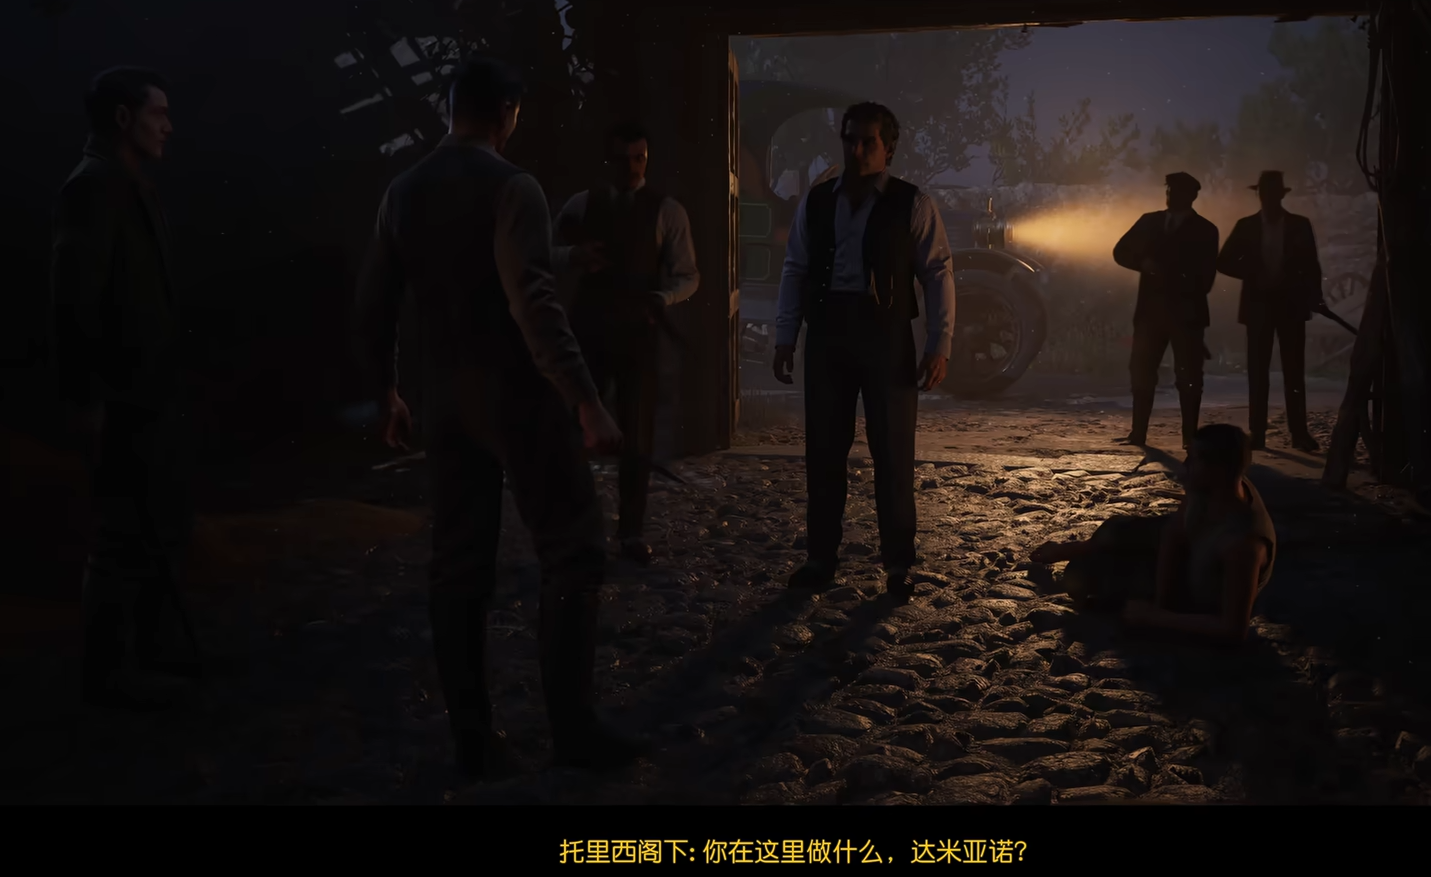
After escaping the mine, Enzo is cornered by "Blackbird" and his men into a small house in the vineyard. Hungry and thirsty, he desperately searches for a way out. Here, you need to start sneaking around and assassinating nearby guards. Be sure to attack them from behind.
However, after killing a few, he is still found by Blackbird. Just as things seem dire, Sir Bernardo Torisi, the owner of the vineyard, arrives in time to intervene, driving away the guards on the grounds that Blackbird and his men violated the ceasefire agreement and crossed boundaries.
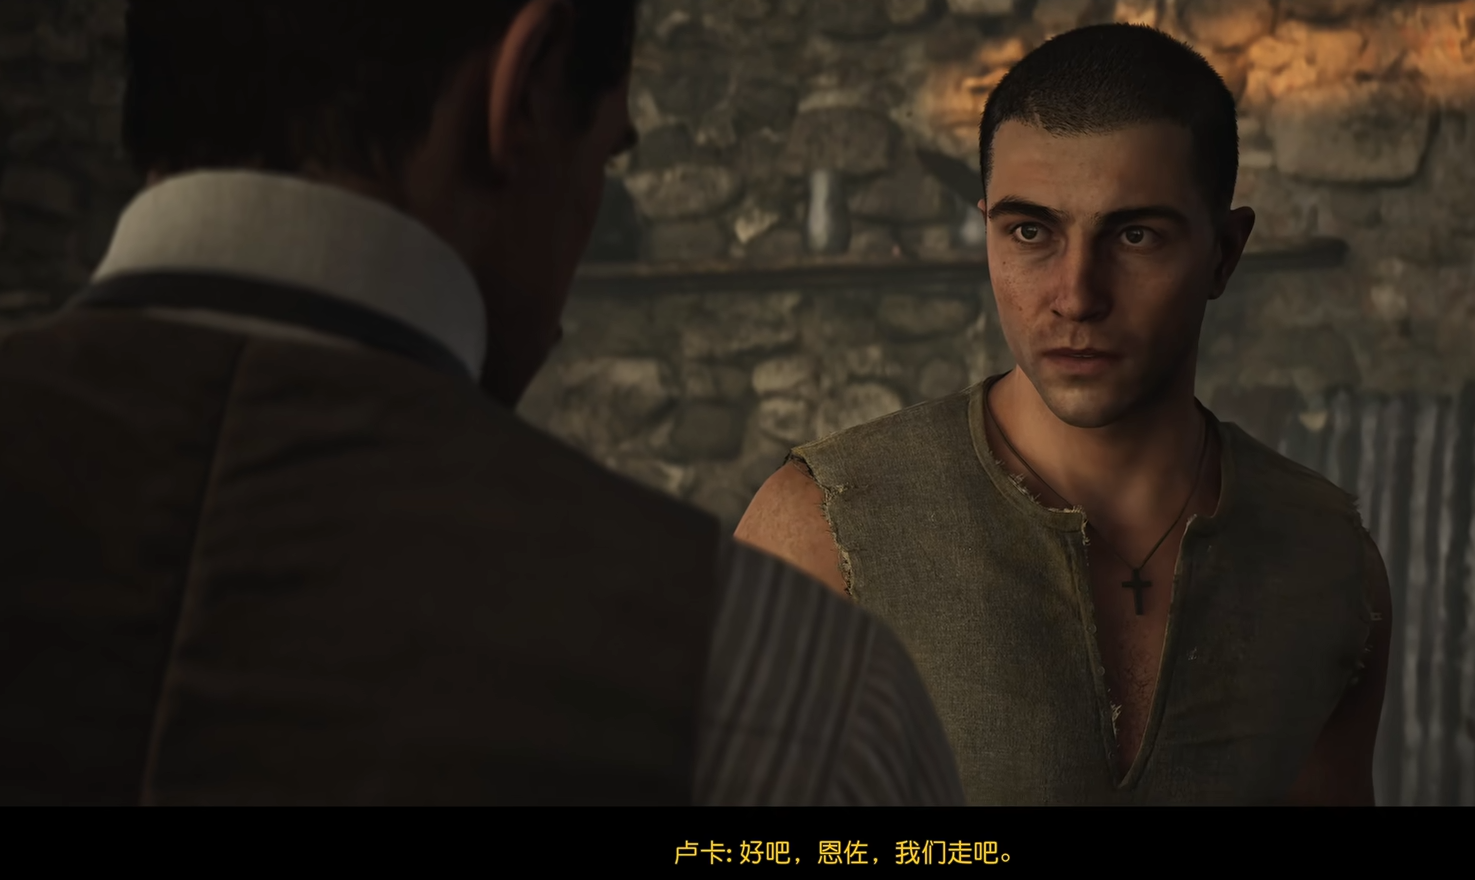
After being rescued, Torisi also offers Enzo a job at the vineyard, placing him under the care of his trusted assistant, Luca Trapani, and providing him with a simple but satisfactory single room to live in temporarily.
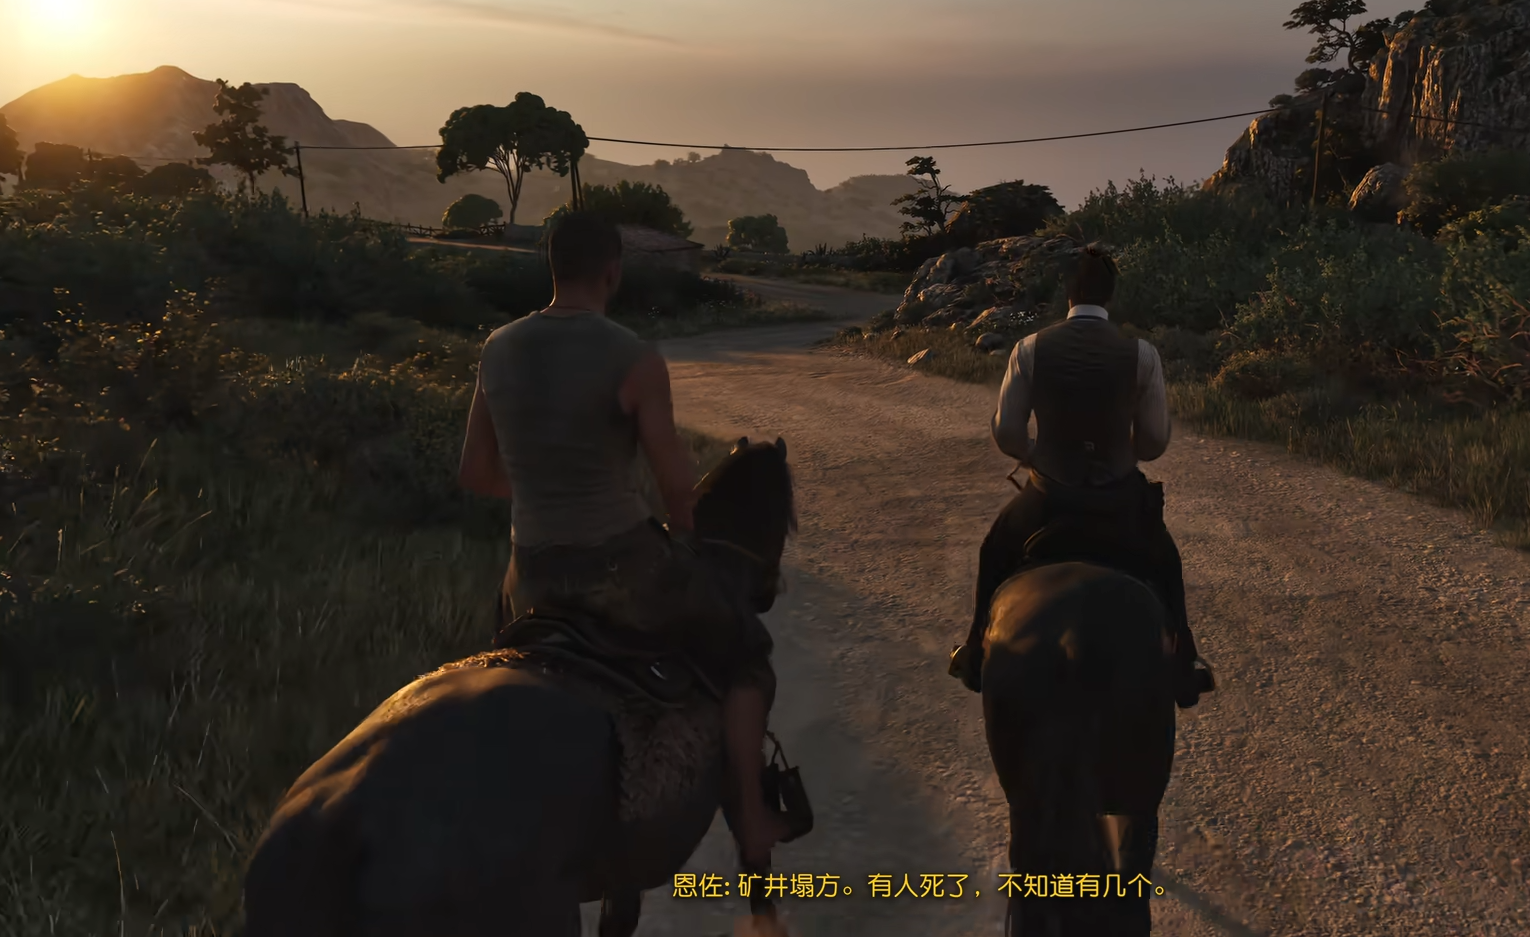
After resting, Enzo begins working in the vineyard. On his first day, he meets Cesare, who will become a close friend. The estate is busy preparing for an evening banquet, and everyone except Cesare Massaro is swamped with work. Cesare is happy to let Enzo take over some of his tasks.
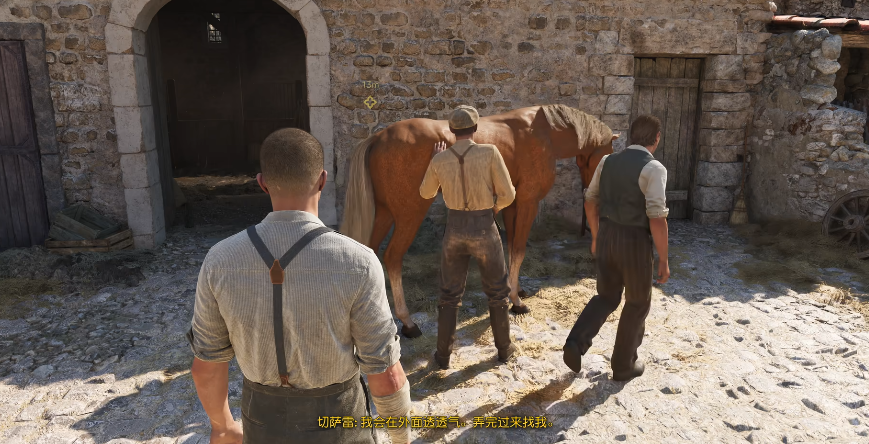
While cleaning the stables, Enzo encounters a beautiful girl and is instantly smitten. At the evening banquet, he learns her identity: Isabella, Sir Torisi's daughter. This marks the first clash between love and class.

If you enjoy the Mafia series, you might want to try this game. It has a high level of completeness, and although it's a new entry in the series, the barrier to entry is not high. If you use Biubiu Accelerator to optimize your download now, there are also gifts waiting for you. This tool compiles the latest free games list daily, and you can claim them with just one click.
In terms of performance, the Biubiu Pallas 3.0 engine is top-notch, ensuring no more teleporting during gameplay. Plus, with the code biubiu no disconnection, you get 3 days of free acceleration, and new accounts get an additional 24 hours. That's almost 96 hours of free acceleration! You'd be missing out if you don't take advantage of this offer. Hurry up and @ your gaming buddies to join in.
This concludes the walkthrough of Chapter One: The Family of the game. Although the content is not extensive, it feels much lighter and brighter compared to the prologue. Life may still revolve around work, but it's a significant improvement over the oppressive conditions in the mine. Everything starts to change, and the future begins to look hopeful.
How to defeat the hidden boss in Chapter 1 of Delta Rune Introduction to the hidden boss in Chapter 1 of Delta Rune
Today, I'm bringing you the content on how to defeat the hidden boss in Chapter 1 of Deltarune. In the game structure of Chapter 1 of Deltarune, the existence of the hidden boss, Jevil the Mad Jester, greatly enriches the exploration dimensions and depth of combat challenges in the game. The unlocking process is closely intertwined with the game's scenes and plot, from the mysterious floor reached by the castle elevator to the discovery of hidden clues in areas like the forest and plains. Each step tests the player's control over game details and their exploration skills. Let's take a closer look together.
To unlock the challenge of Jevil, first, advance the main storyline to the castle area. After reaching the save point on the first floor of the castle, take the elevator to the mysterious floor marked “?????”. In the cell, talking to the NPC can trigger the task of collecting key fragments. The first key fragment can be obtained in the town, by finding the old cat shopkeeper and choosing the highlighted conversation option related to "the strange prisoner" or "the being in the cell". The old cat shopkeeper will then directly hand it over to the player. The second key fragment is hidden in the forest area. Upon returning to the forest, pay attention to the spot directly below where the four NPCs are dancing; there is a hidden passage. Enter this dark path and go to the end, where a chest contains the second fragment.
The third fragment requires solving the puzzle box in the plains area. From bottom to top, the sequence is "Diamond, Heart, Club, Spade". After entering the correct combination, the mechanism will open, and you can obtain the fragment. After collecting all three fragments, go above the Hotdog Stand save point to find the blacksmith, and give him the fragments to repair them into a complete key. During this time, you can also choose to have the blacksmith fix the cake that was destroyed by Susie. The repaired top-notch cake might come in handy during the subsequent battle. Finally, return to the “?????” floor, use the repaired key to open the cell, and the battle with Jevil will officially begin.
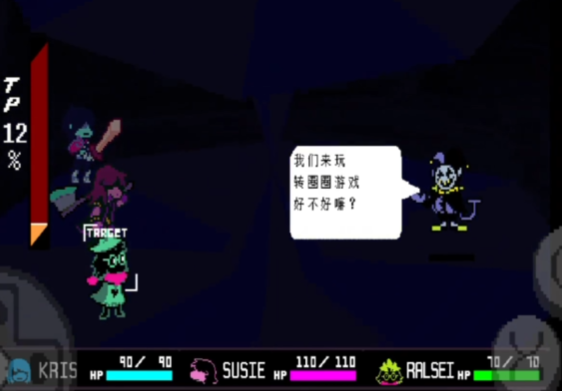
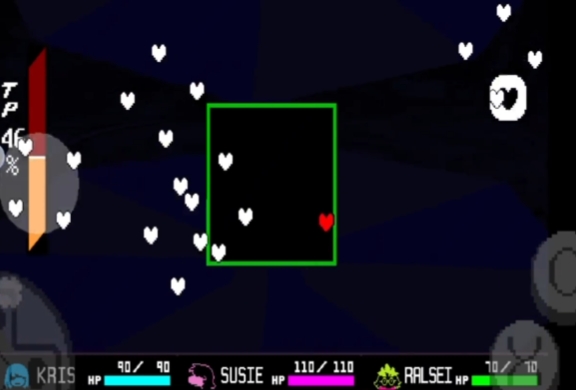
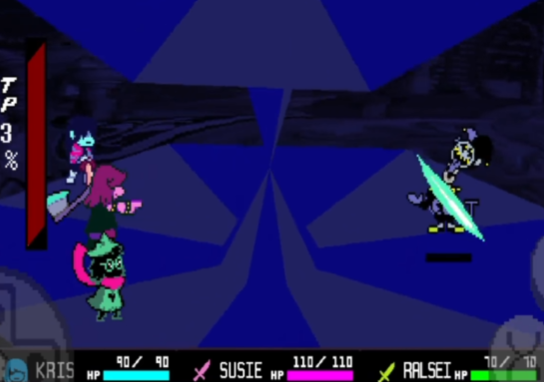
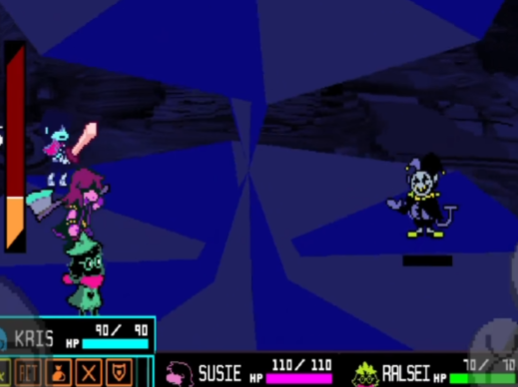
To face this high-intensity battle, thorough preparation is essential. The roles of the team members need to be clearly defined. Kris serves as the main damage dealer, and equipping a high-attack weapon like the Steel Sword can effectively increase damage output. Ralsei takes on the role of support and healing, with the group healing skill Prayer being crucial for maintaining the team's HP. Susie focuses on disruption and control, using Taunt to draw the boss's fire, creating a stable environment for teammates to deal damage. It's indispensable to carry recovery items, such as the top-notch cake which increases the entire team's HP by 90, and the Dark Candy which restores 60 HP to a single character. These items can timely replenish the characters' HP during the battle, ensuring the team's survival.
The content on how to defeat the hidden boss in Chapter 1 of Deltarune has been introduced. The challenge of Jevil the Mad Jester connects the key links in the exploration of hidden content in Chapter 1 of Deltarune. The unlocking process tests the player's ability to explore scenes and solve puzzles, while the preparation stage for the battle involves resource planning and role division, all of which constitute the rich content of this challenge.
Explanation of Easter Eggs in the First Chapter of Delta Rune What are the Easter eggs in the first chapter of Delta Rune?
This game was updated not long ago, which is the first update in recent years. Since its initial release, the game has attracted a lot of attention from players, and many have given it very positive reviews after trying it out. Below are the easter eggs for Chapter 1 of Deltarune. Many players are highly interested in the easter eggs within the game but are unsure about what exactly they are.
There are several easter eggs throughout Chapter 1. The first one we will introduce is the Starwalker. After entering the Dark World, players can go to the Big Bird area. There's an event that triggers on the way back. From the castle save point, head back, and you'll see a bell. Players need to ring the bell. After ringing it, follow the path indicated by the falling bird beak.
After walking for a while, players will encounter the hidden NPC, Starwalker. You can talk to this NPC, and after the conversation, this character will also assist you in entering the Cyber World in Chapter 2. This is one of the easter eggs in Chapter 1.
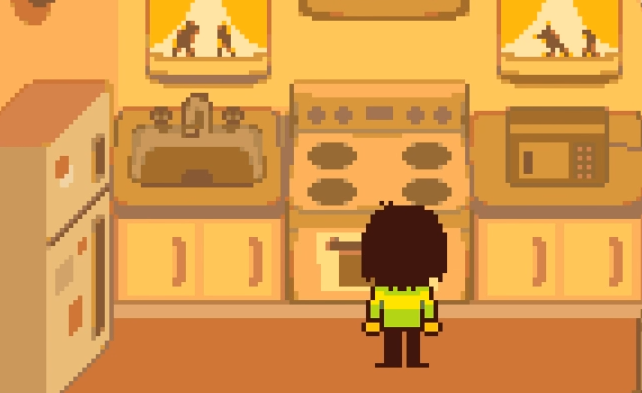
If players enter the Big Bird room multiple times, they can trigger a hidden room. At this point, there is only one tree on the map. You can investigate the tree, and after doing so, you will meet a mysterious person. Next, you can obtain a mysterious egg that can be brought back to the Light World. This can be placed in the refrigerator, and there will be more interactions later.
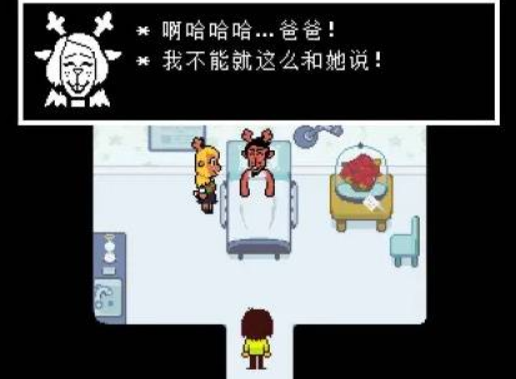
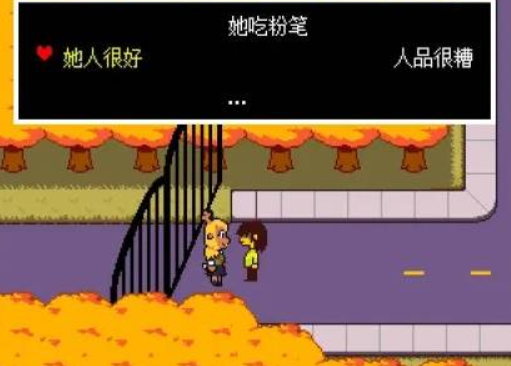
After completing Chapter 1, players can meet Noelle in the hospital. During the conversation, she mentions that Susie is very nice and likes to eat chalk. In Chapter 2, Noelle gives chalk to Susie, but in the Dark World, this item becomes Light Chalk.
The above are the easter eggs for Chapter 1 of Deltarune. These three easter eggs are the ones mentioned most frequently. Each of them is not difficult to trigger, but each one is quite interesting. If players are very interested in these easter eggs, they can go ahead and trigger them.
Introduction to Easter Eggs in the First Chapter of Deltarune Easter Eggs in the first chapter of Deltarune include:
Delta Rune sets a grand, fantastical world where every player can enter and begin their adventure. Unlike traditional games, it is presented in a pixel art style. The following will introduce the Easter eggs in the first chapter of Delta Rune. These Easter egg designs can enhance the fun of the game. Additionally, the first chapter contains a large number of Easter eggs. The settings related to these Easter eggs will all be shared below. Interested players may continue reading.
In the game, players can enter the Dark World. During the process of exploring the way back in the Dark World, players can ring a bell, at which point they can chase after a falling bird's beak. In the course of chasing, they will encounter a hidden NPC character. You can choose to talk to this character and have the character, named Star Messenger, join your team. This way, when challenging the second chapter, the character will become a member of the player's team. Then, the player can also choose to enter and exit the big bird's room multiple times in the game, which triggers a hidden room. In this room, there is only one tree. The player can walk behind the big tree and meet a mysterious person who will give the player an egg. This egg can be taken back to the Light World and placed in the refrigerator. When entering the second chapter, the player will find that the egg still appears in the refrigerator.

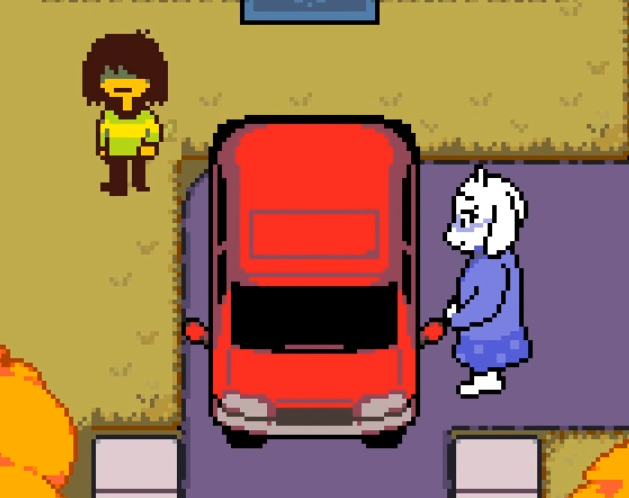
After returning to the Light World, the player can first go to the hospital, where they will encounter a character named Noelle. You can talk to him and during the conversation, praise Susie for being very nice. At this point, the second character will give the player a piece of chalk. In the Light World, it is chalk, but when entering the Dark World, it becomes a Light Candy. The player can also choose to stand still for a while by the river in the Light World, and a character named Onion will appear. You can then talk to this character, and in the second chapter, the storyline involving this character will continue.
Additionally, the player can choose to enter the castle, where a shopkeeper will give the player a key fragment. However, in subsequent chapters, you can go to the forest to search for other fragments. After collecting all the fragments, you can obtain the equipment and rewards inside. Then, the player can choose to give the fragments to the blacksmith, who, after repairing them, can use the iron pieces to open the cell, allowing for a battle with the boss inside the cell.
The content above is the introduction to the Easter eggs in the first chapter of Delta Rune. The game contains a large number of hidden Easter eggs. Unlocking these Easter eggs will allow for the continuation of corresponding plot tasks in later chapters. Each hidden task has a relatively low difficulty. Players can follow the above sharing to go to the designated locations and complete the tasks.
How to play Chapter 1 of Delta Rune Delta Rune Chapter 1 guide
Today, I'm going to introduce how to play the first chapter of Deltarune. The first chapter of Deltarune initiates a wondrous adventure in a bizarre and dark world. The player controls Kris, who steps from an ordinary life into a mysterious underground kingdom. Together with companions, they gradually uncover the secrets behind the disruption of the balance between light and darkness. From exploring the initial area to revealing prophecies in the castle town, the main storyline is tightly packed and full of surprises. Let's dive in and take a look.
The player controls Kris, who wakes up at home, goes through simple daily interactions, and heads to school, where he meets Susie. A series of unexpected events drags them both into a mysterious dark world. In the initial area of the dark world, the path is relatively straightforward, and players can choose to ignore the puffy entities to save time. When encountering the evil swinging objects, one must wait for it to fire three bullets and then attack its core from the right side to pass. Upon reaching the castle town, there are prophecies about the world's balance waiting to be explored. Choosing to listen to the prophecy unlocks the Light People's Manual, which contains information that will provide important guidance for subsequent adventures, helping players better understand the rules of the world they are in.
After leaving the castle town, the game enters a plain pursuit phase, with Lancer's obstruction becoming the first challenge of this stage. The puzzles revolve around stepping on tiles, and players need to step on the glowing tiles within a specified time to continue. In the Death Maze area, walking straight along the right wall is an efficient strategy for progressing, skipping unnecessary battles to save exploration time. After solving the puzzle, Lancer sends out three Hathy to fight the player. After defeating them, you meet Susie again, and at this point, there is a door that requires the cooperation of all three to open. This is when Susie officially joins the team, enhancing the group's combat and exploration capabilities.
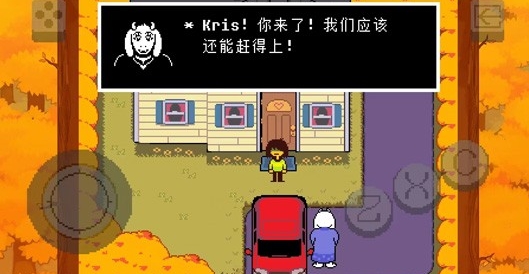
As the adventure progresses and approaches the final destination, Lancer's unusual behavior draws attention. He chooses to leave the team, and when the player catches up, it is revealed that Lancer, as the heir to the kingdom, has a father who is the tyrannical king of the Dark Kingdom. If the player wants to go home, they must fight the king. To prevent his friends from getting hurt, Lancer had tried to lock everyone in jail. With Susie's encouragement, Lancer decides to face his fate, releasing the players. After overcoming numerous difficulties, the group finally confronts the King of the Dark Kingdom, who refuses to stop fighting and launches an attack. During the battle, the king feigns surrender and launches a surprise attack. In the end, Susie saves Kris, and Lancer uses a hypnotic spell to put the king to sleep. Kris and Susie return to their original world, concluding the main storyline of the first chapter.
That concludes the introduction on how to play the first chapter of Deltarune. The various puzzles set in the game not only serve as obstacles but also provide opportunities to enhance the player's observational and thinking skills. By following this guide, players can advance more efficiently in the game, delve deeper into the details, and accumulate experience for the adventures in subsequent chapters.
Babel Tower Anthem Chapter 1 Guide: How to Play Chapter 1 of Babel Tower Anthem
The Anthem of Babel is a puzzle game with a very interesting setting. It creates several different worlds, each with its own unique culture. After entering these worlds, players need to decipher the meaning of the text based on the clues they obtain. The following will bring you the guide for the first chapter of the Anthem of Babel. Among all the chapters, the first chapter has the lowest difficulty. As long as you master the gameplay, you can pass the subsequent levels.
The first chapter is where the player first enters the game and begins their challenge. Here, the player will find that the original culture has no historical records. To complete the challenge, the player needs to unlock more fonts within the game. First, the player needs to go up the stairs. Upon reaching the top, they will see a door. Based on the hints next to this door, choose the corresponding characters, and then the door can be opened to enter the room. In the room, there will be an open faucet. The player needs to check the faucet to stop the water from continuing to flow. Then, the player will encounter an NPC character. After talking with this character, the mechanism can be unlocked to reach the other side.
At this point, the player can continue forward along the path. During this process, they will see a lot of murals. The player can choose to interact with these murals. There are many texts on the murals, and the player can use these texts to complete the subsequent decryption challenges. However, the texts on the murals cannot complete the entire chapter. When encountering other characters, the player should talk to them to unlock more fonts and understand what these fonts represent. In the game, the player also needs to communicate with a child. Through communication, the player can learn some basic common words. After placing these words in the correct positions, a key can be obtained smoothly.

After obtaining this key, the player can go find the merchant in the game. Following the merchant's guidance, proceed to a new scene. Here, there will be numerous statues. The player needs to obtain new fonts based on the shapes and positions of these statues. Continue forward along the road to encounter believers. After talking with the believers, the player can get fonts and items. At this point, the player can continue searching for the elevator. According to the current world's culture, after pressing the elevator, the player can go to the upper level, thus opening a new culture.
The guide for the first chapter of the Anthem of Babel has been shared above. Players can refer to the guide to complete the subsequent chapters. Each chapter presents different scenes and cultural settings. You can follow the approach used to clear the first chapter, find characters to talk to, and use the hints in the game to understand the meanings of the texts. This way, when it comes time to make choices, you can select the correct text. Only by doing so can you enter new chapters for the challenge.
Little Nightmares walkthrough How to complete the first chapter of Little Nightmares
In Little Nightmares, the little one you control is not an ordinary traveler, but a "little yellow raincoat" trapped in a dark world. Today, I will bring you a walkthrough for Little Nightmares. This place has no warm lights, nor any friendly creatures, only strange rooms, oppressive gray tones, and those monsters that may pounce at any time. Below is a complete guide to help you safely leave this nightmare step by step.
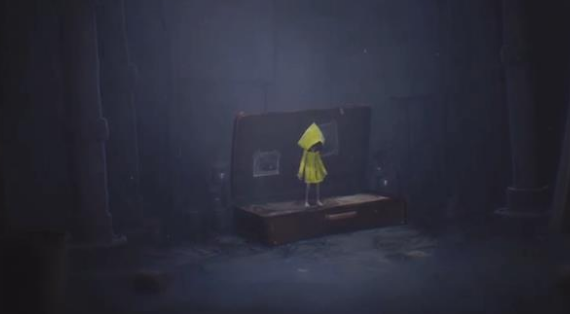
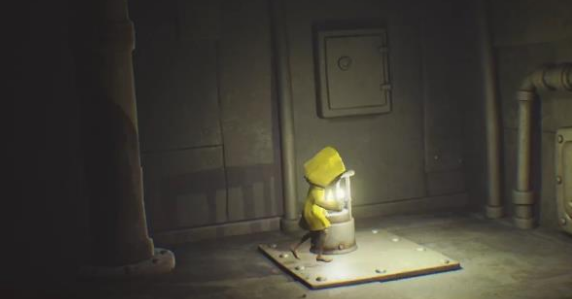
At the beginning of the game, the protagonist wakes up from a deep sleep. First, get familiar with the controls, use the keyboard to move, it's so dark around that you can't see your hand in front of your face. When you touch the oil lamp, press the interaction key to light it; this small flame can make the surroundings less oppressive. After lighting it, crawl through the pipe on the right to enter a new area.
Follow the pipe to a small room, remember to look around. You need to climb up step by step using boxes, then squeeze through the window at the upper right corner. As you continue, you will encounter a closed door. Pull over a nearby chair as a stepping stool, jump up and pull down the door handle, and the door will open.

As you explore deeper, you'll see a refrigerator. Open its door, and it becomes a ladder for you to climb to a higher platform. But don't rush, there's a side path hidden on the right with collectibles waiting for you, missing them would be a pity. Continue forward, find the closed iron door in the room, climb up and press the mechanism, the passage will be unlocked. Inside, you'll encounter a door sealed by wooden planks, pull down the planks, and squeeze through the gap to continue your adventure.
In the underground area, don't ignore the wheel on the wall; turning it will open a mechanical door. There's a lever high up ahead, move nearby boxes to stand on them to reach it. When encountering patrolling lights, stay calm, hide behind cover, and move only when the light beam moves away, or else, once spotted, danger will immediately strike.

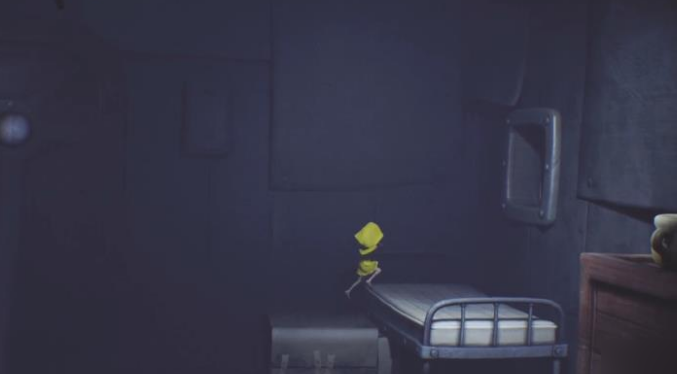
After entering a certain room, the scene suddenly quiets down, and a monster will come to patrol. At this point, hide under the bed and wait until it completely leaves before coming out. Then, you'll come across a place where you need to pull a switch, after pulling it, there will be a brief power outage, take advantage of the darkness to rush through the blocked area, otherwise, the path will be blocked when the power comes back on. Further ahead, there are automatically moving boxes in the scene, which can be used as cover to pass through areas monitored by surveillance.
This concludes the content of the Little Nightmares walkthrough. By now, the protagonist can smoothly pass through this long dangerous section and enter the next stage of the journey. Each area's puzzle-solving segments are tense and oppressive, with the core being to observe details and use objects in the environment to pave the way. Throughout the journey, you'll find that this nightmare is both a test of fear and a contest of patience.
The culprit in the first case of "Detective's Mysterious Cases" is revealed.
The first case of "Detective Strange Chronicles" is the West Market Bloodbath, a case full of eerie color, which naturally piques everyone's interest. Many are eager to know who the culprit is in the first case of Detective Strange Chronicles. Today, I will provide a detailed introduction so that you can see who the real culprit is. After reading this, players will naturally understand the following content.
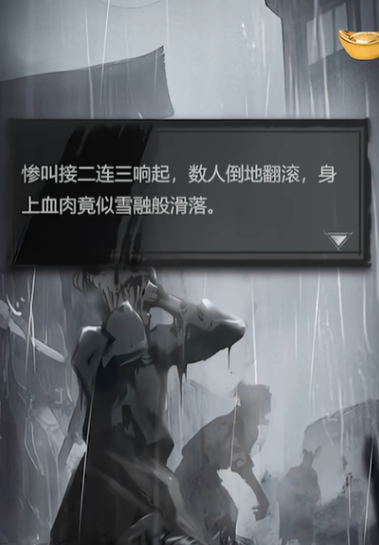
The background of the case is that the protagonist was previously framed by the antagonist. This time, solving the case is key to clearing their name. If the mastermind behind the scenes cannot be exposed, the protagonist may once again fall into trouble. The atmosphere of the entire case is rather oppressive, and robbery incidents occur frequently. On the way, the protagonist witnesses the moment when the crowd is melted, thus it is necessary to uncover the truth.
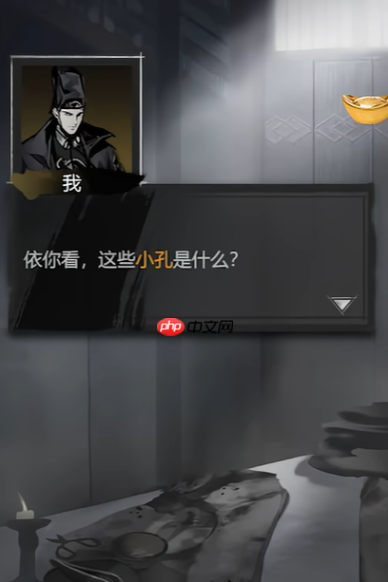
When the player arrives at the flower tower, they see a criminal holding a woman hostage. After rescuing her, they learn that the clue is actually in the ghost market. The player must then immediately investigate the entire transaction. After the investigation, it is discovered that the main culprit of the case is the Corpse Powder, and the player learns that someone has been purchasing large quantities of it recently.
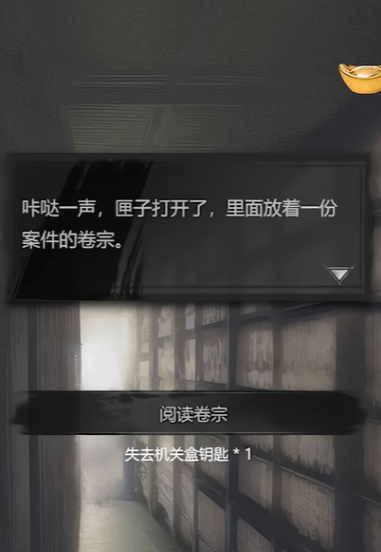
This mysterious person is actually the buyer of the Corpse Powder and also the mastermind behind the entire case. The culprit possesses a high-damage dissolution skill. During the battle, the guard needs to share the damage, and when in a low health state, they can release poison. After the protagonist defeats the true culprit, the case can finally be resolved, and the injustice cleared.
Who is the culprit in the first case of Detective Strange Chronicles? After carefully reading the above content, players should already know the truth: the culprit is the buyer of the Corpse Powder. They possess a powerful dissolution damage skill, so the player needs to defeat them to uncover the truth of the entire case.
Paper Bride 8 Chapter 1 Guide Introduction Paper Bride 8 Chapter 1 Gameplay Operation
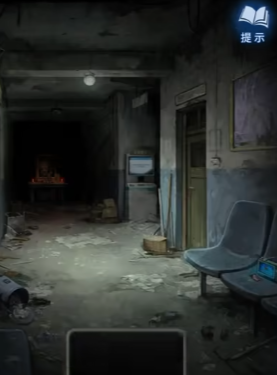
Today, I will introduce to you the content of the first chapter strategy for Paper Bride 8. From the eerie rendering of the hospital environment at the beginning, to the intricate layout of clues, the game ingeniously blends Chinese horror elements with brain-burning puzzle-solving gameplay. Players need to carefully observe various symbols, patterns, and text prompts in the dimly lit scenes, use their logical reasoning skills to connect scattered clues, thereby solving puzzles, and gradually uncovering the secrets hidden behind the hospital. Let's take a look together.
Upon entering the game, the player is on the first floor of the hospital. First, click on the opera machine on the chair to the right of the first floor to obtain a receipt. Then, go to the corridor and use the receipt to scan at the self-service machine. At this point, the screen will prompt an error code 58339; make sure to remember this string of numbers. Return to the wooden door on the right side of the corridor, enter 58339 into the password lock on the door, and successfully unlock it to enter the room. The scene inside the room is eerie. Be careful when lifting the curtain in the room, as a doll will jump out and scare you. Meanwhile, there are puzzle clues presented on the glass ahead. Next, click on the wooden cabinet on the left side of the room, based on the clues remembered earlier, move the corresponding buttons to the correct positions, and successfully open the cabinet to get a paper-cut figure and a banner.
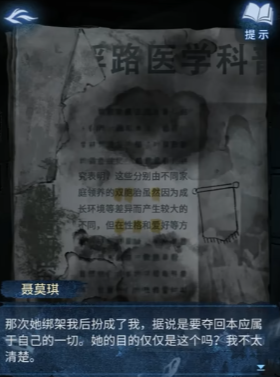
Take the paper-cut figure back to the corridor outside the room, and click on the staircase sign on the left side of the corridor. Select the paper-cut figure from the inventory to unlock the second-floor area. Go up to the second floor to get the box puzzle. Then, according to the clue at the bottom left corner of the square, click on the corresponding squares to form a red cross. After completing the puzzle, open the medical box to get a medical clamp and another banner. In the corridor on the second floor, click on the wooden door of the office in the middle. Inside the office, click on the book under the lamp on the right side of the display screen to get a key clue. Then, click on the blank wall, hang the two banners obtained earlier, and rearrange the order of the banners to open the morgue drawer, ultimately getting the doll.
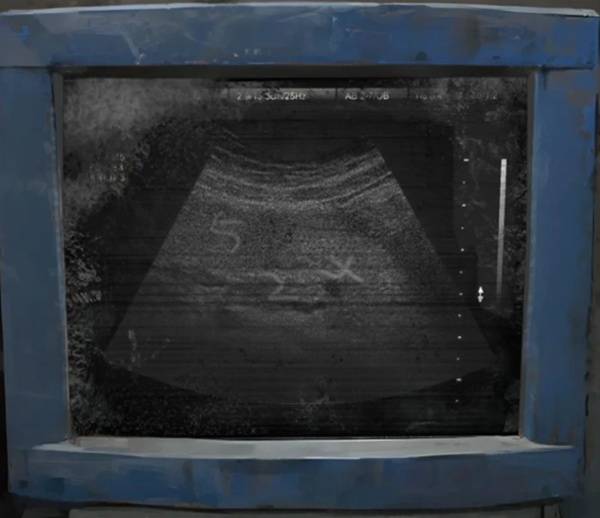
Go back to the first floor and place the doll under the memorial tablet to get a small statue. Enter the door on the right side of the first-floor corridor again, place the statue on top of the cabinet, and get the probe from the fallen cabinet board. Connect the probe to the broken wire in the middle of the white cloth, and switch between the computer and the white cloth to get the password. Place the probe on the brain pattern and the stomach pattern, and the display will show the password. Go back to the far-right door on the second-floor corridor, enter the password to enter the special needs ward, and complete the first chapter.

The introduction to the first chapter strategy for Paper Bride 8 is now complete. With the end of the first chapter, players have successfully navigated through the challenging abandoned hospital scene, gaining an initial understanding and adaptation to the game's puzzle-solving mechanics and clue acquisition methods. Throughout this process, from the discovery of the initial clues to the acquisition and use of key items, each step is closely linked and interdependent.
Paper Bride 8 Chapter 1 Guide: Tips for Clearing the First Chapter Shared
Many players really enjoy this puzzle game with a Chinese style, which offers a rich variety of gameplay elements and numerous thrilling experiences. In this article, the main focus is on providing a guide for Chapter 1 of Paper Bride 8, which is quite crucial for many. If you're interested in this and hope to have a great experience, then let's continue reading below.
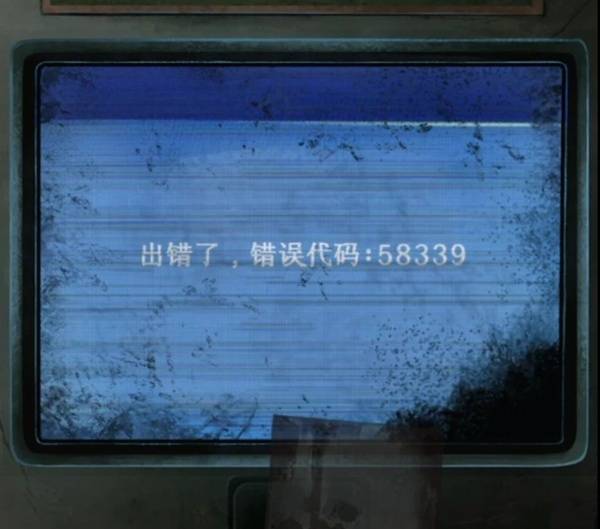
After entering the chapter, players can first click on the radio on the right chair to obtain the [Receipt] item. Return to the corridor and use the receipt to scan the middle machine, getting the error code [58339], which needs to be manually recorded. The locked door on the right requires a five-digit password; setting it to [58339] will successfully open the door.
Upon entering the next room, pull back the curtain and check the drawing board above the bed on the right, noting the directions of each pattern. Then, adjust the mechanism on the left cabinet according to these directions to open it, thereby obtaining the paper-cut figure and the banner.
For the medical kit and forceps, after going upstairs and turning left, inspect the medical kit. Adjust the red cross at the lower left corner to the correct position to open it and get the forceps and the banner.
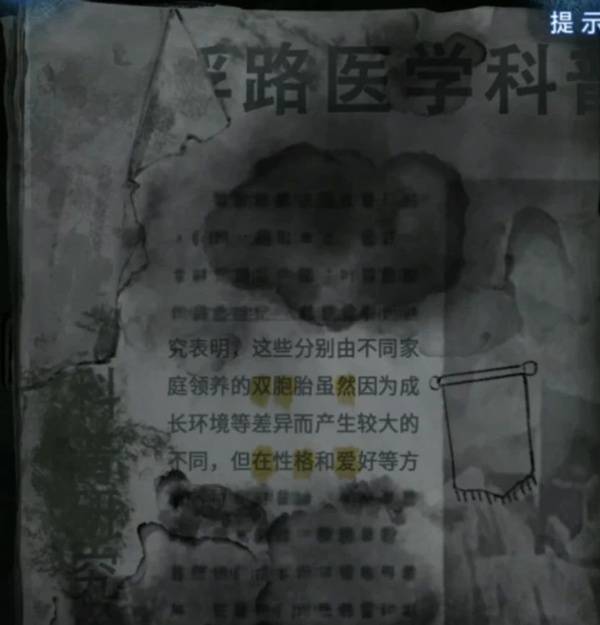
To obtain clues from the morgue and the incense burner, use the forceps to open the office door, hang both banners on the wall, and adjust their positions according to the note's instructions. The first line should be "twins," and the second line should be "love." Note that only the corresponding words need to be included, and the order does not matter. After opening the morgue cabinet, click 2-1, 3-3, 1-3 in sequence based on the finger direction to successfully get the doll. Go downstairs, place the doll in the outline of the portrait in the corridor, and trigger the singing machine to drop the small figure.
For the probe and password cracking, place the small figure in the drawer to get the probe, put it on the bed and connect the data cable, and check the organ patterns on the door. The brain shows 196, and the liver shows 524, making the combined password 196524. Unlock the second-floor door with the password, enter, and pick up the book on the sofa.
For the final ceremony, mainly concerning the ink cartridge and print report, pick up a bunch of flowers from the vase location in the room to trigger the appearance of a trolley, obtaining the ink cartridge and ballpoint pen. Use the ink cartridge on the printer to get the print report. Players need to use the print report and ballpoint pen on the table to draw the portrait, completing the sketch to trigger the story.
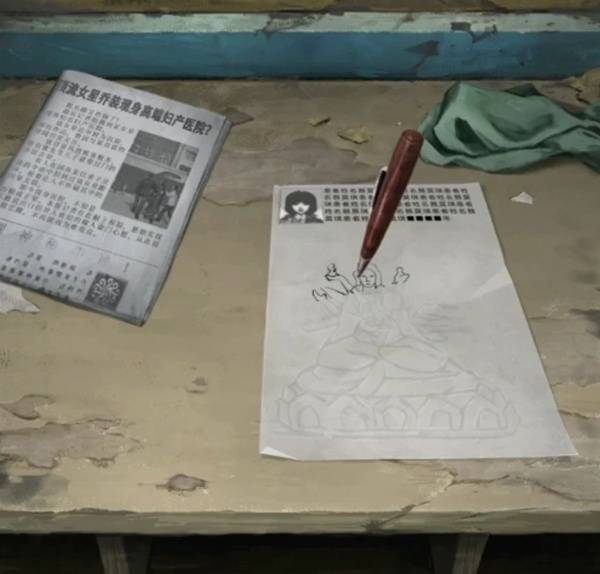
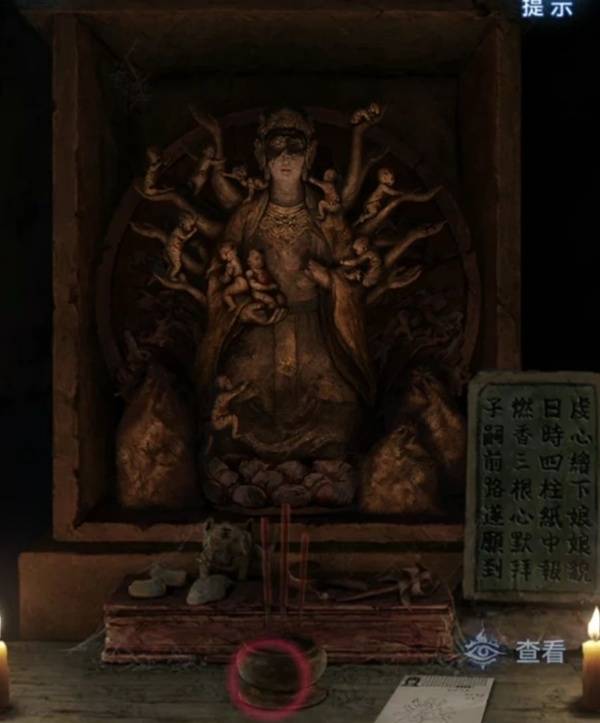
Finally, to complete the ceremony, go downstairs to the Child-Giving Goddess, place the portrait, and use three sticks of incense. After watching a segment of the story, Chapter 1 comes to a successful end.
That's all for the guide to Chapter 1 of Paper Bride 8. The game offers a rich variety of gameplay elements and numerous thrilling challenges, giving players an immersive experience. If you want to explore and solve puzzles smoothly, take a close look at this guide.
Recommend


Strategy

A Guide to Zhetian Fanchen Yiyue Sharing Tips for New Players on How to Play Zhetian Fanchen Yiyue
Introduction to the Public Beta Time of Zhetian Fanchen Yeyi When is the public beta for Zhetian Fanchen Yeyi?
How is Zi Yue from Zhetian Fanchen? Introduction to Zi Yue from Zhetian Fanchen
What are the Luhida Origin redemption codes? Sharing of Luhida Origin mobile game gift codes
Lu Xida Origin Team Recommendations Lu Xida Origin Team Guide
Lu Xida Origin Strategy Sharing: Beginner's Guide to Lu Xida Origin
