
Marble Woka Woka: Blast Mania
Game Introduction


Hot Strategy
How is Carago in the Dragonstone War? A guide to Carago in the Dragonstone War
Kalego of the Orc race is a warrior who loves combat. When his rage bursts, he can deal massive damage. Many players preparing to acquire this hero may not yet know how Kalego performs. The following guide on Kalego will introduce his skills and explain how to cultivate and pair him, so that players can fully utilize the abilities of this warrior.

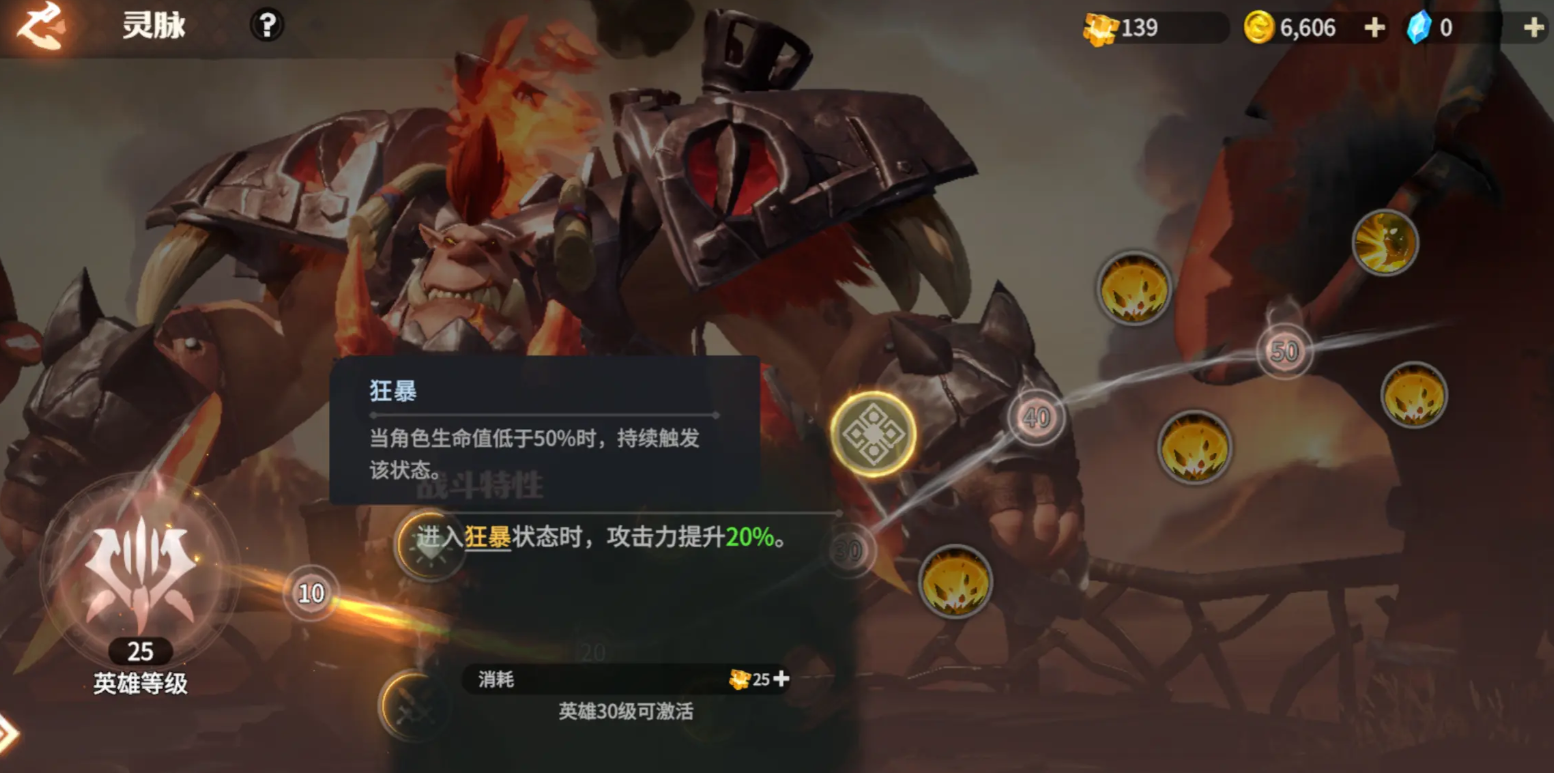
Kalego's passive skill, "Belligerent Instinct," grants him 1.25% attack speed and 0.1% damage recovery for every 1% of health lost, up to a maximum of 100% attack speed and 8% damage recovery. When his health drops to 20%, he no longer gains additional bonuses.

His rage skill, "Rage Burst," puts him in a furious state where each normal attack consumes 4% of his health and deals an additional 130% of his normal attack damage to the target and surrounding ground units. This effect lasts for 7 seconds. Due to the high damage output during the rage period, it is recommended to equip spirit veins that increase movement speed or damage during the rage phase.

For dragon stones, it is recommended to use "Desperate Battle" or "Swift Hunt." "Desperate Battle" grants 20% damage recovery when health is below 35%, allowing the passive ability to be better utilized. "Swift Hunt" allows instant teleportation to the farthest ground target within a certain range when there are ground enemies nearby, and increases attack power by 30% for 10 seconds, helping to effectively take down key enemy outputs.
It is recommended to pair Kalego with the hero Sylis and choose Logistics Medics as soldiers, which provides strong sustainability. When the enemy lacks assassins, this setup can deliver continuous damage. If the enemy lacks control and has air units, you can pair Kalego with the hero Thor and the soldier Thunder Troopers.
The guide for Kalego in the Dragon Stone War is shared here. The above content not only introduces the effects of this warrior's skills but also shares how to cultivate and pair him. After reading, players can apply these strategies in the game to let Kalego perform at his best, assisting us in battle.
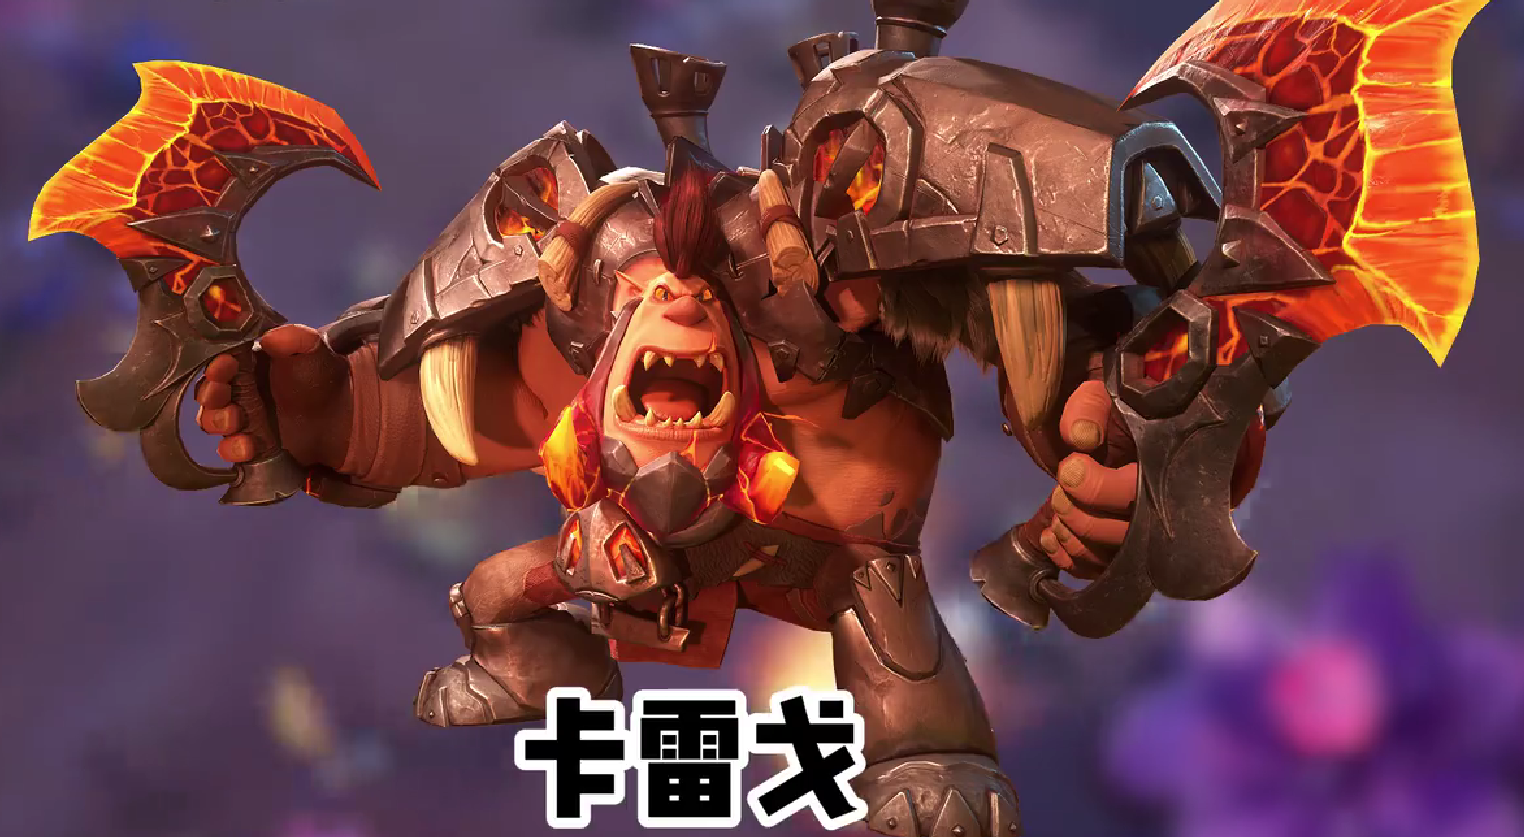
Analysis of Karggo's Strength in the Dragonstone War
To say that the game Dragonstone War is quite interesting, it also involves many heroes. Among them, the close-range combat hero, Cargor, has attracted a lot of attention from players. So, how is Cargor in Dragonstone War? Below, let's take a closer look at Cargor. After all, when players choose to experience the game and encounter the corresponding character, they may not be very clear about the strength of this character. As a result, they often don't know how to operate during battles.

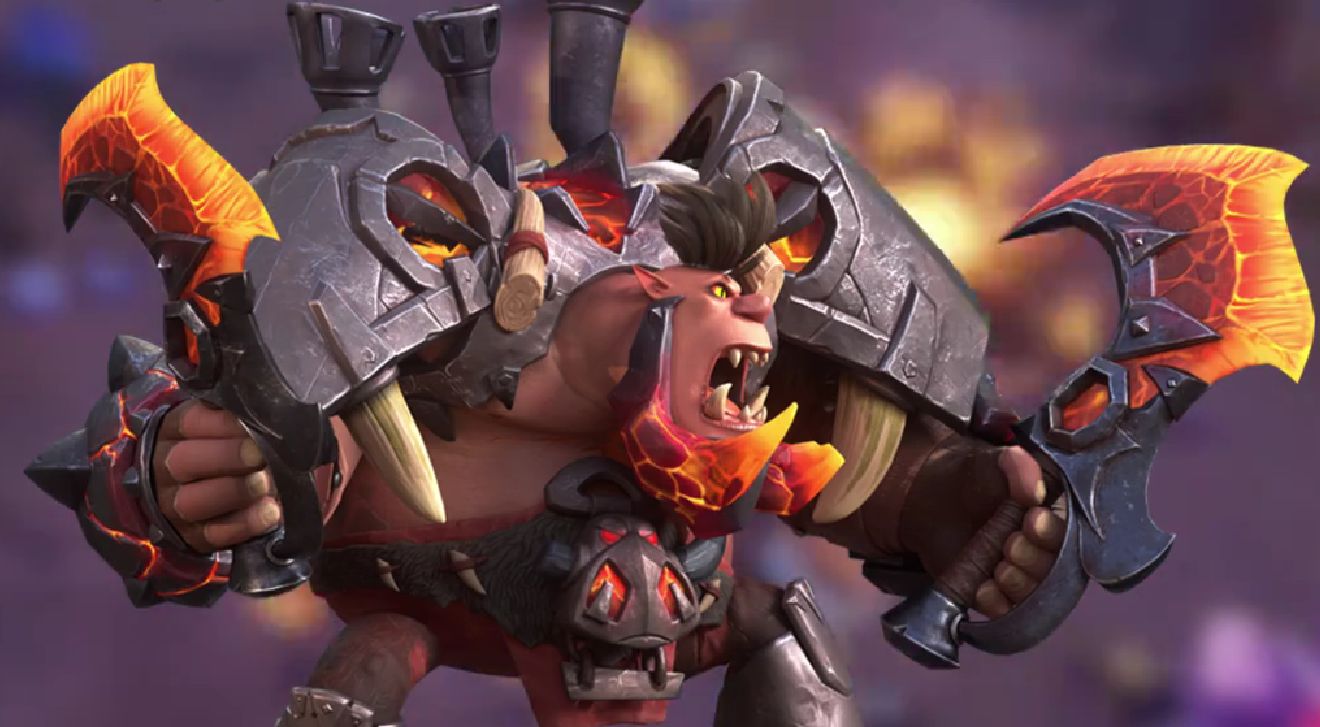
In the game, Cargor, as a close-range combat hero, is actually a role with high burst damage and high defense. For players, during battles, Cargor can withstand a certain amount of damage and also serve as an output to deal significant damage. For example, once he strikes, he can effectively increase his attack speed, greatly enhancing his single-target output ability.
Players should note that once Cargor enters a berserk state, his attack speed and attack power will significantly increase. It can be said that at this point, he is in a very powerful state. If he continues to fight, the enemy will sustain continuous damage.

When Cargor's health drops to 5%, players need to pay attention. At this point, he will enter a rage burst state. This is actually one of his special skills, which often deals 250% damage to the enemy and causes him to go on a rampage for 10 seconds. Once the 10 seconds are up, he will die immediately. Therefore, players should seize the opportunity during this period, as there is a chance to turn the tide.
How is Cargor in Dragonstone War? Through the above introduction, it is believed that players have discovered that Cargor's strength is unquestionable. However, when using him in battle, players also need to pay attention to the order of skill release. If Cargor is in the rage burst phase, players should focus on timing at this moment.
How to Play Water Nourishes the Western River in The Chronicles of Wandering Spirits: An Introduction to the Gameplay of Water Nourishes the Western River
The Water Nourishes the West River in the Wandering on the River of Oblivion is a brand new activity that involves constructing and replacing water channels, planning the diversion and confluence of water flow, and guiding the distribution from the inlet to the outlet. It unfolds based on the story of Li Bing's water management, and many players are unsure how to play it upon their first encounter. Below, we will introduce the rules of this activity so that everyone can successfully manage the water and obtain generous rewards.

Firstly, we need to understand the water channels, which serve as the pathways for the water, connecting the inlet to the outlet and guiding the water. There are two types: straight and curved. Straight channels have two attributes - width and capacity. The capacity determines how much water the channel can handle, while the width affects the proportion of the water flow. Curved channels do not have these two attributes; they are used to change the direction of the water. In each level, there are pre-existing water channels, and you also have channels in your inventory that you can place. You can put the channels from your inventory on empty plots or replace the existing ones directly.
Next, there are the inlets and outlets. The inlet is the starting point of the water flow, and each level may have one or more inlets, with each indicating the amount of water flowing out. The outlet is the endpoint of the water, and similarly, there may be one or more in each level, each marked with its capacity. To pass the level, you need to connect the inlets and outlets through the water channels, allowing the water to flow smoothly to the outlets and meet their capacity requirements.
Finally, there is the terrain, which has elevations, allowing water to flow from high to low. The terrain in the levels is typically higher in the upper left and lower in the lower right, meaning the water always flows from top to bottom and from left to right, and under no circumstances will it flow backwards. These three mechanisms form the basic gameplay of the levels. Once you understand them, you'll be able to handle some simpler levels with ease. However, when faced with complex levels where the water flow from the inlets does not match the capacity of the outlets, you will need to use diversion and confluence to pass the level.
Diversion and confluence mean that when a single water channel cannot handle all the water, or some outlets cannot handle the water flow, you can plan the water channels to change the water flow. For example, diverting the water flow from a straight channel through a curve or special plot to multiple different straight channels is called diversion. Merging the water flow from multiple straight channels through a curve and special plot into a single straight channel is called confluence. Using these two mechanisms, you can better navigate through difficult levels.
Above is an introduction to the Water Nourishes the West River gameplay in the Wandering on the River of Oblivion. In short, this gameplay involves constructing water channels to guide the water flow smoothly. Once you understand the above rules, carefully plan, and try different approaches when encountering obstacles, you should be able to pass the levels smoothly.
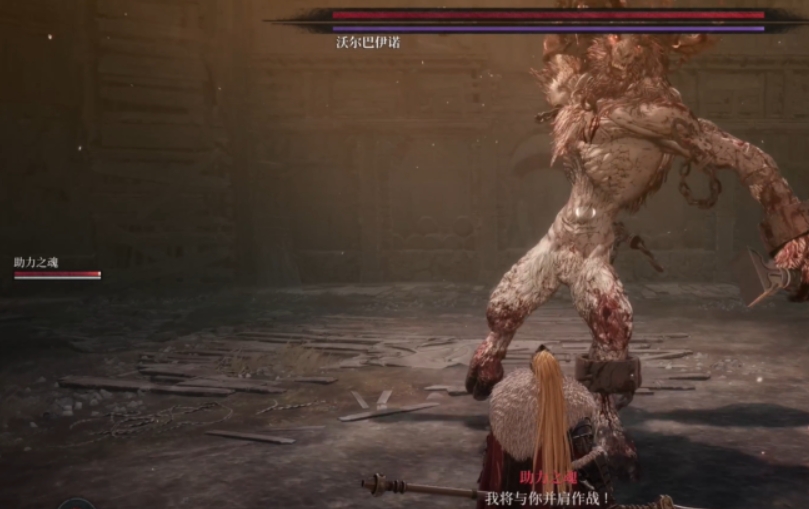
How to clear the first Berserker Kazanvol How to clear the first Berserker, Deerhead Volbaino, with tips
The first Berserker, Kazan Vol, has a substantial amount of health and large movements, which requires us to remain highly vigilant and responsive during the battle. At the start of the fight, the BOSS will perform a series of attack moves, including smashing the ground and waving, and everyone needs to use blocking to defend against these attacks, especially when red light appears at the BOSS's feet, you must immediately stand still and block. Mastering these skills not only improves combat efficiency but also reduces unnecessary casualties, making the gaming experience smoother.
【biubiu Accelerator】Latest Version Download
》》》》》#biubiu Accelerator#《《《《《
First, it is still necessary to check the core skill points learned before entering, and before entering the battle, you can use buffs (such as attack enhancement, defense enhancement) outside the door, and you can also carry ranged throwing weapons (like shurikens) for attrition in a back-and-forth battle. To be fully prepared for combat:
Recommended Moonlight Stance skills, the following are essential:
1. Moonlight Slash: Core movement + damage skill, used for quickly approaching or escaping the battlefield.
2. Crimson Slash: A high-burst combo skill, works well with the Moonlight Stance to suppress the BOSS.
3. Selfless Realm (or related derivative skills): Increases defense or counterattack benefits, recommended to unlock first.
4. Heat Wave: Used to counter the BOSS's shockwave damage (such as the second part of the hammer smash).
Skill Point Priority
1. Prioritize maxing out the core skills under Moonlight Stance (Moonlight Slash, Crimson Slash).
2. When skill points are insufficient in the early stages, passive skills (like Selfless Realm) can be initially set to level 1, then fully upgraded later.
Second, let's go over the skills of this Deer-Headed Wolba Ino, which are divided into 3 phases, with each phase's skill analysis and key move response:
Phase One (Ground Battle)
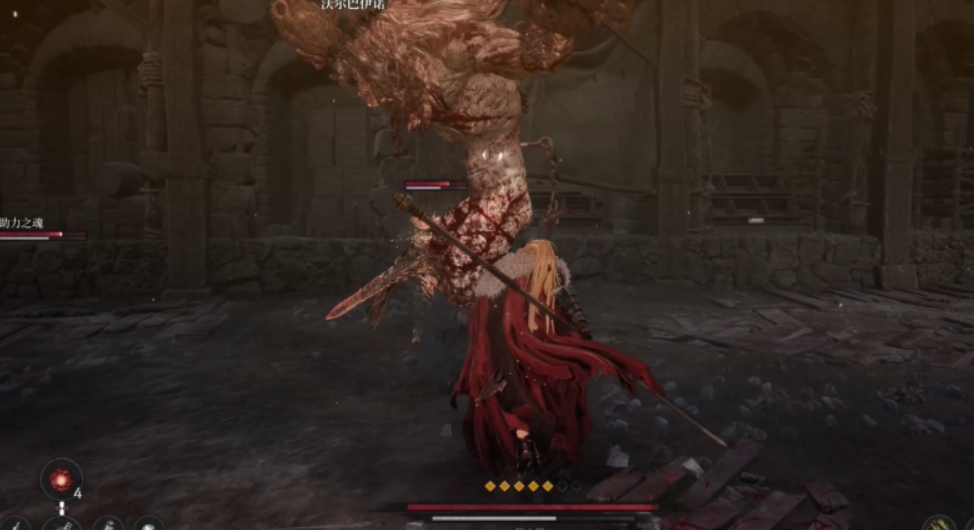
1. Opening Combo
Double Smash: The BOSS starts with a fixed double ground smash, after a precise defense, you can steal a hit for a counterattack, then the BOSS will retreat to create distance, take this opportunity to chase and deal damage.
2. Spikes + Hammer Combo:
Sideways spike smash → Hammer smash (with shockwave): The pre-attack animation for spikes is short, requiring focused observation; the second part of the hammer smash's shockwave can be canceled by Heat Wave.
The combo ends with a high-raised, charged smash. If interrupted in time, the third hit can be skipped.
Damage Output Timing
After the BOSS's combo ends or is interrupted, quickly use Crimson Slash + Moonlight Slash for a burst.
When the BOSS is in a weakened state, go all out, and finish with an execution to enter the next phase.
Phase Two (Chase Battle)
Transition Mechanism
When the BOSS's HP drops to a certain level, it will roar and flee to a high place. Players can choose:
1. Chase: Follow the BOSS upstairs, using movement skills (Moonlight Slash) to continuously pressure.
2. Ranged Attrition: Use shurikens and other throwing weapons downstairs to whittle down the BOSS's HP, and counterattack when it jumps down.
New Moves
1. Fire Spike Attack: The BOSS's spike attack comes with fire damage, even a precise defense will still receive attribute damage, so it needs to be dodged instead.
2. Double Swing: Continuous left and right sweeps, dodge in the same direction twice.
Counter Mechanism: The BOSS will actively trigger a counter (red light prompt), successfully dodging will provide a high-damage output window.
Phase Three (Final Frenzy)
Frenzy Combo
1. Quick Pincer Attacks: Fast double pincer attacks, dodge to the sides.
2. Lick Spike Burst: After the BOSS licks the spike, it triggers an area-of-effect attack, with a red light prompt on the ground, need to stay away or interrupt.
3. Pull Spike Execution: If the BOSS is not stopped in time from pulling the spike, it will trigger a high-damage one-shot skill, need to go all out to suppress.
Decisive Strategy
Maintain close-range pressure, use Moonlight Slash to interrupt the BOSS's actions.
Use Crimson Slash + Execution to finish off the BOSS when it is weakened.
Three, General Tips and Precautions
Defense and Dodge Choices
Normal attacks (like hammer smashes) can be precisely defended, but fire spikes must be dodged.
When facing uncertain combos, prioritize holding the defense button (to reduce the risk of mistakes).
Stamina Management
Continuous defense will quickly deplete stamina, avoid running out of stamina during the BOSS's combos.
Use skills like Heat Wave and Moonlight Slash to link with regular attacks, maintaining the output rhythm.
Throwing Weapon Usage
Consume the BOSS's HP from a distance during phase transitions, saving melee resources.
Pacing Control
Most of the BOSS's combos have a recovery period afterward, do not get greedy, ensure safety before dealing damage.
Four, Recommended Easy Play Style
Pressure Style: Stay close throughout the fight under Moonlight Stance, use Moonlight Slash to interrupt the BOSS's actions, and pour damage with Crimson Slash.
Ranged Attrition: In Phase Two, keep your distance and throw shurikens, wait for the BOSS to jump and counterattack, reducing the pressure of melee combat.
If the network is poor during the fight, it may interrupt your attack while the BOSS remains unaffected, putting you at a disadvantage. To avoid this, you can use the biubiu Accelerator, which will immediately improve your internet speed and reaction time once activated.
Enter the secret code 【biubiu no disconnection】, 3 days of extended duration will be credited immediately! New players will enjoy a 3-hour bonus, totaling 75 hours of non-stop fun! No matter what game, this deal must be grabbed, don't miss it!

The key to fighting Wolba Ino lies in observation, prediction, and flexible response. Through the above strategies, you can efficiently defeat Wolba Ino. The focus is on familiarizing yourself with the BOSS's combo patterns, reasonably allocating skill resources, and flexibly switching between offensive and defensive rhythms. You also need to pay attention to your own health and status, using potions and skills in a timely manner to recover and enhance your combat power. By learning the techniques to clear Wolba Ino, everyone should be able to successfully defeat this BOSS and unlock subsequent content.
How to play Fishman Wat in Don't Starve Together: An introduction to the gameplay of Fishman Wat in Don't Starve Together
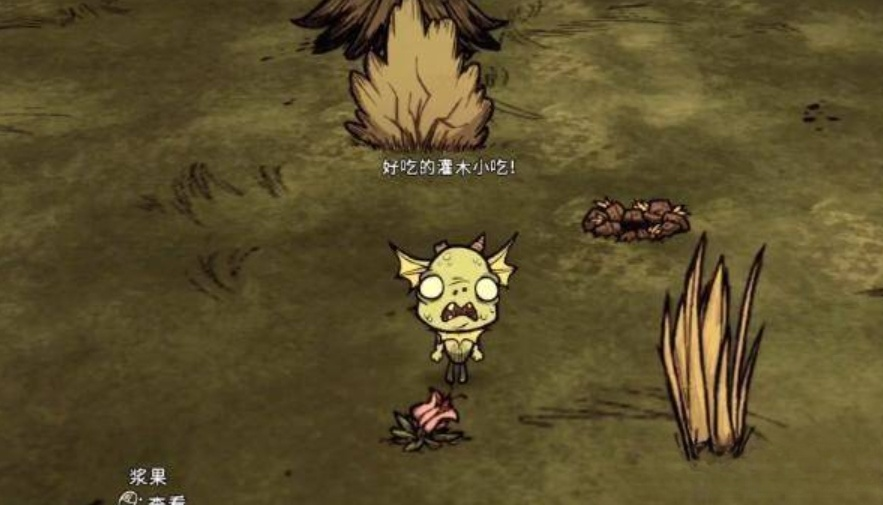
How to play as Water the Mermafink in Don't Starve Together? In Don't Starve Together, Water the Mermafink is a very unique and interesting optional character. As a player, choosing Water will bring a brand new gaming experience because it not only has distinct initial attributes but also possesses unique skills and gameplay. Below is a detailed introduction on how to play as Water, helping you better utilize this character in the game.

The initial attributes of Water the Mermafink are 200 hunger points, 150 sanity points, and 150 health points. Water has a higher survival capability in the early game, especially in terms of sanity and health. However, Water can only eat vegetarian food and has no interest in meat, particularly enjoying durian. Therefore, in the game, special attention must be paid to Water's diet to ensure he has enough vegetarian food supply, especially during exploration and combat.
Water has a very unique skill, which is the ability to craft King Carpets. Crafting a King Carpet requires 15 fish, 10 seaweed, 10 pig skins, and 15 beefalos wool. These materials may be difficult to obtain in the early game, but once crafted successfully, it will provide significant assistance to the player.
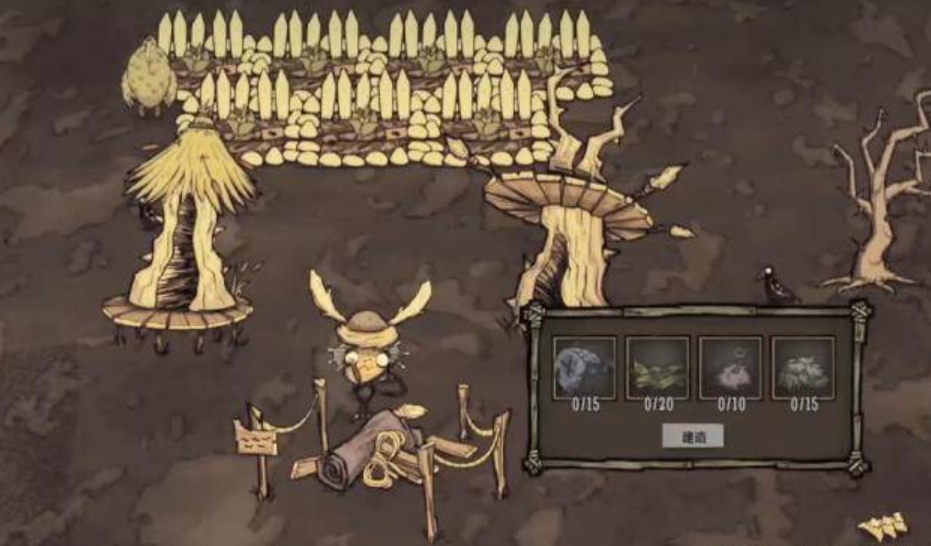
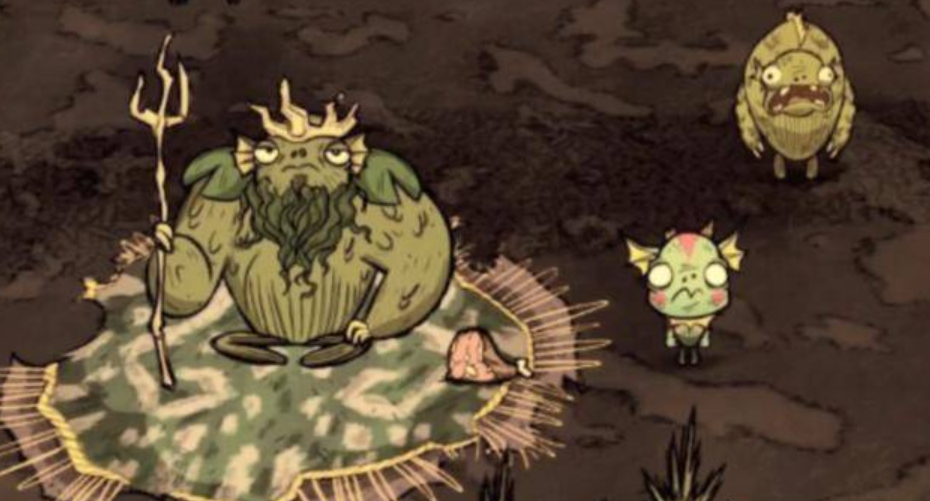
Once the Mermafink Hut is built, you can start summoning the Mermfink King. The Mermfinks in the hut will come over and squat on the carpet, at which point you need to continuously feed them food. When their fullness reaches 50 points, they will transform into the Mermfink King. After the Mermfink King appears, all Mermfinks will gain bonuses, including higher attack power, faster movement speed, and stronger defense capabilities.
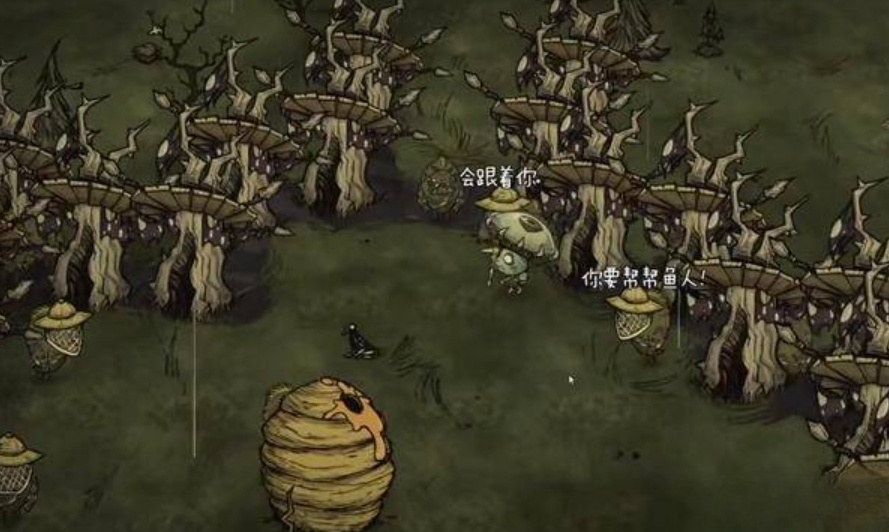
In the early game, you can summon the Mermfink King on the surface to help fight surface enemies or bosses. However, as the game progresses, you may need to enter underground caves for exploration and combat. There is no marsh flooring in underground caves, so you need to transplant marsh flooring to build the Mermfink Hut and summon the Mermfink King underground.
After the Mermfink King appears, you can lead the Mermfinks or Mermfink Warriors on various tasks, including combat, chopping trees, mining, and even cutting down marble forests. The efficiency of Mermfink Warriors is very high, completing a large number of tasks in a short time.
Water can carry fish food in the inventory, which not only helps restore sanity (sanity points) but also provides food in emergencies. Additionally, rainy days have little effect on Water; he does not lose sanity points quickly in the rain like other characters. Water can craft marsh flooring, a special terrain that provides a 1.3x movement speed bonus.
The above introduces how to play as Water the Mermafink in Don't Starve Together. Water is a very unique and powerful character whose skills and characteristics bring new gameplay and challenges. It is hoped that this introduction will help players better master Water's gameplay in the game.
Recommend


Strategy

A Guide to Zhetian Fanchen Yiyue Sharing Tips for New Players on How to Play Zhetian Fanchen Yiyue
Introduction to the Public Beta Time of Zhetian Fanchen Yeyi When is the public beta for Zhetian Fanchen Yeyi?
How is Zi Yue from Zhetian Fanchen? Introduction to Zi Yue from Zhetian Fanchen
What are the Luhida Origin redemption codes? Sharing of Luhida Origin mobile game gift codes
Lu Xida Origin Team Recommendations Lu Xida Origin Team Guide
Lu Xida Origin Strategy Sharing: Beginner's Guide to Lu Xida Origin
